Page 258 of 594
Turning ParkView�On Or Off — With Touch
Screen Radio
1. Turn the Radio on.
2. Press the “More” soft-key.
3. Press the “Settings” soft-key.
4. Press the “Safety & Driving Assistance” soft-key.
5. Press the check box soft key next to “Parkview �
Backup Camera” to enable/disable.
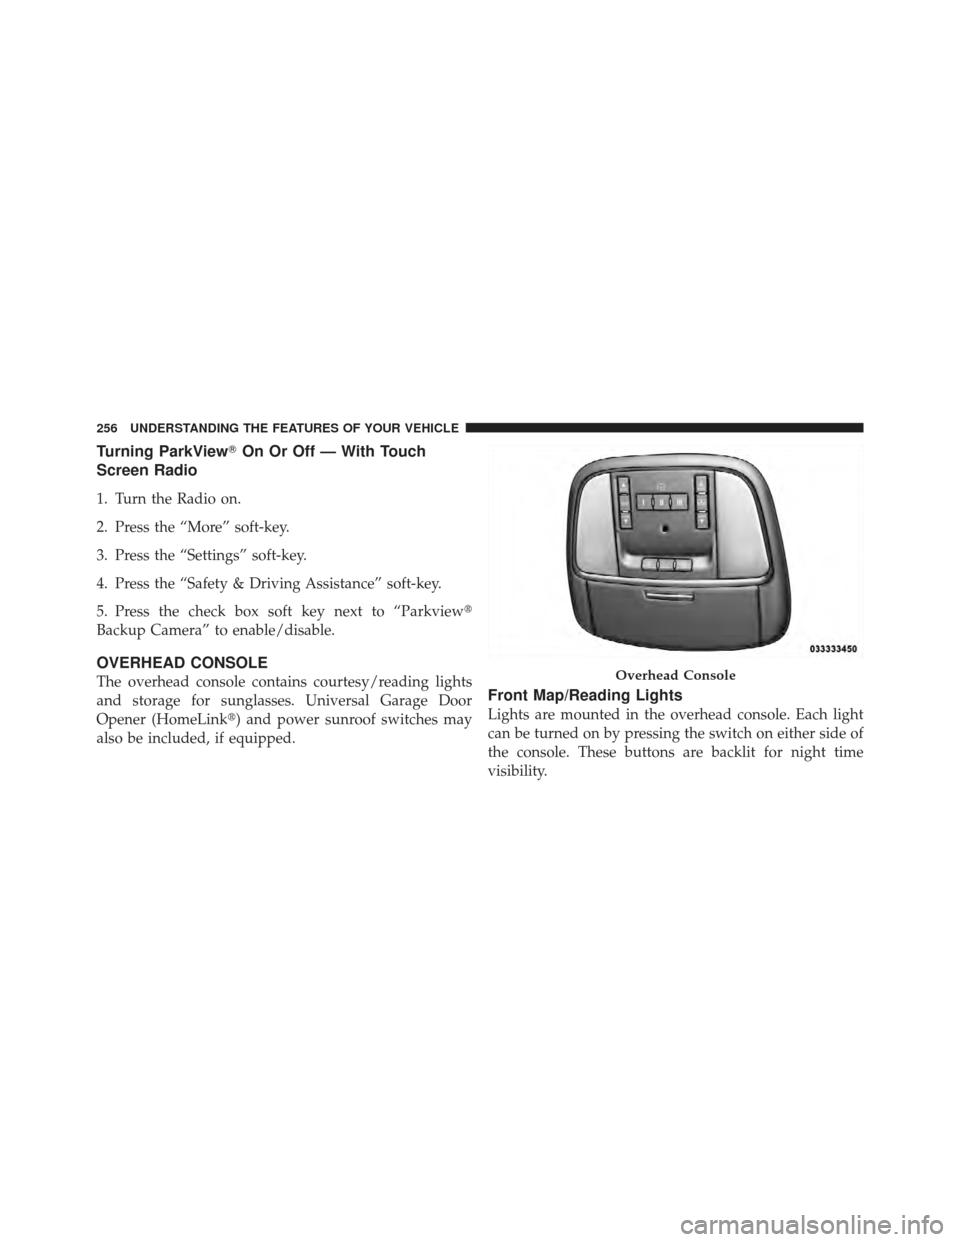
OVERHEAD CONSOLE
The overhead console contains courtesy/reading lights
and storage for sunglasses. Universal Garage Door
Opener (HomeLink�) and power sunroof switches may
also be included, if equipped.Front Map/Reading Lights
Lights are mounted in the overhead console. Each light
can be turned on by pressing the switch on either side of
the console. These buttons are backlit for night time
visibility.
Overhead Console
256 UNDERSTANDING THE FEATURES OF YOUR VEHICLE
Page 261 of 594
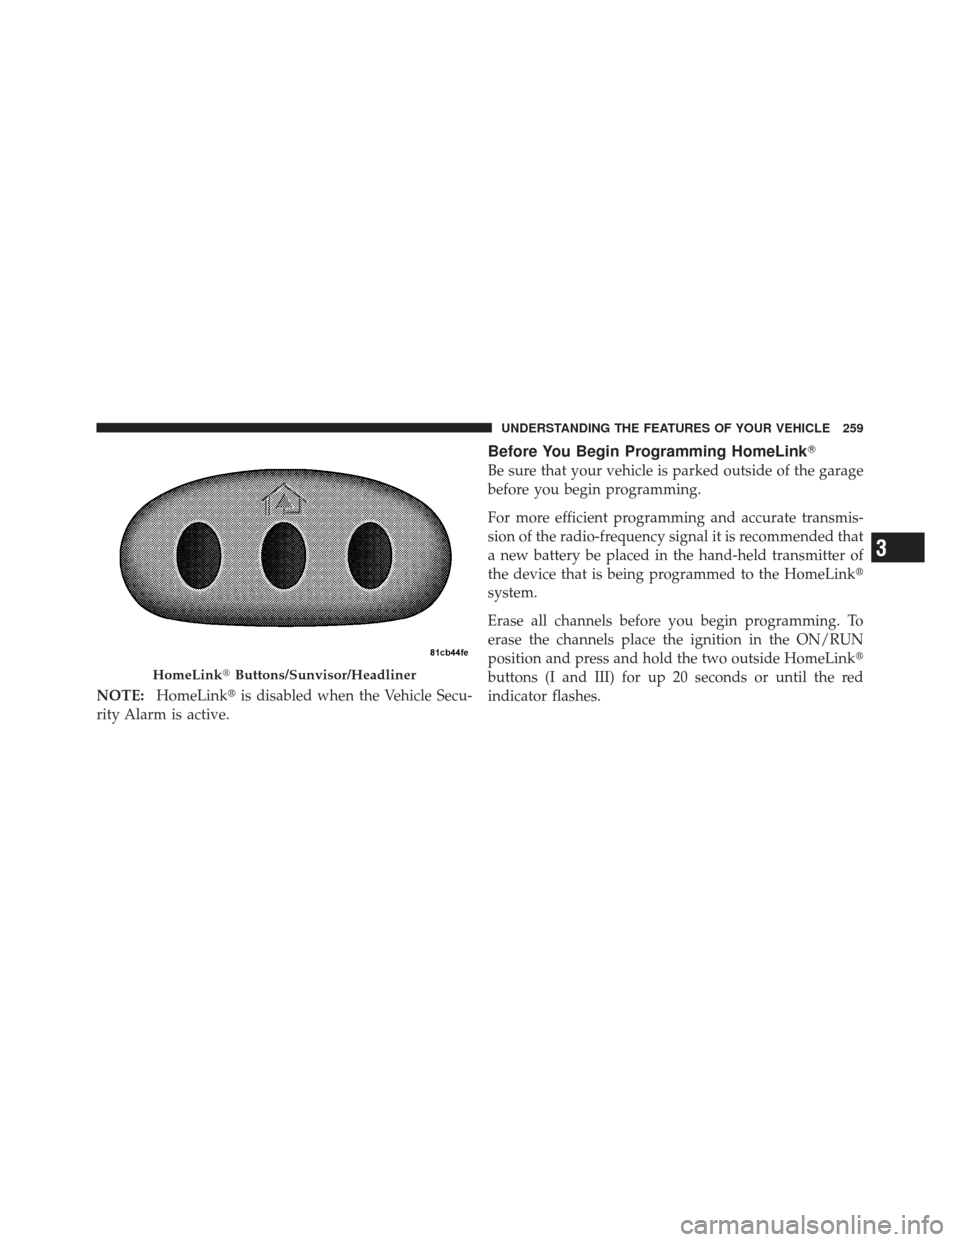
NOTE:HomeLink� is disabled when the Vehicle Secu-
rity Alarm is active.
Before You Begin Programming HomeLink �
Be sure that your vehicle is parked outside of the garage
before you begin programming.
For more efficient programming and accurate transmis-
sion of the radio-frequency signal it is recommended that
a new battery be placed in the hand-held transmitter of
the device that is being programmed to the HomeLink �
system.
Erase all channels before you begin programming. To
erase the channels place the ignition in the ON/RUN
position and press and hold the two outside HomeLink �
buttons (I and III) for up 20 seconds or until the red
indicator flashes.
HomeLink� Buttons/Sunvisor/Headliner
3
UNDERSTANDING THE FEATURES OF YOUR VEHICLE 259
Page 265 of 594

Reprogramming A Single HomeLink�Button
To reprogram a channel that has been previously trained,
follow these steps:
1. Turn the ignition switch to the ON/RUN position.
2. Press and hold the desired HomeLink� button until
the indicator light begins to flash after 20 seconds. Do not
release the button.
3. Without releasing the button proceed with “Program-
ming A Non-Rolling Code” Step 2 and follow all remain-
ing steps.
Canadian/Gate Operator Programming
For programming transmitters in Canada/United States
that require the transmitter signals to “time-out” after
several seconds of transmission.
Canadian radio frequency laws require transmitter sig-
nals to time-out (or quit) after several seconds of trans-
mission – which may not be long enough for HomeLink �to pick up the signal during programming. Similar to this
Canadian law, some U.S. gate operators are designed to
time-out in the same manner.
It may be helpful to unplug the device during the cycling
process to prevent possible overheating of the garage
door or gate motor.
1. Turn the ignition switch to the ON/RUN position.
2. Place the hand-held transmitter 1 to 3 in (3 to 8 cm)
away from the HomeLink�
button you wish to program
while keeping the HomeLink� indicator light in view.
3. Continue to press and hold the HomeLink� button,
while you press and release (“cycle”), your hand-held
transmitter every two seconds until HomeLink �has
successfully accepted the frequency signal. The indicator
light will flash slowly and then rapidly when fully
trained.
3
UNDERSTANDING THE FEATURES OF YOUR VEHICLE 263
Page 288 of 594

▫Turn Menu Off ...................... 313
� Uconnect Touch™ Settings ............... 313
▫ Hard-Keys ......................... 313
▫ Soft-Keys .......................... 314
▫ Customer Programmable Features —
Uconnect Touch™ 4.3 Settings ........... 314
▫ Customer Programmable Features —
Uconnect Touch™ System 8.4 Settings ...... 327
� iPod�/USB/MP3 Control — If Equipped ..... 341
� Harman Kardon� Logic7�High Performance
Multichannel Surround Sound System With
Driver-Selectable Surround (DSS) — If
Equipped ............................ 342 �
Steering Wheel Audio
Controls — If Equipped .................. 343
▫ Radio Operation ..................... 344
▫ CD Player ......................... 344
� CD/DVD Disc Maintenance .............. 345
� Radio Operation And Mobile Phones ....... 345
� Climate Controls ...................... 346
▫ General Overview .................... 346
▫ Climate Control Functions .............. 353
▫ Automatic Temperature Control (ATC) ..... 354
▫ Operating Tips ...................... 355
286 UNDERSTANDING YOUR INSTRUMENT PANEL
Page 302 of 594
ELECTRONIC VEHICLE INFORMATION CENTER
(EVIC)
The Electronic Vehicle Information Center (EVIC) fea-
tures a driver-interactive display that is located in the
instrument cluster.This system allows the driver to select a variety of useful
information by pressing the switches mounted on the
steering wheel. The EVIC consists of the following:
•Radio Info
•Fuel Economy
•Vehicle Speed
•Trip Info
•Tire Pressure
•Vehicle Info (Stored Warning Messages)
•Turn Menu OFF
Electronic Vehicle Information Center (EVIC)
300 UNDERSTANDING YOUR INSTRUMENT PANEL
Page 319 of 594

the digital clock in the status bar. To change the Show
Time Status setting, press and release the ON or OFF
soft-key. Then touch the arrow back soft-key.
•Sync Time
Touch the Sync Time soft-key to change this display.
When in this display, you may have the radio set the time
automatically. To change the Sync Time setting, press and
release the ON or OFF soft-key. Then touch the arrow
back soft-key.
Safety / Assistance
•
Front Collision Warning — If Equipped
Touch the Front Collision Warning soft-key to change this
display. The Front Collision Warning (FCW) feature can
be can be set to Far, set to Near or turned Off. The default
status of FCW is the Far setting. This means the system
will warn you of a possible collision with the vehicle in
front of you when you are farther away. This gives you
the most reaction time. To change the setting for more dynamic driving, select the Near setting. This warns you
of a possible collision when you are much closer to the
vehicle in front of you. This allows for a more dynamic
driving experience. To change the FCW status, press and
release the OFF, Near or Far button. Then touch the arrow
back soft-key.
For further information, refer to ”Adaptive Cruise Con-
trol (ACC)” in “Understanding The Features Of Your
Vehicle”.
•Park Assist
Touch the Park Assist soft-key to change this display. The
Rear Park Assist system will scan for objects behind the
vehicle when the transmission shift lever is in REVERSE
and the vehicle speed is less than 11 mph (18 km/h). The
system can be enabled with Sound Only, Sound and
Display, or turned OFF. To change the Park Assist status,
press and release the OFF, Sound Only or Sounds and
Display soft-key. Then touch the arrow back soft-key.
4
UNDERSTANDING YOUR INSTRUMENT PANEL 317
Page 325 of 594
 without having to press the RKE transmitter lock
or unlock buttons. To make your selection, touch the
Passive Entry soft-key and select ON or OFF. Then touch
the arrow back soft-key. Refer to")
door(s) without having to press the RKE transmitter lock
or unlock buttons. To make your selection, touch the
Passive Entry soft-key and select ON or OFF. Then touch
the arrow back soft-key. Refer to “Keyless Enter-N-Go” in
“Things To Know Before Starting Your Vehicle”.
Heated Seats
•
Auto Heated Seats
Touch the Auto Heated Seats soft-key to change this
display. When this feature is selected, the driver’s heated
seat will automatically turn on when temperatures are
below 40° F (4.4° C). To make your selection, touch the
Auto Heated Seats soft-key and select ON or OFF. Then
touch the arrow back soft-key.
Engine Off Options
•
Easy Exit Seats — If Equipped
Touch the Easy Exit Seats soft-key to change this display.
This feature provides automatic driver seat positioning to enhance driver mobility when entering and exiting the
vehicle. To make your selection, touch the Easy Exit Seats
soft-key, and select ON or OFF. Then touch the arrow
back soft-key. Refer to “Driver Memory Seat” in “Under-
standing The Features Of Your Vehicle” for further infor-
mation.
•Headlight Off Delay
Touch the Headlight Off Delay soft-key to change this
display. When this feature is selected, the driver can
choose to have the headlights remain on for 0, 30, 60, or
90 seconds when exiting the vehicle. To change the
Headlight Off Delay status, touch the 0, 30, 60 or 90
soft-key. Then touch the arrow back soft-key.
•Engine Off Power Delay
Touch the Engine Off Power Delay soft-key to change this
display. When this feature is selected, the power window
switches, radio, Uconnect™ phone system (if equipped),
DVD video system (if equipped), power sunroof (if
4
UNDERSTANDING YOUR INSTRUMENT PANEL 323
Page 328 of 594

•Surround Sound
Touch the Surround Sound soft-key to change this dis-
play. This feature provides simulated surround sound
mode. To make your selection, press the Surround Sound
soft-key and select ON or OFF. Then touch the arrow
back soft-key.
Phone / Bluetooth
•
Paired Devices
This feature shows which phones are paired to the
Phone/Bluetooth system. For further information, refer
to the Uconnect Touch™ Supplement.
SIRIUS Setup
•
Channel Skip
SIRIUS can be programmed to designate a group of
channels that are the most desirable to listen to or to
exclude undesirable channels while scanning. To make your selection, touch the Channel Skip soft-key, select the
channels you would like to skip. Then touch the arrow
back soft-key.
•Subscription Info
New vehicle purchasers or lessees will receive a free
limited time subscription to SIRIUS Satellite Radio with
your radio. Following the expiration of the free services,
it will be necessary to access the information on the
Subscription Information screen in order to re-subscribe.
Touch the Subscription Info soft-key to access the Sub-
scription Information screen.
Write down the SIRIUS ID numbers for your receiver. To
reactivate your service, either call the number listed on
the screen or visit the provider online.
NOTE: SIRIUS Travel Link is a separate subscription.
326 UNDERSTANDING YOUR INSTRUMENT PANEL

The Electronic Vehicle Information Center (EVIC) fea-
tures a driver-interactive display that is located in the
instrument cluster.This system allows the d")