Page 213 of 594

WARNING!
Sudden loss of visibility through the windshield
could lead to a collision. You might not see other
vehicles or other obstacles. To avoid sudden icing of
the windshield during freezing weather, warm the
windshield with the defroster before and during
windshield washer use.
Mist Feature
Rotate the end of the lever downward to the Mist
position to activate a single wipe cycle to clear off road
mist or spray from a passing vehicle. The wipers will
continue to operate until you release the multifunction
lever.
NOTE:The mist feature does not activate the washer
pump; therefore, no washer fluid will be sprayed on the
windshield. The wash function must be used in order to
spray the windshield with washer fluid.
Headlights On With Wipers
(Available With Automatic Headlights Only)
When this feature is active, the headlights will turn on
approximately 10 seconds after the wipers are turned on
if the headlight switch is placed in the AUTO position. In
addition, the headlights will turn off when the wipers are
turned off if they were turned on by this feature.
NOTE: The Headlights On with Wipers feature can be
turned on and off using the Uconnect Touch™ System,
refer to “Uconnect Touch™ Settings” in “Understanding
Your Instrument Panel” for further information.
Rain Sensing Wipers — If Equipped
This feature senses moisture on the windshield and
automatically activates the wipers for the driver. The
feature is especially useful for road splash or overspray
from the windshield washers of the vehicle ahead. Rotate
the end of the multifunction lever to one of four settings
to activate this feature.
3
UNDERSTANDING THE FEATURES OF YOUR VEHICLE 211
Page 234 of 594

If there is no vehicle ahead, the vehicle will maintain the
set speed. If a slower moving vehicle is detected in the
same lane, the EVIC displays the “Sensed Vehicle Indi-
cator” icon, and the system adjusts vehicle speed auto-
matically to maintain the distance setting, regardless of
the set speed.
The vehicle will then maintain the set distance until:
•The vehicle ahead accelerates to a speed above the set
speed.
•The vehicle ahead moves out of your lane or view of
the sensor.
•The vehicle ahead slows to a speed below 15 mph
(24 km/h) and the system automatically disengages
itself.
•The distance setting is changed.
•The system disengages. (Refer to the information on
ACC Activation).
The maximum braking applied by ACC is limited; how-
ever, the driver can always apply the brakes manually, if
necessary.
NOTE: The brake lights will illuminate whenever the
ACC system applies the brakes.
A Proximity Warning will alert the driver if ACC predicts
that its maximum braking level is not sufficient to
maintain the set distance. If this occurs, a visual alert
“BRAKE” will flash in the EVIC and a chime will sound
while ACC continues to apply its maximum braking
capacity. When this occurs, you should immediately
apply the brakes as needed to maintain a safe distance
from the vehicle ahead.
232 UNDERSTANDING THE FEATURES OF YOUR VEHICLE
Page 258 of 594
Turning ParkView�On Or Off — With Touch
Screen Radio
1. Turn the Radio on.
2. Press the “More” soft-key.
3. Press the “Settings” soft-key.
4. Press the “Safety & Driving Assistance” soft-key.
5. Press the check box soft key next to “Parkview �
Backup Camera” to enable/disable.
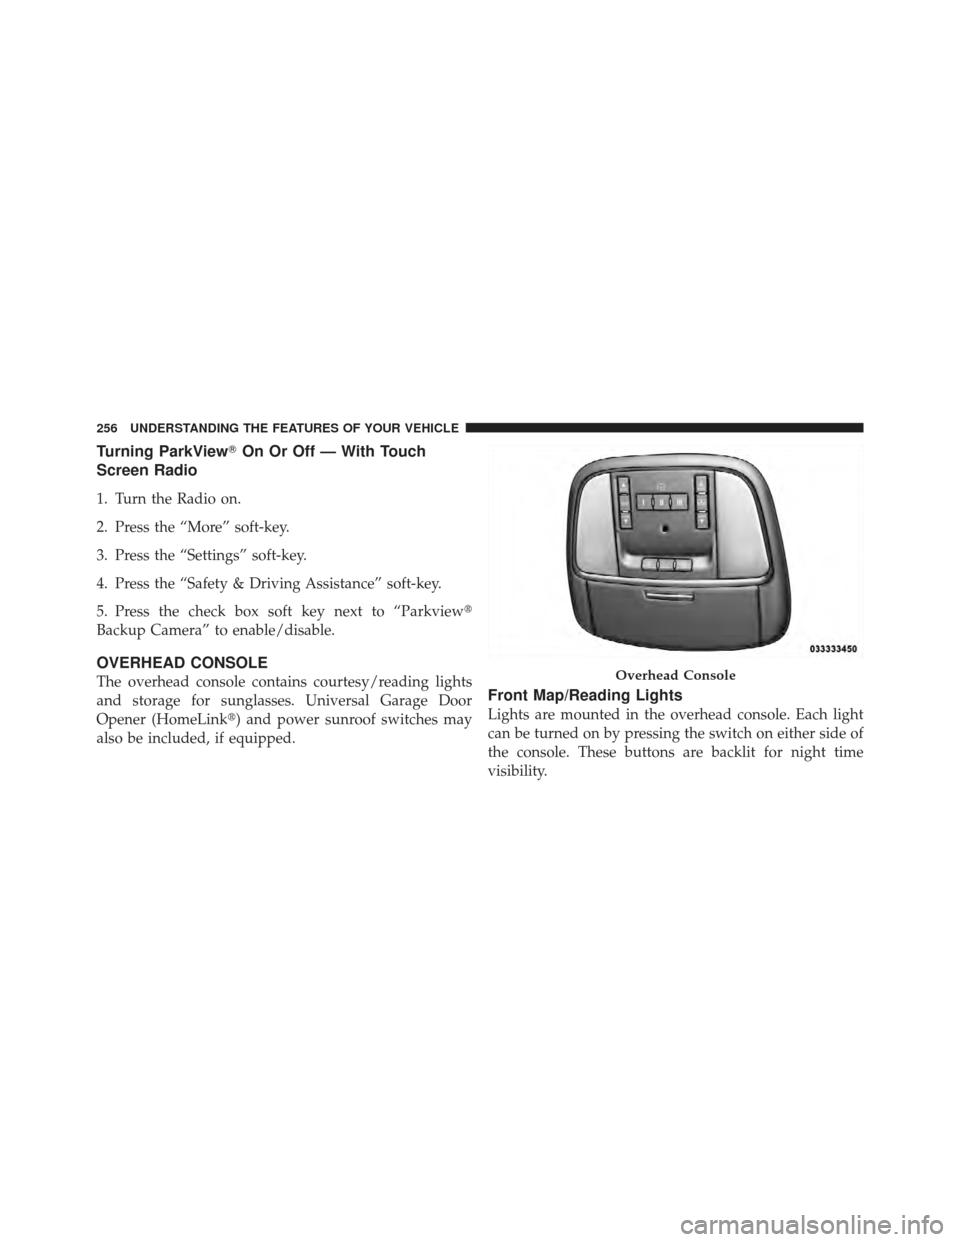
OVERHEAD CONSOLE
The overhead console contains courtesy/reading lights
and storage for sunglasses. Universal Garage Door
Opener (HomeLink�) and power sunroof switches may
also be included, if equipped.Front Map/Reading Lights
Lights are mounted in the overhead console. Each light
can be turned on by pressing the switch on either side of
the console. These buttons are backlit for night time
visibility.
Overhead Console
256 UNDERSTANDING THE FEATURES OF YOUR VEHICLE
Page 259 of 594
To turn the lights off, press the switch a second time. The
lights also turn on when a door is opened. The lights will
also turn on when the UNLOCK button on the RKE is
pressed.
Sunglass Bin Door
At the front of the console a compartment is provided for
the storage of a pair of sunglasses. The storage compart-
ment access is a “push/push” design. Push the chrome
pad on the door to open. Push the chrome pad on the
door to close.
Front Map/Reading Lights
Sunglass Bin Door
3
UNDERSTANDING THE FEATURES OF YOUR VEHICLE 257
Page 276 of 594
CAUTION!
•Many accessories that can be plugged in draw
power from the vehicle’s battery even when not in
use (i.e., cellular phones, etc.). Eventually, if
plugged in long enough, the vehicle’s battery will
discharge sufficiently to degrade battery life
and/or prevent the engine from starting.
•Accessories that draw higher power (i.e., coolers,
vacuum cleaners, lights, etc.) will degrade the
battery even more quickly. Only use these inter-
mittently and with greater caution.(Continued)
CAUTION! (Continued)
•After the use of high power draw accessories or
long periods of the vehicle not being started (with
accessories still plugged in), the vehicle must be
driven a sufficient length of time to allow the
alternator to recharge the vehicle’s battery.
•Power outlets are designed for accessory plugs
only. Do not hang any type of accessory or acces-
sory bracket from the plug. Improper use of the
power outlet can cause damage.
274 UNDERSTANDING THE FEATURES OF YOUR VEHICLE
Page 279 of 594
Rear Seat Cupholders
The rear seat cupholders are located in the center armrest
between the rear seats. The cupholders are positioned
forward in the armrest and side-by-side to provide con-
venient access to beverage cans or bottles while maintain-
ing a resting place for the rear occupant’ s elbows.
Lighted Cupholders — If Equipped
On some vehicles the rear cupholders are equipped with
a light ring that illuminates the cupholders for the rear
passengers. The light ring is controlled by the Dimmer
Control. Refer to “Lights” in “Understanding The Fea-
tures Of Your Vehicle” for further information.
Rear Seat CupholdersLight Ring In Rear Cupholder
3
UNDERSTANDING THE FEATURES OF YOUR VEHICLE 277
Page 287 of 594
UNDERSTANDING YOUR INSTRUMENT PANEL
CONTENTS
�Instrument Panel Features ............... 287
� Instrument Cluster .................... 288
� Instrument Cluster — Premium ........... 289
� Instrument Cluster Descriptions ........... 290
� Electronic Vehicle Information Center (EVIC) . . 300
▫ Electronic Vehicle Information Center
(EVIC) Displays ..................... 302
▫ EVIC White Telltale Lights .............. 303
▫ EVIC Amber Telltale Lights ............. 304▫
EVIC Red Telltale Lights ............... 305
▫ Oil Change Due ..................... 308
▫ Fuel Economy ...................... 309
▫ Vehicle Speed ....................... 311
▫ Trip Info .......................... 311
▫ Units ............................. 312
▫ Vehicle Info
(Customer Information Features) ......... 312
▫ Messages # ......................... 313
4
Page 292 of 594
.
2. AWD (All Wheel Drive) Indicator — If Equipped
The AWD indicator will illuminate when")
INSTRUMENT CLUSTER DESCRIPTIONS
1. Tachometer
This gauge measures engine revolutions-per-minute
(RPM x 1000).
2. AWD (All Wheel Drive) Indicator — If Equipped
The AWD indicator will illuminate when All Wheel Drive
(AWD) is activated.
3. Park/Headlight ON Indicator — If EquippedThis indicator will illuminate when the park
lights or headlights are turned on.
4. Turn Signal Indicators The arrow will flash with the exterior turn signal
when the turn signal lever is operated.
If the vehicle electronics sense that the vehicle is driven
more than 1 mile (1.6 km) with either turn signal on, a continuous chime will sound to alert you to turn the
signals off. If either indicator flashes at a rapid rate, check
for a defective outside light bulb.
5. Front Fog Light Indicator — If Equipped
This indicator will illuminate when the front fog
lights are on.
6. High Beam Indicator This indicator shows that the high beam head-
lights are on. Push the multifunction lever forward
to switch the headlights to high beam, and pull toward
yourself (normal position) to return to low beam.
7. Odometer Display / Electronic Vehicle Information
Center (EVIC) Display
Odometer Display
The odometer display shows the total distance the ve-
hicle has been driven.
290 UNDERSTANDING YOUR INSTRUMENT PANEL

. Eventually, if
plugged in long enough, the vehicle’s b")