Page 186 of 276

9.28
06
1
2
4
3
5
1
2
3
AUDIO/VIDEO
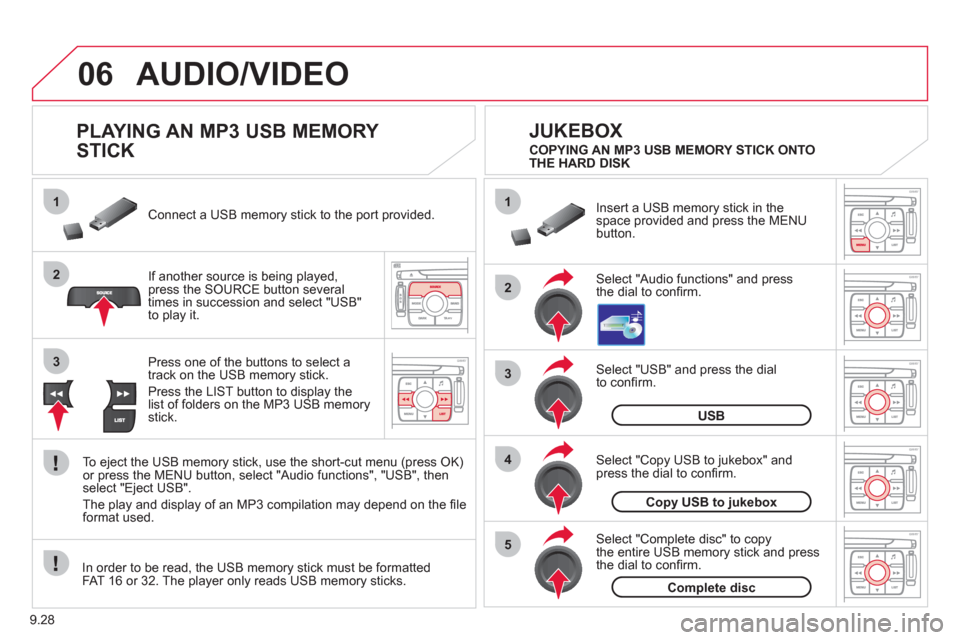
PLAYING AN MP3 USB MEMORY
STICK
If another source is being played,press the SOURCE button several
times in succession and select "USB"
to play it. Connect a USB memor
y stick to the port provided.
To e
ject the USB memory stick, use the short-cut menu (press OK)or press the MENU button, select "Audio functions", "USB", then
select "Eject USB".
The pla
y and display of an MP3 compilation may depend on the fi le
format used.
Select "USB" and press the dial
to confi rm.
Insert a U
SB memory stick in thespace provided and press the MENUbutton.
JUKEBOX
USB
Select "Complete disc" to copythe entire USB memory stick and press
the dial to confi rm.
Complete disc
Select "Copy USB to jukebox" andpress the dial to confi rm.
Copy USB to jukebox
Select "Audio functions" and press
the dial to confi rm.
Pr
ess one of the buttons to select atrack on the USB memory stick.
Press the LIST button to displa
y the list of folders on the MP3 USB memorystick. COPYING AN MP3 USB MEMORY STICK ONTO
THE HARD DISK
In order to be read, the USB memor
y stick must be formatted
FAT 16 or 32. The player only reads USB memory sticks.
Page 187 of 276

9.29
06
1
2
4
3
6
5
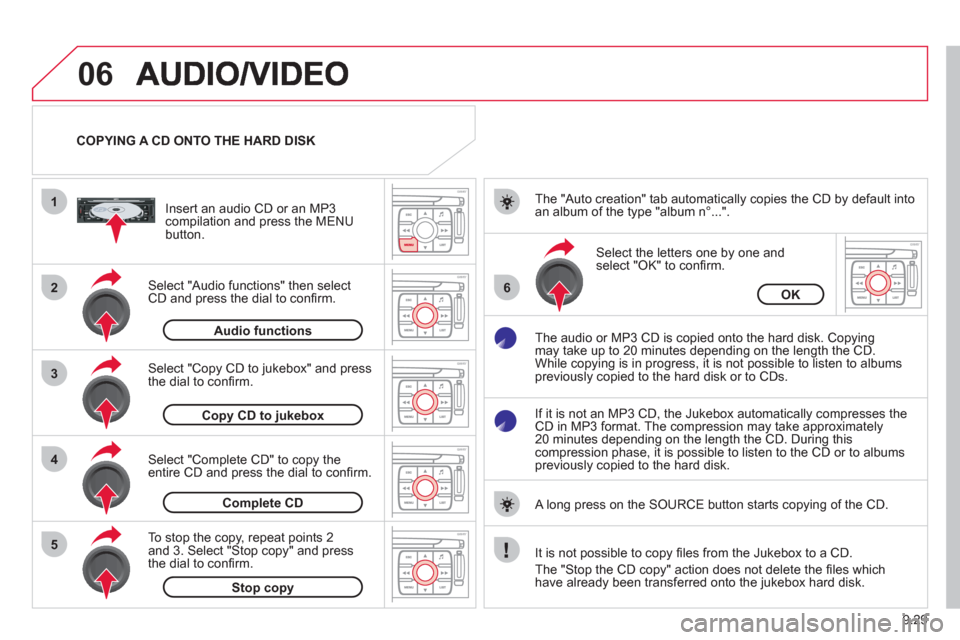
COPYING A CD ONTO THE HARD DISK
Select "Audio functions" then select
CD and press the dial to confi rm.
Insert an audio
CD or an MP3compilation and press the MENU button.
Select "Copy CD to jukebox" and press
the dial to confi rm.
Select the letters one b
y one and select "OK" to confi rm.
The "Auto creation" tab automaticall
y copies the CD by default into
an album of the type "album n∞...".
The audio or MP3
CD is copied onto the hard disk. Copying
may take up to 20 minutes depending on the length the CD.
While copying is in progress, it is not possible to listen to albums
previously copied to the hard disk or to CDs.
If it is not an MP3 CD, the Jukebox automaticall
y compresses theCD in MP3 format. The compression may take approximately20 minutes depending on the length the CD. During thiscompression phase, it is possible to listen to the CD or to albums
previously copied to the hard disk.
A lon
g press on the SOURCE button starts copying of the CD.
Audiofunctions
OK
Copy CD to jukebox
Select "Complete CD" to copy the entire CD and press the dial to confi rm.
Complete CD
To stop the cop
y, repeat points 2 and 3. Select "Stop copy" and press
the dial to confi rm.
Stop copy
It is not possible to copy fi les from the Jukebox to a CD.
The "
Stop the CD copy" action does not delete the fi les which
have already been transferred onto the jukebox hard disk.
Page 188 of 276
9.30
06
1
2
3
4
1
2
3
AUDIO/VIDEO
Select "Audio functions" and press
the dial to confi rm. Press the MEN
U button. RENAMING AN ALBUM
Select the "Jukebox" function andpress the dial to confi rm.
Jukebox
Select the "Jukebox management"function and press the dial to confi rm.
Jukeboxmanagement
Press the LIST button. Press the
SOURCE button several
times in succession and select the"Jukebox" function.
T
urn the dial to select the fi les.
LISTENING TO THE JUKEBOX
Jukebox
Press the ESC button to return to the fi rst fi le level.
Page 189 of 276
9.31
06
5
6
7
8
AUDIO/VIDEO
Select the "Rename" tab and press the dial to confi rm.
Select the album to be renamed andpress the dial to confi rm.
Use the alphanumeric keypad to enter the letters o
f the album title one by one.T
urn the dial and select the letters of
the album title one by one confi rming each time by pressing the dial.
Rename
To rename the tracks of an album, follow the same procedure,selecting the tracks to be renamed.
Use the ESC button to exit from the list of tracks.
Select "OK" and press the dial
to confi rm.
OK
Select the "Delete" function to delete an album or a track from the Jukebox.
Delete
Page 190 of 276
9.32
06
1
2
AUDIO/VIDEO
Connect the portable device (MP3 player…) to the audio
sockets (white and red, RCA
type) located in the glovebox using a suitable audio cable (JACK or RCA). Press the MENU button then select the "
Confi guration" function,
then "Sounds", then "Activate auxiliary source" to activate the
NaviDrive audio/telephone auxiliary input.
It is not possible to cop
y the fi les onto the hard disk via the auxiliary input.Pr
ess the SOURCE button several
times in succession and select AUX.
USING THE AUXILIARY INPUT (AUX)
AUDIO (JACK/RCA) CABLE NOT SUPPLIED
Displa
y and control is on the portable device.
Page 191 of 276
9.33
06
1
2
4
3
7
5
6
AUDIO/VIDEO
VIDEO MENU
Turn the dial and select the "Video"
function.
After connecting the video equipment,press the MENU button.
Pr
ess the dial to confi rm the selection.
T
urn the dial and select the "Activatevideo mode" function to activate/deactivate the video.
Pr
ess the dial to confi rm the selection.
T
urn the dial and select the "Video parameters" function to set the displayformat, the brightness, the contrast and the colours.
Videos can only be displayed when stationary.
Pressin
g the DARK button disconnects display of the video.
You can connect video equipment
(camcorder, digital camera, DVD player...)to the three audio/video sockets, located in the glove box.
Pressin
g the SOURCE button several times in succession permits
the selection of an audio source other than that of the video.
Pr
ess the dial to confi rm the selection.
Activate video mode
Video parameters
Page 192 of 276
9.34
07
1
2
1
2
3
INTERNAL TELEPHONE
Install the SIM card
in the holder andthen insert it in theslot.
Open the holder by pressing the buttonusing the tip of a pen.
Your
SIM card must be installed and removed with the NaviDrive
audio and telematics system switched off and the ignition off.
To remove the
SIM card, repeat step 1.
Confi rm the PIN code by pressing
the # button.
Enter the PIN code on the ke
ypad.
When enterin
g your PIN code, tick the "Store PIN" tab to gain
access to the telephone without having to enter this code when
it is used subsequently.
INSTALLING YOUR SIM CARD
(NOT SUPPLIED)
ENTERING THE PIN CODE
PINcode
Page 193 of 276

9.35
07
1
2
3
4
BLUETOOTH® TELEPHONE®
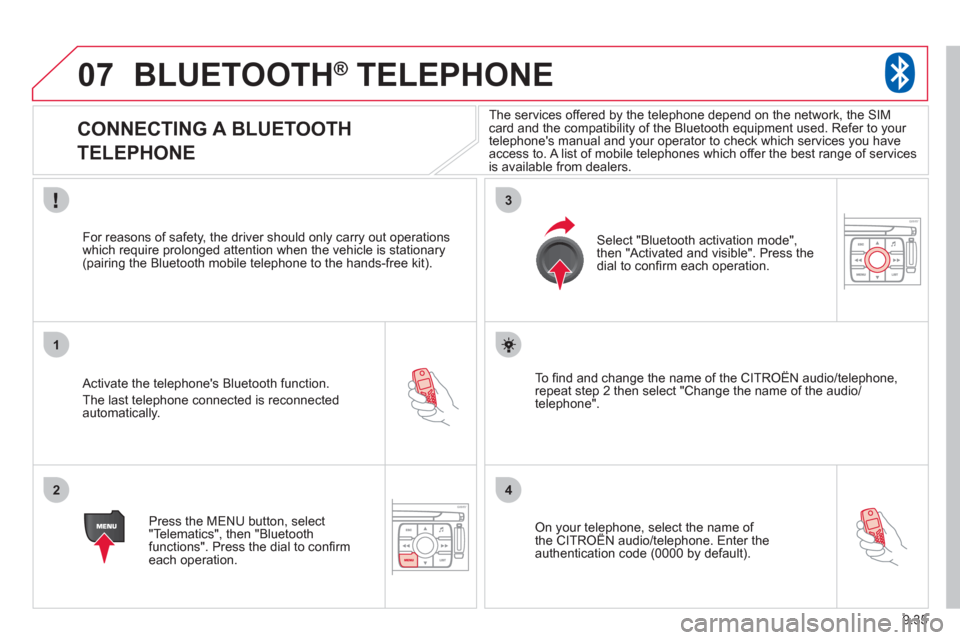
CONNECTING A BLUETOOTH
TELEPHONE
Activate the telephone's Bluetooth function.
The last telephone connected is reconnectedautomatically.
For reasons o
f safety, the driver should only carry out operations
which require prolonged attention when the vehicle is stationary (pairing the Bluetooth mobile telephone to the hands-free kit).
Press the MENU button, select
"Telematics", then "Bluetoothfunctions". Press the dial to confi rmeach operation.
To fi nd and chan
ge the name of the CITROËN audio/telephone,
repeat step 2 then select "Change the name of the audio/
telephone".
Select "Bluetooth activation mode"
,
then "Activated and visible". Press thedial to confi rm each operation.
On your telephone, select the name of the CITROÀN audio/telephone. Enter the yp,
authentication code (0000 by default).
The services offered b
y the telephone depend on the network, the SIM card and the compatibility of the Bluetooth equipment used. Refer to your
telephone's manual and your operator to check which services you have
access to. A list of mobile telephones which offer the best range of services
is available from dealers.