2012 CHRYSLER 300 reset
[x] Cancel search: resetPage 18 of 124

FRONT SEATS
Power Seats
• The power seat switches are located onthe outboard side of the front seat
cushions.
• The seat switch controls, forward/ backward, up/down or to recline the seat.
The passenger’s seat will move up or
down, forward or rearward.
• The recline switch controls the angle of the seatback. Press the switch forward or
rearward and the seatback will move in
either direction.
Power Lumbar
• Push the switch forward to increase thelumbar support. Push the switch rearward
to decrease the lumbar support.
• Pushing upward or downward on the switch will raise and lower the position of
the support.
Memory Seat
• The memory seat feature allows you tosave two different driver seating positions,
driver's outside mirror, adjustable brake
and accelerator pedals, power tilt and
telescopic steering column and radio
station preset settings. The memory seat
buttons are located on the driver's door
panel.
• Adjust all memory profile settings, press the SET (S) button then press 1 or 2 within
five seconds.
• Your Key Fob can be programmed to recall one of two pre-programmed memory profiles by pressing the UNLOCK button on the Key Fob.
• To program your Key Fobs, perform the following: • Change the ignition to OFF.
GETTING STARTED
16
Page 27 of 124
SPEED CONTROL
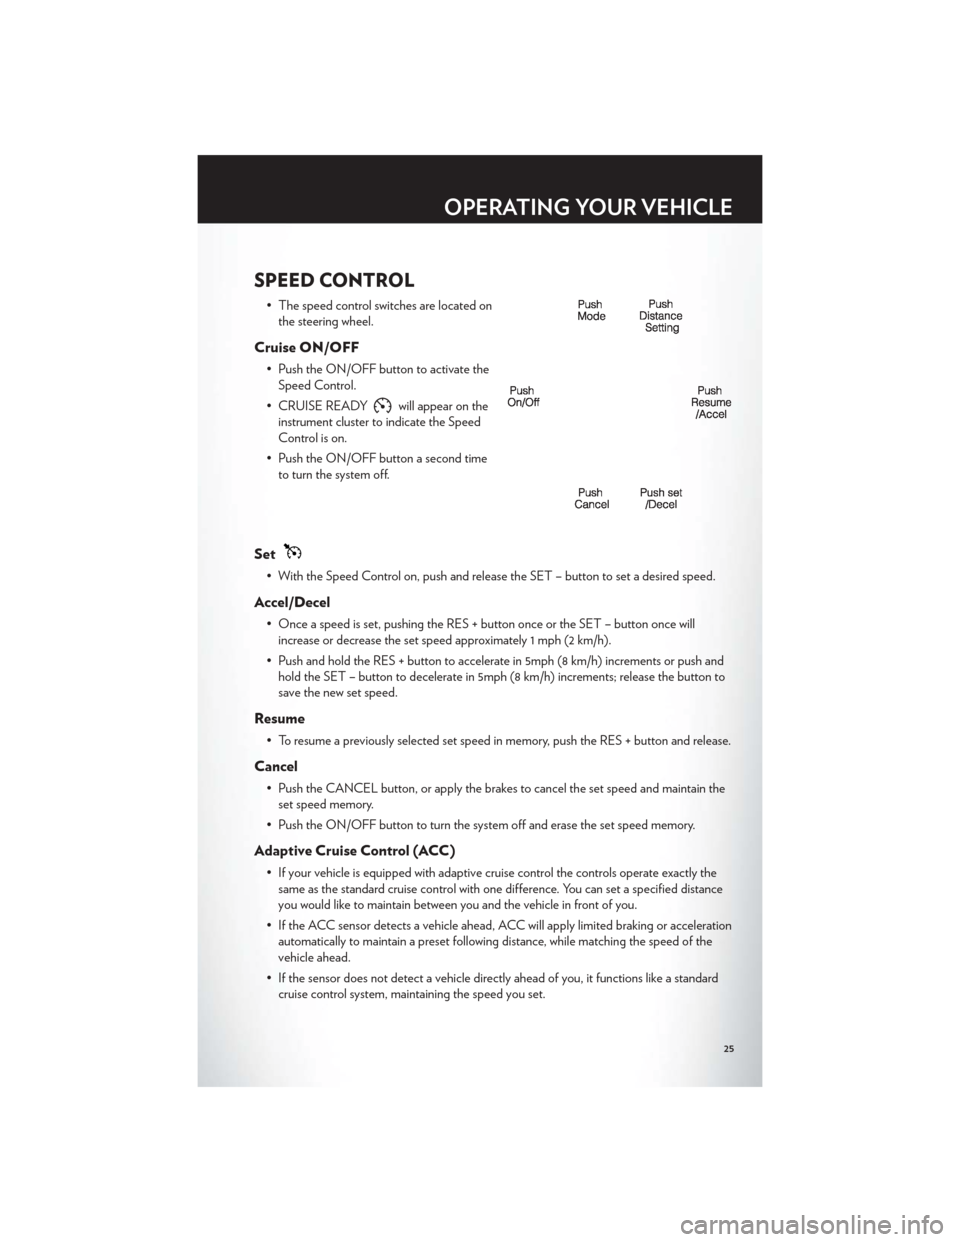
• The speed control switches are located onthe steering wheel.
Cruise ON/OFF
• Push the ON/OFF button to activate theSpeed Control.
• CRUISE READY
will appear on the
instrument cluster to indicate the Speed
Control is on.
• Push the ON/OFF button a second time to turn the system off.
Set
• With the Speed Control on, push and release the SET – button to set a desired speed.
Accel/Decel
• Once a speed is set, pushing the RES + button once or the SET – button once willincrease or decrease the set speed approximately 1 mph (2 km/h).
• Push and hold the RES + button to accelerate in 5mph (8 km/h) increments or push and hold the SET – button to decelerate in 5mph (8 km/h) increments; release the button to
save the new set speed.
Resume
• To resume a previously selected set speed in memory, push the RES + button and release.
Cancel
• Push the CANCEL button, or apply the brakes to cancel the set speed and maintain theset speed memory.
• Push the ON/OFF button to turn the system off and erase the set speed memory.
Adaptive Cruise Control (ACC)
• If your vehicle is equipped with adaptive cruise control the controls operate exactly the same as the standard cruise control with one difference. You can set a specified distance
you would like to maintain between you and the vehicle in front of you.
• If the ACC sensor detects a vehicle ahead, ACC will apply limited braking or acceleration automatically to maintain a preset following distance, while matching the speed of the
vehicle ahead.
• If the sensor does not detect a vehicle directly ahead of you, it functions like a standard cruise control system, maintaining the speed you set.
OPERATING YOUR VEHICLE
25
Page 42 of 124
RADIO
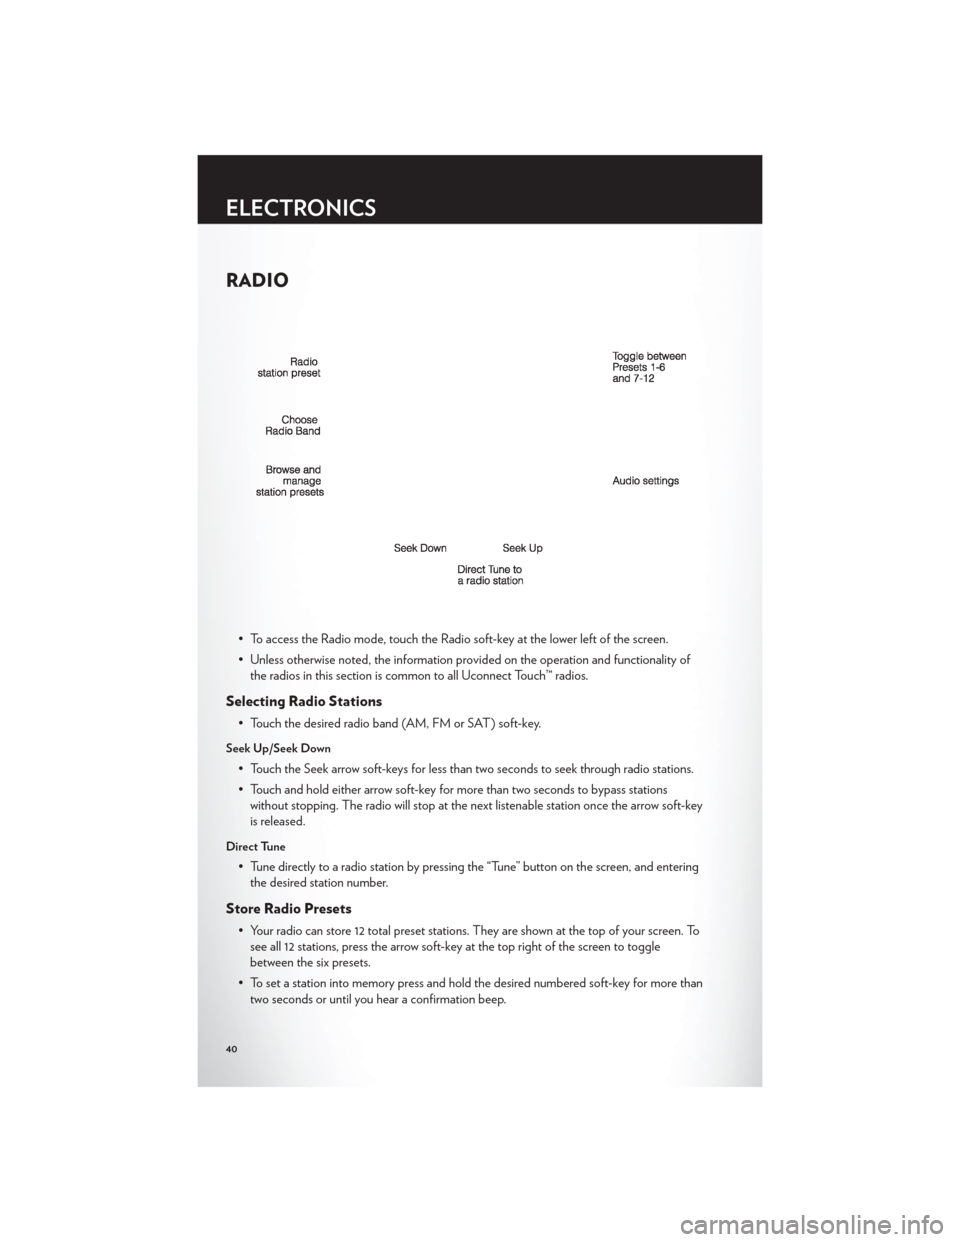
• To access the Radio mode, touch the Radio soft-key at the lower left of the screen.
• Unless otherwise noted, the information provided on the operation and functionality ofthe radios in this section is common to all Uconnect Touch™ radios.
Selecting Radio Stations
• Touch the desired radio band (AM, FM or SAT) soft-key.
Seek Up/Seek Down
• Touch the Seek arrow soft-keys for less than two seconds to seek through radio stations.
• Touch and hold either arrow soft-key for more than two seconds to bypass stationswithout stopping. The radio will stop at the next listenable station once the arrow soft-key
is released.
Direct Tune
• Tune directly to a radio station by pressing the “Tune” button on the screen, and enteringthe desired station number.
Store Radio Presets
• Your radio can store 12 total preset stations. They are shown at the top of your screen. Tosee all 12 stations, press the arrow soft-key at the top right of the screen to toggle
between the six presets.
• To set a station into memory press and hold the desired numbered soft-key for more than two seconds or until you hear a confirmation beep.
ELECTRONICS
40
Page 44 of 124
Browse
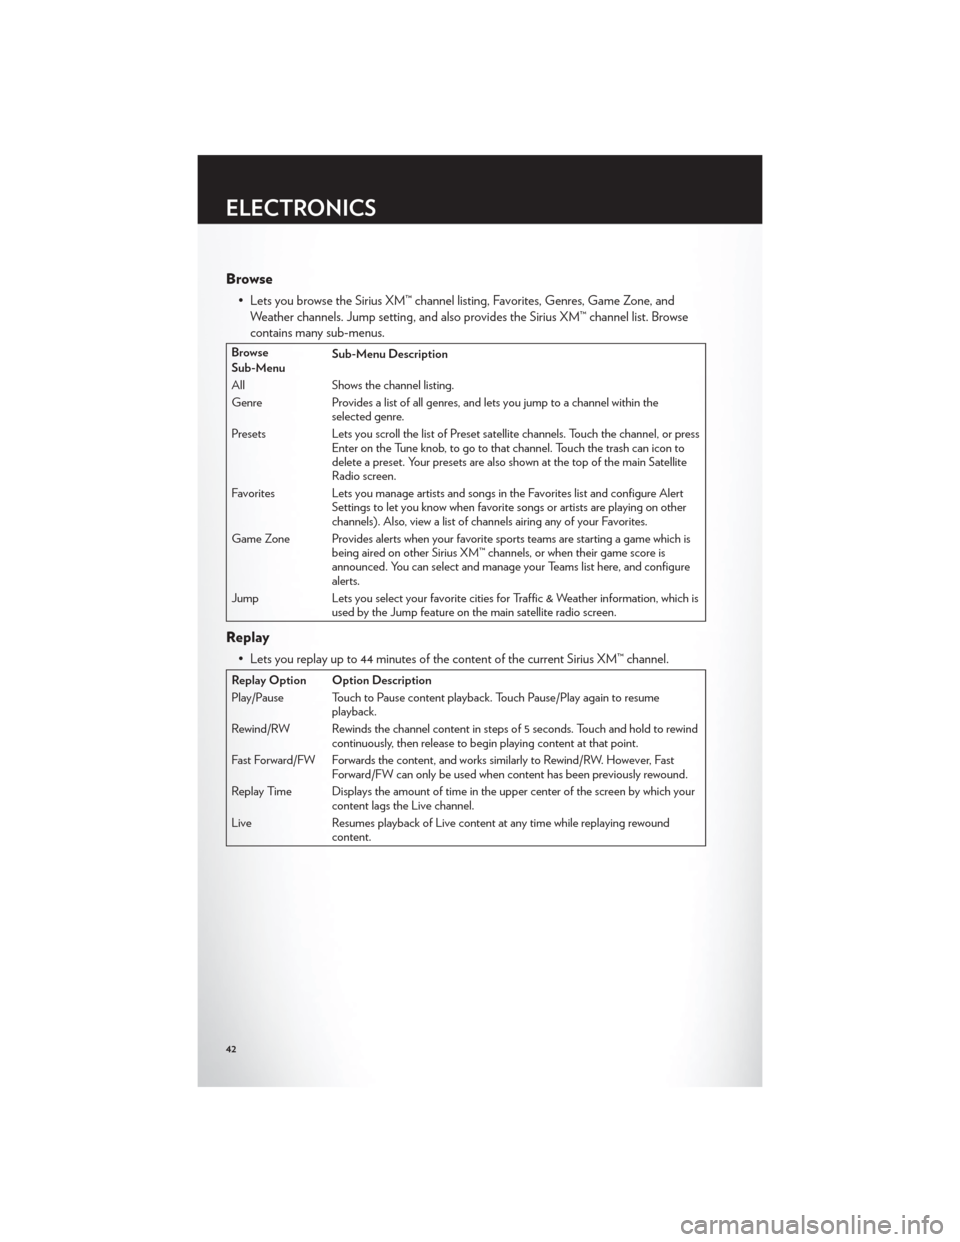
• Lets you browse the Sirius XM™ channel listing, Favorites, Genres, Game Zone, andWeather channels. Jump setting, and also provides the Sirius XM™ channel list. Browse
contains many sub-menus.
Browse
Sub-Menu Sub-Menu Description
All Shows the channel listing.
Genre Provides a list of all genres, and lets you jump to a channel within the selected genre.
Presets Lets you scroll the list of Preset satellite channels. Touch the channel, or press Enter on the Tune knob, to go to that channel. Touch the trash can icon to
delete a preset. Your presets are also shown at the top of the main Satellite
Radio screen.
Favorites Lets you manage artists and songs in the Favorites list and configure Alert Settings to let you know when favorite songs or artists are playing on other
channels). Also, view a list of channels airing any of your Favorites.
Game Zone Provides alerts when your favorite sports teams are starting a game which is being aired on other Sirius XM™ channels, or when their game score is
announced. You can select and manage your Teams list here, and configure
alerts.
Jump Lets you select your favorite cities for Traffic & Weather information, which is used by the Jump feature on the main satellite radio screen.
Replay
• Lets you replay up to 44 minutes of the content of the current Sirius XM™ channel.
Replay Option Option Description
Play/Pause Touch to Pause content playback. Touch Pause/Play again to resumeplayback.
Rewind/RW Rewinds the channel content in steps of 5 seconds. Touch and hold to rewind continuously, then release to begin playing content at that point.
Fast Forward/FW Forwards the content, and works similarly to Rewind/RW. However, Fast Forward/FW can only be used when content has been previously rewound.
Replay Time Displays the amount of time in the upper center of the screen by which your content lags the Live channel.
Live Resumes playback of Live content at any time while replaying rewound content.
ELECTRONICS
42
Page 56 of 124
Common Voice Commands (Examples)
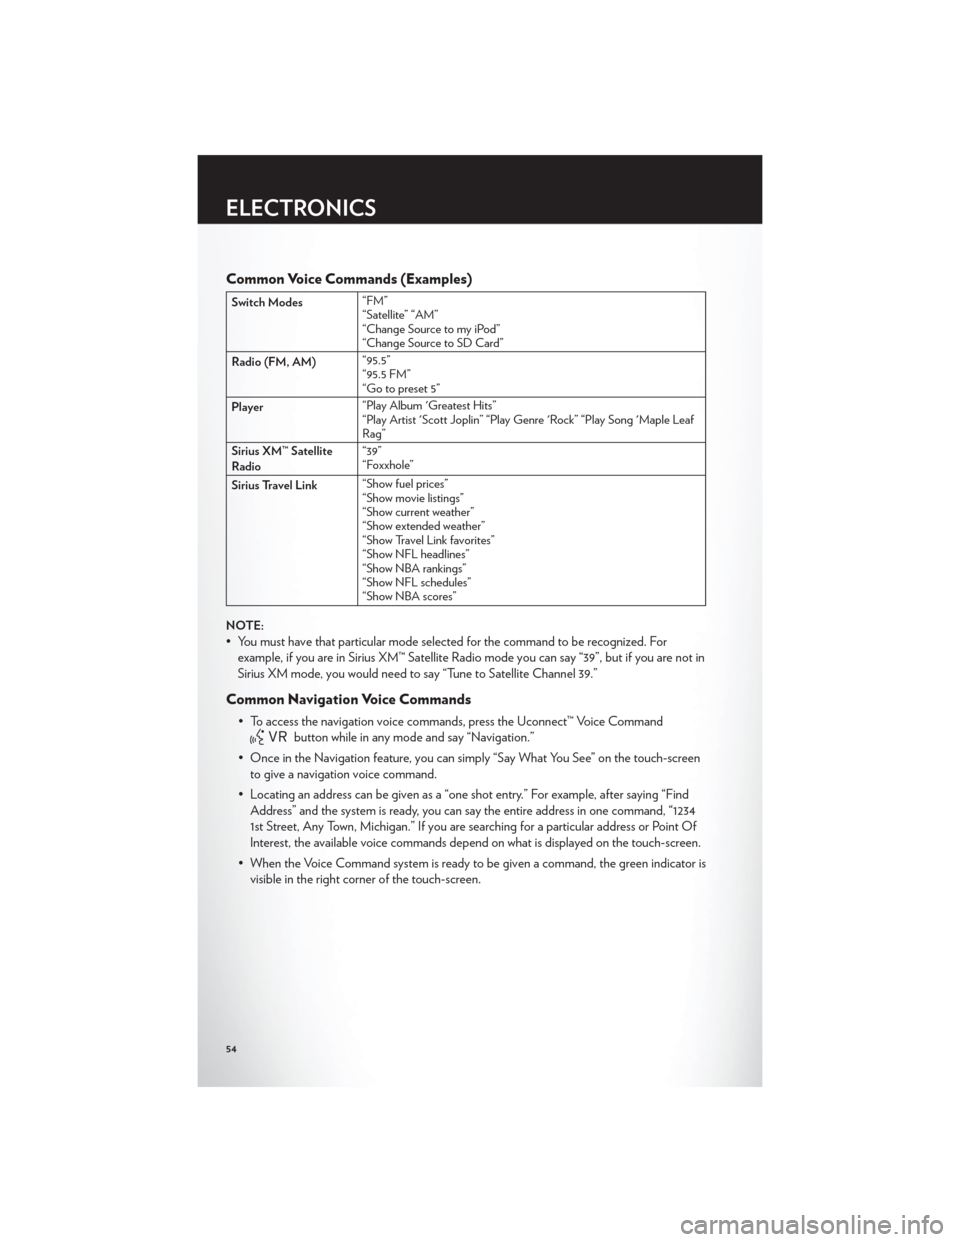
Switch Modes“FM”
“Satellite” “AM”
“Change Source to my iPod”
“Change Source to SD Card”
Radio (FM, AM) “95.5”
“95.5 FM”
“Go to preset 5”
Player “Play Album 'Greatest Hits”
“Play Artist 'Scott Joplin” “Play Genre 'Rock” “Play Song 'Maple Leaf
Rag”
Sirius XM™ Satellite
Radio “39”
“Foxxhole”
Sirius Travel Link “Show fuel prices”
“Show movie listings”
“Show current weather”
“Show extended weather”
“Show Travel Link favorites”
“Show NFL headlines”
“Show NBA rankings”
“Show NFL schedules”
“Show NBA scores”
NOTE:
• You must have that particular mode selected for the command to be recognized. For example, if you are in Sirius XM™ Satellite Radio mode you can say “39”, but if you are not in
Sirius XM mode, you would need to say “Tune to Satellite Channel 39.”
Common Navigation Voice Commands
• To access the navigation voice commands, press the Uconnect™ Voice Command
button while in any mode and say “Navigation.”
• Once in the Navigation feature, you can simply “Say What You See” on the touch-screen to give a navigation voice command.
• Locating an address can be given as a “one shot entry.” For example, after saying “Find Address” and the system is ready, you can say the entire address in one command, “1234
1st Street, Any Town, Michigan.” If you are searching for a particular address or Point Of
Interest, the available voice commands depend on what is displayed on the touch-screen.
• When the Voice Command system is ready to be given a command, the green indicator is visible in the right corner of the touch-screen.
ELECTRONICS
54
Page 57 of 124
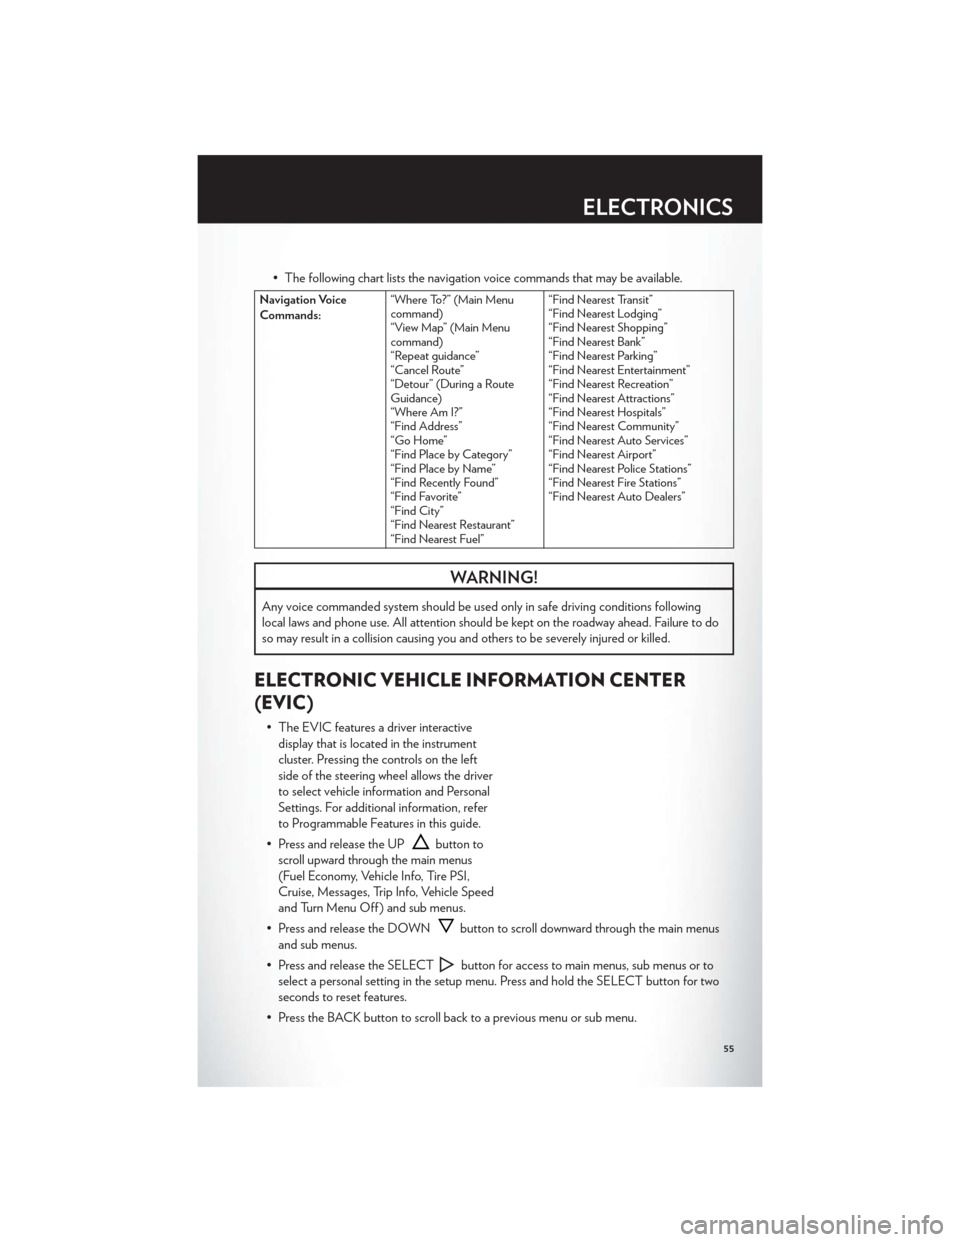
• The following chart lists the navigation voice commands that may be available.
Navigation Voice
Commands:“Where To?” (Main Menu
command)
“View Map” (Main Menu
command)
“Repeat guidance”
“Cancel Route”
“Detour” (During a Route
Guidance)
“Where Am I?”
“Find Address”
“Go Home”
“Find Place by Category”
“Find Place by Name”
“Find Recently Found”
“Find Favorite”
“Find City”
“Find Nearest Restaurant”
“Find Nearest Fuel” “Find Nearest Transit”
“Find Nearest Lodging”
“Find Nearest Shopping”
“Find Nearest Bank”
“Find Nearest Parking”
“Find Nearest Entertainment”
“Find Nearest Recreation”
“Find Nearest Attractions”
“Find Nearest Hospitals”
“Find Nearest Community”
“Find Nearest Auto Services”
“Find Nearest Airport”
“Find Nearest Police Stations”
“Find Nearest Fire Stations”
“Find Nearest Auto Dealers”
WARNING!
Any voice commanded system should be used only in safe driving conditions following
local laws and phone use. All attention should be kept on the roadway ahead. Failure to do
so may result in a collision causing you and others to be severely injured or killed.
ELECTRONIC VEHICLE INFORMATION CENTER
(EVIC)
• The EVIC features a driver interactive
display that is located in the instrument
cluster. Pressing the controls on the left
side of the steering wheel allows the driver
to select vehicle information and Personal
Settings. For additional information, refer
to Programmable Features in this guide.
• Press and release the UP
button to
scroll upward through the main menus
(Fuel Economy, Vehicle Info, Tire PSI,
Cruise, Messages, Trip Info, Vehicle Speed
and Turn Menu Off ) and sub menus.
• Press and release the DOWN
button to scroll downward through the main menus
and sub menus.
• Press and release the SELECT
button for access to main menus, sub menus or to
select a personal setting in the setup menu. Press and hold the SELECT button for two
seconds to reset features.
• Press the BACK button to scroll back to a previous menu or sub menu.
ELECTRONICS
55
Page 73 of 124

- Electronic Throttle Control (ETC) Light
• This light informs you of a problem with the Electronic Throttle Control (ETC) system.
• If a problem is detected, the light will come on while the engine is running. Cycle theignition when the vehicle has completely stopped and the shift lever is placed in the
PARK position; the light should turn off.
• If the light remains lit with the engine running, your vehicle will usually be drivable; however, see an authorized service center immediately. If the light is flashing when the
engine is running, immediate service is required and you may experience reduced
performance, an elevated/rough idle or engine stall and your vehicle may require towing.
- Air Bag Warning Light
• If the light is not on during starting, stays on, or turns on while driving, have the vehicleserviced by an authorized service center immediately.
SERVICE AWD SYSTEM Message
• If the SERVICE AWD SYSTEM warning message appears after engine start up, orduring driving, it means the AWD system is not functioning properly. We recommend
you do not operate the vehicle. Have the vehicle serviced immediately.
SPORTSport Mode
• This light will illuminate when the sport mode is selected. This mode providesperformance based tuning.
Oil Change Indicator
Message
• If an “oil change” message (shown as Oil Change Due) appears and a single chimesounds, it is time for your next required oil change.
Resetting The Light After Servicing
Vehicles Equipped With Keyless Enter-N-Go™
• Without pressing the brake pedal, push the ENGINE START/STOP button and cycle theignition to the ON/RUN position (Do not start the engine.)
• Fully depress the accelerator pedal, slowly, three times within 10 seconds.
• Without pressing the brake pedal, push the ENGINE START/STOP button once to return the ignition to the OFF/LOCK position.
Vehicles Not Equipped With Keyless Enter-N-Go™
• Turn the ignition switch to the ON/RUN position (Do not start the engine.)
• Fully depress the accelerator pedal, slowly, three times within 10 seconds.
• Turn the ignition switch to the OFF/LOCK position.
WHAT TO DO IN EMERGENCIES
71
Page 88 of 124

MANUAL PARK RELEASE — 8 SPEED TRANSMISSION (3.6L Engine)
• If a malfunction occurs and the shift lever cannot be moved out of the PARK position,you can use the following procedure to temporarily move the shift lever:
• Remove the console storage bin to access the Manual Park Release lever.
• Using a small screwdriver or similar tool, fish the tether strap up through the
opening in the console base.
• Insert the screwdriver into the slot in the center of the lever, and disengage the
spring steel lever locking tab by pushing it
to the right.
• While holding the locking tab in the disengaged position, pull the tether strap
to rotate the lever up and rearward, until it
locks in place in the vertical position. The
vehicle is now out of PARK and can be
towed. Release the parking brake only
when the vehicle is securely connected to
a tow vehicle.
To Reset The Manual Park Release: • Push the latch (at the base of the lever, onthe rear side) rearward (away from the
lever) to unlatch the lever.
• Rotate the Manual Park Release lever forward and down, to its original position,
until the locking tab snaps into place to
secure the lever.
• Pull up gently on the tether strap to confirm that the lever is locked in its
stowed position.
• Tuck the tether strap into the base of the console. Reinstall the console storage bin.
WARNING!
Always secure your vehicle by fully applying the parking brake, before activating the
Manual Park Release. Activating the Manual Park Release will allow your vehicle to roll
away if it is not secured by the parking brake or by proper connection to a tow vehicle.
Activating the Manual Park Release on an unsecured vehicle could lead to serious injury or
death for those in or around the vehicle.
WHAT TO DO IN EMERGENCIES
86