Page 196 of 557

The Headlights On with Wipers feature can be turned on
and off using the Uconnect Touch™ System, refer to
“Uconnect Touch™ Settings” in “Understanding Your
Instrument Panel” for further information.
Rain Sensing Wipers
This feature senses moisture on the windshield and
automatically activates the wipers for the driver. The
feature is especially useful for road splash or over spray
from the windshield washers of the vehicle ahead. Rotate
the end of the multifunction lever to one of four settings
to activate this feature.
The sensitivity of the system can be adjusted with the
multifunction lever. Wiper delay position 1 is the least
sensitive, and wiper delay position 4 is the most sensi-
tive. Setting 3 should be used for normal rain conditions.
Settings 1 and 2 can be used if the driver desires less
wiper sensitivity. Settings 4 can be used if the driver
desires more sensitivity. The rain sense wipers willautomatically change between an intermittent wipe, slow
wipe and a fast wipe depending on the amount of
moisture that is sensed on the windshield. Place the
wiper switch in the OFF position when not using the
system.
The Rain Sensing feature can be turned on and off using
the Uconnect Touch™ System, refer to “Uconnect
Touch™ Settings” in “Understanding Your Instrument
Panel” for further information.
NOTE:
•The Rain Sensing feature will not operate when the
wiper speed is in the low or high position.
•The Rain Sensing feature may not function properly
when ice or dried salt water is present on the wind-
shield.
•Use of Rain-X�
or products containing wax or silicone
may reduce rain sensor performance.
194 UNDERSTANDING THE FEATURES OF YOUR VEHICLE
Page 231 of 557

NOTE:The minimum speed for FCW activation is
10 mph (16 km/h).
WARNING!
Forward Collision Warning (FCW) is not intended to
avoid a collision on its own. The driver has the
responsibility to avoid a collision by controlling the
vehicle via braking and steering. Failure to follow
this warning could lead to serious injury or death.
Changing FCW Status
The FCW feature can be set to far, set to near or turned off
using the Uconnect Touch™ System, refer to “Uconnect
Touch™ Settings” in “Understanding Your Instrument
Panel” for further information. The FCW Status Off, Near
or Far will be displayed in the Uconnect Touch™ display. The default status of FCW is the “Far” setting, this allows
the system to warn you of a possible collision with the
vehicle in front of you when you are farther away. This
gives you the most reaction time.
Changing the FCW status to the “Near” setting, allows
the system to warn you of a possible collision with the
vehicle in front of you when you are much closer. This
setting provides less reaction time than the “Far” setting,
which allows for a more dynamic driving experience.
Changing the FCW status to “Off” prevents the system
from warning you of a possible collision with the vehicle
in front of you.
NOTE:
•In the “Off” setting FCW OFF will be displayed on the
Uconnect Touch™ display.
•The system will retain the last setting selected by the
driver after ignition shut down.
3
UNDERSTANDING THE FEATURES OF YOUR VEHICLE 229
Page 234 of 557

ParkSense�Sensors
The four ParkSense� sensors, located in the rear fascia/
bumper, monitor the area behind the vehicle that is
within the sensors’ field of view. The sensors can detect
obstacles from approximately 12 in (30 cm) up to 79 in
(200 cm) from the rear fascia/bumper in the horizontal
direction, depending on the location, type and orienta-
tion of the obstacle.
The six ParkSense� sensors, located in the front fascia/
bumper, monitor the area in front of the vehicle that is
within the sensors’ field of view. The sensors can detect
obstacles from approximately 12 in (30 cm) up to 47 in
(120 cm) from the front fascia/bumper in the horizontal
direction, depending on the location, type and orienta-
tion of the obstacle.
ParkSense� Warning Display
The ParkSense� Warning screen will only be displayed if
Sound and Display is selected from the Uconnect
Touch™ System. Refer to “Uconnect Touch™ Settings” in
“Understanding Your Instrument Panel” for further in-
formation.
The ParkSense� Warning screen is located within the
Electronic Vehicle Information Center (EVIC). It provides
visual warnings to indicate the distance between the rear
fascia/bumper and/or front fascia/bumper and the de-
tected obstacle.
232 UNDERSTANDING THE FEATURES OF YOUR VEHICLE
Page 239 of 557

Front Park Assist Audible Alerts
ParkSense�will turn off the Front Park Assist audible
alert (chime) after approximately 3 seconds when an
obstacle has been detected, the vehicle is stationary, and
brake pedal is applied.
Enabling And Disabling ParkSense �
ParkSense�can be enabled and disabled using the
Uconnect Touch™ System. The available choices are: Off,
Sound Only, or Sound and Display. Refer to “Uconnect
Touch™ Settings” in “Understanding Your Instrument
Panel” for further information.
When the ParkSense� soft-key is pressed to disable the
system, the EVIC will display the “PARK ASSIST SYS-
TEM OFF” message for approximately five seconds.
Refer to “Electronic Vehicle Information Center (EVIC)”
in “Understanding Your Instrument Panel” for further
information. When the shift lever is moved to REVERSE
or to DRIVE (at or below 7 mph [11 km/h]) and the
system is disabled, the EVIC will display the “PARK ASSIST SYSTEM OFF” message for approximately five
seconds in REVERSE or for 5 seconds when the vehicle is
in DRIVE.
Service The ParkSense�
Park Assist System
When the ParkSense�Park Assist System is malfunction-
ing, the instrument cluster will actuate a single chime,
once per ignition cycle. The instrument cluster will
display the “CLEAN PARK ASSIST” message when any
of the rear or front sensor(s) are blocked by snow, mud, or
ice and the vehicle is shifted into REVERSE or DRIVE.
The instrument cluster will display the “SERVICE PARK
ASSIST” message when any of the rear or front sensors
are damaged and require service. When the shift lever is
moved to REVERSE or DRIVE and the system has
detected a faulted condition, the EVIC will display the
“CLEAN PARK ASSIST”, “SERVICE PARK ASSIST” or
the “SERVICE PARK ASSIST SYSTEM” message for as
long as the vehicle is in REVERSE or DRIVE (at speeds
less than 7 mph [11 km/h]). Under this condition
ParkSense� will not operate. Refer to “Electronic Vehicle
3
UNDERSTANDING THE FEATURES OF YOUR VEHICLE 237
Page 240 of 557

Information Center (EVIC)” in “Understanding Your
Instrument Panel” for further information.
If “CLEAN PARK ASSIST” appears in the Electronic
Vehicle Information Center (EVIC) make sure the outer
surface and the underside of the rear fascia/bumper
and/or front fascia/bumper is clean and clear of snow,
ice, mud, dirt or other obstruction and then cycle the
ignition. If the message continues to appear see an
authorized dealer.
If “SERVICE PARK ASSIST�or “SERVICE PARK ASSIST
SYSTEM” appears in the EVIC, see an authorized dealer.
Cleaning The ParkSense �System
Clean the ParkSense� sensors with water, car wash soap
and a soft cloth. Do not use rough or hard cloths. Do not
scratch or poke the sensors. Otherwise, you could dam-
age the sensors.
ParkSense� System Usage Precautions
NOTE:
•Ensure that the front and rear bumper are free of snow,
ice, mud, dirt and debris to keep the ParkSense �
system operating properly.
•Jackhammers, large trucks, and other vibrations could
affect the performance of ParkSense�.
•When you turn ParkSense� off, the EVIC will display
“PARK ASSIST SYSTEM OFF.” Furthermore, once you
turn ParkSense� off, it remains off until you turn it on
again, even if you cycle the ignition key.
•When you move the shift lever to the REVERSE or
DRIVE position and ParkSense� is turned off, the
EVIC will display “PARK ASSIST SYSTEM OFF”
message for approximately five seconds in REVERSE
or for 5 seconds when the vehicle is in DRIVE.
238 UNDERSTANDING THE FEATURES OF YOUR VEHICLE
Page 260 of 557

Ignition OFF Operation
For vehicles not equipped with the Electronic Vehicle
Information Center (EVIC), the power sunroof switch
will remain active for 45 seconds after the ignition switch
is turned to the LOCK position. Opening either front
door will cancel this feature.
NOTE:
•For vehicles equipped with the EVIC, the power
sunroof switch will remain active for up to approxi-
mately ten minutes after the ignition switch is turned
to the LOCK position. Opening either front door will
cancel this feature.
•The Ignition Off time is programmable using the
Uconnect Touch™ System. Refer to “Uconnect
Touch™ Settings” in “Understanding Your Instrument
Panel” for further information.
COMMANDVIEW�SUNROOF WITH POWER
SHADE — IF EQUIPPED
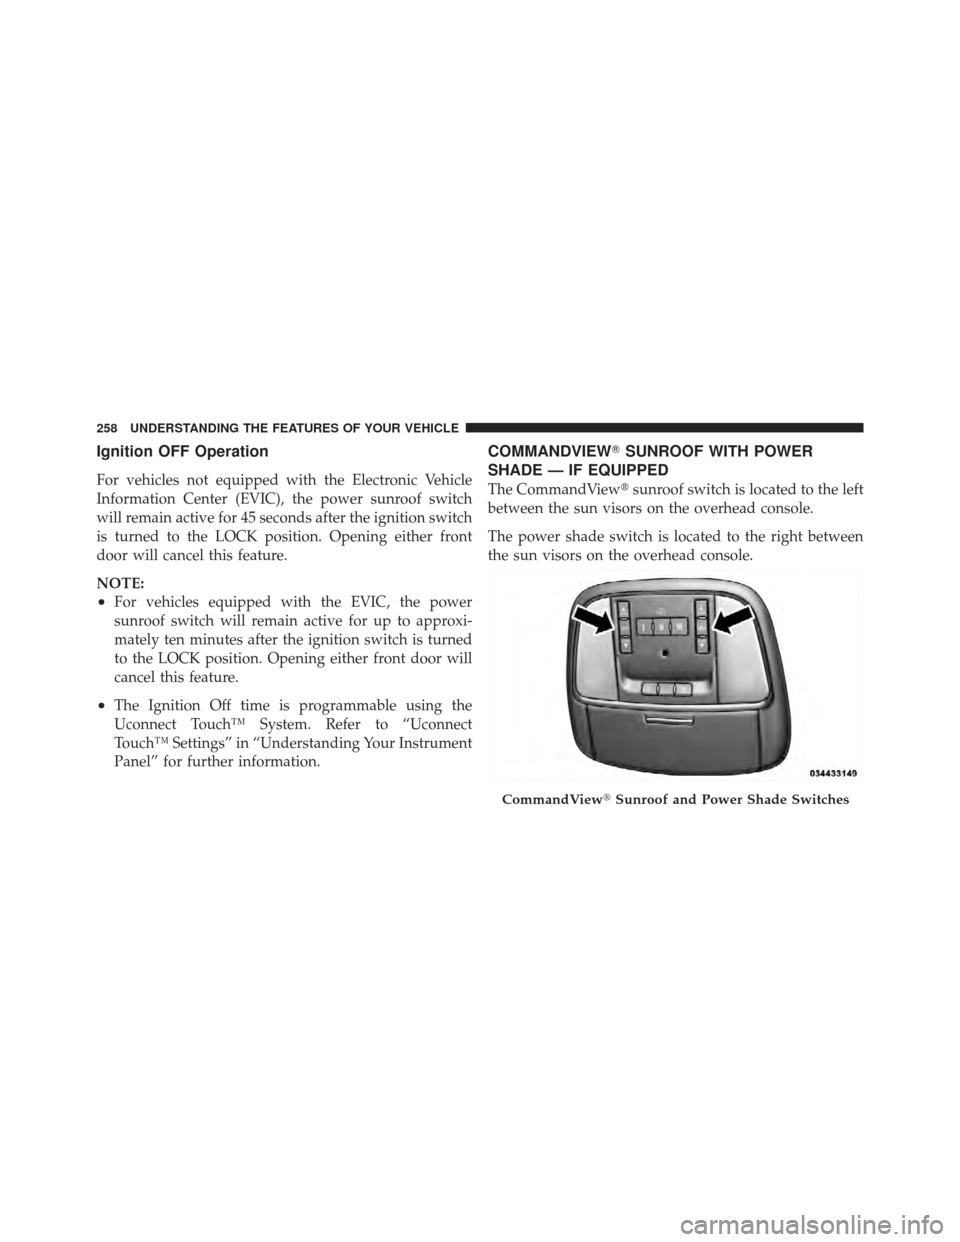
The CommandView� sunroof switch is located to the left
between the sun visors on the overhead console.
The power shade switch is located to the right between
the sun visors on the overhead console.
CommandView �Sunroof and Power Shade Switches
258 UNDERSTANDING THE FEATURES OF YOUR VEHICLE
Page 264 of 557

Ignition Off Operation
For vehicles not equipped with the Electronic Vehicle
Information Center (EVIC), the power sunroof switch
will remain active for 45 seconds after the ignition switch
is turned to the LOCK position. Opening either front
door will cancel this feature.
NOTE:
•For vehicles equipped with the EVIC, the power
sunroof switch will remain active for up to approxi-
mately ten minutes after the ignition switch is turned
to the LOCK position. Opening either front door will
cancel this feature.
•The Ignition Off time is programmable using the
Uconnect Touch™ System. Refer to “Uconnect
Touch™ Settings” in “Understanding Your Instrument
Panel” for further information.
Sunroof Fully Closed
Press the switch forward and release to ensure that the
sunroof is fully closed.
ELECTRICAL POWER OUTLETS
There are three 12 Volt (13 Amp) electrical power outlets
on this vehicle. The power outlets are protected by a fuse.
Insert cigar lighter or accessory plug into the power
outlets for use to ensure proper operation.
NOTE:To ensure proper operation, a MOPAR� knob
and element must be used.
CAUTION!
•Do not exceed the maximum power of 160 Watts
(13 Amps) at 12 Volts. If the 160 Watt (13 Amp)
power rating is exceeded, the fuse protecting the
system will need to be replaced.
(Continued)
262 UNDERSTANDING THE FEATURES OF YOUR VEHICLE
Page 267 of 557
WARNING!
To avoid serious injury or death:
•Only devices designed for use in this type of
outlet should be inserted into any 12 Volt outlet.
•Do not touch with wet hands.
•Close the lid when not in use and while driving
the vehicle.
•If this outlet is mishandled, it may cause an
electric shock and failure.
Power Outlet Fuse Locations
1 — #12 Fuse 20 A Yellow Cigar Lighter Instrument Panel And
Power Outlet Console Rear
2 — #38 Fuse 20 A Yellow Power Outlet Inside Arm Rest
3
UNDERSTANDING THE FEATURES OF YOUR VEHICLE 265