Page 77 of 557
Here are some tips on getting the most out of your child
restraint:
•Before buying any restraint system, make sure that it
has a label certifying that it meets all applicable Safety
Standards. Chrysler Group LLC also recommends that
you make sure that you can install the child restraint in
the vehicle where you will use it before you buy it.
•The restraint must be appropriate for your child’s
weight and height. Check the label on the restraint for
weight and height limits.
•Carefully follow the instructions that come with the
restraint. If you install the restraint improperly, it may
not work when you need it.
•Buckle the child into the seat according to the child
restraint manufacturer’s directions.
WARNING!
When your child restraint is not in use, secure it in
the vehicle with the seat belt or remove it from the
vehicle. Do not leave it loose in the vehicle. In a
sudden stop or accident, it could strike the occupants
or seatbacks and cause serious personal injury.
Lower Anchors and Tether for CHildren (LATCH)
Your vehicle’s rear seat is equipped with the child
restraint anchorage system called LATCH. The LATCH
system provides for the installation of the child restraint
without using the vehicle’s seat belts, instead securing
the child restraint using lower anchorages and upper
tether straps from the child restraint to the vehicle
structure.
2
THINGS TO KNOW BEFORE STARTING YOUR VEHICLE 75
Page 78 of 557
LATCH-compatible child restraint systems are now avail-
able. However, because the lower anchorages are to be
introduced over a period of years, child restraint systems
having attachments for those anchorages will continue to
have features for installation using the vehicle’s seat
belts. Child restraints having tether straps and hooks for
connection to the top tether anchorages have been avail-
able for some time. For some older child restraints, many
child restraint manufacturers offer add-on tether strap
kits or retrofit kits. You are urged to take advantage of all
the available attachments provided with your child re-
straint in any vehicle.
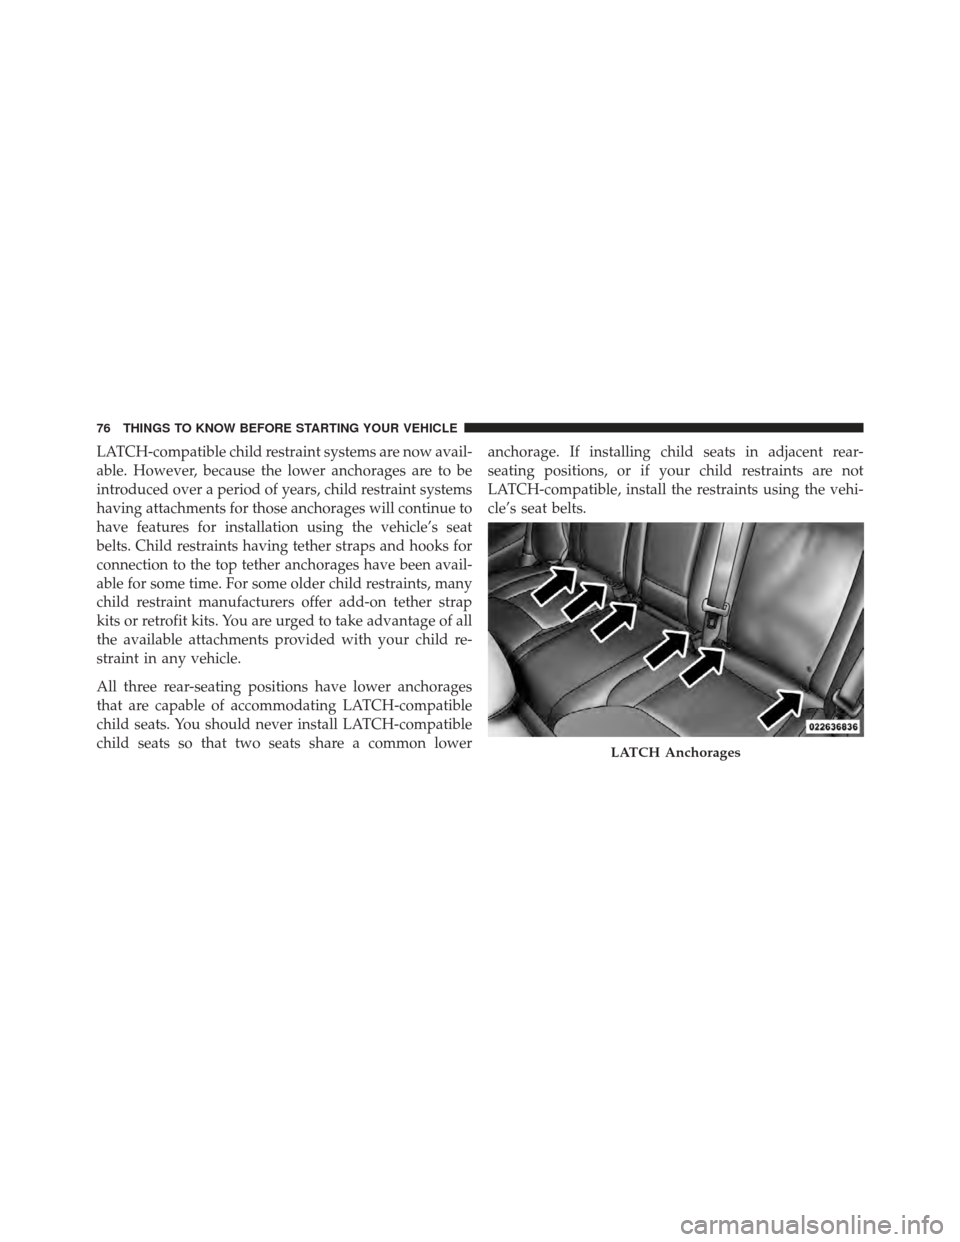
All three rear-seating positions have lower anchorages
that are capable of accommodating LATCH-compatible
child seats. You should never install LATCH-compatible
child seats so that two seats share a common loweranchorage. If installing child seats in adjacent rear-
seating positions, or if your child restraints are not
LATCH-compatible, install the restraints using the vehi-
cle’s seat belts.
LATCH Anchorages
76 THINGS TO KNOW BEFORE STARTING YOUR VEHICLE
Page 79 of 557
Installing The LATCH-Compatible Child Restraint
System
We urge you to follow the manufacturer’s directions
carefully when installing your child restraint. Not all
child restraint systems will be installed as described here.
Again, carefully follow the installation instructions that
are provided with the child restraint system.The rear seat lower anchorages are round bars
located at the rear of the seat cushion where it
meets the seatback and are located just below
the button with the anchorage symbol on the
rear seat, but are not visible. You will easily feel them if
you run your finger along the intersection of the seatback
and seat cushion surfaces. In addition, there are tether strap anchorages
behind each rear seating position located in the
panel between the rear seatback and the rear
window. These tether strap anchorages are
under a plastic cover with this symbol on it.
Many, but not all, restraint systems will be equipped with
separate straps on each side, with each having a hook or
connector for attachment to the lower anchorage and a
means of adjusting the tension in the strap. Forward-
facing toddler restraints and some rear-facing infant
restraints will also be equipped with a tether strap, a
hook for attachment to the tether strap anchorage and a
means of adjusting the tension of the strap.
2
THINGS TO KNOW BEFORE STARTING YOUR VEHICLE 77
Page 80 of 557
You will first loosen the child seat adjusters on the lower
straps and on the tether strap so that you can more easily
attach the hooks or connectors to the vehicle anchorages.
Next, attach the lower hooks or connectors over the top
of the seat cover material. Then, rotate the tether anchor-
age cover directly behind the seat where you are placing
the child restraint and attach the tether strap to the
anchorage, being careful to route the tether strap to
provide the most direct path between the anchor and the
child restraint. Finally, tighten all three straps as you
push the child restraint rearward and downward into the
seat, removing slack in the straps according to the child
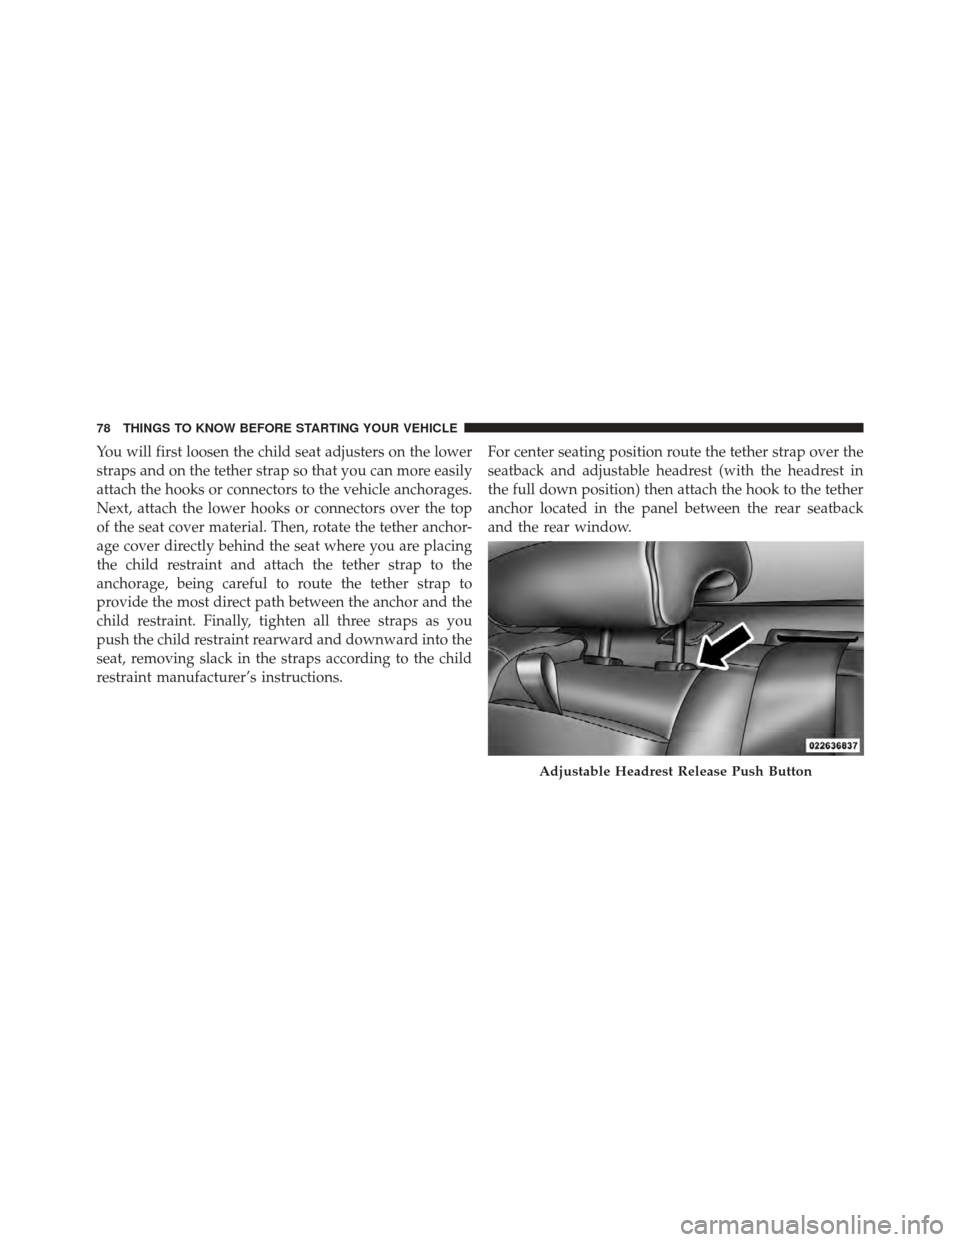
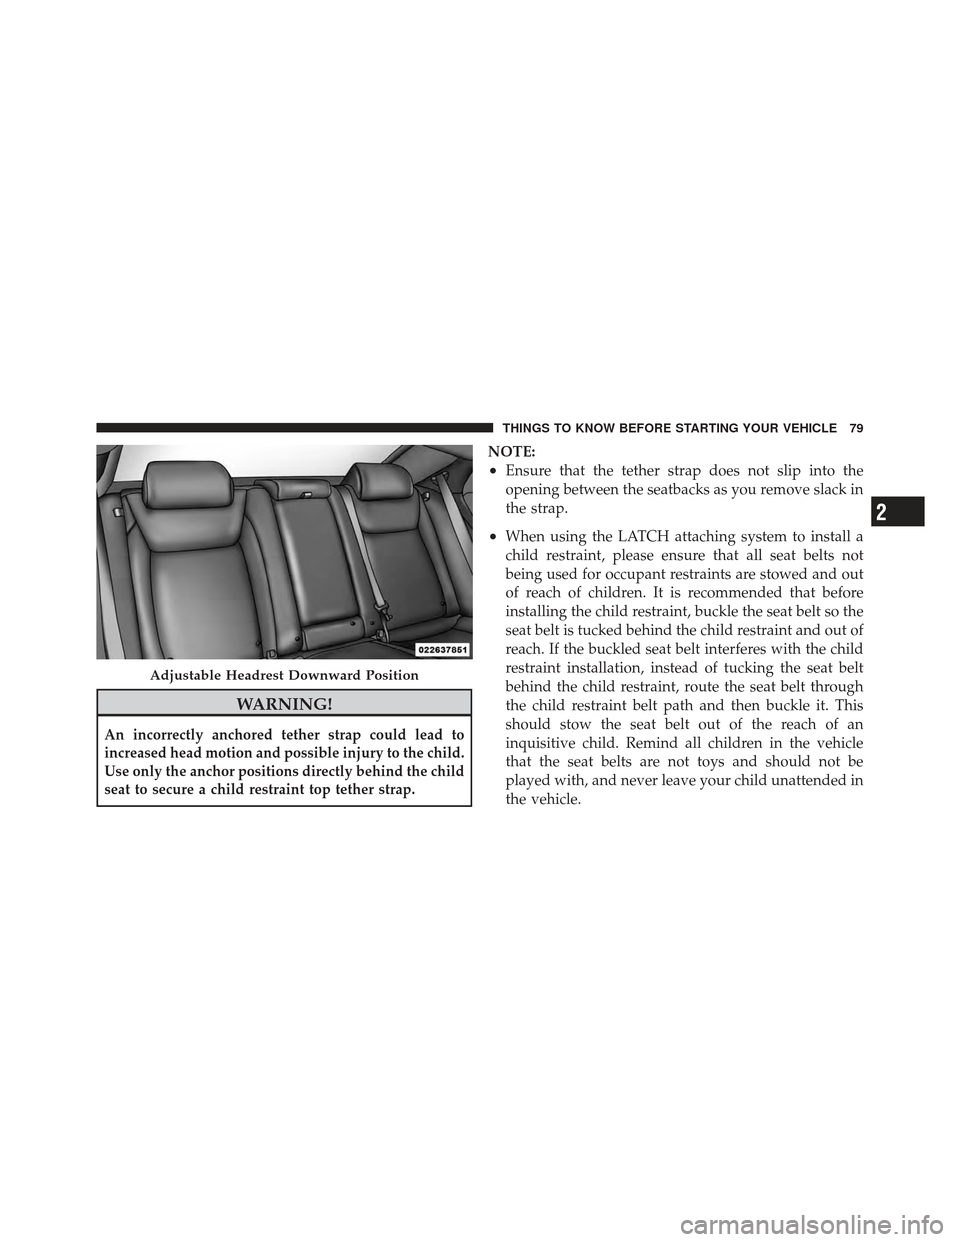
restraint manufacturer’s instructions.For center seating position route the tether strap over the
seatback and adjustable headrest (with the headrest in
the full down position) then attach the hook to the tether
anchor located in the panel between the rear seatback
and the rear window.
Adjustable Headrest Release Push Button
78 THINGS TO KNOW BEFORE STARTING YOUR VEHICLE
Page 81 of 557
WARNING!
An incorrectly anchored tether strap could lead to
increased head motion and possible injury to the child.
Use only the anchor positions directly behind the child
seat to secure a child restraint top tether strap.
NOTE:
•Ensure that the tether strap does not slip into the
opening between the seatbacks as you remove slack in
the strap.
•When using the LATCH attaching system to install a
child restraint, please ensure that all seat belts not
being used for occupant restraints are stowed and out
of reach of children. It is recommended that before
installing the child restraint, buckle the seat belt so the
seat belt is tucked behind the child restraint and out of
reach. If the buckled seat belt interferes with the child
restraint installation, instead of tucking the seat belt
behind the child restraint, route the seat belt through
the child restraint belt path and then buckle it. This
should stow the seat belt out of the reach of an
inquisitive child. Remind all children in the vehicle
that the seat belts are not toys and should not be
played with, and never leave your child unattended in
the vehicle.
Adjustable Headrest Downward Position
2
THINGS TO KNOW BEFORE STARTING YOUR VEHICLE 79
Page 82 of 557
WARNING!
Improper installation of a child restraint to the
LATCH anchorages can lead to failure of an infant or
child restraint. The child could be badly injured or
killed. Follow the manufacturer’s directions exactly
when installing an infant or child restraint.
Installing Child Restraints Using The Vehicle Seat
Belts
The seat belts in the passenger seating positions are
equipped with an Automatic Locking Retractor (ALR) to
secure a Child Restraint System (CRS). These types of
seat belts are designed to keep the lap portion of the seat
belt tight around the child restraint so that it is notnecessary to use a locking clip. The ALR will make a
ratcheting noise if you extract the entire belt from the
retractor and then allow the belt to retract into the
retractor. For additional information on ALR, refer to
“Automatic Locking Mode”. The chart below defines the
seating positions with an Automatic Locking Retractor
(ALR) or a cinching latch plate.
Driver Center Passenger
CRS Lock CRS Lock CRS Lock
First Row N/A N/A ALR
Second Row ALR ALR ALR
•N/A — Not Applicable
•ALR — Automatic Locking Retractor
80 THINGS TO KNOW BEFORE STARTING YOUR VEHICLE
Page 83 of 557
1. To install a child restraint with ALR, first, pull enough
of the seat belt webbing from the retractor to route it
through the belt path of the child restraint. Slide the latch
plate into the buckle until you hear a click. Next, extract
all the seat belt webbing out of the retractor and then
allow the belt to retract into the retractor. As the belt
retracts, you will hear a ratcheting sound. This indicates
the safety belt is now in the Automatic Locking mode.
2. Finally, pull on any excess webbing to tighten the lap
portion around the child restraint. Any seat belt system
will loosen with time, so check the belt occasionally, and
pull it tight if necessary.To attach a child restraint tether strap:
1. Rotate the cover over the anchor directly behind the
seat where you are placing the child restraint.
Tether Strap Mounting
1 — Cover
A — Tether Strap Hook
3 — Attaching Strap B — Tether Anchor
2
THINGS TO KNOW BEFORE STARTING YOUR VEHICLE 81
Page 84 of 557
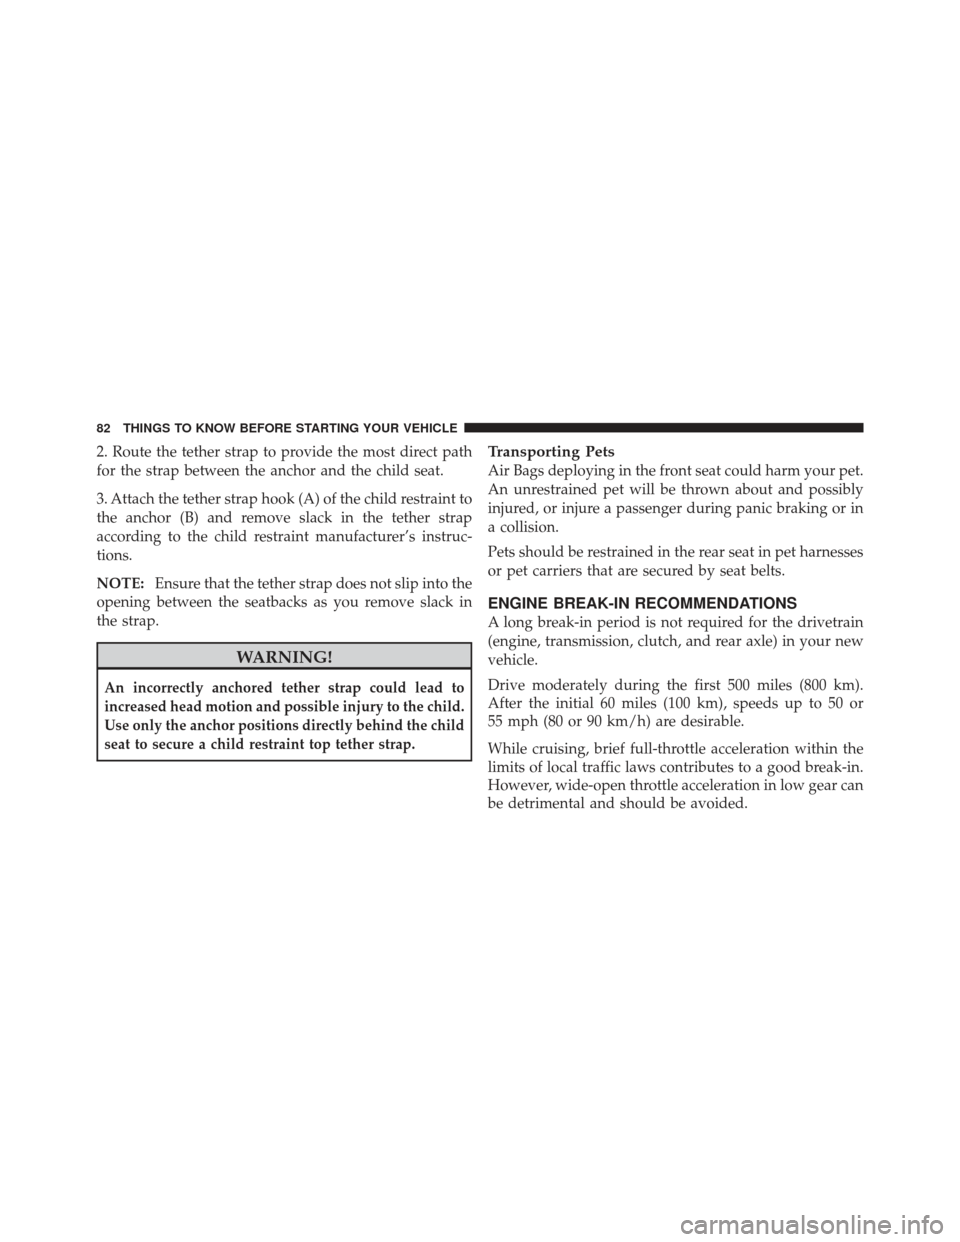
2. Route the tether strap to provide the most direct path
for the strap between the anchor and the child seat.
3. Attach the tether strap hook (A) of the child restraint to
the anchor (B) and remove slack in the tether strap
according to the child restraint manufacturer’s instruc-
tions.
NOTE:Ensure that the tether strap does not slip into the
opening between the seatbacks as you remove slack in
the strap.
WARNING!
An incorrectly anchored tether strap could lead to
increased head motion and possible injury to the child.
Use only the anchor positions directly behind the child
seat to secure a child restraint top tether strap.
Transporting Pets
Air Bags deploying in the front seat could harm your pet.
An unrestrained pet will be thrown about and possibly
injured, or injure a passenger during panic braking or in
a collision.
Pets should be restrained in the rear seat in pet harnesses
or pet carriers that are secured by seat belts.
ENGINE BREAK-IN RECOMMENDATIONS
A long break-in period is not required for the drivetrain
(engine, transmission, clutch, and rear axle) in your new
vehicle.
Drive moderately during the first 500 miles (800 km).
After the initial 60 miles (100 km), speeds up to 50 or
55 mph (80 or 90 km/h) are desirable.
While cruising, brief full-throttle acceleration within the
limits of local traffic laws contributes to a good break-in.
However, wide-open throttle acceleration in low gear can
be detrimental and should be avoided.
82 THINGS TO KNOW BEFORE STARTING YOUR VEHICLE