Page 73 of 508

Air Bag Warning Light
You will want to have the air bags ready to
inflate for your protection in a collision. The
Air Bag Warning Light monitors the internal
circuits and interconnecting wiring associated
with air bag system electrical components. While the air
bag system is designed to be maintenance free, if any of
the following occurs, have an authorized dealer service
the air bag system immediately.
•The Air Bag Warning Light does not come on during
the four to eight seconds when the ignition switch is
first turned to the ON/RUN position.
•The Air Bag Warning Light remains on after the four to
eight-second interval.
•The Air Bag Warning Light comes on intermittently or
remains on while driving. NOTE:
If the speedometer, tachometer, or any engine
related gauges are not working, the Occupant Restraint
Controller (ORC) may also be disabled. The air bags may
not be ready to inflate for your protection. Promptly
check the fuse block for blown fuses. Refer to the label
located on the inside of the fuse block cover for the
proper air bag fuses. See your authorized dealer if the
fuse is good.
Event Data Recorder (EDR)
This vehicle is equipped with an event data recorder
(EDR). The main purpose of an EDR is to record, in
certain crash or near crash-like situations, such as an air
bag deployment or hitting a road obstacle, data that will
assist in understanding how a vehicle’s systems per-
formed. The EDR is designed to record data related to
vehicle dynamics and safety systems for a short period of
time, typically 30 seconds or less. The EDR in this vehicle
is designed to record such data as:
•How various systems in your vehicle were operating;
2
THINGS TO KNOW BEFORE STARTING YOUR VEHICLE 71
Page 89 of 508

inspect the exhaust system each time the vehicle is raised
for lubrication or oil change. Replace as required.
Safety Checks You Should Make Inside The
Vehicle
Seat Belts
Inspect the belt system periodically, checking for cuts,
frays, and loose parts. Damaged parts must be replaced
immediately. Do not disassemble or modify the system.
Front seat belt assemblies must be replaced after a
collision. Rear seat belt assemblies must be replaced after
a collision if they have been damaged (i.e., bent retractor,
torn webbing, etc.). If there is any question regarding belt
or retractor condition, replace the belt.
Air Bag Warning Light
The light should come on and remain on for four to eight
seconds as a bulb check when the ignition switch is first
turned ON. If the light is not lit during starting, see yourauthorized dealer. If the light stays on, flickers, or comes
on while driving, have the system checked by an autho-
rized dealer.
Defroster
Check operation by selecting the defrost mode and place
the blower control on high speed. You should be able to
feel the air directed against the windshield. See your
authorized dealer for service if your defroster is
inoperable.
Floor Mat Safety Information
Always use floor mats designed to fit the footwell of your
vehicle. Use only floor mats that leave the pedal area
unobstructed and that are firmly secured so that they
cannot slip out of position and interfere with the pedals
or impair safe operation of your vehicle in other ways.
2
THINGS TO KNOW BEFORE STARTING YOUR VEHICLE 87
Page 101 of 508

Adjusting Sideview Mirrors
Outside Mirror — Driver Side
Adjust the outside mirror to center on the adjacent lane of
traffic, with a slight overlap of the view obtained on the
inside mirror.
Outside Mirror — Passenger Side
Adjust the convex outside mirror so you can just see the
side of your vehicle in the part of the mirror closest to the
vehicle.
WARNING!
Vehicles and other objects seen in the passenger side
convex mirror will look smaller and farther away
than they really are. Relying too much on your
passenger side mirror could cause you to collide with
another vehicle or other objects. Use your inside
mirror when judging the size or distance of a vehicle
seen in the passenger side mirror.
Exterior Mirrors Folding Feature
All exterior mirrors are hinged and may be moved either
forward or rearward to resist damage. The hinges have
three detent positions: full forward, full rearward and
normal.
Heated Mirrors — If Equipped
These mirrors are heated to melt frost or ice. This feature
is activated whenever you turn on the rear window
defroster. Refer to “Rear Window Features” in “Under-
standing the Features of Your Vehicle” for further
information.
3
UNDERSTANDING THE FEATURES OF YOUR VEHICLE 99
Page 115 of 508

Emergency Assistance
If you are in an emergency and the mobile phone is
reachable:
•Pick up the phone and manually dial the emergency
number for your area.
If the phone is not reachable and the Uconnect™ Phone is
operational, you may reach the emergency number as
follows:
•Press thebutton to begin.
•After the “Ready” prompt and the following beep, say
“Emergency” and the Uconnect™ Phone will instruct
the paired mobile phone to call the emergency num-
ber. This feature is supported in the U.S., Canada, and
Mexico.
NOTE:
•The emergency number dialed is based on the country
where the vehicle is purchased (911 for the U.S. and Canada and 060 for Mexico). The number dialed may
not be applicable with the available mobile service and
area.
•If supported, this number may be programmable on
some systems. To do this, press the
button and say
“Setup”, followed by “Emergency”.
•The Uconnect™ Phone does slightly lower your
chances of successfully making a phone call as to that
for the mobile phone directly.
WARNING!
To use your Uconnect™ Phone System in an emer-
gency, your mobile phone must be:
•turned on,
•paired to the Uconnect™ System,
•and have network coverage.
3
UNDERSTANDING THE FEATURES OF YOUR VEHICLE 113
Page 140 of 508

You can choose from HIGH, LOW or OFF heat settings.
Amber indicator lights in each switch indicate the level of
heat in use. Two indicator lights will illuminate for
HIGH, one for LOW and none for OFF.Press the switch once to select HIGH-level
heating. Press the switch a second time to select
LOW-level heating. Press the switch a third
time to shut the heating elements OFF.
NOTE: Once a heat setting is selected, heat will be felt
within two to five minutes.
When the HIGH-level setting is selected, the heater will
provide a boosted heat level during the first four minutes
of operation. Then, the heat output will drop to the
normal HIGH-level. If the HIGH-level setting is selected,
the system will automatically switch to LOW-level after a
maximum of 60 minutes of continuous operation. At that
time, the number of illuminated LEDs changes from two to one, indicating the change. The LOW-level setting will
turn OFF automatically after a maximum of 45 minutes.
WARNING!
•Persons who are unable to feel pain to the skin
because of advanced age, chronic illness, diabetes,
spinal cord injury, medication, alcohol use, ex-
haustion or other physical condition must exercise
care when using the seat heater. It may cause burns
even at low temperatures, especially if used for
long periods of time.
•Do not place anything on the seat that insulates
against heat, such as a blanket or cushion. This
may cause the seat heater to overheat. Sitting in a
seat that has been overheated could cause serious
burns due to the increased surface temperature of
the seat.
138 UNDERSTANDING THE FEATURES OF YOUR VEHICLE
Page 151 of 508
NOTE:Before closing the hood, make sure to stow the
prop rod in its proper location.
CAUTION!
To prevent possible damage, do not slam the hood to
close it. Use a firm downward push at the center of
the hood to ensure that both latches engage.
WARNING!
Be sure the hood is fully latched before driving your
vehicle. If the hood is not fully latched, it could open
when the vehicle is in motion and block your vision.
Failure to follow this warning could result in serious
injury or death.
LIGHTS
Multifunction Lever
The multifunction lever controls the operation of the
parking lights, headlights, headlight beam selection,
Hood Prop Rod Hole Location
3
UNDERSTANDING THE FEATURES OF YOUR VEHICLE 149
Page 161 of 508

WARNING!
Sudden loss of visibility through the windshield
could lead to a collision. You might not see other
vehicles or other obstacles. To avoid sudden icing of
the windshield during freezing weather, warm the
windshield with defroster before and during wind-
shield washer use.
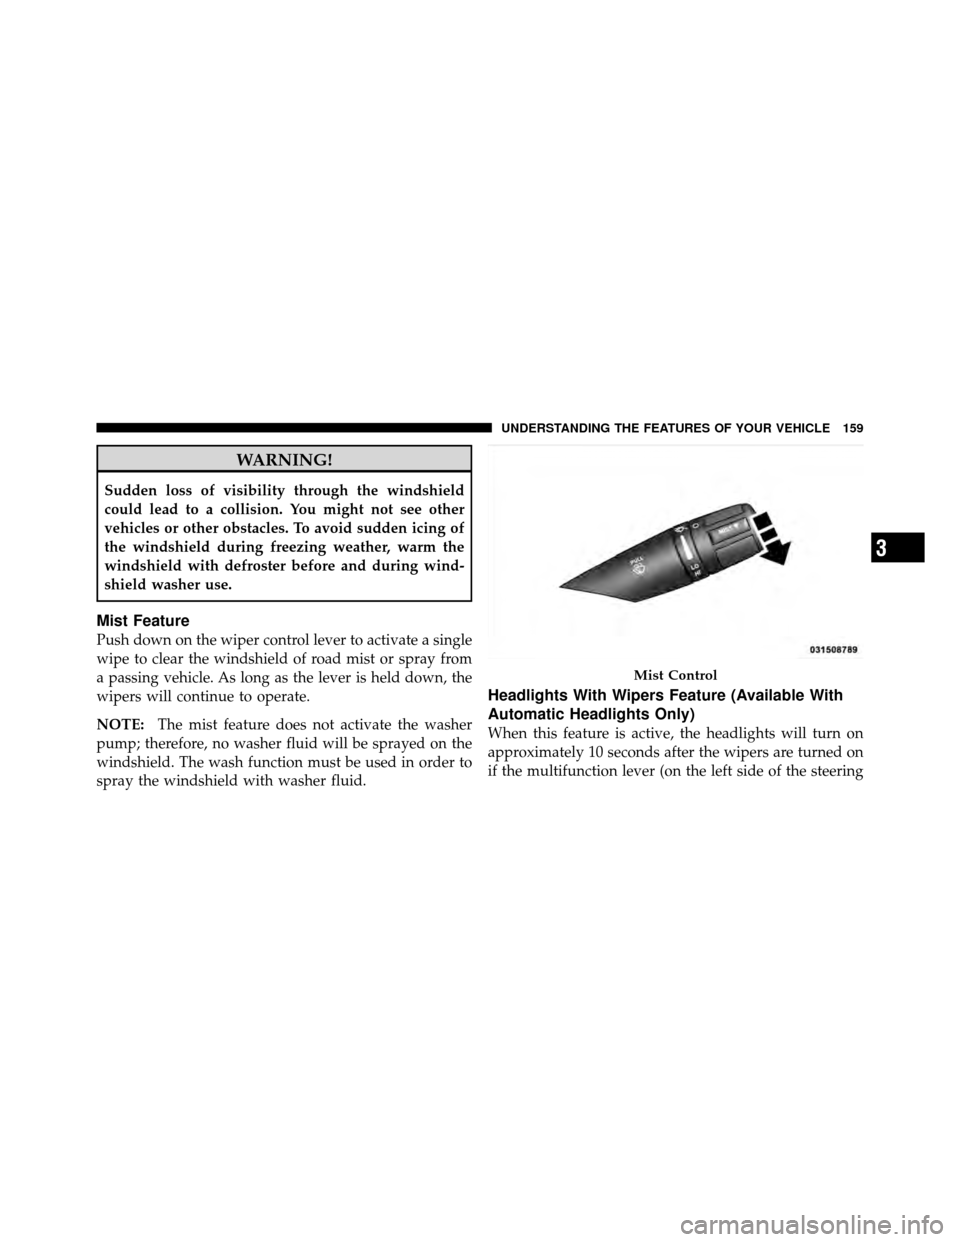
Mist Feature
Push down on the wiper control lever to activate a single
wipe to clear the windshield of road mist or spray from
a passing vehicle. As long as the lever is held down, the
wipers will continue to operate.
NOTE:The mist feature does not activate the washer
pump; therefore, no washer fluid will be sprayed on the
windshield. The wash function must be used in order to
spray the windshield with washer fluid.
Headlights With Wipers Feature (Available With
Automatic Headlights Only)
When this feature is active, the headlights will turn on
approximately 10 seconds after the wipers are turned on
if the multifunction lever (on the left side of the steering
Mist Control
3
UNDERSTANDING THE FEATURES OF YOUR VEHICLE 159
Page 164 of 508

the same time. If this occurs, the Electronic Speed Control
System can be reactivated by pushing the Electronic
Speed Control ON/OFF button and resetting the desired
vehicle set speed.
To Activate
Push the ON/OFF button. The Cruise Indicator Light in
the instrument cluster will illuminate. To turn the system
off, push the ON/OFF button a second time. The Cruise
Indicator Light will turn off. The system should be
turned off when not in use.
WARNING!
Leaving the Electronic Speed Control system on
when not in use is dangerous. You could accidentally
set the system or cause it to go faster than you want.
You could lose control and have an accident. Always
leave the system OFF when you are not using it.
To Set A Desired Speed
Turn the Electronic Speed Control ON. When the vehicle
has reached the desired speed, press the SET (-) button
and release. Release the accelerator and the vehicle will
operate at the selected speed.
NOTE:The vehicle should be traveling at a steady
speed and on level ground before pressing the SET
button.
To Deactivate
A soft tap on the brake pedal, pushing the CANCEL
button, or normal brake pressure while slowing the
vehicle will deactivate Electronic Speed Control without
erasing the set speed memory. Pressing the ON/OFF
button or turning the ignition switch OFF erases the set
speed memory.
162 UNDERSTANDING THE FEATURES OF YOUR VEHICLE