2012 CHEVROLET SUBURBAN remote start
[x] Cancel search: remote startPage 229 of 514
Black plate (35,1)Chevrolet Tahoe/Suburban Owner Manual - 2012
Infotainment System 7-35
Shuffle Functionality
To use Shuffle:
Press the softkey below
>,2,
Cor=to select between
Shuffle Off, Shuffle All Songs/
Shuffle Songs, Shuffle Album,
or Shuffle Folder.
>(Shuffle Off): Press the
softkey below
2to turn shuffle
off. This is the default mode when a
USB storage device or iPod is first
connected.
2(Shuffle All Songs / Shuffle
Songs): Press the softkey
below
=orCto shuffle all
songs on the USB storage device
or iPod.
C(Shuffle Album): Press the
softkey below
>to shuffle all
songs in the current album on
an iPod.
=(Shuffle Folder): Press the
softkey below
>to shuffle all
songs in the current folder on a USB
storage device.
Rear Seat
Infotainment
Rear Seat Entertainment
(RSE) System
The vehicle may have an
Overhead DVD Rear Seat
Entertainment (RSE) system.
The RSE system works with the
vehicle's audio system. The DVD
player is part of the front radio. The
RSE system includes a radio with a
DVD player, a video display screen,
and if the vehicle has a third row
seat, it could have a second video
display screen, audio/video jacks,
two wireless headphones, and a
remote control. See CD/DVD Player
on page 7‑20 for more information
on the vehicle's DVD system.
Before Driving
The RSE is designed for rear seat
passengers only. The driver cannot
safely view the video screen while
driving and should not try to do so. In severe or extreme weather
conditions, the RSE system might
not work until the temperature is
within the operating range. The
operating range for the RSE system
is above
−20°C (−4°F) or below
60°C (140°F). If the temperature of
the vehicle is outside this range,
heat or cool the vehicle until the
temperature is within the operating
range of the RSE system.
Parental Control
The RSE system may have a
Parental Control feature, depending
on which radio the vehicle has. To
start Parental Control, press and
hold the radio power button for more
than two seconds to stop all system
features such as: radio, video
screen, Rear Seat Audio (RSA),
DVD, and/or CD. While Parental
Control is on, a padlock icon
displays.
Page 234 of 514
Black plate (40,1)Chevrolet Tahoe/Suburban Owner Manual - 2012
7-40 Infotainment System
Objects blocking the line of sight
could also affect the function of the
remote control.
If a CD or DVD is in the Radio DVD
slot, the remote control
O(power)
button can be used to turn on the
video screen display and start the
disc. The radio can also turn on the
video screen display. See CD/DVD
Player on page 7‑20 for more
information.
Notice: Storing the remote
control in a hot area or in direct
sunlight can damage it, and the
repairs will not be covered by the
warranty. Storage in extreme cold
can weaken the batteries. Keep
the remote control stored in a
cool, dry place.
If the remote control becomes lost
or damaged, a new universal
remote control can be purchased.
If this happens, make sure the
universal remote control uses a
code set of Toshiba
®. Remote Control Buttons
O(Power):
Press this button to
turn the video screen on and off.
P(Illumination): Press this button
to turn the remote control backlight
on. The backlight automatically
times out after 7 to 10 seconds if no
other button is pressed while the
backlight is on.
v(Title): Press this button to
return the DVD to the main menu of
the DVD. This function could vary
for each disc.
y(Main Menu): Press this button
to access the DVD menu. The DVD
menu is different on every DVD.
Use the navigation arrows to move
the cursor around the DVD menu.
After making a selection press the
enter button. This button only
operates when using a DVD.
n,q,p,o(Menu Navigation
Arrows): Use the arrow buttons to
navigate through a menu.
r(Enter): Press this button to
select the choice that is highlighted
in any menu.
z(Display Menu): Press this
button to adjust the brightness,
screen display mode (normal, full,
or zoom), and display the
language menu.
q(Return): Press this button to
exit the current active menu and
return to the previous menu. This
button operates only when the
display menu or a DVD menu is
active.
c(Stop): Press this button to
stop playing, fast reversing, or fast
forwarding a DVD. Press this button
twice to return to the beginning of
the DVD.
s(Play/Pause): Press this
button to start playing a DVD. Press
this button while a DVD is playing to
pause it. Press it again to continue
playing the DVD.
Page 237 of 514
Black plate (43,1)Chevrolet Tahoe/Suburban Owner Manual - 2012
Infotainment System 7-43
Tips and Troubleshooting Chart
ProblemRecommended Action
There is no power. The ignition might not be turned to ON/RUN or ACC/
ACCESSORY.
The picture does not fill the screen. There are black
borders on the top and bottom or on both sides, or the
picture looks stretched out. Check the display mode settings in the setup menu by
pressing the display menu button on the remote control.
In auxiliary mode, the picture moves or scrolls. Check the auxiliary input connections at both devices.
The remote control does not work. Check to make sure there is no obstruction between the
remote control and the transmitter window.
Check the batteries to make sure they are not dead or
installed incorrectly.
After stopping the player, and pushing Play, sometimes
the DVD starts where it left off and sometimes at the
beginning. If the stop button was pressed one time, the DVD player
resumes playing where the DVD was stopped. If the
stop button was pressed two times, the DVD player
begins to play from the beginning of the DVD.
The auxiliary source is running, but there is no picture or
sound. Check that the RSE video screen is in the auxiliary
source mode.
Check the auxiliary input connections at both devices.
Page 357 of 514
Black plate (7,1)Chevrolet Tahoe/Suburban Owner Manual - 2012
Vehicle Care 10-7
A.Engine Air Cleaner/Filter on
page 10‑14.
B. Coolant Surge Tank and Pressure Cap. See Cooling
System on page 10‑15.
C. Remote Positive (+) Terminal. See Jump Starting on
page 10‑82.
D. Battery on page 10‑26.
E. Remote Negative (−) Terminal (Out of View). See Jump
Starting on page 10‑82.
F. Automatic Transmission Dipstick (Out of View). See
“Checking the Fluid Level”
under Automatic Transmission
Fluid on page 10‑11.
G. Engine Oil Fill Cap. See “When
to Add Engine Oil” under
Engine Oil on page 10‑7.
H. Engine Oil Dipstick (Out of View). See “Checking Engine
Oil” under Engine Oil on
page 10‑7. I. Engine Cooling Fan (Out of
View). See Cooling System on
page 10‑15.
J. Power Steering Fluid Reservoir. See Power Steering Fluid on
page 10‑22.
K. Brake Master Cylinder Reservoir. See “Brake Fluid”
under Brake Fluid on
page 10‑25.
L. Engine Compartment Fuse
Block on page 10‑37.
M. Windshield Washer Fluid Reservoir. See “Adding Washer
Fluid” under Washer Fluid on
page 10‑23.
If the vehicle is a hybrid, see the
hybrid supplement for more
information.Engine Oil
To ensure proper engine
performance and long life, careful
attention must be paid to engine
oil. Following these simple, but
important steps will help protect
your investment:
.Always use engine oil approved
to the proper specification and of
the proper viscosity grade. See
“Selecting the Right Engine Oil”
in this section.
.Check the engine oil level
regularly and maintain the
proper oil level. See “Checking
Engine Oil” and“When to Add
Engine Oil” in this section.
.Change the engine oil at the
appropriate time. See Engine Oil
Life System on page 10‑9.
.Always dispose of engine oil
properly. See “What to Do with
Used Oil” in this section.
Page 406 of 514
Black plate (56,1)Chevrolet Tahoe/Suburban Owner Manual - 2012
10-56 Vehicle Care
.The TPMS sensor matching
process was not done or not
completed successfully after
rotating the tires. The
malfunction light and the DIC
message should go off after
successfully completing the
sensor matching process. See
"TPMS Sensor Matching
Process" later in this section.
.One or more TPMS sensors
are missing or damaged. The
malfunction light and the DIC
message should go off when the
TPMS sensors are installed and
the sensor matching process is
performed successfully. See
your dealer for service.
.Replacement tires or wheels do
not match the original equipment
tires or wheels. Tires and wheels
other than those recommended
could prevent the TPMS from
functioning properly. SeeBuying
New Tires on page 10‑59.
.Operating electronic devices or
being near facilities using radio
wave frequencies similar to the
TPMS could cause the TPMS
sensors to malfunction.
If the TPMS is not functioning
properly, it cannot detect or signal a
low tire condition. See your dealer
for service if the TPMS malfunction
light and DIC message comes on
and stays on.
TPMS Sensor Matching
Process
Each TPMS sensor has a unique
identification code. The identification
code needs to be matched to a new
tire/wheel position after rotating the
vehicle’s tires or replacing one or
more of the TPMS sensors. The
TPMS sensor matching process
should also be performed after
replacing a spare tire with a road
tire containing the TPMS sensor.
The malfunction light and the DIC
message should go off at the next
ignition cycle. The sensors are
matched to the tire/wheel positions, using a TPMS relearn tool, in the
following order: driver side front tire,
passenger side front tire, passenger
side rear tire, and driver side rear.
See your dealer for service or to
purchase a relearn tool.
There are two minutes to match
the first tire/wheel position, and
five minutes overall to match all
four tire/wheel positions. If it takes
longer, the matching process stops
and must be restarted.
The TPMS sensor matching process
is outlined below:
1. Set the parking brake.
2. Turn the ignition to ON/RUN with
the engine off.
3. Press
QandKon the
Remote Keyless Entry (RKE)
transmitter at the same time for
approximately five seconds. The
horn sounds twice to signal the
receiver is in relearn mode and
TIRE LEARNING ACTIVE
message displays on the DIC
screen.
Page 433 of 514
Black plate (83,1)Chevrolet Tahoe/Suburban Owner Manual - 2012
Vehicle Care 10-83
2. Get the vehicles close enoughso the jumper cables can reach,
but be sure the vehicles are
not touching each other. If they
are, it could cause a ground
connection you do not want. You
would not be able to start your
vehicle, and the bad grounding
could damage the electrical
systems.
To avoid the possibility of the
vehicles rolling, set the parking
brake firmly on both vehicles
involved in the jump start
procedure. Put the automatic
transmission in P (Park) or a
manual transmission in
N (Neutral) before setting the
parking brake. If the vehicle has
a four-wheel-drive transfer case
with a N (Neutral) position, be
sure the transfer case is in a
drive gear, not in N (Neutral). Notice:
If any accessories are left
on or plugged in during the jump
starting procedure, they could
be damaged. The repairs would
not be covered by the vehicle
warranty. Whenever possible,
turn off or unplug all accessories
on either vehicle when jump
starting the vehicle.
3. Turn off the ignition on both
vehicles. Unplug unnecessary
accessories plugged into the
accessory power outlets. Turn
off the radio and all the lamps
that are not needed. This avoids
sparks and helps save both
batteries. And it could save the
radio!
4. Open the hood on the other vehicle and locate the
positive (+) and negative (−)
terminal locations on that
vehicle.
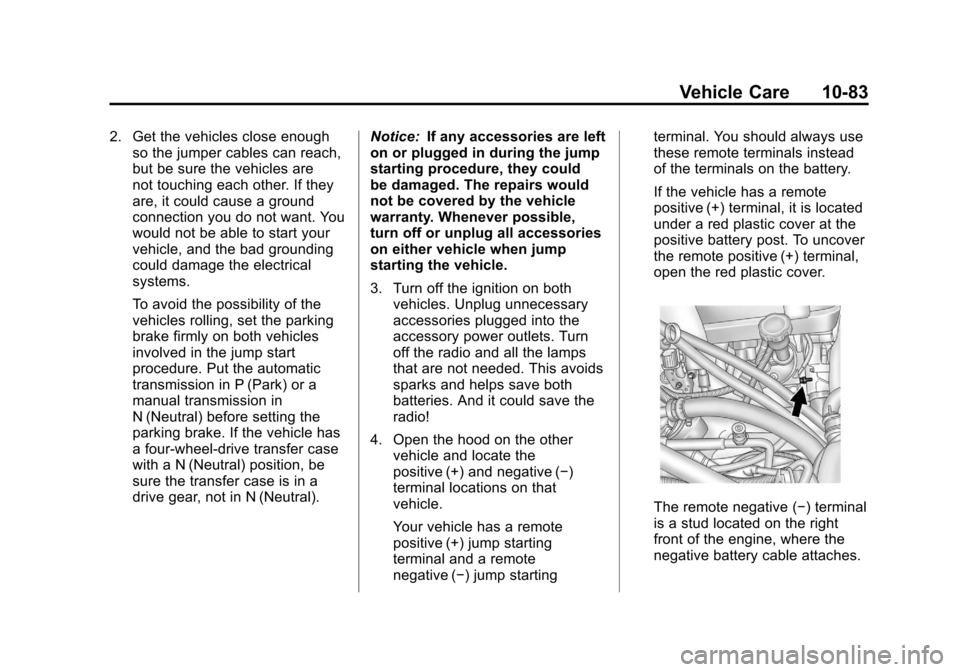
Your vehicle has a remote
positive (+) jump starting
terminal and a remote
negative (−) jump starting terminal. You should always use
these remote terminals instead
of the terminals on the battery.
If the vehicle has a remote
positive (+) terminal, it is located
under a red plastic cover at the
positive battery post. To uncover
the remote positive (+) terminal,
open the red plastic cover.
The remote negative (−) terminal
is a stud located on the right
front of the engine, where the
negative battery cable attaches.
Page 434 of 514
Black plate (84,1)Chevrolet Tahoe/Suburban Owner Manual - 2012
10-84 Vehicle Care
SeeEngine Compartment
Overview on page 10‑6 for more
information on the location of the
remote positive (+) and remote
negative (−) terminals.
{WARNING
An electric fan can start up even
when the engine is not running
and can injure you. Keep hands,
clothing and tools away from any
underhood electric fan.
{WARNING
Using an open flame near a
battery can cause battery gas to
explode. People have been hurt
doing this, and some have been
blinded. Use a flashlight if you
need more light.
Be sure the battery has enough
water. You do not need to add
water to the battery installed in
your new vehicle. But if a battery
has filler caps, be sure the right
amount of fluid is there. If it is low,
add water to take care of that
first. If you do not, explosive gas
could be present.
(Continued)
WARNING (Continued)
Battery fluid contains acid that
can burn you. Do not get it on
you. If you accidentally get it in
your eyes or on your skin, flush
the place with water and get
medical help immediately.
{WARNING
Fans or other moving engine
parts can injure you badly. Keep
your hands away from moving
parts once the engine is running.
Page 435 of 514
Black plate (85,1)Chevrolet Tahoe/Suburban Owner Manual - 2012
Vehicle Care 10-85
5. Check that the jumper cablesdo not have loose or missing
insulation. If they do, you could
get a shock. The vehicles could
be damaged too.
Before you connect the cables,
here are some basic things you
should know. Positive (+) will go
to positive (+) or to a remote
positive (+) terminal if the vehicle
has one. Negative (−) will go to a
heavy, unpainted metal engine
part or to a remote negative (−)
terminal if the vehicle has one.
Do not connect positive (+) to
negative (−) or you will get a
short that would damage the
battery and maybe other parts
too. And do not connect the
negative (−) cable to the
negative (−) terminal on the
dead battery because this can
cause sparks.
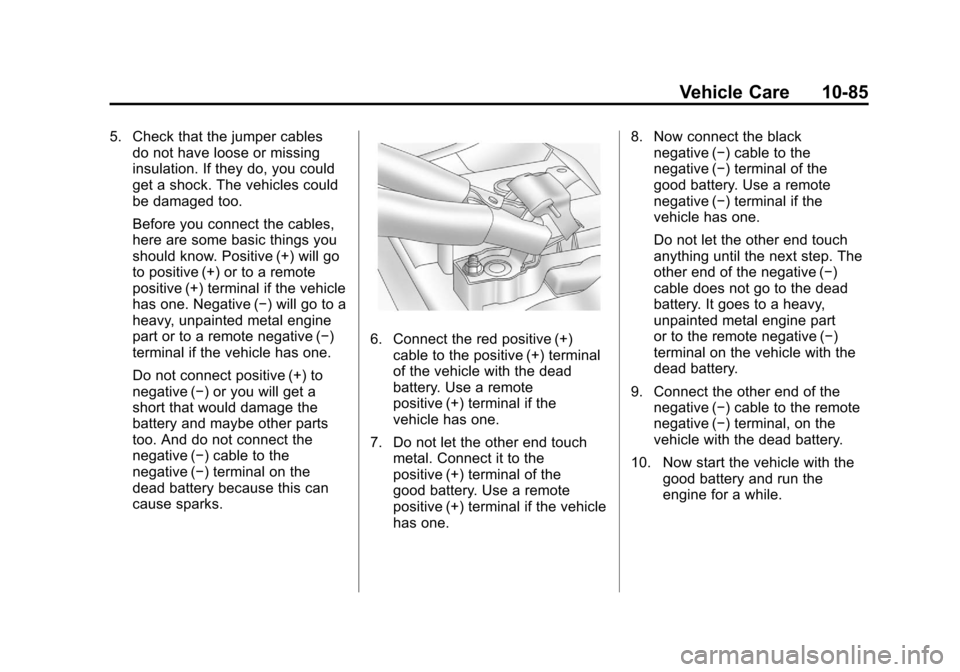
6. Connect the red positive (+)
cable to the positive (+) terminal
of the vehicle with the dead
battery. Use a remote
positive (+) terminal if the
vehicle has one.
7. Do not let the other end touch metal. Connect it to the
positive (+) terminal of the
good battery. Use a remote
positive (+) terminal if the vehicle
has one. 8. Now connect the black
negative (−) cable to the
negative (−) terminal of the
good battery. Use a remote
negative (−) terminal if the
vehicle has one.
Do not let the other end touch
anything until the next step. The
other end of the negative (−)
cable does not go to the dead
battery. It goes to a heavy,
unpainted metal engine part
or to the remote negative (−)
terminal on the vehicle with the
dead battery.
9. Connect the other end of the negative (−) cable to the remote
negative (−) terminal, on the
vehicle with the dead battery.
10. Now start the vehicle with the good battery and run the
engine for a while.