2012 CHEVROLET SUBURBAN fuel cap
[x] Cancel search: fuel capPage 326 of 514
Black plate (64,1)Chevrolet Tahoe/Suburban Owner Manual - 2012
9-64 Driving and Operating
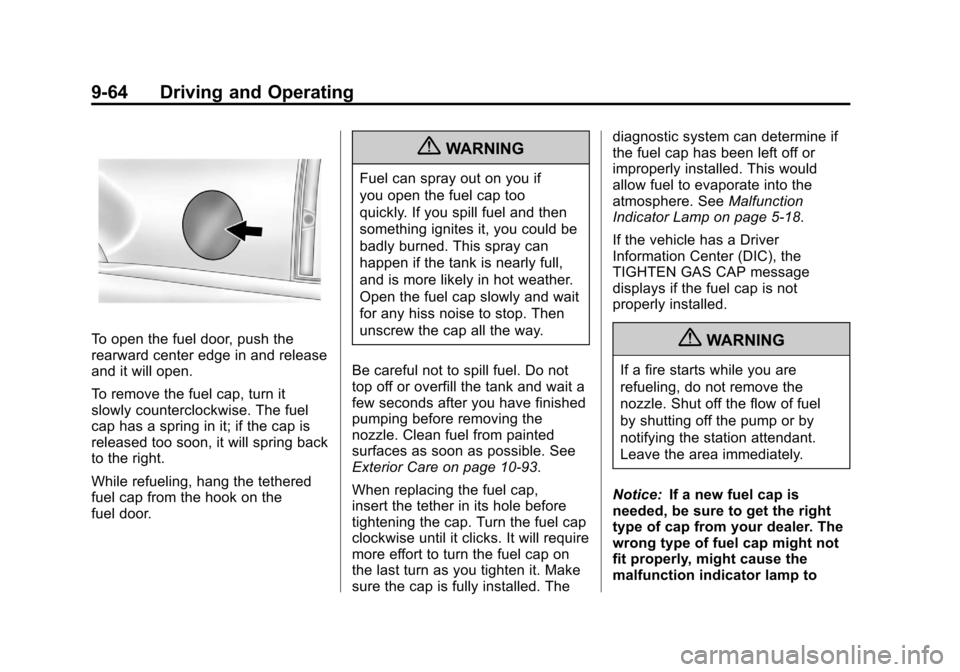
To open the fuel door, push the
rearward center edge in and release
and it will open.
To remove the fuel cap, turn it
slowly counterclockwise. The fuel
cap has a spring in it; if the cap is
released too soon, it will spring back
to the right.
While refueling, hang the tethered
fuel cap from the hook on the
fuel door.
{WARNING
Fuel can spray out on you if
you open the fuel cap too
quickly. If you spill fuel and then
something ignites it, you could be
badly burned. This spray can
happen if the tank is nearly full,
and is more likely in hot weather.
Open the fuel cap slowly and wait
for any hiss noise to stop. Then
unscrew the cap all the way.
Be careful not to spill fuel. Do not
top off or overfill the tank and wait a
few seconds after you have finished
pumping before removing the
nozzle. Clean fuel from painted
surfaces as soon as possible. See
Exterior Care on page 10‑93.
When replacing the fuel cap,
insert the tether in its hole before
tightening the cap. Turn the fuel cap
clockwise until it clicks. It will require
more effort to turn the fuel cap on
the last turn as you tighten it. Make
sure the cap is fully installed. The diagnostic system can determine if
the fuel cap has been left off or
improperly installed. This would
allow fuel to evaporate into the
atmosphere. See
Malfunction
Indicator Lamp on page 5‑18.
If the vehicle has a Driver
Information Center (DIC), the
TIGHTEN GAS CAP message
displays if the fuel cap is not
properly installed.
{WARNING
If a fire starts while you are
refueling, do not remove the
nozzle. Shut off the flow of fuel
by shutting off the pump or by
notifying the station attendant.
Leave the area immediately.
Notice: If a new fuel cap is
needed, be sure to get the right
type of cap from your dealer. The
wrong type of fuel cap might not
fit properly, might cause the
malfunction indicator lamp to
Page 348 of 514
Black plate (86,1)Chevrolet Tahoe/Suburban Owner Manual - 2012
9-86 Driving and Operating
Say, for example, you have a 318 kg
(700 lb) snow plow. The total weight
of all occupants and cargo inside
the cab should not exceed 135 kg
(300 lb). This means that you may
only be able to carry one passenger.
But, even this may be too much if
there is other equipment already
adding to the weight of the vehicle.
Here are some guidelines for safely
carrying a snow plow on the vehicle:
.Make sure the weight on the
front and rear axles does not
exceed the axle rating for each.
.For the front axle, if more cargo
or passengers must be carried,
appropriate counter ballast must
be installed rear of the rear axle.
Counter ballast must be properly
secured so it will not move
during driving.
.Follow the snow plow
manufacturer's
recommendations regarding
rear ballast. Rear ballast may be
required to ensure a proper front
and rear weight distribution ratio,
even though the actual weight at
the front axle may be less than
the front axle rating.
.The snow plow manufacturer
or installer can assist in
determining the amount of rear
ballast required, to help make
sure the snowplow/vehicle
combination does not exceed
the GVW rating, the front and
rear axle ratings, and the front
and rear weight distribution ratio.
.The total vehicle must not
exceed the GVW rating.Front axle reserve capacity is the
difference between the front Gross
Axle Weight Rating (GAWR) and the
front axle weight of the vehicle with
full fuel and passengers. Basically, it
is the amount of weight that can be
added to the front axle before
reaching the front GAWR.
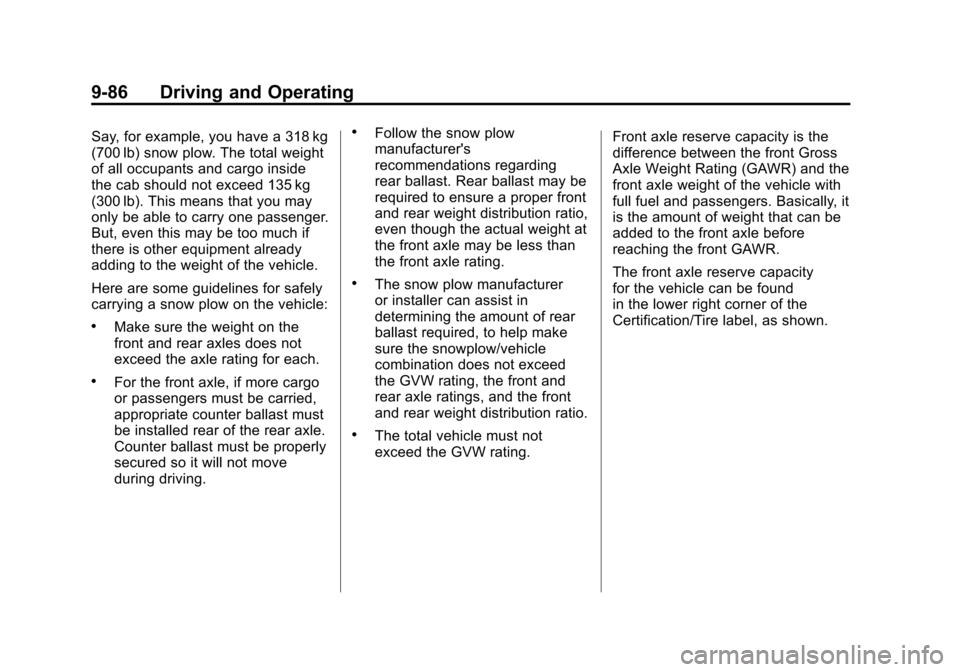
The front axle reserve capacity
for the vehicle can be found
in the lower right corner of the
Certification/Tire label, as shown.
Page 350 of 514
Black plate (88,1)Chevrolet Tahoe/Suburban Owner Manual - 2012
9-88 Driving and Operating
This has the effect of reducing the
load on the front. However, the front
GAWR, rear GAWR, and the Gross
Vehicle Weight Rating (GVWR)
must never be exceeded.
{WARNING
On some vehicles that have
certain front mounted equipment,
such as a snow plow, it may be
possible to load the front axle to
the front gross axle weight rating
(GAWR) but not have enough
weight on the rear axle to have
proper braking performance.
If the brakes cannot work
properly, you could have a crash.
To help the brakes work properly
when a snow plow is installed,
always follow the snow plow
manufacturer or installer's
recommendation for rear ballast
to ensure a proper front and rear
weight distribution ratio, even
though the actual front weight(Continued)
WARNING (Continued)
may be less than the front
GAWR, and the total vehicle
weight is less than the gross
vehicle weight rating (GVWR).
Maintaining a proper front and
rear weight distribution ratio is
necessary to provide proper
braking performance.
Total vehicle reserve capacity is the
difference between the GVWR and
the weight of the vehicle with full
fuel and passengers. It is the
amount of weight that can be added
to the vehicle before reaching
theGVWR. Keep in mind that
reserve capacity numbers are
intended as a guide when selecting
the amount of equipment or cargo
the vehicle can carry. If you are
unsure of the vehicle's front, rear,
or total weight, go to a weigh station
and weigh the vehicle. Your dealer
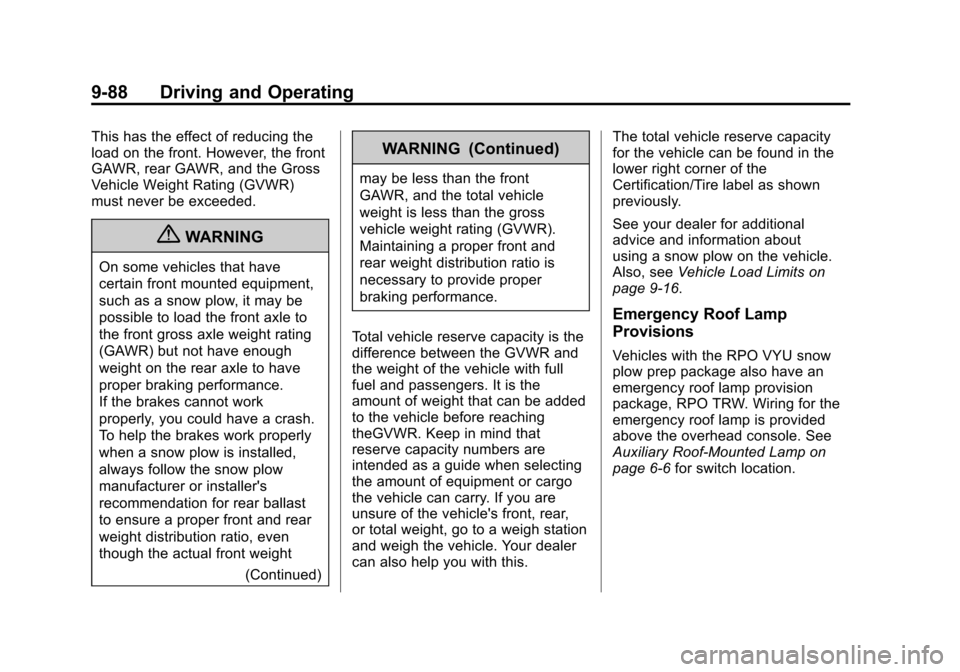
can also help you with this. The total vehicle reserve capacity
for the vehicle can be found in the
lower right corner of the
Certification/Tire label as shown
previously.
See your dealer for additional
advice and information about
using a snow plow on the vehicle.
Also, see
Vehicle Load Limits on
page 9‑16.
Emergency Roof Lamp
Provisions
Vehicles with the RPO VYU snow
plow prep package also have an
emergency roof lamp provision
package, RPO TRW. Wiring for the
emergency roof lamp is provided
above the overhead console. See
Auxiliary Roof-Mounted Lamp on
page 6‑6 for switch location.
Page 358 of 514
Black plate (8,1)Chevrolet Tahoe/Suburban Owner Manual - 2012
10-8 Vehicle Care
Checking Engine Oil
It is a good idea to check the
engine oil level at each fuel fill. In
order to get an accurate reading,
the vehicle must be on level ground.
The engine oil dipstick handle
is a yellow loop. SeeEngine
Compartment Overview on
page 10‑6 for the location of the
engine oil dipstick.
Obtaining an accurate oil level
reading is essential:
1. If the engine has been running recently, turn off the engine and
allow several minutes for the oil
to drain back into the oil pan.
Checking the oil level too soon
after engine shutoff will not
provide an accurate oil level
reading.
2. Pull out the dipstick and clean it with a paper towel or cloth,
then push it back in all the way.
Remove it again, keeping the tip
down, and check the level.
When to Add Engine Oil
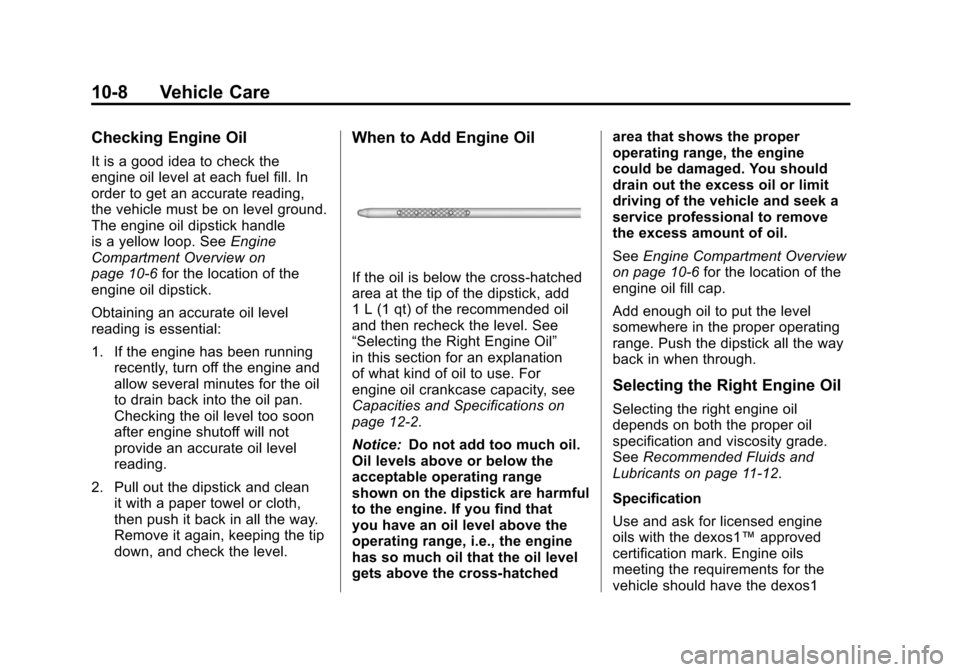
If the oil is below the cross-hatched
area at the tip of the dipstick, add
1 L (1 qt) of the recommended oil
and then recheck the level. See
“Selecting the Right Engine Oil”
in this section for an explanation
of what kind of oil to use. For
engine oil crankcase capacity, see
Capacities and Specifications on
page 12‑2.
Notice: Do not add too much oil.
Oil levels above or below the
acceptable operating range
shown on the dipstick are harmful
to the engine. If you find that
you have an oil level above the
operating range, i.e., the engine
has so much oil that the oil level
gets above the cross-hatched area that shows the proper
operating range, the engine
could be damaged. You should
drain out the excess oil or limit
driving of the vehicle and seek a
service professional to remove
the excess amount of oil.
See
Engine Compartment Overview
on page 10‑6 for the location of the
engine oil fill cap.
Add enough oil to put the level
somewhere in the proper operating
range. Push the dipstick all the way
back in when through.
Selecting the Right Engine Oil
Selecting the right engine oil
depends on both the proper oil
specification and viscosity grade.
See Recommended Fluids and
Lubricants on page 11‑12.
Specification
Use and ask for licensed engine
oils with the dexos1™ approved
certification mark. Engine oils
meeting the requirements for the
vehicle should have the dexos1
Page 372 of 514
Black plate (22,1)Chevrolet Tahoe/Suburban Owner Manual - 2012
10-22 Vehicle Care
This improves fuel economy and
reduces fan noise. Under heavy
vehicle loading, trailer towing, and/
or high outside temperatures, the
fan speed increases as the clutch
more fully engages, so an increase
in fan noise may be heard. This is
normal and should not be mistaken
as the transmission slipping or
making extra shifts. It is merely the
cooling system functioning properly.
The fan will slow down when
additional cooling is not required
and the clutch disengages.
This fan noise may also be heard
when starting the engine. It will go
away as the fan clutch partially
disengages.
If the vehicle has electric cooling
fans, the fans may be heard
spinning at low speed during
most everyday driving. The fans
may turn off if no cooling is required.
Under heavy vehicle loading, trailer
towing, high outside temperatures,
or operation of the air conditioning
system, the fans may change to
high speed and an increase in fannoise may be heard. This is normal
and indicates that the cooling
system is functioning properly. The
fans will change to low speed when
additional cooling is no longer
required.
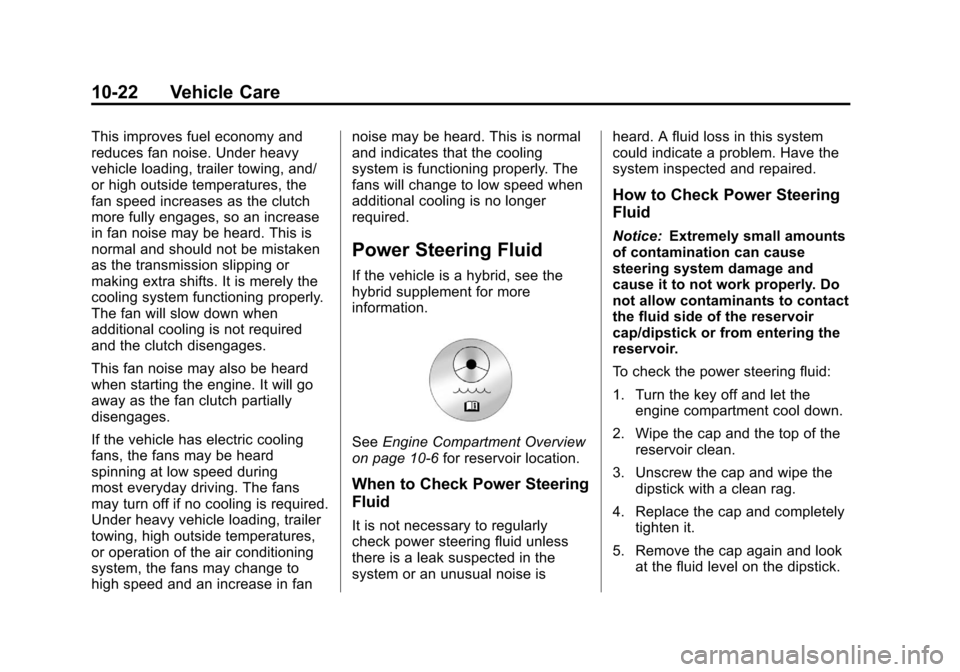
Power Steering Fluid
If the vehicle is a hybrid, see the
hybrid supplement for more
information.
See
Engine Compartment Overview
on page 10‑6 for reservoir location.
When to Check Power Steering
Fluid
It is not necessary to regularly
check power steering fluid unless
there is a leak suspected in the
system or an unusual noise is heard. A fluid loss in this system
could indicate a problem. Have the
system inspected and repaired.
How to Check Power Steering
Fluid
Notice:
Extremely small amounts
of contamination can cause
steering system damage and
cause it to not work properly. Do
not allow contaminants to contact
the fluid side of the reservoir
cap/dipstick or from entering the
reservoir.
To check the power steering fluid:
1. Turn the key off and let the engine compartment cool down.
2. Wipe the cap and the top of the reservoir clean.
3. Unscrew the cap and wipe the dipstick with a clean rag.
4. Replace the cap and completely tighten it.
5. Remove the cap again and look at the fluid level on the dipstick.
Page 399 of 514

Black plate (49,1)Chevrolet Tahoe/Suburban Owner Manual - 2012
Vehicle Care 10-49
(F) Load Range:Load Range.
(G) Service Description
:The
service description indicates the
load index and speed rating of a
tire. If two numbers are given as
in the example, 120/116, then
this represents the load index for
single versus dual wheel usage
(single/dual). The speed rating is
the maximum speed a tire is
certified to carry a load.
Tire Terminology and
Definitions
Air Pressure:The amount
of air inside the tire pressing
outward on each square inch
of the tire. Air pressure is
expressed in kPa (kilopascal)
or psi (pounds per square inch).
Accessory Weight
:The
combined weight of optional
accessories. Some examples
of optional accessories are
automatic transmission, power steering, power brakes, power
windows, power seats, and air
conditioning.
Aspect Ratio
:The relationship
of a tire's height to its width.
Belt
:A rubber coated layer of
cords that is located between
the plies and the tread. Cords
may be made from steel or other
reinforcing materials.
Bead
:The tire bead contains
steel wires wrapped by steel
cords that hold the tire onto
the rim.
Bias Ply Tire
:A pneumatic tire
in which the plies are laid at
alternate angles less than
90 degrees to the centerline of
the tread.
Cold Tire Pressure
:The
amount of air pressure in a tire,
measured in kPa (kilopascal)
or psi (pounds per square inch) before a tire has built up heat
from driving. See
Tire Pressure
on page 10‑52.
Curb Weight
:The weight of a
motor vehicle with standard and
optional equipment including
the maximum capacity of fuel,
oil, and coolant, but without
passengers and cargo.
DOT Markings
:A code molded
into the sidewall of a tire
signifying that the tire is in
compliance with the U.S.
Department of Transportation
(DOT) Motor Vehicle Safety
Standards. The DOT code
includes the Tire Identification
Number (TIN), an alphanumeric
designator which can also
identify the tire manufacturer,
production plant, brand, and
date of production.
GVWR
:Gross Vehicle Weight
Rating. See Vehicle Load Limits
on page 9‑16.
Page 402 of 514
Black plate (52,1)Chevrolet Tahoe/Suburban Owner Manual - 2012
10-52 Vehicle Care
Tire Pressure
If the vehicle is a hybrid, see
the hybrid supplement for more
information.
Tires need the correct amount
of air pressure to operate
effectively.
Notice:Neither tire
underinflation nor
overinflation is good.
Underinflated tires, or
tires that do not have
enough air, can result in:
.Tire overloading and
overheating which could
lead to a blowout.
.Premature or
irregular wear.
.Poor handling.
.Reduced fuel economy. Overinflated tires, or tires
that have too much air, can
result in:
.Unusual wear.
.Poor handling.
.Rough ride.
.Needless damage from
road hazards.
The Tire and Loading
Information label on the
vehicle indicates the original
equipment tires and the correct
cold tire inflation pressures. The
recommended pressure is the
minimum air pressure needed to
support the vehicle's maximum
load carrying capacity.
For additional information
regarding how much weight
the vehicle can carry, and an
example of the Tire and Loading
Information label, see Vehicle
Load Limits on page 9‑16. How the vehicle is loaded
affects vehicle handling and ride
comfort. Never load the vehicle
with more weight than it was
designed to carry.
When to Check
Check the tires once a month
or more.
Do not forget the spare tire.
See
Full-Size Spare Tire on
page 10‑81 for additional
information.
How to Check
Use a good quality pocket-type
gauge to check tire pressure.
Proper tire inflation cannot be
determined by looking at the tire.
Check the tire inflation pressure
when the tires are cold meaning
the vehicle has not been driven
for at least three hours or no
more than 1.6 km (1 mi).
Page 403 of 514
Black plate (53,1)Chevrolet Tahoe/Suburban Owner Manual - 2012
Vehicle Care 10-53
Remove the valve cap from the
tire valve stem. Press the tire
gauge firmly onto the valve to
get a pressure measurement.
If the cold tire inflation pressure
matches the recommended
pressure on the Tire and
Loading Information label, no
further adjustment is necessary.
If the inflation pressure is low,
add air until the recommended
pressure is reached. If the
inflation pressure is high, press
on the metal stem in the center
of the tire valve to release air.
Recheck the tire pressure with
the tire gauge
Return the valve caps on the
valve stems to prevent leaks
and keep out dirt and moisture.Tire Pressure Monitor
System
The Tire Pressure Monitor System
(TPMS) uses radio and sensor
technology to check tire pressure
levels. The TPMS sensors monitor
the air pressure in your tires and
transmit tire pressure readings to a
receiver located in the vehicle.
Each tire, including the spare
(if provided), should be checked
monthly when cold and inflated to
the inflation pressure recommended
by the vehicle manufacturer on the
vehicle placard or tire inflation
pressure label. (If your vehicle has
tires of a different size than the size
indicated on the vehicle placard or
tire inflation pressure label, you
should determine the proper tire
inflation pressure for those tires.)
As an added safety feature, your
vehicle has been equipped with a
tire pressure monitoring system
(TPMS) that illuminates a low tirepressure telltale when one or
more of your tires is significantly
under‐inflated.
Accordingly, when the low tire
pressure telltale illuminates, you
should stop and check your tires as
soon as possible, and inflate them
to the proper pressure. Driving on
a significantly under‐inflated tire
causes the tire to overheat and can
lead to tire failure. Under‐inflation
also reduces fuel efficiency and
tire tread life, and may affect the
vehicle's handling and stopping
ability.
Please note that the TPMS is
not a substitute for proper tire
maintenance, and it is the driver's
responsibility to maintain correct
tire pressure, even if under‐inflation
has not reached the level to trigger
illumination of the TPMS low tire
pressure telltale.
Your vehicle has also been
equipped with a TPMS malfunction
indicator to indicate when the
system is not operating properly.