Page 165 of 352
Black plate (1,1)Chevrolet Sonic Owner Manual - 2012
Climate Controls 8-1
Climate Controls
Climate Control Systems
Climate Control Systems . . . . . . 8-1
Air Vents
Air Vents . . . . . . . . . . . . . . . . . . . . . . 8-3
Maintenance
Air Intake . . . . . . . . . . . . . . . . . . . . . 8-4
Passenger Compartment AirFilter . . . . . . . . . . . . . . . . . . . . . . . . . 8-4
Climate Control
Systems
For vehicles with these climate
control systems, the heating,
cooling, and ventilation can be
controlled for the vehicle.
Climate Control System with
Heater and Air Conditioning
A. Temperature Control
B. Fan Control
C. Air Delivery Mode Control
D. Driver and Passenger Heated Seats E. Air Conditioning
F. Rear Window Defogger
G. Recirculation
Climate Control System with
Heater Only
A. Temperature Control
B. Fan Control
C. Air Delivery Mode Control
D. Rear Window Defogger
E. Recirculation
Page 168 of 352
Black plate (4,1)Chevrolet Sonic Owner Manual - 2012
8-4 Climate Controls
Maintenance
Air Intake
Clear away any ice, snow, or leaves
from the air intake at the base of the
windshield that can block the flow of
air into the vehicle.
Passenger Compartment
Air Filter
The filter removes dust, pollen, and
other airborne irritants from outside
air that is pulled into the vehicle.
The filter should be replaced as part
of routine scheduled maintenance,
seeMaintenance Schedule on
page 11‑3. To find out what type of
filter to use, see Maintenance
Replacement Parts on page 11‑15.
1. Open the glove box completely and pull it to remove.2. Remove the filter cover byunscrewing both sides of the
cover.3. Install the new air filter.
4. Reinstall the air filter cover andglove box in reverse order.
See your dealer if additional
assistance is needed.
Page 209 of 352

Black plate (1,1)Chevrolet Sonic Owner Manual - 2012
Vehicle Care 10-1
Vehicle Care
General Information
General Information . . . . . . . . . . 10-2
California Proposition 65Warning . . . . . . . . . . . . . . . . . . . 10-3
California Perchlorate Materials Requirements . . . . 10-3
Accessories and Modifications . . . . . . . . . . . . . . . 10-3
Vehicle Checks
Doing Your OwnService Work . . . . . . . . . . . . . . . 10-4
Hood . . . . . . . . . . . . . . . . . . . . . . . . 10-4
Engine Compartment Overview . . . . . . . . . . . . . . . . . . . 10-6
Engine Oil . . . . . . . . . . . . . . . . . . . 10-9
Engine Oil Life System . . . . . 10-12
Automatic Transmission Fluid . . . . . . . . . . . . . . . . . . . . . . 10-13 Manual Transmission
Fluid . . . . . . . . . . . . . . . . . . . . . . 10-13
Hydraulic Clutch . . . . . . . . . . . . 10-13
Engine Air Cleaner/Filter . . . . 10-14
Cooling System . . . . . . . . . . . . 10-15
Engine Coolant . . . . . . . . . . . . . 10-16
Engine Overheating . . . . . . . . 10-20
Washer Fluid . . . . . . . . . . . . . . . 10-21
Brakes . . . . . . . . . . . . . . . . . . . . . 10-22
Brake Fluid . . . . . . . . . . . . . . . . . 10-23
Battery . . . . . . . . . . . . . . . . . . . . . 10-25
Starter Switch Check . . . . . . . 10-25
Automatic Transmission Shift Lock Control Function
Check . . . . . . . . . . . . . . . . . . . . . 10-26
Ignition Transmission Lock Check . . . . . . . . . . . . . . . . . . . . . 10-26
Park Brake and P (Park) Mechanism Check . . . . . . . . 10-27
Wiper Blade Replacement . . . . . . . . . . . . . . 10-27
Headlamp Aiming
Headlamp Aiming . . . . . . . . . . 10-29
Bulb Replacement
Bulb Replacement . . . . . . . . . . 10-29
Halogen Bulbs . . . . . . . . . . . . . . 10-29
Headlamps, Front TurnSignal and Parking
Lamps . . . . . . . . . . . . . . . . . . . . 10-29
Taillamps, Turn Signal, Stoplamps, and Back-Up
Lamps . . . . . . . . . . . . . . . . . . . . 10-31
License Plate Lamp . . . . . . . . 10-31
Replacement Bulbs . . . . . . . . . 10-32
Electrical System
Electrical System Overload . . . . . . . . . . . . . . . . . . 10-33
Fuses and Circuit Breakers . . . . . . . . . . . . . . . . . . 10-34
Engine Compartment Fuse
Block . . . . . . . . . . . . . . . . . . . . . 10-34
Instrument Panel Fuse Block . . . . . . . . . . . . . . . . . . . . . 10-37
Page 215 of 352
Black plate (7,1)Chevrolet Sonic Owner Manual - 2012
Vehicle Care 10-7
A.Engine Air Cleaner/Filter on
page 10‑14.
B. Engine Oil Dipstick. See Engine
Oil on page 10‑9.
C. Engine Electric Cooling Fan (Out of View). See Cooling
System on page 10‑15.
D. Engine Oil Fill Cap. See Engine
Oil on page 10‑9. E. Engine Coolant Surge Tank and
Pressure Cap. See Cooling
System on page 10‑15.
F. Brake/Clutch Fluid Reservoir. See Brakes on page 10‑22 and
Hydraulic Clutch on page 10‑13.
G. Battery on page 10‑25. H. Windshield Washer Fluid
Reservoir. See Washer Fluid on
page 10‑21.
I. Engine Compartment Fuse
Block on page 10‑34.
Page 217 of 352

Black plate (9,1)Chevrolet Sonic Owner Manual - 2012
Vehicle Care 10-9
A.Engine Air Cleaner/Filter on
page 10‑14.
B. Engine Oil Dipstick. See Engine
Oil on page 10‑9.
C. Engine Electric Cooling Fan (Out of View). See Cooling
System on page 10‑15.
D. Engine Oil Fill Cap. See Engine
Oil on page 10‑9.
E. Engine Coolant Surge Tank and Pressure Cap. See Cooling
System on page 10‑15.
F. Brake/Clutch Fluid Reservoir. See Brakes on page 10‑22 and
Hydraulic Clutch on page 10‑13.
G. Battery on page 10‑25.
H. Engine Compartment Fuse
Block on page 10‑34.
I. Windshield Washer Fluid Reservoir. See Washer Fluid on
page 10‑21.Engine Oil
To ensure proper engine
performance and long life, careful
attention must be paid to engine oil.
Following these simple, but
important steps will help protect
your investment:
.Always use engine oil approved
to the proper specification and of
the proper viscosity grade. See
“Selecting the Right Engine Oil”
in this section.
.Check the engine oil level
regularly and maintain the
proper oil level. See “Checking
Engine Oil” and“When to Add
Engine Oil” in this section.
.Change the engine oil at the
appropriate time. See Engine Oil
Life System on page 10‑12.
.Always dispose of engine oil
properly. See “What to Do with
Used Oil” in this section.
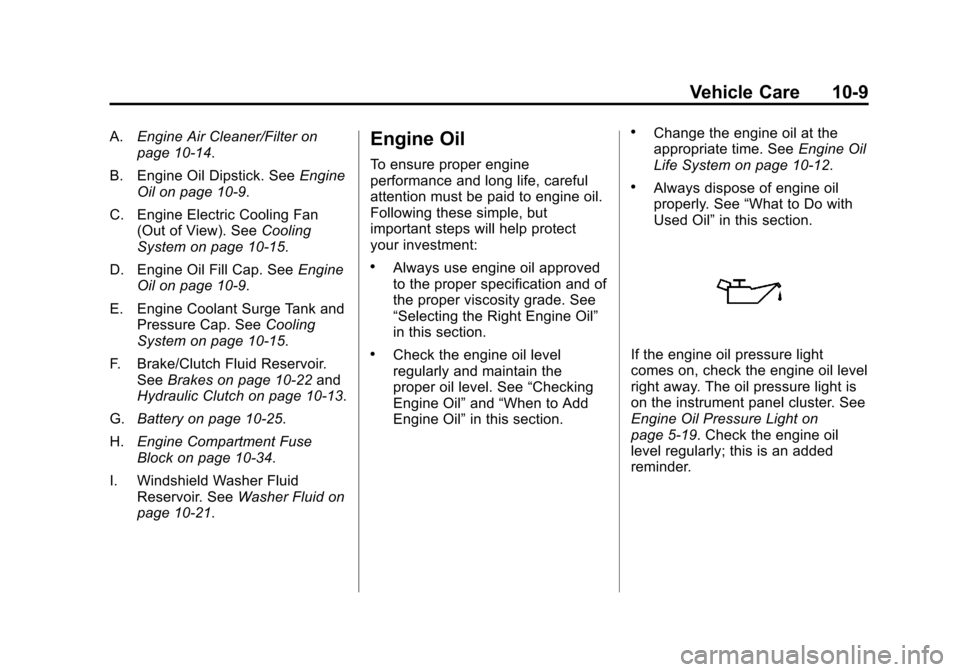
If the engine oil pressure light
comes on, check the engine oil level
right away. The oil pressure light is
on the instrument panel cluster. See
Engine Oil Pressure Light on
page 5‑19. Check the engine oil
level regularly; this is an added
reminder.
Page 221 of 352

Black plate (13,1)Chevrolet Sonic Owner Manual - 2012
Vehicle Care 10-13
Automatic Transmission
Fluid
How to Check Automatic
Transmission Fluid
It is not necessary to check
the transmission fluid level. A
transmission fluid leak is the only
reason for fluid loss. If a leak
occurs, take the vehicle to your
dealer and have it repaired as soon
as possible.
There is a special procedure for
checking and changing the
transmission fluid. Because this
procedure is difficult, you should
have this done at your dealer.Change the fluid and filter at the
intervals listed in
Maintenance
Schedule on page 11‑3, and be
sure to use the fluid listed in
Recommended Fluids and
Lubricants on page 11‑13.
Manual Transmission
Fluid
It is not necessary to check the
manual transmission fluid level.
A transmission fluid leak is the only
reason for fluid loss. If a leak
occurs, take the vehicle to your
dealer and have it repaired as soon
as possible. See Recommended
Fluids and Lubricants on page 11‑13
for the proper fluid to use.
Hydraulic Clutch
For vehicles with a manual
transmission, it is not necessary to
regularly check brake/clutch fluid
unless there is a leak suspected.
Adding fluid will not correct a leak.
A fluid loss in this system could
indicate a problem. Have the
system inspected and repaired.
When to Check and What
to Use
The common hydraulic clutch and
brake master cylinder fluid reservoir
is filled with DOT 3 brake fluid as
indicated on the reservoir cap. See
Engine Compartment Overview on
page 10‑6 for reservoir location.
Page 222 of 352

Black plate (14,1)Chevrolet Sonic Owner Manual - 2012
10-14 Vehicle Care
How to Check and Add Fluid
Visually check the brake/clutch fluid
reservoir to make sure the fluid level
is at the MIN (minimum) line on the
side of the reservoir. The brake/
hydraulic clutch fluid system should
be closed and sealed.
Do not remove the cap to check the
fluid level or to top‐off the fluid level.
Remove the cap only when
necessary to add the proper fluid
until the level reaches the MIN line.
Engine Air Cleaner/Filter
The engine air cleaner/filter is
located in the engine compartment
on the passenger side of the
vehicle. SeeEngine Compartment
Overview on page 10‑6 for more
information on location.
When to Inspect the Engine Air
Cleaner/Filter
Inspect the air cleaner/filter at the
scheduled maintenance intervals.
See Maintenance Schedule on
page 11‑3 for more information.
If you are driving in dusty/dirty
conditions, inspect the filter at
each engine oil change.
How to Inspect the Engine Air
Cleaner/Filter
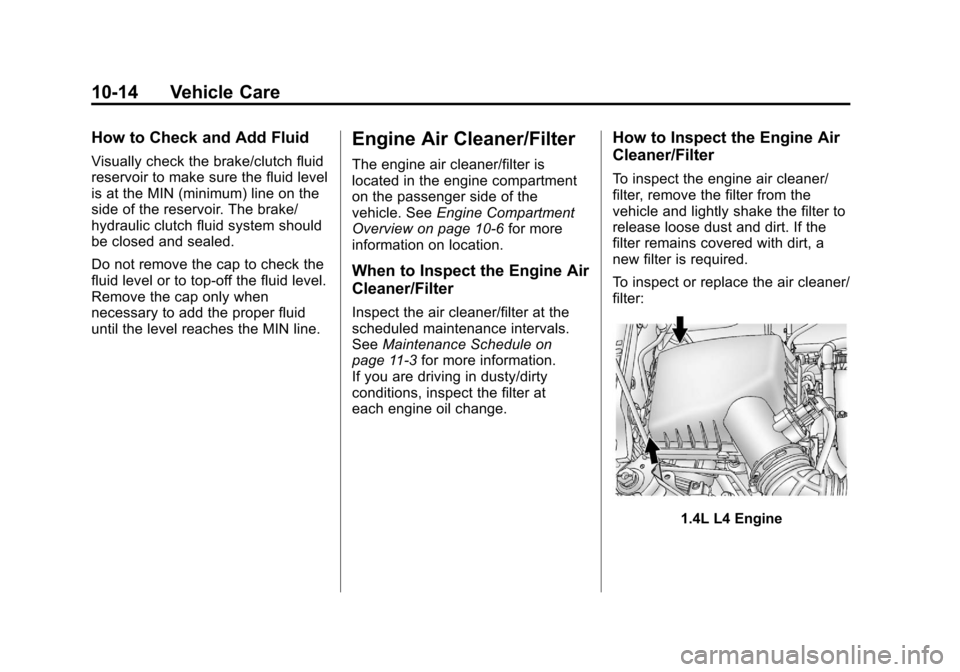
To inspect the engine air cleaner/
filter, remove the filter from the
vehicle and lightly shake the filter to
release loose dust and dirt. If the
filter remains covered with dirt, a
new filter is required.
To inspect or replace the air cleaner/
filter:
1.4L L4 Engine
Page 223 of 352

Black plate (15,1)Chevrolet Sonic Owner Manual - 2012
Vehicle Care 10-15
1.8L L4 Engine
1. Remove the two screws, tilt the cover, and slide it out of the
assembly.
2. Inspect or replace the engine air cleaner/filter.
3. Lower the cover, slide it into the assembly, then secure with the
two screws.
See Maintenance Schedule on
page 11‑3 for replacement intervals.
{WARNING
Operating the engine with the air
cleaner/filter off can cause you or
others to be burned. The air
cleaner not only cleans the air; it
helps to stop flames if the engine
backfires. Use caution when
working on the engine and do not
drive with the air cleaner/filter off.
Notice: If the air cleaner/filter is
off, dirt can easily get into the
engine, which could damage it.
Always have the air cleaner/filter
in place when you are driving.
Cooling System
The cooling system allows the
engine to maintain the correct
working temperature.
1.4L L4 Engine
A. Engine Electric Cooling Fan (Out of View)
B. Engine Coolant Surge Tank and Pressure Cap