2012 CHEVROLET SILVERADO stop start
[x] Cancel search: stop startPage 339 of 584
Black plate (53,1)Chevrolet Silverado Owner Manual - 2012
Driving and Operating 9-53
If the knob is turned to the
Four-Wheel Drive High,
or Two-Wheel Drive High switch
position when the vehicle is in
gear and/or moving more than
5 km/h (3 mph), the Four-Wheel
Drive High, AUTO, or Two-Wheel
Drive High indicator light will flash
for 30 seconds but will not complete
the shift.
Shifting into Neutral
To shift the transfer case to
N (Neutral) do the following:
1. Make sure the vehicle is parkedso that it will not roll.
2. Set the parking brake and press and hold the regular brake
pedal. See Parking Brake on
page 9‑60 for more information.
3. Start the vehicle or turn the ignition to ON/RUN.
4. Shift the transmission to N (Neutral). 5. Shift the transfer case to
Two-Wheel Drive High.
6. Turn the transfer case dial clockwise to N (Neutral) until it
stops and hold it there until the
Neutral light starts blinking. This
will take at least 10 seconds.
Then slowly release the dial
to the four low position.
The N (Neutral) light will come
on when the transfer case shift
to N (Neutral) is complete.
7. If the engine is running, verify that the transfer case is in
N (Neutral) by shifting the
transmission to R (Reverse) for
one second, then shift the
transmission to D (Drive) for
one second.
8. Turn the ignition to ACC/ACCESSORY,
which will turn the engine off. 9. Place the transmission shift
lever in P (Park).
10. Release the parking brake prior to moving the vehicle.
11. Turn the ignition to LOCK/OFF.
Shifting Out of Neutral
To shift the transfer case out of
N (Neutral) do the following:
1. Set the parking brake and apply the regular brake pedal.
2. Turn the ignition to ON/RUN with the engine off, and shift the
transmission to N (Neutral).
3. Turn the transfer case dial to Two-Wheel Drive High.
After the transfer case has
shifted out of N (Neutral), the
N (Neutral) light will go out.
Page 340 of 584
Black plate (54,1)Chevrolet Silverado Owner Manual - 2012
9-54 Driving and Operating
4. Release the parking brake priorto moving the vehicle.
Notice: Shifting the transmission
into gear before the requested
mode indicator light has stopped
flashing could damage the
transfer case. To help avoid
damaging the vehicle, always wait
for the mode indicator lights to
stop flashing before shifting the
transmission into gear.
5. Start the engine and shift the transmission to the desired
position.
Excessively shifting the transfer
case into or out of the different
modes may cause the transfer case
to enter the shift protection mode.
This will protect the transfer case
from possible damage and will only
allow the transfer case to respond
to one shift per 10 seconds.
The transfer case may stay in this
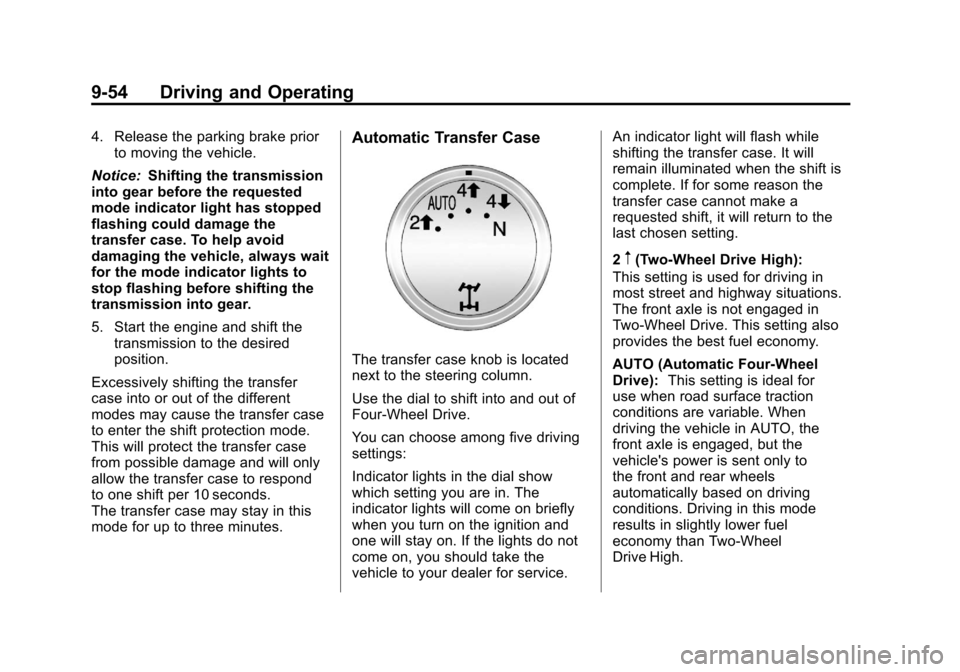
mode for up to three minutes.Automatic Transfer Case
The transfer case knob is located
next to the steering column.
Use the dial to shift into and out of
Four-Wheel Drive.
You can choose among five driving
settings:
Indicator lights in the dial show
which setting you are in. The
indicator lights will come on briefly
when you turn on the ignition and
one will stay on. If the lights do not
come on, you should take the
vehicle to your dealer for service. An indicator light will flash while
shifting the transfer case. It will
remain illuminated when the shift is
complete. If for some reason the
transfer case cannot make a
requested shift, it will return to the
last chosen setting.
2
m(Two-Wheel Drive High):
This setting is used for driving in
most street and highway situations.
The front axle is not engaged in
Two-Wheel Drive. This setting also
provides the best fuel economy.
AUTO (Automatic Four-Wheel
Drive): This setting is ideal for
use when road surface traction
conditions are variable. When
driving the vehicle in AUTO, the
front axle is engaged, but the
vehicle's power is sent only to
the front and rear wheels
automatically based on driving
conditions. Driving in this mode
results in slightly lower fuel
economy than Two-Wheel
Drive High.
Page 343 of 584
Black plate (57,1)Chevrolet Silverado Owner Manual - 2012
Driving and Operating 9-57
Notice:Shifting the transmission
into gear before the requested
mode indicator light has stopped
flashing could damage the
transfer case. To help avoid
damaging the vehicle, always wait
for the mode indicator lights to
stop flashing before shifting the
transmission into gear.
It is typical for the vehicle to exhibit
significant engagement noise and
bump when shifting between
Four-Wheel Drive Low and
Four-Wheel Drive High ranges or
from N (Neutral) with the engine
running.
If the knob is turned to the
Four-Wheel Drive High, AUTO,
or Two-Wheel Drive High switch
position when the vehicle is in gear
and/or moving more than
5 km/h (3 mph), the Four-Wheel
Drive High, AUTO or Two-Wheel
Drive High indicator light will flash
for 30 seconds but will not complete
the shift. Shifting into Neutral
To shift the transfer case to
N (Neutral) do the following:
1. Make sure the vehicle is parked
so that it will not roll.
2. Set the parking brake and apply the regular brake pedal. See
Parking Brake on page 9‑60 for
more information.
3. Start the vehicle or turn the ignition in ON/RUN.
4. Put the transmission in N (Neutral).
5. Shift the transfer case to Two-Wheel Drive High.
6. Turn the transfer case dial clockwise to N (Neutral) until it
stops and hold it there until
the N (Neutral) light starts
blinking. This will take at least
10 seconds. Then slowly release
the dial to the four low position.
The N (Neutral) light will come
on when the transfer case shift
to N (Neutral) is complete. 7. If the engine is running, make
sure that the transfer case is in
N (Neutral) by shifting the
transmission to R (Reverse) for
one second, then shift the
transmission to D (Drive) for
one second.
8. Turn the ignition to ACC/ACCESSORY,
which will turn the engine off.
9. Place the transmission shift lever in P (Park).
10. Release the parking brake prior to moving the vehicle.
11. Turn the ignition to LOCK/OFF.
Shifting Out of Neutral
To shift out of N (Neutral) do the
following:
1. Set the parking brake and apply the regular brake pedal.
2. Turn the ignition to ON/RUN with the engine off, and shift the
transmission to N (Neutral).
Page 344 of 584
Black plate (58,1)Chevrolet Silverado Owner Manual - 2012
9-58 Driving and Operating
3. Turn the transfer case dial toTwo-Wheel Drive High,
Four-Wheel Drive High,
or AUTO.
After the transfer case has
shifted out of N (Neutral), the
N (Neutral) light will go out.
4. Release the parking brake prior to moving the vehicle.
Notice: Shifting the transmission
into gear before the requested
mode indicator light has stopped
flashing could damage the
transfer case. To help avoid
damaging the vehicle, always wait
for the mode indicator lights to
stop flashing before shifting the
transmission into gear.
5. Start the engine and shift the transmission to the desired
position.Brakes
Antilock Brake
System (ABS)
This vehicle might have the Antilock
Brake System (ABS), an advanced
electronic braking system that helps
prevent a braking skid.
When the engine is started and the
vehicle begins to drive away, ABS
checks itself. A momentary motor or
clicking noise might be heard while
this test is going on. This is normal.
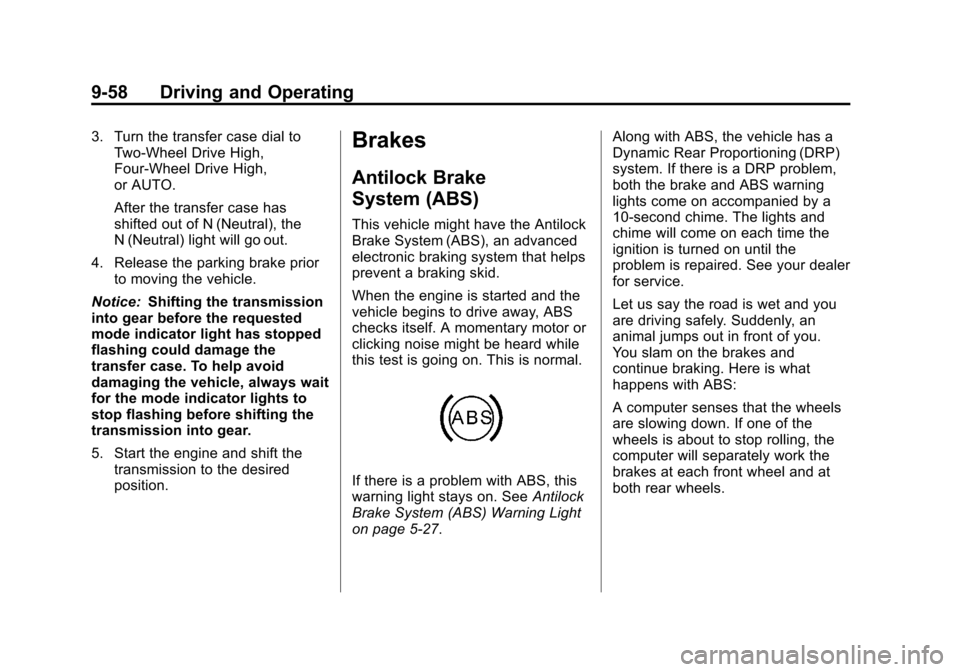
If there is a problem with ABS, this
warning light stays on. See Antilock
Brake System (ABS) Warning Light
on page 5‑27. Along with ABS, the vehicle has a
Dynamic Rear Proportioning (DRP)
system. If there is a DRP problem,
both the brake and ABS warning
lights come on accompanied by a
10‐second chime. The lights and
chime will come on each time the
ignition is turned on until the
problem is repaired. See your dealer
for service.
Let us say the road is wet and you
are driving safely. Suddenly, an
animal jumps out in front of you.
You slam on the brakes and
continue braking. Here is what
happens with ABS:
A computer senses that the wheels
are slowing down. If one of the
wheels is about to stop rolling, the
computer will separately work the
brakes at each front wheel and at
both rear wheels.
Page 348 of 584
Black plate (62,1)Chevrolet Silverado Owner Manual - 2012
9-62 Driving and Operating
Hill Start Assist (HSA)
Non‐hybrid vehicles with StabiliTrak
have a Hill Start Assist (HSA)
feature, which may be useful when
the vehicle is stopped on a grade.
This feature is designed to prevent
the vehicle from rolling, either
forward or rearward, during vehicle
drive off. After the driver completely
stops and holds the vehicle in a
complete standstill on a grade,
HSA will be automatically activated.
During the transition period between
when the driver releases the brake
pedal and starts to accelerate to
drive off on a grade, HSA holds the
braking pressure for a maximum oftwo seconds to ensure that
there is no rolling. The brakes will
automatically release when the
accelerator pedal is applied within
the two‐second window. If the
vehicle is equipped with the
Integrated Trailer Brake Control
(ITBC) system, HSA may also apply
the trailer brakes. It will not activate
if the vehicle is in a drive gear and
facing downhill or if the vehicle is
facing uphill and in R (Reverse).
There may be situations on minor
hills (less than 5% grade) with a
loaded vehicle or while pulling a
trailer where HSA will not activate.
Ride Control Systems
StabiliTrak®System
The vehicle has a vehicle stability
enhancement system called
StabiliTrak. It is an advanced
computer-controlled system that
assists the driver with directional
control of the vehicle in difficult
driving conditions.
StabiliTrak activates when the
computer senses a discrepancy
between the intended path and the
direction the vehicle is actually
traveling. StabiliTrak selectively
applies braking pressure at any one
of the vehicle's brakes to assist the
driver with keeping the vehicle on
the intended path.
Page 366 of 584
Black plate (80,1)Chevrolet Silverado Owner Manual - 2012
9-80 Driving and Operating
Filling the Tank
If the vehicle has a diesel engine,
see the Duramax diesel supplement
for more information.
{WARNING
Fuel vapor burns violently and a
fuel fire can cause bad injuries.
To help avoid injuries to you and
others, read and follow all the
instructions on the fuel pump
island. Turn off the engine when
refueling. Do not smoke near fuel
or when refueling the vehicle.
Do not use cellular phones.
Keep sparks, flames, and
smoking materials away from fuel.
Do not leave the fuel pump
unattended when refueling the
vehicle. This is against the law in
some places. Do not re-enter the
vehicle while pumping fuel. Keep
children away from the fuel pump;
never let children pump fuel.The tethered fuel cap is located
behind a hinged fuel door on the
driver side of the vehicle. Vehicles
that have a FlexFuel badge and a
yellow fuel cap can use either
unleaded gasoline or ethanol fuel
containing up to 85% ethanol (E85).
See
Fuel E85 (85% Ethanol) on
page 9‑78.
To remove the fuel cap, turn it
slowly counterclockwise.
{WARNING
Fuel can spray out on you if you
open the fuel cap too quickly.
If you spill fuel and then
something ignites it, you could be
badly burned. This spray can
happen if the tank is nearly full,
and is more likely in hot weather.
Open the fuel cap slowly and wait
for any hiss noise to stop. Then
unscrew the cap all the way. If the vehicle is a dual fuel tank
chassis cab model, and it runs out
of fuel, refuel the front fuel tank first
to ensure a quick restart.
Be careful not to spill fuel. Do not
top off or overfill the tank and wait a
few seconds after you have finished
pumping before removing the
nozzle. Clean fuel from painted
surfaces as soon as possible.
See
Exterior Care on page 10‑102.
When replacing the fuel cap, turn it
clockwise until it clicks. It will require
more effort to turn the fuel cap on
the last turn as you tighten it.
Make sure the cap is fully installed.
The diagnostic system can
determine if the fuel cap has been
left off or improperly installed. This
would allow fuel to evaporate into
the atmosphere. See Malfunction
Indicator Lamp on page 5‑24.
Page 371 of 584

Black plate (85,1)Chevrolet Silverado Owner Manual - 2012
Driving and Operating 9-85
If parking the rig on a hill:
1. Press the brake pedal, butdo not shift into P (Park) yet.
Turn the wheels into the curb if
facing downhill or into traffic if
facing uphill.
2. Have someone place chocks under the trailer wheels.
3. When the wheel chocks are in place, release the regular brakes
until the chocks absorb the load.
4. Reapply the brake pedal. Then apply the parking brake
and shift into P (Park).
5. If the vehicle is four-wheel-drive, be sure the transfer case is in a
drive gear and not in N (Neutral).
6. Release the brake pedal.{WARNING
It can be dangerous to get out of
the vehicle if the shift lever is not
fully in P (Park) with the parking
brake firmly set. The vehicle
can roll.
If the engine has been left
running, the vehicle can move
suddenly. You or others could be
injured. To be sure the vehicle will
not move, even when on fairly
level ground, use the steps that
follow.
Always put the shift lever fully in
P (Park) with the parking brake
firmly set.
If the transfer case on a
four-wheel-drive vehicle is in
N (Neutral), the vehicle will be
free to roll, even if the shift lever
is in P (Park). Be sure the transfer
case is in a drive gear —not in
N (Neutral).
Leaving After Parking on a Hill
1. Apply and hold the brake pedal.
2. Start the engine.
3. Shift into a gear.
4. Release the parking brake.
5. Let up on the brake pedal.
6. Drive slowly until the trailer is clear of the chocks.
7. Stop and have someone pick up and store the chocks.
Maintenance when Trailer
Towing
The vehicle needs service more
often when pulling a trailer.
See Maintenance Schedule on
page 11‑3. Things that are
especially important in trailer
operation are automatic
transmission fluid, engine oil, axle
lubricant, belts, cooling system, and
brake system. It is a good idea to
inspect these before and during
the trip.
Check periodically to see that all
hitch nuts and bolts are tight.
Page 407 of 584

Black plate (1,1)Chevrolet Silverado Owner Manual - 2012
Vehicle Care 10-1
Vehicle Care
General Information
General Information . . . . . . . . . . 10-2
California Proposition65 Warning . . . . . . . . . . . . . . . . . 10-3
California Perchlorate Materials Requirements . . . . 10-3
Accessories and Modifications . . . . . . . . . . . . . . . 10-3
Vehicle Checks
Doing Your OwnService Work . . . . . . . . . . . . . . . 10-4
Hood . . . . . . . . . . . . . . . . . . . . . . . . 10-5
Engine Compartment Overview . . . . . . . . . . . . . . . . . . . 10-6
Engine Oil . . . . . . . . . . . . . . . . . . . 10-7
Engine Oil Life System . . . . . 10-10
Automatic Transmission Fluid (4-Speed Transmission) . . . 10-11
Automatic Transmission Fluid (6-Speed
Transmission) . . . . . . . . . . . . . 10-14
Manual Transmission Fluid . . . . . . . . . . . . . . . . . . . . . . 10-17
Hydraulic Clutch . . . . . . . . . . . . 10-17 Engine Air Cleaner/Filter . . . . 10-17
Cooling System . . . . . . . . . . . . 10-19
Engine Coolant . . . . . . . . . . . . . 10-20
Engine Overheating . . . . . . . . 10-23
Overheated Engine
Protection
Operating Mode . . . . . . . . . . . 10-26
Engine Fan . . . . . . . . . . . . . . . . . 10-26
Power Steering Fluid . . . . . . . 10-27
Washer Fluid . . . . . . . . . . . . . . . 10-28
Brakes . . . . . . . . . . . . . . . . . . . . . 10-28
Brake Fluid . . . . . . . . . . . . . . . . . 10-30
Battery . . . . . . . . . . . . . . . . . . . . . 10-31
Four-Wheel Drive . . . . . . . . . . . 10-32
Front Axle . . . . . . . . . . . . . . . . . . 10-33
Rear Axle . . . . . . . . . . . . . . . . . . 10-34
Noise Control System . . . . . . 10-36
Starter Switch Check . . . . . . . 10-36
Automatic Transmission Shift Lock Control Function
Check . . . . . . . . . . . . . . . . . . . . . 10-37
Ignition Transmission Lock Check . . . . . . . . . . . . . . . . . . . . . 10-38
Park Brake and P (Park) Mechanism Check . . . . . . . . 10-38
Wiper Blade Replacement . . . . . . . . . . . . . . 10-39
Glass Replacement . . . . . . . . 10-39
Headlamp Aiming
Headlamp Aiming . . . . . . . . . . 10-39
Bulb Replacement
Bulb Replacement . . . . . . . . . . 10-42
Halogen Bulbs . . . . . . . . . . . . . . 10-42
Headlamps, Front Turn Signal, Sidemarker, and
Parking Lamps . . . . . . . . . . . . 10-42
Pick-Up Box Identification and Fender Marker
Lamps . . . . . . . . . . . . . . . . . . . . 10-43
Taillamps (Chassis Cab Models) . . . . . . . . . . . . . . . . . . . 10-43
Taillamps, Turn Signal, Stoplamps, and Back-Up
Lamps . . . . . . . . . . . . . . . . . . . . 10-44
Center High-Mounted
Stoplamp (CHMSL) and
Cargo Lamp . . . . . . . . . . . . . . 10-44
License Plate Lamp . . . . . . . . 10-45
Replacement Bulbs . . . . . . . . . 10-45