2012 CHEVROLET MALIBU fuse
[x] Cancel search: fusePage 5 of 398

Black plate (5,1)Chevrolet Malibu Owner Manual - 2012
Introduction v
Vehicle Symbol Chart
Here are some additional symbols
that may be found on the vehicle
and what they mean. For more
information on the symbol, refer to
the Index.
9:Airbag Readiness Light
#:Air Conditioning
!:Antilock Brake System (ABS)
%:Audio Steering Wheel Controls
or OnStar®
$: Brake System Warning Light
":Charging System
I:Cruise Control
B: Engine Coolant Temperature
O:Exterior Lamps
#:Fog Lamps
.: Fuel Gauge
+:Fuses
3: Headlamp High/Low-Beam
Changer
j: LATCH System Child
Restraints
*: Malfunction Indicator Lamp
::Oil Pressure
}:Power
/:Remote Vehicle Start
>:Safety Belt Reminders
7:Tire Pressure Monitor
d:Traction Control/Electronic
Stability Control (ESC)
M: Windshield Washer Fluid
Page 51 of 398
Black plate (3,1)Chevrolet Malibu Owner Manual - 2012
Seats and Restraints 3-3
Front Seats
Seat Adjustment
Seat Position
{WARNING
You can lose control of the
vehicle if you try to adjust a
manual driver seat while the
vehicle is moving. The sudden
movement could startle and
confuse you, or make you push a
pedal when you do not want to.
Adjust the driver seat only when
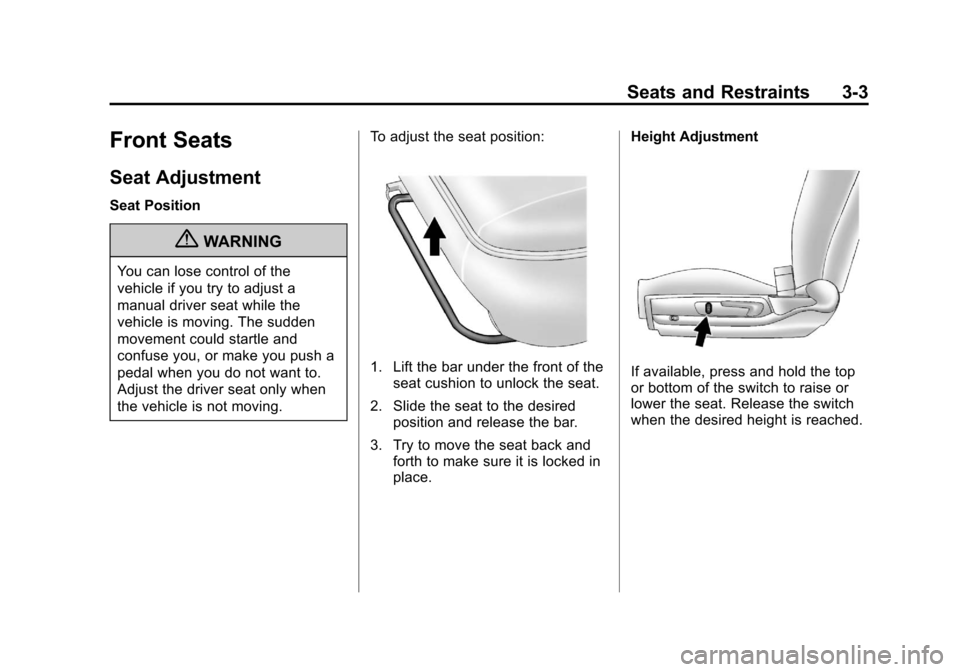
the vehicle is not moving.To adjust the seat position:
1. Lift the bar under the front of the
seat cushion to unlock the seat.
2. Slide the seat to the desired position and release the bar.
3. Try to move the seat back and forth to make sure it is locked in
place. Height AdjustmentIf available, press and hold the top
or bottom of the switch to raise or
lower the seat. Release the switch
when the desired height is reached.
Page 52 of 398
Black plate (4,1)Chevrolet Malibu Owner Manual - 2012
3-4 Seats and Restraints
Power Seat Adjustment
{WARNING
You can lose control of the
vehicle if you try to adjust the
seat while the vehicle is moving.
The sudden movement could
startle and confuse you, or
make you push a pedal when
you do not want to. Adjust the
driver seat only when the vehicle
is not moving.
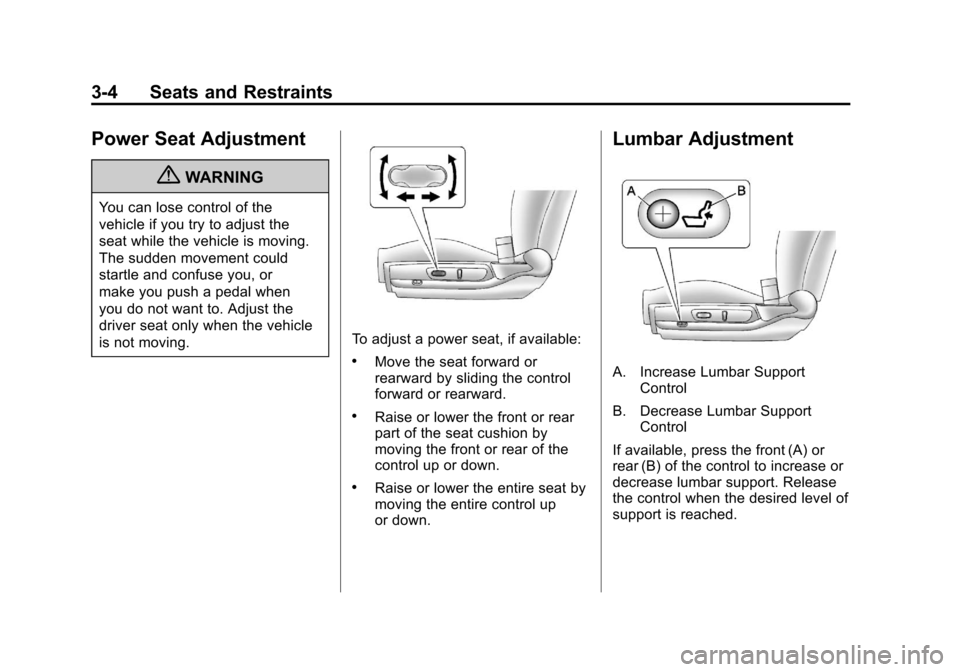
To adjust a power seat, if available:
.Move the seat forward or
rearward by sliding the control
forward or rearward.
.Raise or lower the front or rear
part of the seat cushion by
moving the front or rear of the
control up or down.
.Raise or lower the entire seat by
moving the entire control up
or down.
Lumbar Adjustment
A. Increase Lumbar SupportControl
B. Decrease Lumbar Support Control
If available, press the front (A) or
rear (B) of the control to increase or
decrease lumbar support. Release
the control when the desired level of
support is reached.
Page 54 of 398
Black plate (6,1)Chevrolet Malibu Owner Manual - 2012
3-6 Seats and Restraints
Manual Reclining Seatbacks
{WARNING
You can lose control of the
vehicle if you try to adjust a
manual driver seat while the
vehicle is moving. The sudden
movement could startle and
confuse you, or make you push a
pedal when you do not want to.
Adjust the driver seat only when
the vehicle is not moving.
{WARNING
If either seatback is not locked, it
could move forward in a sudden
stop or crash. That could cause
injury to the person sitting there.
Always push and pull on the
seatbacks to be sure they are
locked.
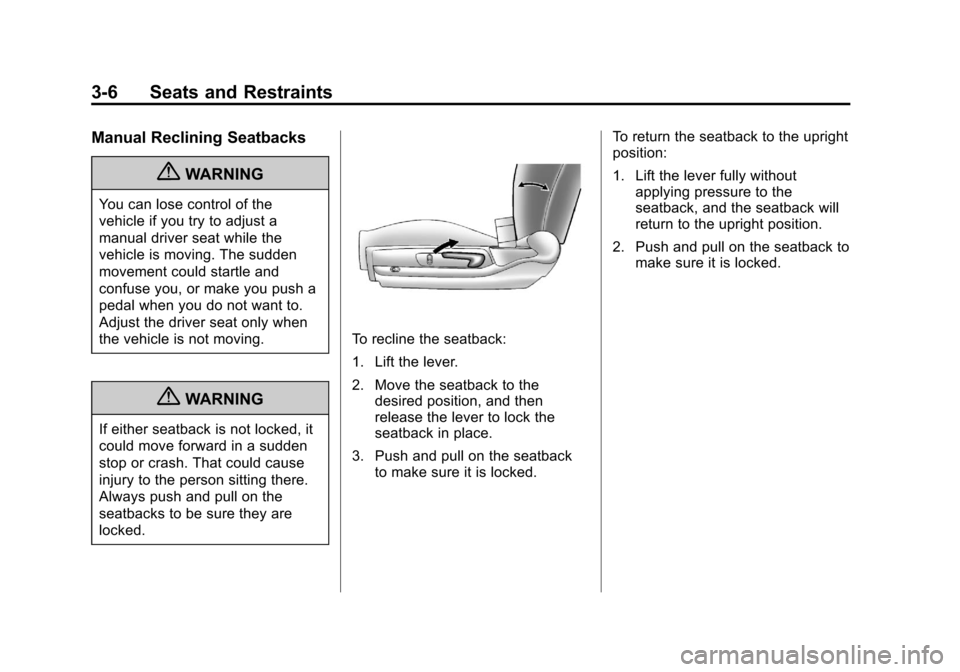
To recline the seatback:
1. Lift the lever.
2. Move the seatback to thedesired position, and then
release the lever to lock the
seatback in place.
3. Push and pull on the seatback to make sure it is locked. To return the seatback to the upright
position:
1. Lift the lever fully without
applying pressure to the
seatback, and the seatback will
return to the upright position.
2. Push and pull on the seatback to make sure it is locked.
Page 113 of 398

Black plate (7,1)Chevrolet Malibu Owner Manual - 2012
Instruments and Controls 5-7
The date does not automatically
display. To see the date press
H
while the radio is on. The date
with display times out after a
few seconds and goes back to the
normal radio and time display.
To change the time default setting
from 12 hour to 24 hour or to
change the date default setting from
month/day/year to day/month/year:
1. Press the
Hbutton and then
the softkey located below the
forward arrow label. Once the
time 12H and 24H, and the date
MM/DD/YYYY (month, day,
and year) and DD/MM/YYYY
(day, month, and year) displays.
2. Press the softkey located below the desired option.
3. Press the
Hbutton again to
apply the selected default, or let
the screen time out.
Power Outlets
Accessory power outlets can be
used to plug in electrical equipment,
such as a cell phone or MP3 player.
There are two accessory power
outlets. One accessory power outlet
is located inside the storage bin
below the climate controls and the
other outlet is on the rear of the
center storage console.
Remove the cover to access
and replace when not in use.
The accessory power outlet is
operational at all times.
{WARNING
Power is always supplied to the
outlets. Do not leave electrical
equipment plugged in when the
vehicle is not in use because the
vehicle could catch fire and cause
injury or death. Notice:
Leaving electrical
equipment plugged in for an
extended period of time while
the vehicle is off will drain the
battery. Always unplug electrical
equipment when not in use and
do not plug in equipment that
exceeds the maximum 20 ampere
rating.
Certain electrical accessories
may not be compatible with the
accessory power outlet and could
overload vehicle or adapter fuses.
If a problem is experienced,
see your dealer.
When adding electrical equipment,
be sure to follow the proper
installation instructions included
with the equipment. See Add-On
Electrical Equipment on page 9‑48.
Notice: Hanging heavy
equipment from the power
outlet can cause damage not
covered by the vehicle warranty.
The power outlets are designed
for accessory power plugs only,
such as cell phone charge cords.
Page 147 of 398
Black plate (5,1)Chevrolet Malibu Owner Manual - 2012
Lighting 6-5
The lever returns to its starting
position when it is released.
If a turn signal arrow flashes rapidly
or does not come on, a signal bulb
may need to be replaced. See
Fuses on page 10‑34.
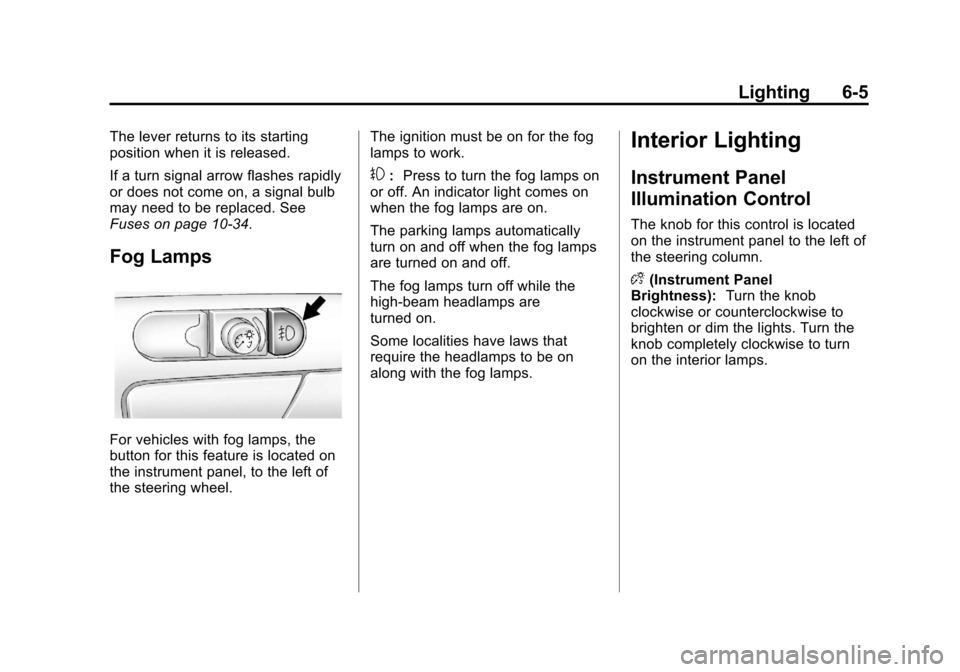
Fog Lamps
For vehicles with fog lamps, the
button for this feature is located on
the instrument panel, to the left of
the steering wheel.The ignition must be on for the fog
lamps to work.
#:
Press to turn the fog lamps on
or off. An indicator light comes on
when the fog lamps are on.
The parking lamps automatically
turn on and off when the fog lamps
are turned on and off.
The fog lamps turn off while the
high-beam headlamps are
turned on.
Some localities have laws that
require the headlamps to be on
along with the fog lamps.
Interior Lighting
Instrument Panel
Illumination Control
The knob for this control is located
on the instrument panel to the left of
the steering column.
D (Instrument Panel
Brightness): Turn the knob
clockwise or counterclockwise to
brighten or dim the lights. Turn the
knob completely clockwise to turn
on the interior lamps.
Page 241 of 398
Black plate (1,1)Chevrolet Malibu Owner Manual - 2012
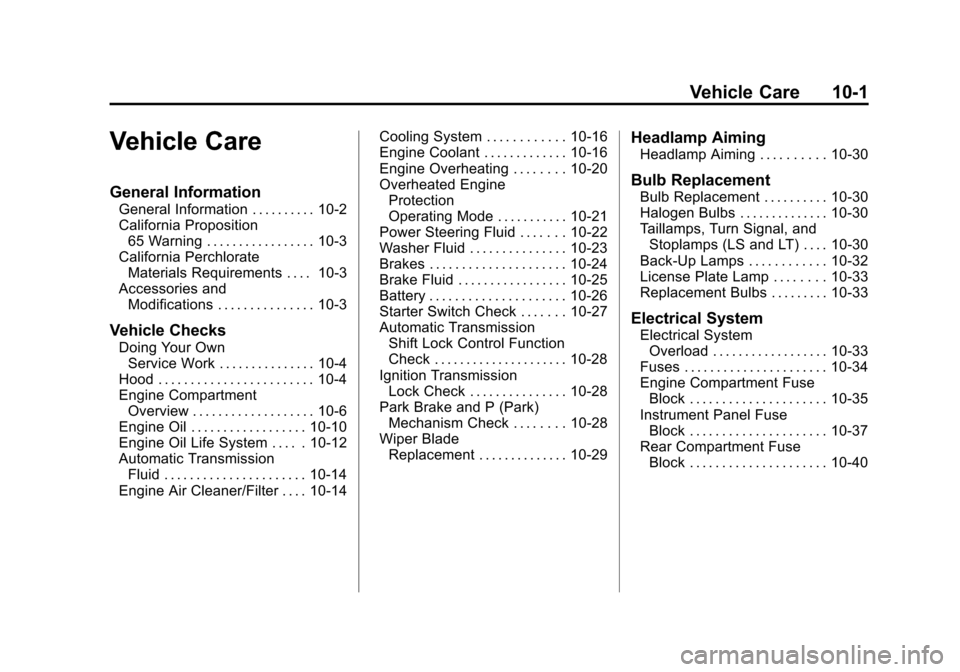
Vehicle Care 10-1
Vehicle Care
General Information
General Information . . . . . . . . . . 10-2
California Proposition65 Warning . . . . . . . . . . . . . . . . . 10-3
California Perchlorate Materials Requirements . . . . 10-3
Accessories and Modifications . . . . . . . . . . . . . . . 10-3
Vehicle Checks
Doing Your OwnService Work . . . . . . . . . . . . . . . 10-4
Hood . . . . . . . . . . . . . . . . . . . . . . . . 10-4
Engine Compartment Overview . . . . . . . . . . . . . . . . . . . 10-6
Engine Oil . . . . . . . . . . . . . . . . . . 10-10
Engine Oil Life System . . . . . 10-12
Automatic Transmission Fluid . . . . . . . . . . . . . . . . . . . . . . 10-14
Engine Air Cleaner/Filter . . . . 10-14 Cooling System . . . . . . . . . . . . 10-16
Engine Coolant . . . . . . . . . . . . . 10-16
Engine Overheating . . . . . . . . 10-20
Overheated Engine
Protection
Operating Mode . . . . . . . . . . . 10-21
Power Steering Fluid . . . . . . . 10-22
Washer Fluid . . . . . . . . . . . . . . . 10-23
Brakes . . . . . . . . . . . . . . . . . . . . . 10-24
Brake Fluid . . . . . . . . . . . . . . . . . 10-25
Battery . . . . . . . . . . . . . . . . . . . . . 10-26
Starter Switch Check . . . . . . . 10-27
Automatic Transmission Shift Lock Control Function
Check . . . . . . . . . . . . . . . . . . . . . 10-28
Ignition Transmission Lock Check . . . . . . . . . . . . . . . 10-28
Park Brake and P (Park) Mechanism Check . . . . . . . . 10-28
Wiper Blade Replacement . . . . . . . . . . . . . . 10-29
Headlamp Aiming
Headlamp Aiming . . . . . . . . . . 10-30
Bulb Replacement
Bulb Replacement . . . . . . . . . . 10-30
Halogen Bulbs . . . . . . . . . . . . . . 10-30
Taillamps, Turn Signal, andStoplamps (LS and LT) . . . . 10-30
Back-Up Lamps . . . . . . . . . . . . 10-32
License Plate Lamp . . . . . . . . 10-33
Replacement Bulbs . . . . . . . . . 10-33
Electrical System
Electrical System Overload . . . . . . . . . . . . . . . . . . 10-33
Fuses . . . . . . . . . . . . . . . . . . . . . . 10-34
Engine Compartment Fuse Block . . . . . . . . . . . . . . . . . . . . . 10-35
Instrument Panel Fuse Block . . . . . . . . . . . . . . . . . . . . . 10-37
Rear Compartment Fuse Block . . . . . . . . . . . . . . . . . . . . . 10-40
Page 244 of 398
Black plate (4,1)Chevrolet Malibu Owner Manual - 2012
10-4 Vehicle Care
Vehicle Checks
Doing Your Own
Service Work
{WARNING
You can be injured and the
vehicle could be damaged if you
try to do service work on a vehicle
without knowing enough about it.
.Be sure you have sufficient
knowledge, experience,
the proper replacement
parts, and tools before
attempting any vehicle
maintenance task.
.Be sure to use the proper
nuts, bolts, and other
fasteners. Metric and
English fasteners can be
easily confused. If the
wrong fasteners are used,
parts can later break or fall
off. You could be hurt.If doing some of your own service
work, use the proper service
manual. It tells you much more
about how to service the vehicle
than this manual can. To order the
proper service manual, see
Service
Publications Ordering Information
on page 13‑18.
This vehicle has an airbag system.
Before attempting to do your own
service work, see Servicing the
Airbag-Equipped Vehicle on
page 3‑30.
Keep a record with all parts receipts
and list the mileage and the date
of any service work performed.
See Maintenance Records on
page 11‑14.
Hood
To open the hood:
1. Pull the hood release handle with this symbol on it. It is
located inside the vehicle to the
left of the steering column.