2012 CHEVROLET MALIBU radio
[x] Cancel search: radioPage 108 of 398
Black plate (2,1)Chevrolet Malibu Owner Manual - 2012
5-2 Instruments and Controls
Controls
Steering Wheel
Adjustment
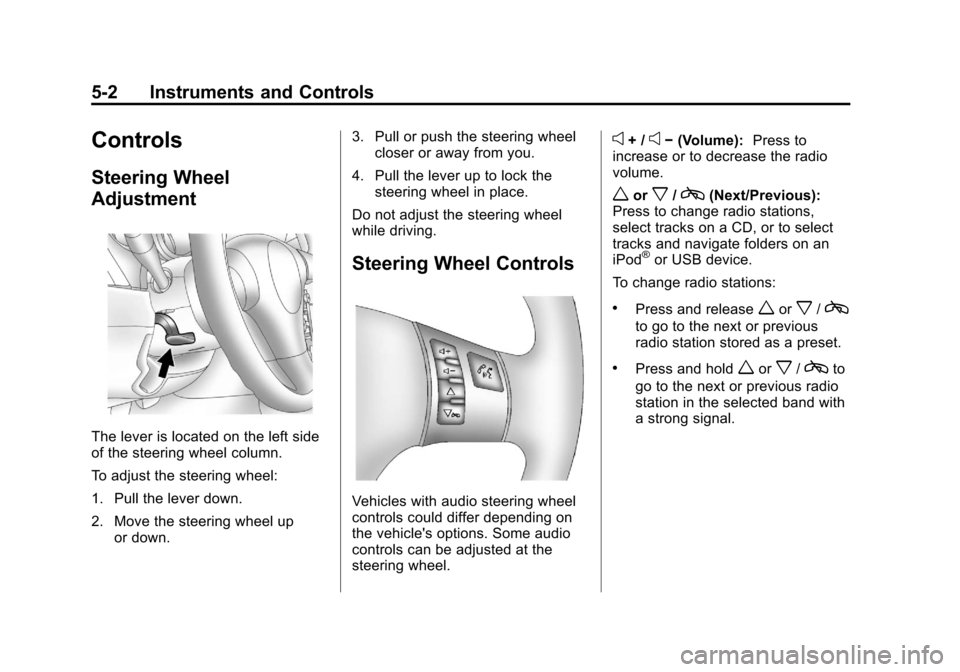
The lever is located on the left side
of the steering wheel column.
To adjust the steering wheel:
1. Pull the lever down.
2. Move the steering wheel upor down. 3. Pull or push the steering wheel
closer or away from you.
4. Pull the lever up to lock the steering wheel in place.
Do not adjust the steering wheel
while driving.
Steering Wheel Controls
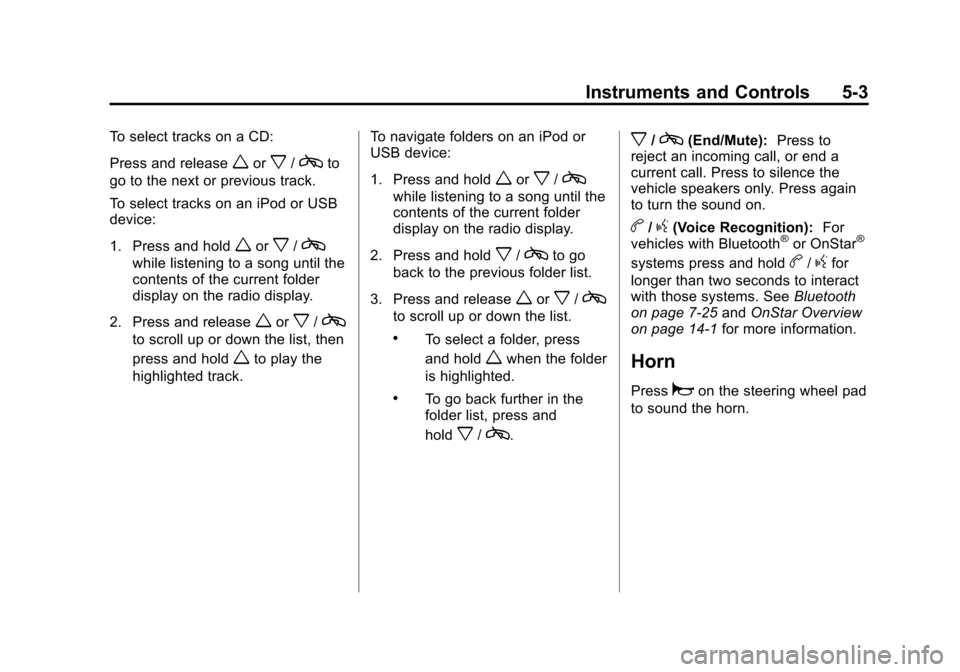
Vehicles with audio steering wheel
controls could differ depending on
the vehicle's options. Some audio
controls can be adjusted at the
steering wheel.
e+ /e− (Volume): Press to
increase or to decrease the radio
volume.
worx/c(Next/Previous):
Press to change radio stations,
select tracks on a CD, or to select
tracks and navigate folders on an
iPod
®or USB device.
To change radio stations:
.Press and releaseworx/c
to go to the next or previous
radio station stored as a preset.
.Press and holdworx/cto
go to the next or previous radio
station in the selected band with
a strong signal.
Page 109 of 398
Black plate (3,1)Chevrolet Malibu Owner Manual - 2012
Instruments and Controls 5-3
To select tracks on a CD:
Press and release
worx/cto
go to the next or previous track.
To select tracks on an iPod or USB
device:
1. Press and hold
worx/c
while listening to a song until the
contents of the current folder
display on the radio display.
2. Press and release
worx/c
to scroll up or down the list, then
press and hold
wto play the
highlighted track. To navigate folders on an iPod or
USB device:
1. Press and hold
worx/c
while listening to a song until the
contents of the current folder
display on the radio display.
2. Press and hold
x/cto go
back to the previous folder list.
3. Press and release
worx/c
to scroll up or down the list.
.To select a folder, press
and hold
wwhen the folder
is highlighted.
.To go back further in the
folder list, press and
hold
x/c.
x/c(End/Mute): Press to
reject an incoming call, or end a
current call. Press to silence the
vehicle speakers only. Press again
to turn the sound on.
b/g(Voice Recognition): For
vehicles with Bluetooth®or OnStar®
systems press and holdb/gfor
longer than two seconds to interact
with those systems. See Bluetooth
on page 7‑25 andOnStar Overview
on page 14‑1 for more information.
Horn
Pressaon the steering wheel pad
to sound the horn.
Page 112 of 398
Black plate (6,1)Chevrolet Malibu Owner Manual - 2012
5-6 Instruments and Controls
Clock
Without Date Display
AM/FM Base Radio with a
Single CD Player
To set the time:
1. Turn the ignition key toACC/ACCESSORY or ON/RUN.
Press the
Oknob to turn the
radio on.
2. Press the
Hbutton until the hour
begins flashing on the display.
Press the
Hbutton a second
time and the minute begins
flashing on the display.
3. While either the hour or the minute numbers are flashing,
turn the
fknob to increase or
decrease the time.
4. Press the
Hbutton again until
the clock display stops flashing
to set the currently displayed
time; otherwise, the flashing
stops after five seconds and
the current time displayed is
automatically set. To change the time default setting
from 12 hour to 24 hour, press
the
Hbutton until 12H or 24H is
displayed. Once 12H or 24H is
displayed, turn the
fknob to the
desired option to select the setting.
Press the
Hbutton again to apply
the setting, or let the screen
time out.
With Date Display
Radio with CD (MP3) and
USB Port, and Radio with
Single CD (MP3) Player
To set the time and date:
1. Turn the ignition key to ACC/ACCESSORY or ON/RUN.
Press the
Oknob to turn the
radio on.
2. Press the
Hbutton and the HR,
MIN, MM, DD, YYYY (hour,
minute, month, day, and year)
displays. 3. Press the softkey located below
any one of the tabs that you
want to change.
4. To increase the time or date do one of the following:
.Press the softkey located
below the selected tab.
.Press the¨SEEK, or
\FWD button.
.Turn thefknob clockwise.
5. To decrease the time or date do one of the following:
.Press the©SEEK or
sREV button.
.Turn thefknob
counterclockwise.
Page 113 of 398

Black plate (7,1)Chevrolet Malibu Owner Manual - 2012
Instruments and Controls 5-7
The date does not automatically
display. To see the date press
H
while the radio is on. The date
with display times out after a
few seconds and goes back to the
normal radio and time display.
To change the time default setting
from 12 hour to 24 hour or to
change the date default setting from
month/day/year to day/month/year:
1. Press the
Hbutton and then
the softkey located below the
forward arrow label. Once the
time 12H and 24H, and the date
MM/DD/YYYY (month, day,
and year) and DD/MM/YYYY
(day, month, and year) displays.
2. Press the softkey located below the desired option.
3. Press the
Hbutton again to
apply the selected default, or let
the screen time out.
Power Outlets
Accessory power outlets can be
used to plug in electrical equipment,
such as a cell phone or MP3 player.
There are two accessory power
outlets. One accessory power outlet
is located inside the storage bin
below the climate controls and the
other outlet is on the rear of the
center storage console.
Remove the cover to access
and replace when not in use.
The accessory power outlet is
operational at all times.
{WARNING
Power is always supplied to the
outlets. Do not leave electrical
equipment plugged in when the
vehicle is not in use because the
vehicle could catch fire and cause
injury or death. Notice:
Leaving electrical
equipment plugged in for an
extended period of time while
the vehicle is off will drain the
battery. Always unplug electrical
equipment when not in use and
do not plug in equipment that
exceeds the maximum 20 ampere
rating.
Certain electrical accessories
may not be compatible with the
accessory power outlet and could
overload vehicle or adapter fuses.
If a problem is experienced,
see your dealer.
When adding electrical equipment,
be sure to follow the proper
installation instructions included
with the equipment. See Add-On
Electrical Equipment on page 9‑48.
Notice: Hanging heavy
equipment from the power
outlet can cause damage not
covered by the vehicle warranty.
The power outlets are designed
for accessory power plugs only,
such as cell phone charge cords.
Page 122 of 398
Black plate (16,1)Chevrolet Malibu Owner Manual - 2012
5-16 Instruments and Controls
Charging System Light
This light comes on briefly when the
ignition key is turned to START,
but the engine is not running,
as a check to show it is working.
If it does not, have the vehicle
serviced by your dealer.
The light should go out once the
engine starts. If it stays on,
or comes on while driving, there
could be a problem with the
charging system. This light could
indicate that there are problems with
a generator drive belt, or that there
is an electrical problem. Have it
checked right away. If the vehicle
must be driven a short distance with
the light on, turn off accessories,
such as the radio and air
conditioner.
Malfunction
Indicator Lamp
A computer system called OBD II
(On-Board Diagnostics-Second
Generation) monitors the operation
of the vehicle to ensure emissions
are at acceptable levels, to produce
a cleaner environment. This light
comes on when the vehicle is
placed in ON/RUN, as a check to
show it is working. If it does not,
have the vehicle serviced by your
dealer. SeeIgnition Positions on
page 9‑16 for more information.
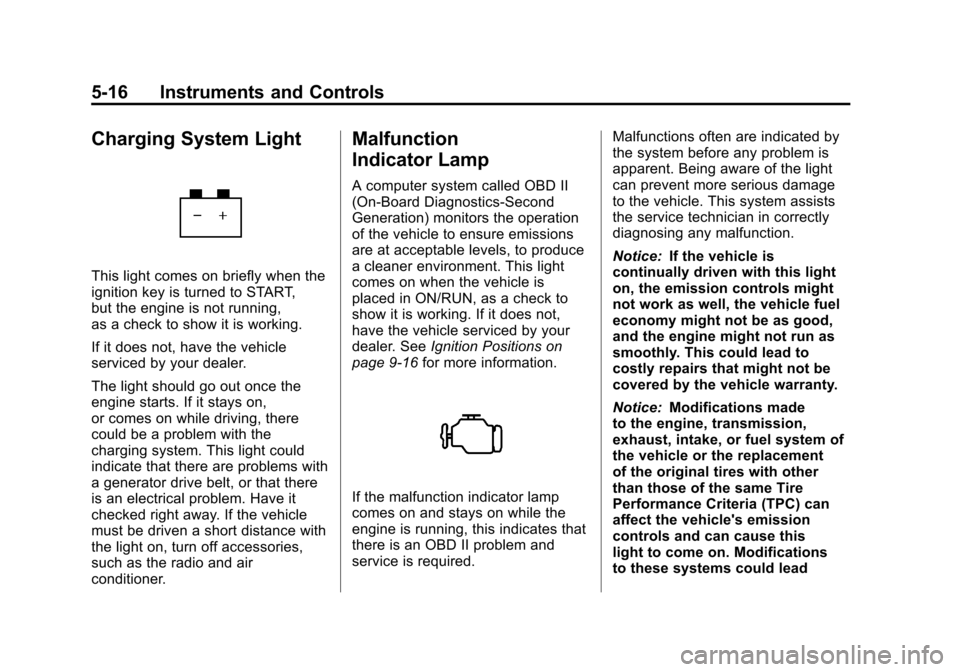
If the malfunction indicator lamp
comes on and stays on while the
engine is running, this indicates that
there is an OBD II problem and
service is required. Malfunctions often are indicated by
the system before any problem is
apparent. Being aware of the light
can prevent more serious damage
to the vehicle. This system assists
the service technician in correctly
diagnosing any malfunction.
Notice:
If the vehicle is
continually driven with this light
on, the emission controls might
not work as well, the vehicle fuel
economy might not be as good,
and the engine might not run as
smoothly. This could lead to
costly repairs that might not be
covered by the vehicle warranty.
Notice: Modifications made
to the engine, transmission,
exhaust, intake, or fuel system of
the vehicle or the replacement
of the original tires with other
than those of the same Tire
Performance Criteria (TPC) can
affect the vehicle's emission
controls and can cause this
light to come on. Modifications
to these systems could lead
Page 145 of 398
Black plate (3,1)Chevrolet Malibu Owner Manual - 2012
Lighting 6-3
.The light sensor detects
daytime light.
.The parking brake is released or
the vehicle is not in P (Park).
When the DRL system is on, the
taillamps, sidemarker lamps,
parking lamps, and instrument panel
lights are not on unless you turn the
exterior lamps control to the parking
lamp position.
The regular headlamp system
should be turned on when they are
needed.
Automatic Headlamp
System
When it is dark enough outside, the
automatic headlamp system turns
on the headlamps at the normal
brightness along with other lamps
such as the taillamps, sidemarker,
parking lamps, and the instrument
panel lights. The radio lights will
also be dim.
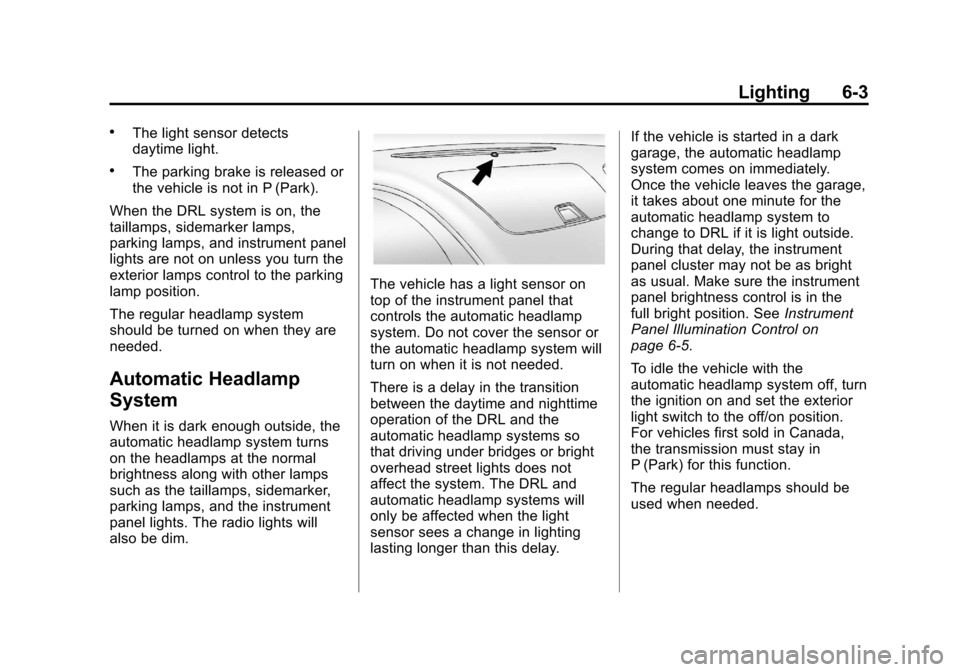
The vehicle has a light sensor on
top of the instrument panel that
controls the automatic headlamp
system. Do not cover the sensor or
the automatic headlamp system will
turn on when it is not needed.
There is a delay in the transition
between the daytime and nighttime
operation of the DRL and the
automatic headlamp systems so
that driving under bridges or bright
overhead street lights does not
affect the system. The DRL and
automatic headlamp systems will
only be affected when the light
sensor sees a change in lighting
lasting longer than this delay. If the vehicle is started in a dark
garage, the automatic headlamp
system comes on immediately.
Once the vehicle leaves the garage,
it takes about one minute for the
automatic headlamp system to
change to DRL if it is light outside.
During that delay, the instrument
panel cluster may not be as bright
as usual. Make sure the instrument
panel brightness control is in the
full bright position. See
Instrument
Panel Illumination Control on
page 6‑5.
To idle the vehicle with the
automatic headlamp system off, turn
the ignition on and set the exterior
light switch to the off/on position.
For vehicles first sold in Canada,
the transmission must stay in
P (Park) for this function.
The regular headlamps should be
used when needed.
Page 151 of 398
Black plate (1,1)Chevrolet Malibu Owner Manual - 2012
Infotainment System 7-1
Infotainment
System
Introduction
Infotainment . . . . . . . . . . . . . . . . . . . 7-1
Theft-Deterrent Feature . . . . . . . 7-2
Operation . . . . . . . . . . . . . . . . . . . . . 7-2
Radio
AM-FM Radio . . . . . . . . . . . . . . . . . 7-6
Satellite Radio . . . . . . . . . . . . . . . . 7-9
Radio Reception . . . . . . . . . . . . . 7-13
Backglass Antenna . . . . . . . . . . 7-14
Satellite Radio Antenna . . . . . . 7-14
Audio Players
CD Player . . . . . . . . . . . . . . . . . . . 7-15
Auxiliary Devices . . . . . . . . . . . . 7-20
Phone
Bluetooth . . . . . . . . . . . . . . . . . . . . 7-25
Introduction
Infotainment
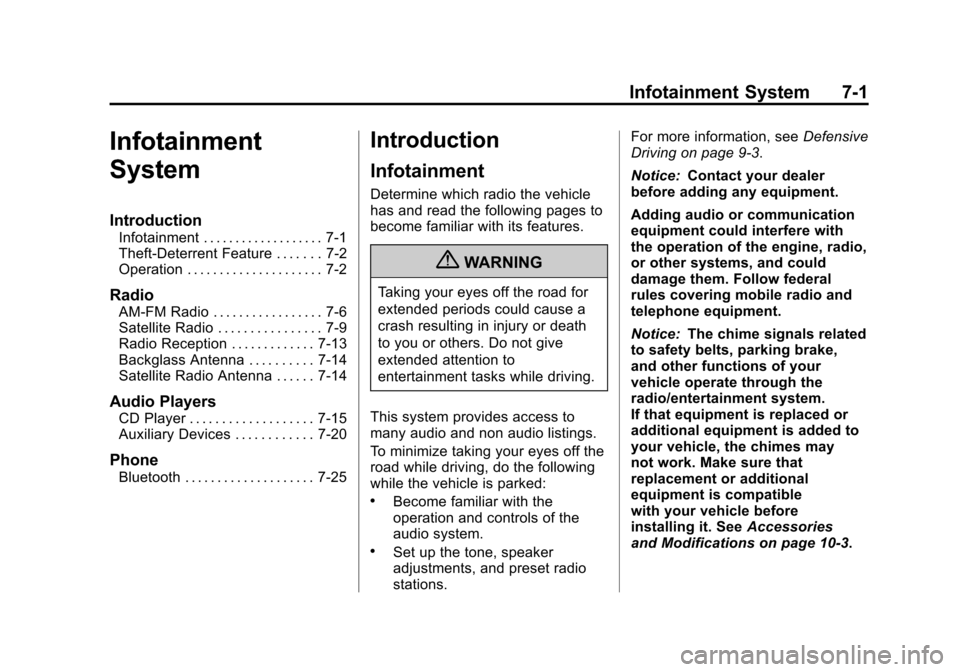
Determine which radio the vehicle
has and read the following pages to
become familiar with its features.
{WARNING
Taking your eyes off the road for
extended periods could cause a
crash resulting in injury or death
to you or others. Do not give
extended attention to
entertainment tasks while driving.
This system provides access to
many audio and non audio listings.
To minimize taking your eyes off the
road while driving, do the following
while the vehicle is parked:
.Become familiar with the
operation and controls of the
audio system.
.Set up the tone, speaker
adjustments, and preset radio
stations. For more information, see
Defensive
Driving on page 9‑3.
Notice: Contact your dealer
before adding any equipment.
Adding audio or communication
equipment could interfere with
the operation of the engine, radio,
or other systems, and could
damage them. Follow federal
rules covering mobile radio and
telephone equipment.
Notice: The chime signals related
to safety belts, parking brake,
and other functions of your
vehicle operate through the
radio/entertainment system.
If that equipment is replaced or
additional equipment is added to
your vehicle, the chimes may
not work. Make sure that
replacement or additional
equipment is compatible
with your vehicle before
installing it. See Accessories
and Modifications on page 10‑3.
Page 152 of 398
Black plate (2,1)Chevrolet Malibu Owner Manual - 2012
7-2 Infotainment System
The vehicle has Retained
Accessory Power (RAP). With RAP,
the audio system can be played
even after the ignition is turned off.
SeeRetained Accessory Power
(RAP) on page 9‑21 for more
information.
Theft-Deterrent Feature
TheftLock®is designed to
discourage theft of the vehicle's
radio by learning a portion of the
Vehicle Identification Number (VIN).
The radio does not operate if it is
stolen or moved to a different
vehicle.
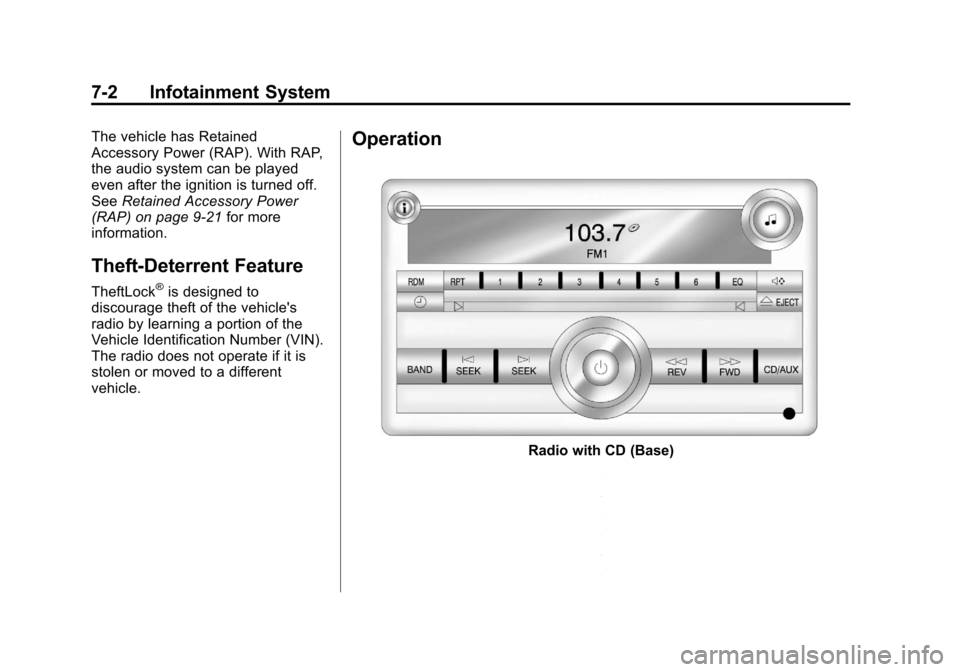
Operation
Radio with CD (Base)