2012 CHEVROLET IMPALA low beam
[x] Cancel search: low beamPage 5 of 374

Black plate (5,1)Chevrolet Impala Owner Manual - 2012
Introduction v
Vehicle Symbol Chart
Here are some additional symbols
that may be found on the vehicle
and what they mean. For more
information on the symbol, refer to
the Index.
9:Airbag Readiness Light
#:Air Conditioning
!:Antilock Brake System (ABS)
%:Audio Steering Wheel Controls
or OnStar®
$: Brake System Warning Light
":Charging System
I:Cruise Control
B: Engine Coolant Temperature
O:Exterior Lamps
#:Fog Lamps
.: Fuel Gauge
+:Fuses
3: Headlamp High/Low-Beam
Changer
j: LATCH System Child
Restraints
*: Malfunction Indicator Lamp
::Oil Pressure
}:Power
/:Remote Vehicle Start
>:Safety Belt Reminders
7:Tire Pressure Monitor
d:Traction Control/Stabilitrak®
M:Windshield Washer Fluid
Page 125 of 374
Black plate (23,1)Chevrolet Impala Owner Manual - 2012
Instruments and Controls 5-23
This light comes on briefly while
starting the engine. If it does not,
have the vehicle serviced by your
dealer. If the system is working
normally, the indicator light then
goes off.
If the light comes on and stays on, it
means that oil is not flowing through
the engine properly. The vehicle
could be low on oil and it might
have some other system problem.
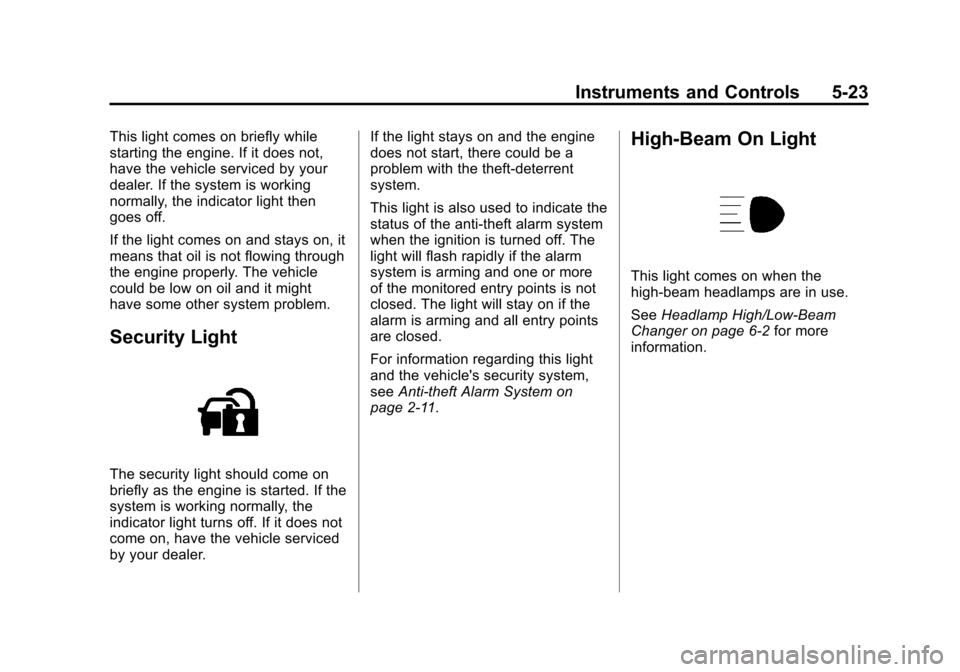
Security Light
The security light should come on
briefly as the engine is started. If the
system is working normally, the
indicator light turns off. If it does not
come on, have the vehicle serviced
by your dealer.If the light stays on and the engine
does not start, there could be a
problem with the theft-deterrent
system.
This light is also used to indicate the
status of the anti-theft alarm system
when the ignition is turned off. The
light will flash rapidly if the alarm
system is arming and one or more
of the monitored entry points is not
closed. The light will stay on if the
alarm is arming and all entry points
are closed.
For information regarding this light
and the vehicle's security system,
see
Anti-theft Alarm System on
page 2‑11.
High-Beam On Light
This light comes on when the
high-beam headlamps are in use.
See Headlamp High/Low-Beam
Changer on page 6‑2 for more
information.
Page 151 of 374
Black plate (1,1)Chevrolet Impala Owner Manual - 2012
Lighting 6-1
Lighting
Exterior Lighting
Exterior Lamp Controls . . . . . . . . 6-1
Headlamp High/Low-BeamChanger . . . . . . . . . . . . . . . . . . . . . 6-2
Flash-to-Pass . . . . . . . . . . . . . . . . . 6-3
Daytime Running Lamps (DRL)/Automatic Headlamp
System . . . . . . . . . . . . . . . . . . . . . . 6-3
Hazard Warning Flashers . . . . . 6-4
Turn and Lane-Change Signals . . . . . . . . . . . . . . . . . . . . . . 6-4
Fog Lamps . . . . . . . . . . . . . . . . . . . . 6-5
Interior Lighting
Instrument Panel Illumination Control . . . . . . . . . . . . . . . . . . . . . . 6-5
Courtesy Lamps . . . . . . . . . . . . . . 6-6
Dome Lamps . . . . . . . . . . . . . . . . . 6-6
Reading Lamps . . . . . . . . . . . . . . . 6-6
Lighting Features
Entry Lighting . . . . . . . . . . . . . . . . . 6-7
Delayed Entry Lighting . . . . . . . . 6-7
Delayed Exit Lighting . . . . . . . . . 6-7
Parade Dimming . . . . . . . . . . . . . . 6-7
Battery Load Management . . . . 6-8
Battery Power Protection . . . . . . 6-8
Exterior Lighting
Exterior Lamp Controls
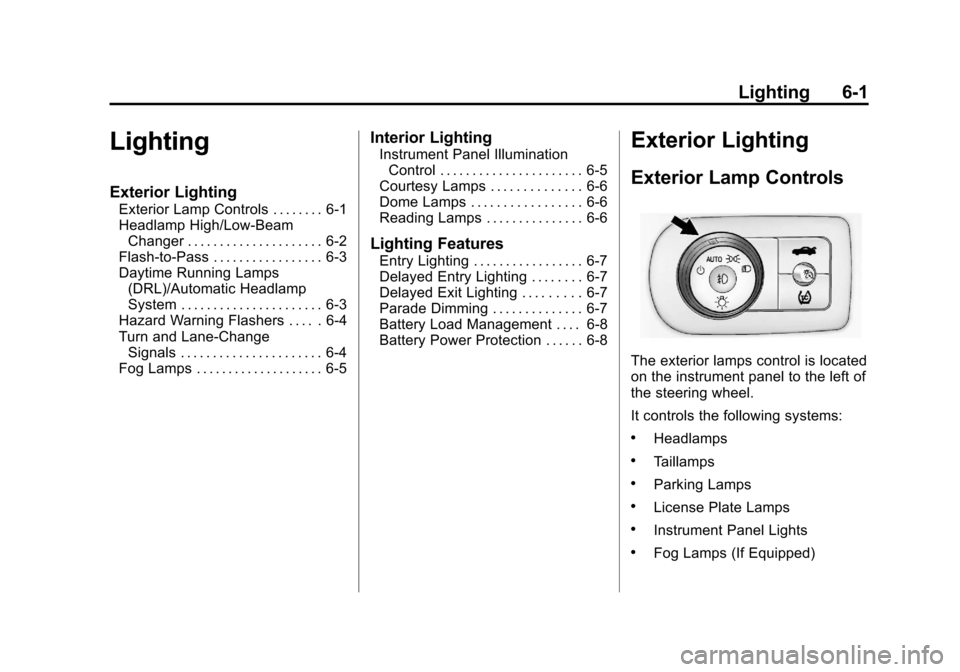
The exterior lamps control is located
on the instrument panel to the left of
the steering wheel.
It controls the following systems:
.Headlamps
.Taillamps
.Parking Lamps
.License Plate Lamps
.Instrument Panel Lights
.Fog Lamps (If Equipped)
Page 152 of 374
Black plate (2,1)Chevrolet Impala Owner Manual - 2012
6-2 Lighting
The exterior lamps control has four
positions:
O(Off):Turns off the automatic
headlamps and Daytime Running
Lamps (DRL). Turning the headlamp
control to the off position again will
turn the automatic headlamps or
DRL back on. For vehicles first sold
in Canada, the off position only
works when the vehicle is shifted
into the P (Park) position.
AUTO (Automatic): Automatically
turns on the headlamps at normal
brightness, together with the
following:
.Parking Lamps
.Instrument Panel Lights
.Taillamps
.License Plate Lamps
;(Parking Lamps): Turns on
the parking lamps together with the
following:
.Instrument Panel Lights
.Taillamps
.License Plate Lamps
2(Headlamps): Turns on the
headlamps together with the
following lamps listed below. When
the headlamps are turned on while
the vehicle is on, the headlamps will
turn off automatically 10 minutes
after the ignition is turned off. When
the headlamps are turned on while
the vehicle is off, the headlamps will
stay on for 10 minutes before
automatically turning off to prevent
the battery from being drained. Turn
the headlamp control to off and then
back to the headlamp on position to
make the headlamps stay on for an
additional 10 minutes.
.Parking Lamps
.Taillamps
.License Plate Lamps
.Instrument Panel Lights
#(Fog Lamps) (If Equipped):
Turns on the fog lamps.
See Fog Lamps on page 6‑5.
Headlamp High/
Low-Beam Changer
To change the headlamps from low
beam to high beam, push the turn
signal/multifunction lever away
from you.
This instrument panel cluster light
3comes on if the high‐beam
lamps are turned on while the
ignition is in ON/RUN.
To change the headlamps from high
beam to low beam, pull the turn
signal lever toward you.
Page 153 of 374

Black plate (3,1)Chevrolet Impala Owner Manual - 2012
Lighting 6-3
Flash-to-Pass
This feature is used to signal to the
vehicle ahead that you want
to pass.
If the headlamps are off or in the
low‐beam position, pull the turn
signal lever toward you to
momentarily switch to high beams.
Release the lever to turn the
high-beam headlamps off.
Daytime Running Lamps
(DRL)/Automatic
Headlamp System
Daytime Running Lamps (DRL) can
make it easier for others to see the
front of your vehicle during the day.
Fully functional daytime running
lamps are required on all vehicles
first sold in Canada.The DRL system makes the
low-beam headlamps come on at a
reduced brightness when the
following conditions are met:
.The ignition is in the ON/RUN
position.
.The exterior lamps control is
in AUTO.
.The engine is running.
When the DRL are on, the regular
headlamps, taillamps, sidemarker,
and other lamps are not on. The
instrument panel and cluster are
also not on.
The headlamps automatically
change from DRL to the regular
headlamps depending on the
darkness of the surroundings. The
other lamps that come on with the
headlamps will also come on. When it is bright enough outside,
the headlamps go off and the DRL
come on.
The regular headlamp system
should be turned on when needed.
Do not cover the light sensor on top
of the instrument panel because it
works with the DRL.
Page 158 of 374

Black plate (8,1)Chevrolet Impala Owner Manual - 2012
6-8 Lighting
Battery Load
Management
The vehicle has Electric Power
Management (EPM) that estimates
the battery's temperature and state
of charge. It then adjusts the voltage
for best performance and extended
life of the battery.
When the battery's state of charge
is low, the voltage is raised slightly
to quickly bring the charge back up.
When the state of charge is high,
the voltage is lowered slightly to
prevent overcharging. If the vehicle
has a voltmeter gauge or a voltage
display on the Driver Information
Center (DIC), you may see the
voltage move up or down. This is
normal. If there is a problem, an
alert will be displayed.
The battery can be discharged at
idle if the electrical loads are very
high. This is true for all vehicles.
This is because the generator
(alternator) may not be spinning fastenough at idle to produce all the
power that is needed for very high
electrical loads.
A high electrical load occurs when
several of the following are on, such
as: headlamps, high beams, fog
lamps, rear window defogger,
climate control fan at high speed,
heated seats, engine cooling fans,
trailer loads, and loads plugged into
accessory power outlets.
EPM works to prevent excessive
discharge of the battery. It does this
by balancing the generator's output
and the vehicle's electrical needs.
It can increase engine idle speed to
generate more power, whenever
needed. It can temporarily reduce
the power demands of some
accessories.
Normally, these actions occur in
steps or levels, without being
noticeable. In rare cases at the
highest levels of corrective action,
this action may be noticeable to the
driver. If so, a Driver Information
Center (DIC) message might bedisplayed, such as BATTERY
SAVER ACTIVE. If this messages
displays, it is recommended that the
driver reduce the electrical loads as
much as possible. See
Driver
Information Center (DIC) on
page 5‑24.
Battery Power Protection
This feature helps prevent the
battery from being drained, if the
interior courtesy lamps, reading/map
lamps, visor vanity lamps, or trunk
lamp are accidentally left on. If any
of these lamps are left on, they
automatically turn off after
10 minutes, if the ignition is off. The
lamps will not come back on again
until one of the following occurs:
.The ignition is turned on.
.The exterior lamps control is
turned off, then on again.
The headlamps will time out after
10 minutes, if they are manually
turned on with the ignition on or off.
Page 267 of 374
Black plate (25,1)Chevrolet Impala Owner Manual - 2012
Vehicle Care 10-25
Headlamp Aiming
Headlamp aim has been preset at
the factory and should need no
further adjustment.
However, if the vehicle is damaged
in a crash, the headlamp aim may
be affected. Aim adjustment to the
low-beam headlamps may be
necessary if oncoming drivers flash
their high-beam headlamps at you
(for vertical aim).
If the headlamps need to be
re-aimed, it is recommended that
the vehicle be taken to the dealer
for service.
Bulb Replacement
For the proper type of replacement
bulbs, seeReplacement Bulbs on
page 10‑29.
For any bulb‐changing procedure
not listed in this section, contact
your dealer.
Halogen Bulbs
{WARNING
Halogen bulbs have pressurized
gas inside and can burst if you
drop or scratch the bulb. You or
others could be injured. Be sure
to read and follow the instructions
on the bulb package.
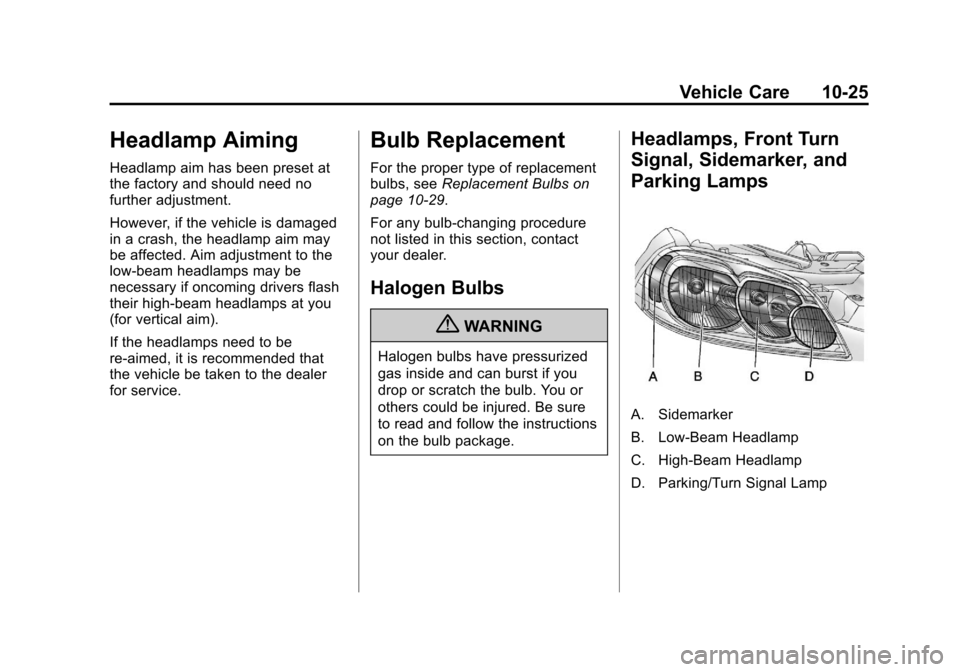
Headlamps, Front Turn
Signal, Sidemarker, and
Parking Lamps
A. Sidemarker
B. Low-Beam Headlamp
C. High-Beam Headlamp
D. Parking/Turn Signal Lamp
Page 271 of 374
Black plate (29,1)Chevrolet Impala Owner Manual - 2012
Vehicle Care 10-29
License Plate Lamp
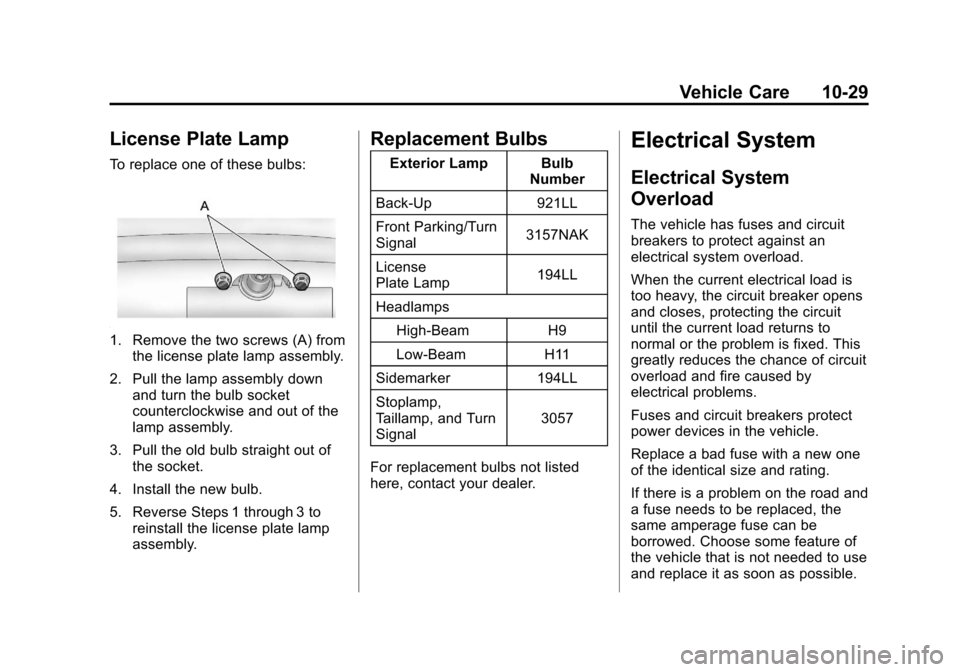
To replace one of these bulbs:
1. Remove the two screws (A) fromthe license plate lamp assembly.
2. Pull the lamp assembly down and turn the bulb socket
counterclockwise and out of the
lamp assembly.
3. Pull the old bulb straight out of the socket.
4. Install the new bulb.
5. Reverse Steps 1 through 3 to reinstall the license plate lamp
assembly.
Replacement Bulbs
Exterior Lamp Bulb Number
Back-Up 921LL
Front Parking/Turn
Signal 3157NAK
License
Plate Lamp 194LL
Headlamps High-Beam H9
Low-Beam H11
Sidemarker 194LL
Stoplamp,
Taillamp, and Turn
Signal 3057
For replacement bulbs not listed
here, contact your dealer.
Electrical System
Electrical System
Overload
The vehicle has fuses and circuit
breakers to protect against an
electrical system overload.
When the current electrical load is
too heavy, the circuit breaker opens
and closes, protecting the circuit
until the current load returns to
normal or the problem is fixed. This
greatly reduces the chance of circuit
overload and fire caused by
electrical problems.
Fuses and circuit breakers protect
power devices in the vehicle.
Replace a bad fuse with a new one
of the identical size and rating.
If there is a problem on the road and
a fuse needs to be replaced, the
same amperage fuse can be
borrowed. Choose some feature of
the vehicle that is not needed to use
and replace it as soon as possible.