2012 CHEVROLET IMPALA four wheel drive
[x] Cancel search: four wheel drivePage 165 of 374

Black plate (7,1)Chevrolet Impala Owner Manual - 2012
Infotainment System 7-7
.To scan preset stations in the
selected band, press and hold
©SEEK for four seconds until a
double beep sounds. The radio
goes to a stored preset, plays for
a few seconds, then goes to
the next stored preset. Press
©SEEK again to stop scanning
preset stations.
¨SEEK: Press to seek or scan
stations with a strong signal in the
selected band.
.To seek stations, press and
release
¨SEEK to go to the
next station and stay there.
.To scan stations, press and hold¨SEEK for a few seconds until
the radio beeps once. The radio
goes to a station, plays for a
few seconds, then goes to the
next station. Press
¨SEEK
again to stop scanning.
.To scan preset stations in the
selected band, press and hold
¨SEEK for four seconds until a
double beep sounds. The radio
goes to a stored preset, plays
for a few seconds, then goes
to the next stored preset. Press
¨SEEK again to stop scanning
preset stations.
Storing Radio Stations
Drivers are encouraged to store
radio station while the vehicle is
parked. See Defensive Driving on
page 9‑3. Tune to stored radio
stations using the presets, favorites
button, and steering wheel controls,
if the vehicle has this feature.
Radios that have a FAV button store
radio stations as favorites, up to
36 stations can be programmed as
favorites using the 6 softkeys below
the radio station frequency tabs and
by using the FAV button. Press the
FAV button to go through up to
6 pages of favorites, each having
6 favorite stations available per page. Each page of favorites can
contain any combination of AM, FM,
or XM, if equipped, stations.
Radios that do not have a FAV
button store radio stations as
presets, up to 18 stations (6 FM1,
6 FM2, and 6 AM), can be
programmed on the 6 numbered
pushbuttons.
Storing a Radio Station as a
Preset, Radio with CD (Base)
Radios that have numbered
pushbuttons store radio stations as
presets.
Up to 18 stations (6 FM1, 6 FM2,
and 6 AM), can be programmed on
the six numbered buttons.
To store preset stations:
1. Tune to a radio station.
2. Press and hold one of the
6 numbered pushbuttons for
3 seconds until a beep sounds.
3. Repeat Steps 1 and 2 to store additional radio stations.
Page 220 of 374

Black plate (28,1)Chevrolet Impala Owner Manual - 2012
9-28 Driving and Operating
Downshifting the transmission in
slippery road conditions could result
in skidding, see "Skidding" under
Loss of Control on page 9‑5.
L (Low):This position gives you
access to gear ranges. This
provides more engine braking but
lower fuel economy than D (Drive).
You can use it on very steep hills,
or in deep snow or mud. See the
following text on Manual Mode.Manual Mode
Electronic Range Select
(ERS) Mode
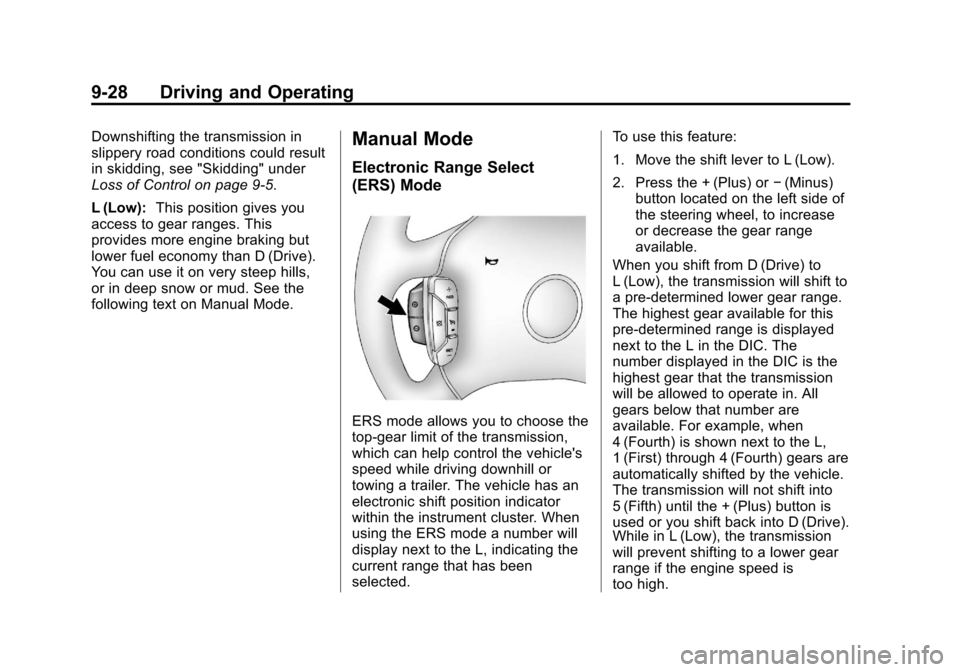
ERS mode allows you to choose the
top-gear limit of the transmission,
which can help control the vehicle's
speed while driving downhill or
towing a trailer. The vehicle has an
electronic shift position indicator
within the instrument cluster. When
using the ERS mode a number will
display next to the L, indicating the
current range that has been
selected. To use this feature:
1. Move the shift lever to L (Low).
2. Press the + (Plus) or
−(Minus)
button located on the left side of
the steering wheel, to increase
or decrease the gear range
available.
When you shift from D (Drive) to
L (Low), the transmission will shift to
a pre-determined lower gear range.
The highest gear available for this
pre-determined range is displayed
next to the L in the DIC. The
number displayed in the DIC is the
highest gear that the transmission
will be allowed to operate in. All
gears below that number are
available. For example, when
4 (Fourth) is shown next to the L,
1 (First) through 4 (Fourth) gears are
automatically shifted by the vehicle.
The transmission will not shift into
5 (Fifth) until the + (Plus) button is
used or you shift back into D (Drive).
While in L (Low), the transmission
will prevent shifting to a lower gear
range if the engine speed is
too high.
Page 288 of 374

Black plate (46,1)Chevrolet Impala Owner Manual - 2012
10-46 Vehicle Care
TPMS Sensor Matching
Process
Each TPMS sensor has a unique
identification code. The identification
code needs to be matched to a new
tire/wheel position after rotating the
vehicle’s tires or replacing one or
more of the TPMS sensors. Also,
the TPMS sensor matching process
should be performed after replacing
a spare tire with a road tire
containing the TPMS sensor. The
malfunction light and the DIC
message should go off at the next
ignition cycle. The sensors are
matched to the tire/wheel positions,
using a TPMS relearn tool, in the
following order: driver side front tire,
passenger side front tire, passenger
side rear tire, and driver side rear.
See your dealer for service or to
purchase a relearn tool.
There are two minutes to match the
first tire/wheel position, and
five minutes overall to match all four
tire/wheel positions. If it takes
longer, the matching process stops
and must be restarted.The TPMS sensor matching
process is:
1. Set the parking brake.
2. Turn the ignition to ON/RUN with
the engine off.
3. Press the Remote Keyless Entry (RKE) transmitter's Qand "
buttons at the same time for
approximately five seconds. The
horn sounds twice to signal the
receiver is in relearn mode and
the TIRE LEARNING ACTIVE
message displays on the DIC
screen.
4. Start with the driver side front tire.
5. Place the relearn tool against the tire sidewall, near the valve
stem. Then press the button to
activate the TPMS sensor.
A horn chirp confirms that the
sensor identification code has
been matched to this tire and
wheel position. 6. Proceed to the passenger side
front tire, and repeat the
procedure in Step 5.
7. Proceed to the passenger side rear tire, and repeat the
procedure in Step 5.
8. Proceed to the driver side rear tire, and repeat the procedure in
Step 5. The horn sounds two
times to indicate the sensor
identification code has been
matched to the driver side rear
tire, and the TPMS sensor
matching process is no longer
active. The TIRE LEARNING
ACTIVE message on the DIC
display screen goes off.
9. Turn the ignition to LOCK/OFF.
10. Set all four tires to the recommended air pressure
level as indicated on the Tire
and Loading Information label.
Page 310 of 374

Black plate (68,1)Chevrolet Impala Owner Manual - 2012
10-68 Vehicle Care
Here are some important things to
consider before recreational vehicle
towing:
.What is the towing capacity
of the towing vehicle? Be
sure to read the tow vehicle
manufacturer's
recommendations.
.What is the distance that will be
travelled? Some vehicles have
restrictions on how far and how
long they can tow.
.Is the proper towing equipment
going to be used? See your
dealer or trailering professional
for additional advice and
equipment recommendations.
.Is the vehicle ready to be
towed? Just as preparing the
vehicle for a long trip, make sure
the vehicle is prepared to be
towed.
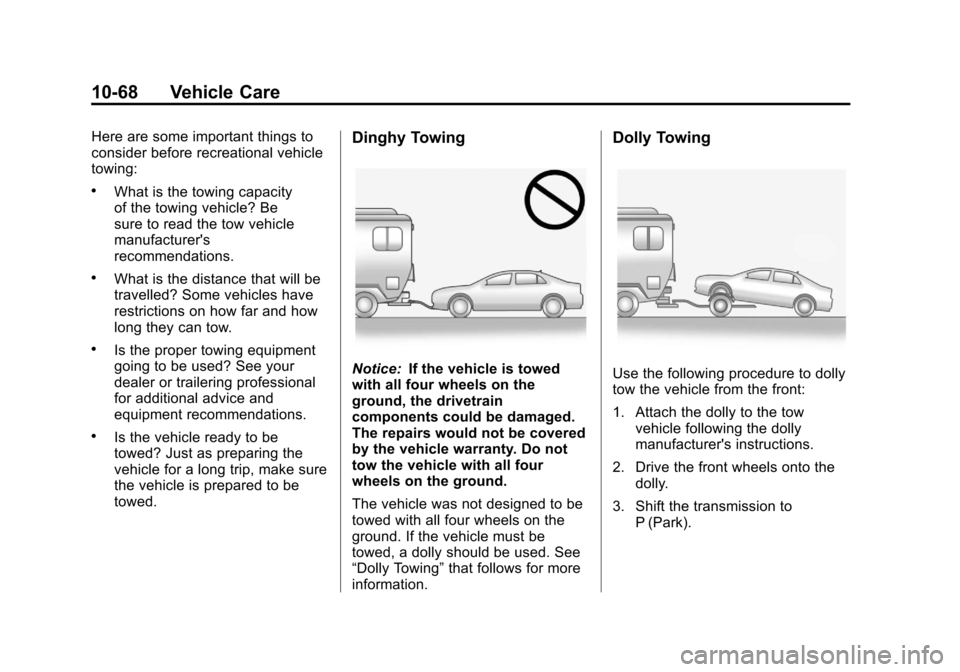
Dinghy Towing
Notice:If the vehicle is towed
with all four wheels on the
ground, the drivetrain
components could be damaged.
The repairs would not be covered
by the vehicle warranty. Do not
tow the vehicle with all four
wheels on the ground.
The vehicle was not designed to be
towed with all four wheels on the
ground. If the vehicle must be
towed, a dolly should be used. See
“Dolly Towing” that follows for more
information.
Dolly Towing
Use the following procedure to dolly
tow the vehicle from the front:
1. Attach the dolly to the tow vehicle following the dolly
manufacturer's instructions.
2. Drive the front wheels onto the dolly.
3. Shift the transmission to P (Park).