2012 CHEVROLET EQUINOX light
[x] Cancel search: lightPage 310 of 428
Black plate (30,1)Chevrolet Equinox Owner Manual - 2012
10-30 Vehicle Care
Headlamp Aiming
The headlamp aiming system has
been preset at the factory.
If the vehicle is damaged in an
accident, the aim of the headlamps
may be affected and adjustment
may be necessary.
It is recommended that a dealer
adjust the headlamps. To re-aim the
headlamps yourself, use the
following procedure.
The vehicle should be properly
prepared as follows. The vehicle:
.Should be placed so the
headlamps are 7.6 m (25 ft) from
a light colored wall.
.Must have all four tires on a
level surface which is level all
the way to the wall.
.Should be placed so it is
perpendicular to the wall or other
flat surface.
.Should not have any snow, ice,
or mud on it.
.Should be fully assembled and
all other work stopped while
headlamp aiming is being
performed.
.Should be normally loaded with
a full tank of fuel and one person
or 75 kg (160 lbs) sitting on the
driver's seat.
.Tires should be properly inflated.
Headlamp aiming is done with the
vehicle's low-beam headlamps. The
high-beam headlamps will be
correctly aimed if the low-beam
headlamps are aimed properly. To adjust the vertical aim, do the
following:
1. Open the hood. See
Hood on
page 10‑5 for more information.
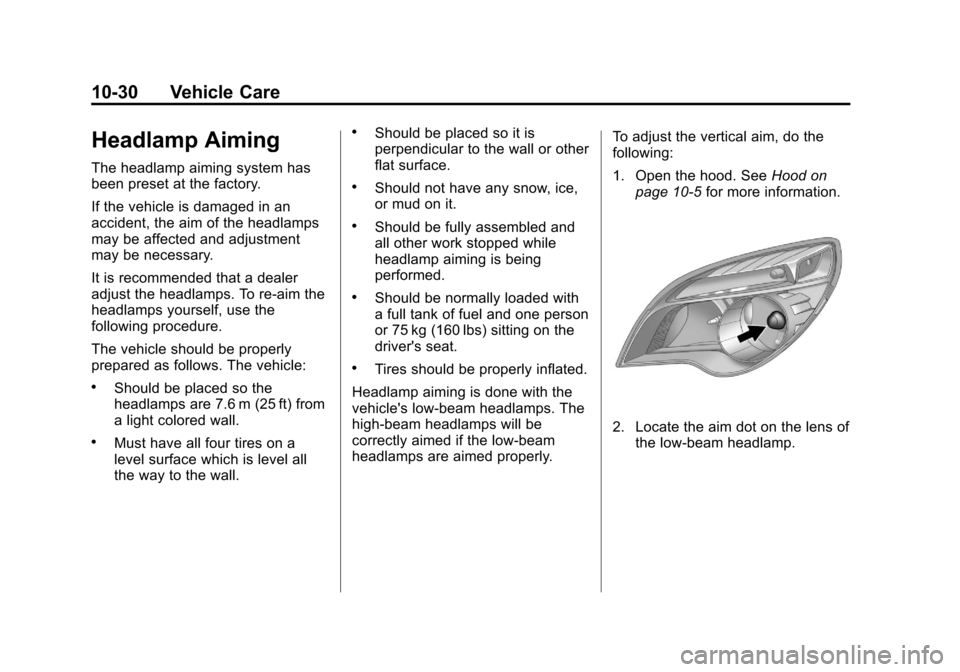
2. Locate the aim dot on the lens of
the low‐beam headlamp.
Page 311 of 428
Black plate (31,1)Chevrolet Equinox Owner Manual - 2012
Vehicle Care 10-31
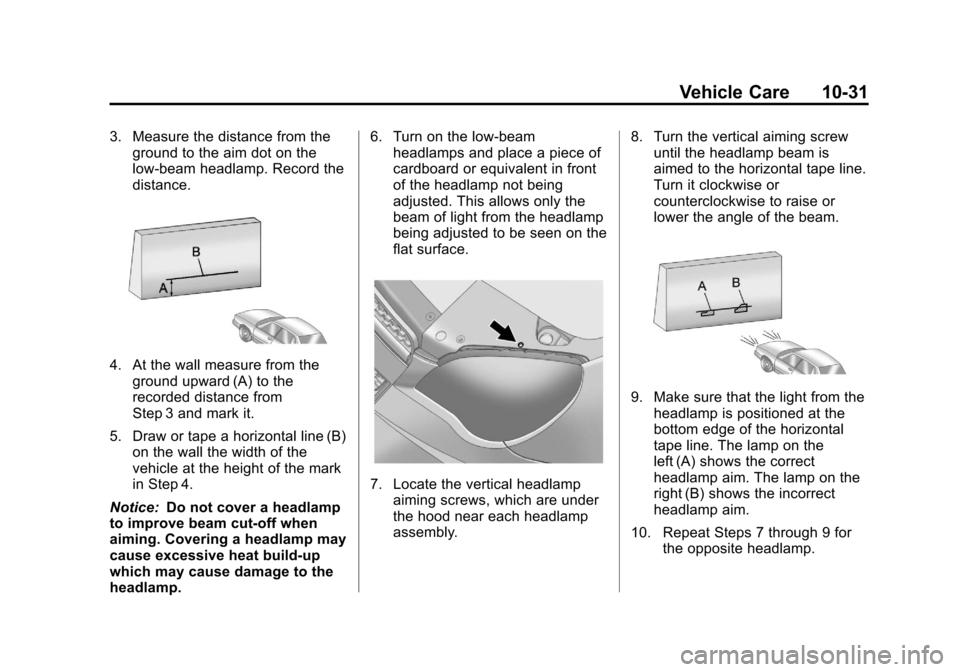
3. Measure the distance from theground to the aim dot on the
low‐beam headlamp. Record the
distance.
4. At the wall measure from the
ground upward (A) to the
recorded distance from
Step 3 and mark it.
5. Draw or tape a horizontal line (B) on the wall the width of the
vehicle at the height of the mark
in Step 4.
Notice: Do not cover a headlamp
to improve beam cut-off when
aiming. Covering a headlamp may
cause excessive heat build-up
which may cause damage to the
headlamp. 6. Turn on the low-beam
headlamps and place a piece of
cardboard or equivalent in front
of the headlamp not being
adjusted. This allows only the
beam of light from the headlamp
being adjusted to be seen on the
flat surface.
7. Locate the vertical headlamp
aiming screws, which are under
the hood near each headlamp
assembly. 8. Turn the vertical aiming screw
until the headlamp beam is
aimed to the horizontal tape line.
Turn it clockwise or
counterclockwise to raise or
lower the angle of the beam.
9. Make sure that the light from theheadlamp is positioned at the
bottom edge of the horizontal
tape line. The lamp on the
left (A) shows the correct
headlamp aim. The lamp on the
right (B) shows the incorrect
headlamp aim.
10. Repeat Steps 7 through 9 for the opposite headlamp.
Page 318 of 428
Black plate (38,1)Chevrolet Equinox Owner Manual - 2012
10-38 Vehicle Care
J-CaseFuses Usage
6 Power Seat –Left
7 Instrument Panel
Fuse Block 1
8 Rear Defogger
9 Starter
10 AIR Pump Motor
11 Instrument Panel
Fuse Block 2
12 Sunroof
13 Antilock Brake
System Pump
14 Instrument Panel
Fuse Block 3
15 Power
Windows
–Left
16 Antilock Brake
System Module Mini Fuses Usage
17 Transmission
Control Module
Battery
18 Trailer Parking Light
19 AIR Pump Solenoid
20 Engine Control
Module Battery
21 Canister Vent
22 Trailer Left Side
(If Equipped)
23 Lift Gate Module
24 Power Lumbar
25 Trailer Right Side
(If Equipped)
26 Rear Accessory
Power Outlet
27 Memory Mirror
Module
28 Regulated Voltage
Control Battery
Sensor Mini Fuses Usage
29 Front Wiper
30 Rear Wiper
31 Air Conditioning
Compressor
32 Rear Latch
33 Heated Mirrors
34 Horn
35 Right High‐Beam
Headlamp
36 Left High‐Beam
Headlamp
37 Ignition Even Coil
38 Ignition Odd Coil
39 Windshield Washer
40 Front Fog Lamps
41 Post Catalytic
Converter Oxygen
Sensor
42 Engine Control
Module
Page 328 of 428

Black plate (48,1)Chevrolet Equinox Owner Manual - 2012
10-48 Vehicle Care
GAWR RR:Gross Axle Weight
Rating for the rear axle. See
Vehicle Load Limits on
page 9‑16.
Intended Outboard Sidewall
:
The side of an asymmetrical tire,
that must always face outward
when mounted on a vehicle.
Kilopascal (kPa)
:The metric
unit for air pressure.
Light Truck (LT‐Metric) Tire
:A
tire used on light duty trucks and
some multipurpose passenger
vehicles.
Load Index
:An assigned
number ranging from 1 to 279
that corresponds to the load
carrying capacity of a tire. Maximum Inflation Pressure
:
The maximum air pressure to
which a cold tire can be inflated.
The maximum air pressure is
molded onto the sidewall.
Maximum Load Rating
:The
load rating for a tire at the
maximum permissible inflation
pressure for that tire.
Maximum Loaded Vehicle
Weight
:The sum of curb
weight, accessory weight,
vehicle capacity weight, and
production options weight.
Normal Occupant Weight
:The
number of occupants a vehicle
is designed to seat multiplied by
68 kg (150 lbs). See Vehicle
Load Limits on page 9‑16.
Occupant Distribution
:
Designated seating positions. Outward Facing Sidewall
:The
side of an asymmetrical tire that
has a particular side that faces
outward when mounted on a
vehicle. The side of the tire that
contains a whitewall, bears
white lettering, or bears
manufacturer, brand, and/or
model name molding that is
higher or deeper than the same
moldings on the other sidewall
of the tire.
Passenger (P-Metric) Tire
:A
tire used on passenger cars and
some light duty trucks and
multipurpose vehicles.
Recommended Inflation
Pressure
:Vehicle
manufacturer's recommended
tire inflation pressure as shown
on the tire placard. See Tire
Pressure on page 10‑50 and
Vehicle Load Limits on
page 9‑16.
Page 333 of 428
Black plate (53,1)Chevrolet Equinox Owner Manual - 2012
Vehicle Care 10-53
Tire Pressure Monitor
Operation
This vehicle may have a Tire
Pressure Monitor System (TPMS).
The TPMS is designed to warn the
driver when a low tire pressure
condition exists. TPMS sensors are
mounted onto each tire and wheel
assembly, excluding the spare tire
and wheel assembly. The TPMS
sensors monitor the air pressure in
the tires and transmits the tire
pressure readings to a receiver
located in the vehicle.
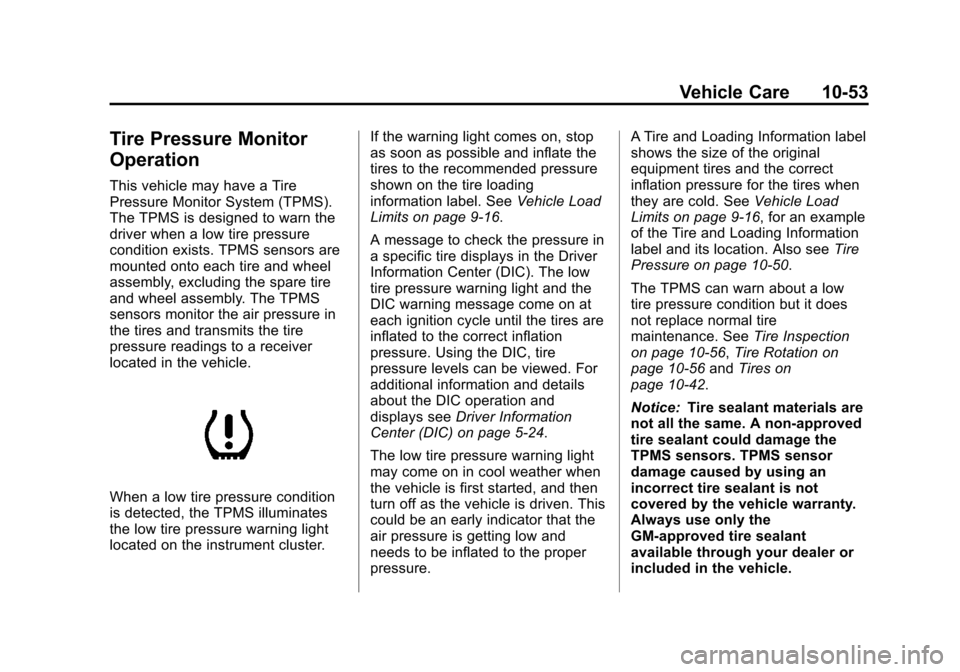
When a low tire pressure condition
is detected, the TPMS illuminates
the low tire pressure warning light
located on the instrument cluster.If the warning light comes on, stop
as soon as possible and inflate the
tires to the recommended pressure
shown on the tire loading
information label. See
Vehicle Load
Limits on page 9‑16.
A message to check the pressure in
a specific tire displays in the Driver
Information Center (DIC). The low
tire pressure warning light and the
DIC warning message come on at
each ignition cycle until the tires are
inflated to the correct inflation
pressure. Using the DIC, tire
pressure levels can be viewed. For
additional information and details
about the DIC operation and
displays see Driver Information
Center (DIC) on page 5‑24.
The low tire pressure warning light
may come on in cool weather when
the vehicle is first started, and then
turn off as the vehicle is driven. This
could be an early indicator that the
air pressure is getting low and
needs to be inflated to the proper
pressure. A Tire and Loading Information label
shows the size of the original
equipment tires and the correct
inflation pressure for the tires when
they are cold. See
Vehicle Load
Limits on page 9‑16, for an example
of the Tire and Loading Information
label and its location. Also see Tire
Pressure on page 10‑50.
The TPMS can warn about a low
tire pressure condition but it does
not replace normal tire
maintenance. See Tire Inspection
on page 10‑56, Tire Rotation on
page 10‑56 andTires on
page 10‑42.
Notice: Tire sealant materials are
not all the same. A non-approved
tire sealant could damage the
TPMS sensors. TPMS sensor
damage caused by using an
incorrect tire sealant is not
covered by the vehicle warranty.
Always use only the
GM-approved tire sealant
available through your dealer or
included in the vehicle.
Page 334 of 428
Black plate (54,1)Chevrolet Equinox Owner Manual - 2012
10-54 Vehicle Care
TPMS Malfunction Light and
Message
The TPMS will not function properly
if one or more of the TPMS sensors
are missing or inoperable. When the
system detects a malfunction, the
low tire pressure warning light
flashes for about one minute and
then stays on for the remainder of
the ignition cycle. A DIC warning
message also displays. The low tire
pressure warning light and DIC
warning message come on at each
ignition cycle until the problem is
corrected. Some of the conditions
that can cause these to come
on are:
.One of the road tires has been
replaced with the spare tire. The
spare tire does not have a
TPMS sensor. The malfunction
light and DIC message should
go off after the road tire is
replaced and the sensor
matching process is performed
successfully. See "TPMS Sensor
Matching Process" later in this
section.
.The TPMS sensor matching
process was not done or not
completed successfully after
rotating the tires. The
malfunction light and the DIC
message should go off after
successfully completing the
sensor matching process. See
"TPMS Sensor Matching
Process" later in this section
.One or more TPMS sensors are
missing or damaged. The DIC
message and the TPMS
malfunction light should go off
when the TPMS sensors are
installed and the sensor
matching process is performed
successfully. See your dealer for
service.
.Replacement tires or wheels do
not match the original equipment
tires or wheels. Tires and wheels
other than those recommended
could prevent the TPMS from
functioning properly. SeeBuying
New Tires on page 10‑58.
.Operating electronic devices or
being near facilities using radio
wave frequencies similar to the
TPMS could cause the TPMS
sensors to malfunction.
If the TPMS is not functioning
properly, it cannot detect or signal a
low tire condition. See your dealer
for service if the TPMS malfunction
light and DIC message comes on
and stays on.
TPMS Sensor Matching
Process
Each TPMS sensor has a unique
identification code. The identification
code needs to be matched to a new
tire/wheel position after rotating the
tires or replacing one or more of the
TPMS sensors. The TPMS sensor
matching process should also be
performed after replacing a spare
tire with a road tire containing the
TPMS sensor. The malfunction light
and the DIC message should go off
at the next ignition cycle. The
sensors are matched to the tire/
wheel positions, using a TPMS
Page 337 of 428
Black plate (57,1)Chevrolet Equinox Owner Manual - 2012
Vehicle Care 10-57
Reset the Tire Pressure Monitor
System. SeeTire Pressure
Monitor Operation on
page 10‑53.
Check that all wheel nuts are
properly tightened. See “Wheel
Nut Torque” underCapacities
and Specifications on
page 12‑2.
{WARNING
Rust or dirt on a wheel, or on the
parts to which it is fastened, can
make wheel nuts become loose
after time. The wheel could come
off and cause an accident. When
changing a wheel, remove any
rust or dirt from places where the
wheel attaches to the vehicle. In
an emergency, a cloth or a paper
towel can be used; however, use
a scraper or wire brush later to
remove all rust or dirt.
Lightly coat the center of the
wheel hub with wheel bearing
grease after a wheel change or
tire rotation to prevent corrosion
or rust build-up. Do not get
grease on the flat wheel
mounting surface or on the
wheel nuts or bolts.
When It Is Time for New
Tires
Factors such as maintenance,
temperatures, driving speeds,
vehicle loading, and road conditions
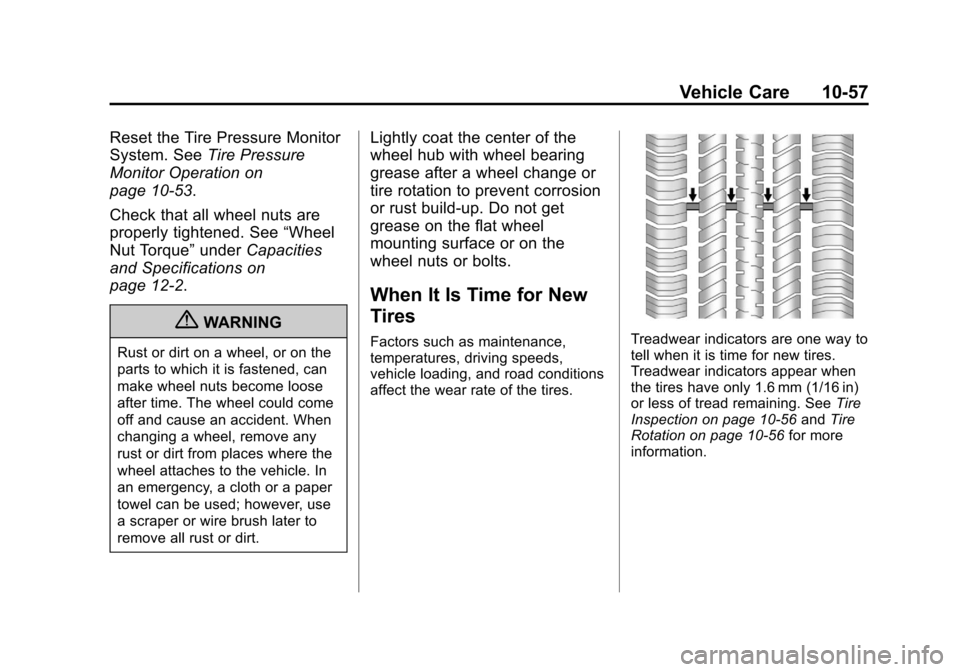
affect the wear rate of the tires.Treadwear indicators are one way to
tell when it is time for new tires.
Treadwear indicators appear when
the tires have only 1.6 mm (1/16 in)
or less of tread remaining. See Tire
Inspection on page 10‑56 andTire
Rotation on page 10‑56 for more
information.
Page 338 of 428
Black plate (58,1)Chevrolet Equinox Owner Manual - 2012
10-58 Vehicle Care
The rubber in tires ages over time.
This also applies for the spare tire,
if the vehicle has one, even if it is
never used. Multiple conditions
including temperatures, loading
conditions, and inflation pressure
maintenance affect how fast aging
takes place. Tires will typically need
to be replaced due to wear before
they may need to be replaced due
to age. Consult the tire
manufacturer for more information
on when tires should be replaced.
Vehicle Storage
Tires age when stored normally
mounted on a parked vehicle. Park
a vehicle that will be stored for at
least a month in a cool, dry, clean
area away from direct sunlight to
slow aging. This area should be free
of grease, gasoline, or other
substances that can deteriorate
rubber.Parking for an extended period can
cause flat spots on the tires that
may result in vibrations while
driving. When storing a vehicle for
at least a month, remove the tires or
raise the vehicle to reduce the
weight from the tires.
Buying New Tires
GM has developed and matched
specific tires for the vehicle. The
original equipment tires installed
were designed to meet General
Motors Tire Performance Criteria
Specification (TPC Spec)
system rating. When
replacement tires are needed,
GM strongly recommends
buying tires with the same TPC
Spec rating.
GM's exclusive TPC Spec
system considers over a dozen
critical specifications that impact
the overall performance of the
vehicle, including brake system
performance, ride and handling,
traction control, and tire
pressure monitoring
performance. GM's TPC Spec
number is molded onto the tire's
sidewall near the tire size. If the
tires have an all‐season tread
design, the TPC Spec number
will be followed by MS for mud
and snow. See
Tire Sidewall
Labeling on page 10‑43 for
additional information.