2012 CHEVROLET CRUZE service indicator
[x] Cancel search: service indicatorPage 218 of 400

Black plate (20,1)Chevrolet Cruze Owner Manual - 2012
9-20 Driving and Operating
ON/RUN/START (Green LED
Light):This mode is for driving and
starting. With the ignition off, and
the brake pedal applied, pressing
the button once will place the
ignition system in ON/RUN/START.
Once engine cranking begins,
release the button. Engine cranking
will continue until the engine
starts. See Starting the Engine on
page 9‑20 for more information. The
ignition will then remain in ON/RUN.
Service Only Mode
This power mode is available for
service and diagnostics, and to
verify the proper operation of the
malfunction indicator lamp as may
be required for emission inspection
purposes. With the vehicle off, and
the brake pedal not applied,
pressing and holding the button for
more than five seconds will place
the vehicle in Service Only Mode.
The instruments and audio systems
will operate as they do in ON/RUN,
but the vehicle will not be able to be driven. The engine will not start in
Service Only Mode. Push the button
again to turn the vehicle off.
Starting the Engine
Place the transmission in the
proper gear.
Notice:
The engine is designed to
work with the electronics in the
vehicle. If you add electrical parts
or accessories, you could change
the way the engine operates.
Before adding electrical
equipment, check with your
dealer. If you do not, the engine
might not perform properly. Any
resulting damage would not be
covered by the vehicle warranty.
Automatic Transmission
Move the shift lever to P (Park) or
N (Neutral). The engine will not start
in any other position. To restart the
vehicle when it is already moving,
use N (Neutral) only. Notice:
Do not try to shift to
P (Park) if the vehicle is moving.
If you do, you could damage the
transmission. Shift to P (Park)
only when the vehicle is stopped.
Manual Transmission
The shift lever should be in Neutral
and the parking brake engaged.
Hold the clutch pedal down to the
floor and start the engine. The
vehicle will not start if the clutch
pedal is not all the way down.
Starting Procedure (Key Access)
1. With your foot off the accelerator pedal, turn the ignition key to
START. When the engine starts,
let go of the key. The idle speed
will go down as the engine
warms. Do not race the engine
immediately after starting it.
Allow the oil to warm up and
lubricate all moving parts.
The vehicle has a
Computer-Controlled Cranking
System. This feature assists in
starting the engine and protects
Page 244 of 400
Black plate (46,1)Chevrolet Cruze Owner Manual - 2012
9-46 Driving and Operating
Gasolines containing oxygenates,
such as ethers and ethanol, and
reformulated gasolines might be
available in your area. We
recommend that you use these
gasolines, if they comply with the
specifications described earlier.
However, E85 (85% ethanol) and
other fuels containing more than
15% ethanol must not be used in
vehicles that were not designed
for those fuels.
Notice:This vehicle was not
designed for fuel that contains
methanol. Do not use fuel
containing methanol. It can
corrode metal parts in the fuel
system and also damage plastic
and rubber parts. That damage
would not be covered under the
vehicle warranty.
Some gasolines that are
not reformulated for low
emissions can contain an
octane-enhancing additive called
methylcyclopentadienyl manganese
tricarbonyl (MMT); ask the attendant
where you buy gasoline whether the fuel contains MMT. We recommend
against the use of such gasolines.
Fuels containing MMT can reduce
spark plug life and affect emission
control system performance. The
malfunction indicator lamp might
turn on. If this occurs, return to your
dealer for service.
Filling the Tank
{WARNING
Fuel vapor burns violently and a
fuel fire can cause bad injuries.
To help avoid injuries to you and
others, read and follow all the
instructions on the fuel pump
island. Turn off the engine when
refueling. Do not smoke near fuel
or when refueling the vehicle.
Do not use cellular phones.
Keep sparks, flames, and
smoking materials away from fuel.
Do not leave the fuel pump
unattended when refueling the
(Continued)
WARNING (Continued)
vehicle. This is against the law in
some places. Do not re-enter the
vehicle while pumping fuel. Keep
children away from the fuel pump;
never let children pump fuel.
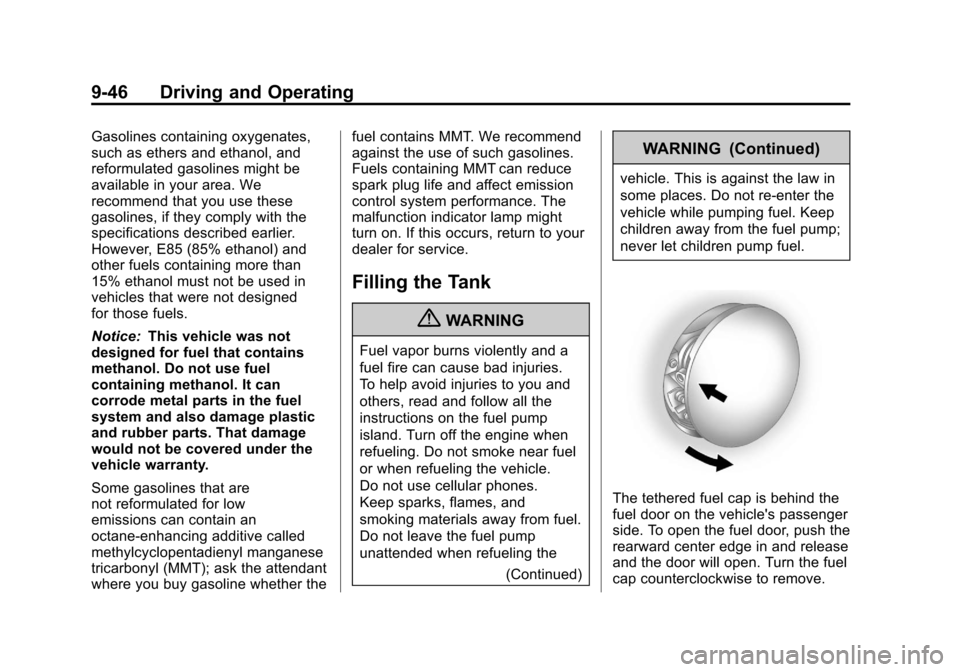
The tethered fuel cap is behind the
fuel door on the vehicle's passenger
side. To open the fuel door, push the
rearward center edge in and release
and the door will open. Turn the fuel
cap counterclockwise to remove.
Page 273 of 400
Black plate (19,1)Chevrolet Cruze Owner Manual - 2012
Vehicle Care 10-19
WARNING (Continued)
and it will burn if the engine parts
are hot enough. Do not spill
coolant on a hot engine.
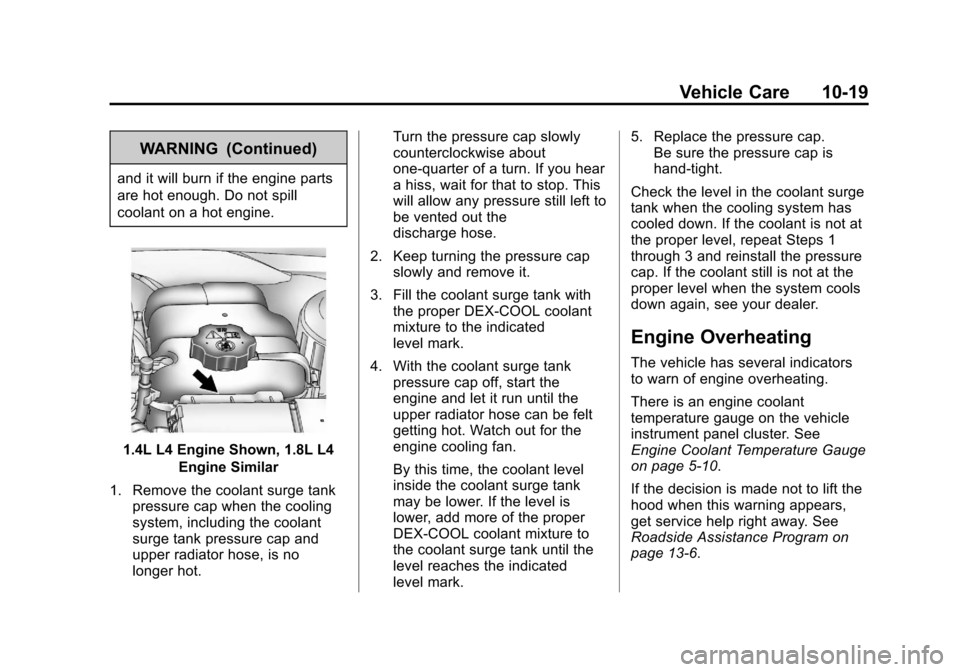
1.4L L4 Engine Shown, 1.8L L4Engine Similar
1. Remove the coolant surge tank pressure cap when the cooling
system, including the coolant
surge tank pressure cap and
upper radiator hose, is no
longer hot. Turn the pressure cap slowly
counterclockwise about
one-quarter of a turn. If you hear
a hiss, wait for that to stop. This
will allow any pressure still left to
be vented out the
discharge hose.
2. Keep turning the pressure cap slowly and remove it.
3. Fill the coolant surge tank with the proper DEX-COOL coolant
mixture to the indicated
level mark.
4. With the coolant surge tank pressure cap off, start the
engine and let it run until the
upper radiator hose can be felt
getting hot. Watch out for the
engine cooling fan.
By this time, the coolant level
inside the coolant surge tank
may be lower. If the level is
lower, add more of the proper
DEX-COOL coolant mixture to
the coolant surge tank until the
level reaches the indicated
level mark. 5. Replace the pressure cap.
Be sure the pressure cap is
hand-tight.
Check the level in the coolant surge
tank when the cooling system has
cooled down. If the coolant is not at
the proper level, repeat Steps 1
through 3 and reinstall the pressure
cap. If the coolant still is not at the
proper level when the system cools
down again, see your dealer.
Engine Overheating
The vehicle has several indicators
to warn of engine overheating.
There is an engine coolant
temperature gauge on the vehicle
instrument panel cluster. See
Engine Coolant Temperature Gauge
on page 5‑10.
If the decision is made not to lift the
hood when this warning appears,
get service help right away. See
Roadside Assistance Program on
page 13‑6.
Page 276 of 400
Black plate (22,1)Chevrolet Cruze Owner Manual - 2012
10-22 Vehicle Care
Washer Fluid
What to Use
When windshield washer fluid is
needed, be sure to read the
manufacturer's instructions before
use. If operating the vehicle in an
area where the temperature may fall
below freezing, use a fluid that has
sufficient protection against
freezing.
Adding Washer Fluid
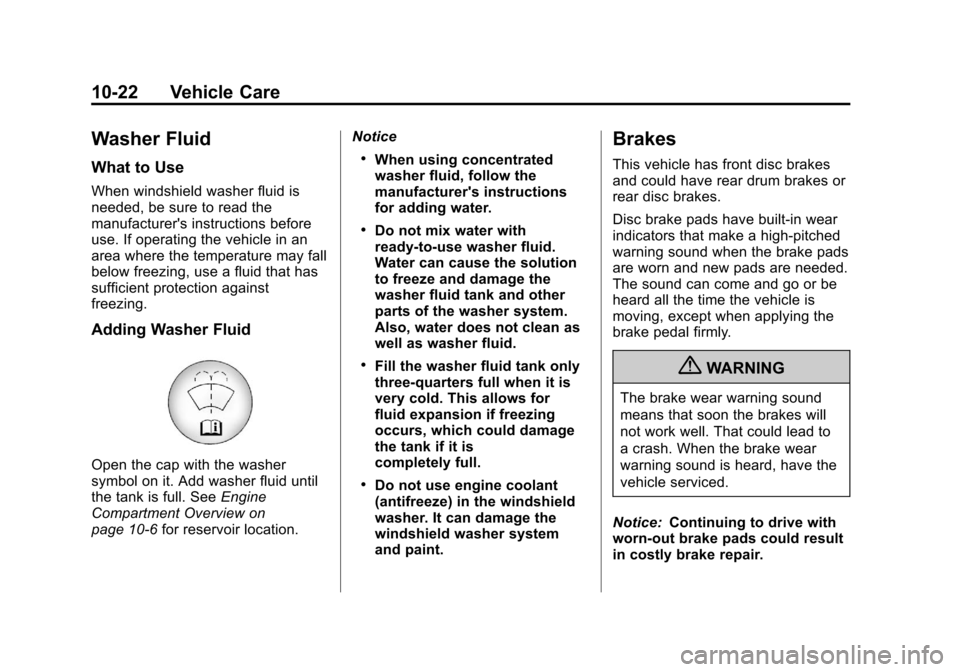
Open the cap with the washer
symbol on it. Add washer fluid until
the tank is full. SeeEngine
Compartment Overview on
page 10‑6 for reservoir location. Notice
.When using concentrated
washer fluid, follow the
manufacturer's instructions
for adding water.
.Do not mix water with
ready-to-use washer fluid.
Water can cause the solution
to freeze and damage the
washer fluid tank and other
parts of the washer system.
Also, water does not clean as
well as washer fluid.
.Fill the washer fluid tank only
three-quarters full when it is
very cold. This allows for
fluid expansion if freezing
occurs, which could damage
the tank if it is
completely full.
.Do not use engine coolant
(antifreeze) in the windshield
washer. It can damage the
windshield washer system
and paint.
Brakes
This vehicle has front disc brakes
and could have rear drum brakes or
rear disc brakes.
Disc brake pads have built-in wear
indicators that make a high-pitched
warning sound when the brake pads
are worn and new pads are needed.
The sound can come and go or be
heard all the time the vehicle is
moving, except when applying the
brake pedal firmly.
{WARNING
The brake wear warning sound
means that soon the brakes will
not work well. That could lead to
a crash. When the brake wear
warning sound is heard, have the
vehicle serviced.
Notice: Continuing to drive with
worn-out brake pads could result
in costly brake repair.
Page 277 of 400
Black plate (23,1)Chevrolet Cruze Owner Manual - 2012
Vehicle Care 10-23
Some driving conditions or climates
can cause a brake squeal when the
brakes are first applied or lightly
applied. This does not mean
something is wrong with the brakes.
Properly torqued wheel nuts are
necessary to help prevent brake
pulsation. When tires are rotated,
inspect brake pads for wear and
evenly tighten wheel nuts in the
proper sequence to torque
specifications inCapacities and
Specifications on page 12‑2.
If the vehicle has rear drum brakes,
they do not have wear indicators,
but if a rear brake rubbing noise is
heard, have the rear brake linings
inspected immediately. Rear brake
drums should be removed and
inspected each time the tires are
removed for rotation or changing.
Drum brakes have an inspection
hole to inspect lining wear during
scheduled maintenance. When the
front brake pads are replaced, have
the rear brakes inspected, too. Brake linings should always be
replaced as complete axle sets.
Brake Pedal Travel
See your dealer if the brake pedal
does not return to normal height,
or if there is a rapid increase in
pedal travel. This could be a sign
that brake service might be
required.
Brake Adjustment
Every time the brakes are applied,
with or without the vehicle moving,
the brakes adjust for wear.
Replacing Brake System Parts
The braking system on a vehicle is
complex. Its many parts have to be
of top quality and work well together
if the vehicle is to have really good
braking. The vehicle was designed
and tested with top-quality brake
parts. When parts of the braking
system are replaced, be sure to get
new, approved replacement parts.
If this is not done, the brakes might
not work properly.For example, installing disc brake
pads that are wrong for the vehicle,
can change the balance between
the front and rear brakes
—for the
worse. The braking performance
expected can change in many other
ways if the wrong replacement
brake parts are installed.
Brake Fluid
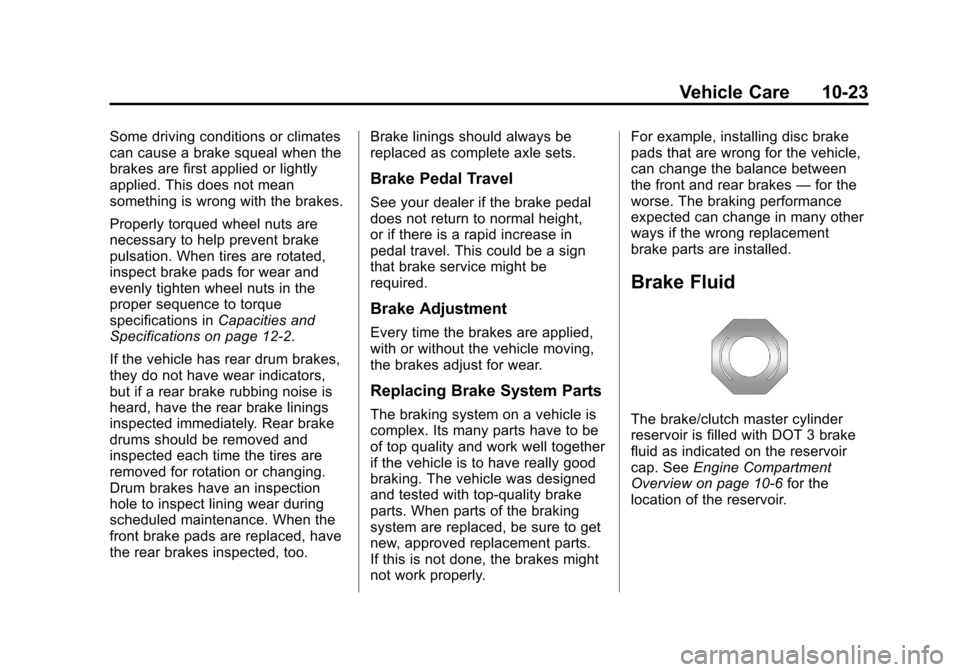
The brake/clutch master cylinder
reservoir is filled with DOT 3 brake
fluid as indicated on the reservoir
cap. See Engine Compartment
Overview on page 10‑6 for the
location of the reservoir.
Page 359 of 400
Black plate (11,1)Chevrolet Cruze Owner Manual - 2012
Service and Maintenance 11-11
Hoses
Hoses transport fluids and should
be regularly inspected to ensure
that there are no cracks or leaks.
With a multi‐point inspection, your
dealer can inspect the hoses and
advise if replacement is needed.
Lamps
Properly working headlamps,
taillamps, and brake lamps are
important to see and be seen on
the road.
.Signs that the headlamps need
attention include dimming, failure
to light, cracking, or damage.
The brake lamps need to be
checked periodically to ensure
that they light when braking.
.With a multi‐point inspection,
your dealer can check the lamps
and note any concerns.Shocks and Struts
Shocks and struts help aid in control
for a smoother ride.
.Signs of wear may include
steering wheel vibration, bounce/
sway while braking, longer
stopping distance, or uneven
tire wear.
.As part of the multi‐point
inspection, trained dealer
technicians can visually inspect
the shocks and struts for signs
of leaking, blown seals,
or damage, and can advise
when service is needed.
Tires
Tires need to be properly inflated,
rotated, and balanced. Maintaining
the tires can save money, fuel, and
can reduce the risk of tire failure.
.Signs that the tires need to be
replaced include three or more
visible treadwear indicators; cord
or fabric showing through the rubber; cracks or cuts in the
tread or sidewall; or a bulge or
split in the tire.
.Trained dealer technicians can
inspect and recommend the
right tires. Your dealer can also
provide tire/wheel balancing
services to ensure smooth
vehicle operation at all speeds.
Your dealer sells and services
name brand tires.
Vehicle Care
To help keep the vehicle looking
like new, vehicle care products are
available from your dealer. For
information on how to clean and
protect the vehicle’s interior and
exterior, see Interior Care on
page 10‑90 andExterior Care on
page 10‑86.
Page 391 of 400

Black plate (3,1)Chevrolet Cruze Owner Manual - 2012
INDEX i-3
Courtesy TransportationProgram . . . . . . . . . . . . . . . . . . . . . . 13-8
Cruise Control . . . . . . . . . . . . . . . . . 9-40 Light . . . . . . . . . . . . . . . . . . . . . . . . . . 5-23
Messages . . . . . . . . . . . . . . . . . . . . 5-29
Cupholders . . . . . . . . . . . . . . . . . . . . . 4-1
Customer Assistance . . . . . . . . . . 13-4 Offices . . . . . . . . . . . . . . . . . . . . . . . . 13-3
Text Telephone (TTY)Users . . . . . . . . . . . . . . . . . . . . . . . 13-4
Customer Information
Service PublicationsOrdering Information . . . . . . 13-12
Customer Satisfaction Procedure . . . . . . . . . . . . . . . . . . . . 13-1
D
Damage Repair, Collision . . . . . . 13-9
Danger, Warnings, andCautions . . . . . . . . . . . . . . . . . . . . . . . . iv
Data Recorders, Event . . . . . . . 13-14
Daytime Running Lamps (DRL) . . . . . . . . . . . . . . . . . . 6-2
Indicator Light . . . . . . . . . . . . . . . . 5-22
Defensive Driving . . . . . . . . . . . . . . . 9-3 Devices, Auxiliary . . . . . . . . . . . . . 7-20
Distracted Driving . . . . . . . . . . . . . . . 9-2
Dome Lamps . . . . . . . . . . . . . . . . . . . 6-5
Door
Ajar Light . . . . . . . . . . . . . . . . . . . . . 5-23
Ajar Messages . . . . . . . . . . . . . . . 5-29
Locks . . . . . . . . . . . . . . . . . . . . . . . . . 2-10
Power Locks . . . . . . . . . . . . . . . . . . 2-11
Drive Belt Routing, Engine . . . . . 12-4
Driver Information Center (DIC) . . . . . . . . . . . . . . . . . 5-23
Driving Characteristics andTowing Tips . . . . . . . . . . . . . . . . . 9-49
Defensive . . . . . . . . . . . . . . . . . . . . . . 9-3
Drunk . . . . . . . . . . . . . . . . . . . . . . . . . . 9-3
For Better Fuel Economy . . . . . 1-21
Highway Hypnosis . . . . . . . . . . . . . 9-7
Hill and Mountain Roads . . . . . . . 9-7
If the Vehicle is Stuck . . . . . . . . . 9-10
Loss of Control . . . . . . . . . . . . . . . . 9-5
Off-Road Recovery . . . . . . . . . . . . 9-5
Vehicle Load Limits . . . . . . . . . . . 9-10
Wet Roads . . . . . . . . . . . . . . . . . . . . 9-6
Winter . . . . . . . . . . . . . . . . . . . . . . . . . 9-8
E
Electrical Equipment, Add-On . . . . . . . . . . . . . . . . . . . . . . 9-55
Electrical System Engine CompartmentFuse Block . . . . . . . . . . . . . . . . 10-36
Fuses and Circuit
Breakers . . . . . . . . . . . . . . . . . . 10-35
Instrument Panel Fuse Block . . . . . . . . . . . . . . . . . . . . . . 10-40
Overload . . . . . . . . . . . . . . . . . . . 10-35
Engine Air Cleaner/Filter . . . . . . . . . . . 10-14
Check and Service EngineSoon Light . . . . . . . . . . . . . . . . . . 5-13
Compartment Overview . . . . . . . 10-6
Coolant . . . . . . . . . . . . . . . . . . . . . 10-16
Coolant Temperature
Gauge . . . . . . . . . . . . . . . . . . . . . . 5-10
Cooling System . . . . . . . . . . . . . 10-16
Cooling System Messages . . . 5-30
Drive Belt Routing . . . . . . . . . . . . 12-4
Exhaust . . . . . . . . . . . . . . . . . . . . . . 9-27
Page 393 of 400

Black plate (5,1)Chevrolet Cruze Owner Manual - 2012
INDEX i-5
G
GasolineSpecifications . . . . . . . . . . . . . . . . . 9-44
Gauges Engine CoolantTemperature . . . . . . . . . . . . . . . . 5-10
Fuel . . . . . . . . . . . . . . . . . . . . . . . . . . . 5-9
Odometer . . . . . . . . . . . . . . . . . . . . . . 5-9
Speedometer . . . . . . . . . . . . . . . . . . 5-9
Tachometer . . . . . . . . . . . . . . . . . . . . 5-9
Trip Odometer . . . . . . . . . . . . . . . . . 5-9
Warning Lights and
Indicators . . . . . . . . . . . . . . . . . . . . 5-7
General Information Service and Maintenance . . . . . 11-1
Towing . . . . . . . . . . . . . . . . . . . . . . . . 9-48
Vehicle Care . . . . . . . . . . . . . . . . . . 10-2
Glove Box . . . . . . . . . . . . . . . . . . . . . . 4-1
GM Mobility Reimbursement Program . . . . . . . . . . . . . . . . . . . . . . 13-5
H
Hazard Warning Flashers . . . . . . . 6-3
Head Restraints . . . . . . . . . . . . . . . . 3-2
Headlamps
Aiming . . . . . . . . . . . . . . . . . . . . . . 10-29
Automatic . . . . . . . . . . . . . . . . . . . . . . 6-3
Bulb Replacement . . . . . . . . . . 10-29
Daytime RunningLamps (DRL) . . . . . . . . . . . . . . . . . 6-2
Daytime Running Lamps (DRL) Indicator Light . . . . . . . . 5-22
Flash-to-Pass . . . . . . . . . . . . . . . . . . 6-2
High-Beam On Light . . . . . . . . . . 5-21
High/Low Beam Changer . . . . . . 6-2
Lamps On Reminder . . . . . . . . . 5-22
Heated Front Seats . . . . . . . . . . . . . 3-7
Heated Mirrors . . . . . . . . . . . . . . . . . 2-16
Heater
Engine . . . . . . . . . . . . . . . . . . . . . . . . 9-22
Heating and Air
Conditioning . . . . . . . . . . . . . . . 8-1, 8-3
High-Beam On Light . . . . . . . . . . . 5-21
Highway Hypnosis . . . . . . . . . . . . . . 9-7
Hill and Mountain Roads . . . . . . . . 9-7 Hood . . . . . . . . . . . . . . . . . . . . . . . . . . 10-4
Horn . . . . . . . . . . . . . . . . . . . . . . . . . . . . 5-3
How to Wear Safety Belts
Properly . . . . . . . . . . . . . . . . . . . . . . 3-11
Hydraulic Clutch . . . . . . . . . . . . . . 10-14
I
Ignition Positions . . . . . . . . 9-15, 9-18
Ignition Transmission Lock Check . . . . . . . . . . . . . . . . . . . . . . . 10-27
Immobilizer . . . . . . . . . . . . . . . . . . . . 2-14
Infants and Young Children, Restraints . . . . . . . . . . . . . . . . . . . . 3-35
Infotainment . . . . . . . . . . . . . . . . . . . . 7-2
Instrument Cluster . . . . . . . . . . . . . . 5-8
Instrument Panel Storage Area . . . . . . . . . . . . . . . . . . 4-1
Instrument Panel Overview . . . . . 1-2
Introduction . . . . . . . . . . . . . . . . . . . . . . . iii
J
Jump Starting . . . . . . . . . . . . . . . . . 10-80