2012 CHEVROLET CORVETTE clock
[x] Cancel search: clockPage 116 of 434

Black plate (6,1)Chevrolet Corvette Owner Manual - 2012
5-6 Instruments and Controls
Compass Variance
The mirror is set to zone eight.
If you do not live in zone eight or
drive out of the area, the compass
variance needs to be changed to
the appropriate zone.
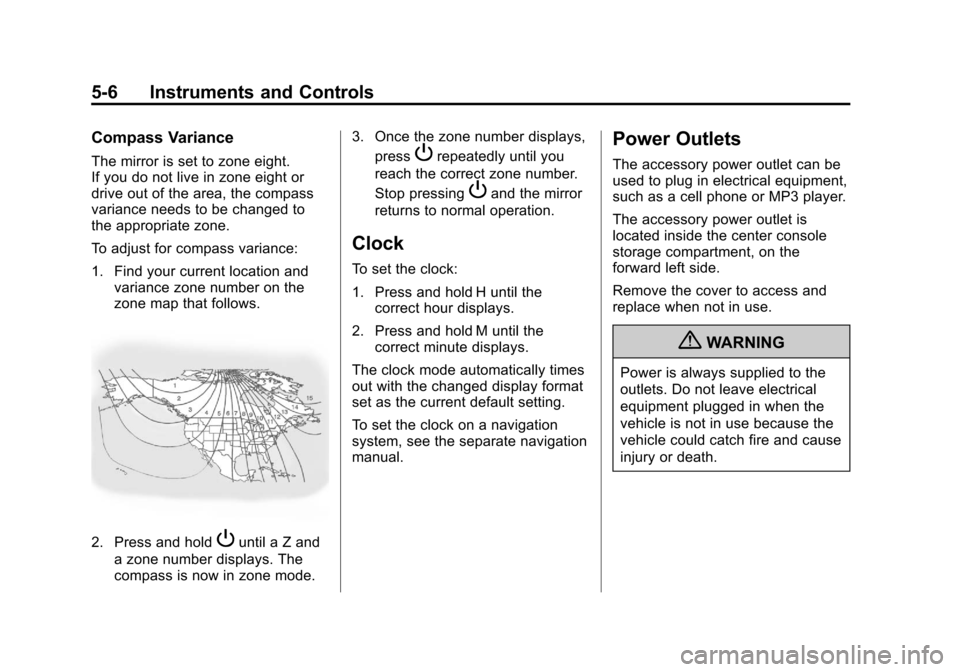
To adjust for compass variance:
1. Find your current location andvariance zone number on the
zone map that follows.
2. Press and holdPuntil a Z and
a zone number displays. The
compass is now in zone mode. 3. Once the zone number displays,
press
Prepeatedly until you
reach the correct zone number.
Stop pressing
Pand the mirror
returns to normal operation.
Clock
To set the clock:
1. Press and hold H until the correct hour displays.
2. Press and hold M until the correct minute displays.
The clock mode automatically times
out with the changed display format
set as the current default setting.
To set the clock on a navigation
system, see the separate navigation
manual.
Power Outlets
The accessory power outlet can be
used to plug in electrical equipment,
such as a cell phone or MP3 player.
The accessory power outlet is
located inside the center console
storage compartment, on the
forward left side.
Remove the cover to access and
replace when not in use.
{WARNING
Power is always supplied to the
outlets. Do not leave electrical
equipment plugged in when the
vehicle is not in use because the
vehicle could catch fire and cause
injury or death.
Page 185 of 434

Black plate (5,1)Chevrolet Corvette Owner Manual - 2012
Lighting 6-5
Raise or lower the lever until the
arrow starts to flash to signal a lane
change. Release the lever and the
turn signal automatically flashes
three times. If more flashes are
desired, continue to hold the lever.
The lever returns to its starting
position when it is released.
If after signaling a turn or lane
change the arrows flash rapidly or
do not come on, a signal bulb may
be burned out.
Have the bulbs replaced. If the bulb
is not burned out, check the fuse.
SeeFuses and Circuit Breakers on
page 10‑51.
Turn Signal on Chime
A chime sounds if the turn
signal has been on for more than
1.2 km (0.75 miles) of driving.
If you need to leave the
turn signal on for more than
1.2 km (0.75 miles), turn off the
signal and then turn it back on.Fog Lamps
Use fog lamps for better vision in
foggy or misty conditions.
The fog lamps control is located on
the multifunction lever next to the
exterior lamp control.
#(Fog Lamps): Turning the
band to this position will turn the
fog lamps on.
When you turn the fog lamps on,
the fog lamp light will appear on the
instrument panel cluster to indicate
that the fog lamps and the parking
lamps are on.
If you turn the high-beam
headlamps on, the fog lamps will
turn off. They will turn on again
when you switch to low-beam
headlamps.
The ignition must be on for the
fog lamps to operate.
Some localities have laws that
require the headlamps to be on
along with the fog lamps.
Interior Lighting
Instrument Panel
Illumination Control
The knob for this feature is located
on the left side of the instrument
panel.
Push the knob in to turn on the
interior lights.
Turn and hold the knob clockwise
to brighten the lights or
counterclockwise to dim them.
During the day, this knob will adjust
the instrument panel brightness and
at night will adjust all interior
lighting.
Page 272 of 434

Black plate (52,1)Chevrolet Corvette Owner Manual - 2012
9-52 Driving and Operating
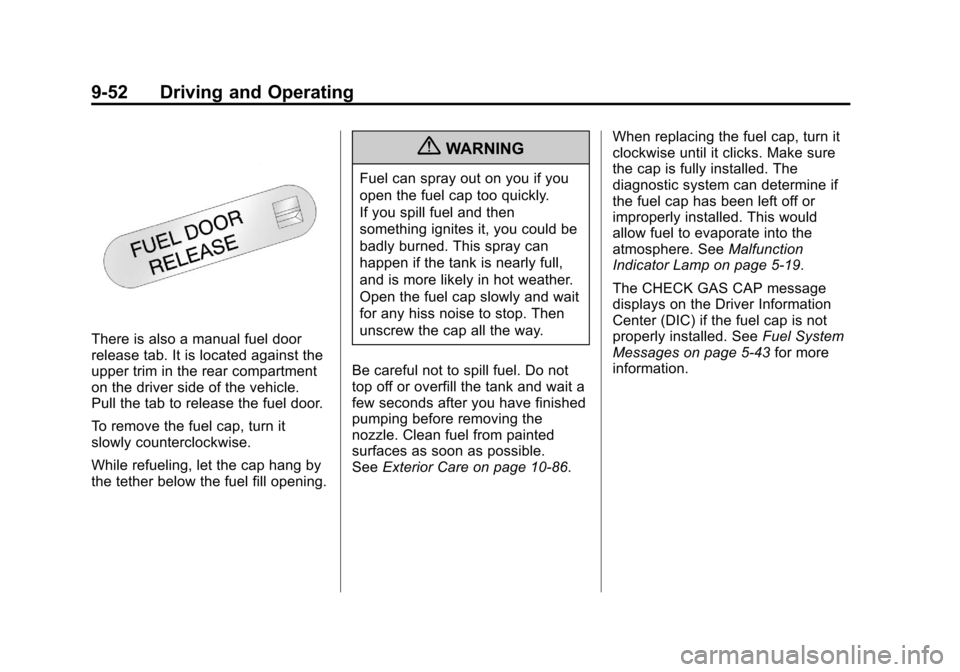
There is also a manual fuel door
release tab. It is located against the
upper trim in the rear compartment
on the driver side of the vehicle.
Pull the tab to release the fuel door.
To remove the fuel cap, turn it
slowly counterclockwise.
While refueling, let the cap hang by
the tether below the fuel fill opening.
{WARNING
Fuel can spray out on you if you
open the fuel cap too quickly.
If you spill fuel and then
something ignites it, you could be
badly burned. This spray can
happen if the tank is nearly full,
and is more likely in hot weather.
Open the fuel cap slowly and wait
for any hiss noise to stop. Then
unscrew the cap all the way.
Be careful not to spill fuel. Do not
top off or overfill the tank and wait a
few seconds after you have finished
pumping before removing the
nozzle. Clean fuel from painted
surfaces as soon as possible.
See Exterior Care on page 10‑86. When replacing the fuel cap, turn it
clockwise until it clicks. Make sure
the cap is fully installed. The
diagnostic system can determine if
the fuel cap has been left off or
improperly installed. This would
allow fuel to evaporate into the
atmosphere. See
Malfunction
Indicator Lamp on page 5‑19.
The CHECK GAS CAP message
displays on the Driver Information
Center (DIC) if the fuel cap is not
properly installed. See Fuel System
Messages on page 5‑43 for more
information.
Page 306 of 434

Black plate (32,1)Chevrolet Corvette Owner Manual - 2012
10-32 Vehicle Care
How to Add Coolant to the
Coolant Surge Tank
{WARNING
You can be burned if you spill
coolant on hot engine parts.
Coolant contains ethylene glycol
and it will burn if the engine parts
are hot enough. Do not spill
coolant on a hot engine.
{WARNING
Steam and scalding liquids from a
hot cooling system can blow out
and burn you badly. They are
under pressure, and if you turn
the coolant surge tank pressure(Continued)
WARNING (Continued)
cap—even a little —they can
come out at high speed. Never
turn the cap when the cooling
system, including the coolant
surge tank pressure cap, is hot.
Wait for the cooling system and
coolant surge tank pressure cap
to cool if you ever have to turn
the pressure cap.
If coolant is needed, add the proper
DEX-COOL coolant mixture directly
to the surge tank, but be sure the
cooling system is cool before this
is done.
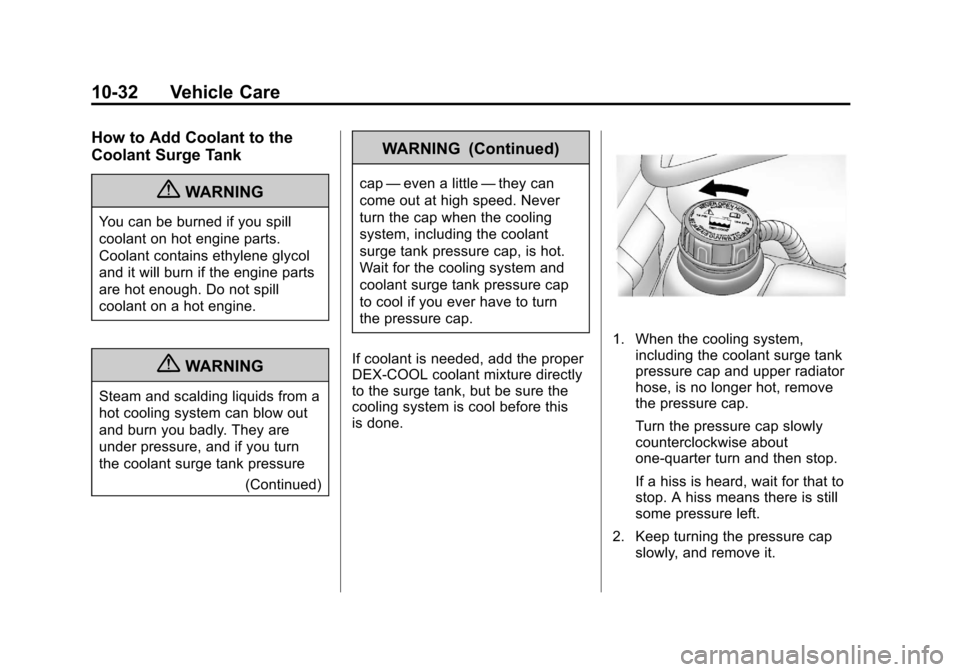
1. When the cooling system, including the coolant surge tank
pressure cap and upper radiator
hose, is no longer hot, remove
the pressure cap.
Turn the pressure cap slowly
counterclockwise about
one-quarter turn and then stop.
If a hiss is heard, wait for that to
stop. A hiss means there is still
some pressure left.
2. Keep turning the pressure cap slowly, and remove it.
Page 323 of 434

Black plate (49,1)Chevrolet Corvette Owner Manual - 2012
Vehicle Care 10-49
Headlamps, Front Turn
Signal and Parking
Lamps
A. High-beam Headlamp
B. Low-beam Headlamp
C. Front Parking/Turn Signal
If the low-beam headlamp needs
to be replaced, see your dealer.
SeeHigh Intensity Discharge (HID)
Lighting on page 10‑48 for more
information. To replace a high-beam or front
parking/turn signal bulb:
1. Turn the wheel to allow access
to the wheel well.2. Remove the three outerfasteners to move the access
panel back.
3. Remove the outer cover to expose the high-beam headlamp
bulb socket.
4. Remove the headlamp bulb byreleasing the outer tabs from the
socket.
5. Remove the front parking/turn signal bulb by turning the bulb
socket counterclockwise.
6. Replace the high-beam headlamp bulb with a new bulb
and reattach to the bulb socket.
Replace the front parking/turn
signal bulb by turning the bulb
socket clockwise.
7. Reverse the Steps 2 through 4 to reinstall.
Page 324 of 434

Black plate (50,1)Chevrolet Corvette Owner Manual - 2012
10-50 Vehicle Care
Taillamps, Turn Signal,
and Stoplamps
To replace a stoplamp, taillamp/turn
signal bulb:
1. Remove the screw from the topof the lamp assembly.
2. Tilt the lamp assemblytoward you.
3. Turn the bulb socket one-quarter turn counterclockwise and pull
it out.
4. Pull the bulb straight out to remove it from the socket. 5. Push the new bulb in the bulb
socket until it snaps into place.
6. Reinstall the lamp assembly by first lining up the tabs on the
bottom of the lamp assembly
with the tabs in the vehicle, then
slide it in.
7. Replace the screw at the top of the lamp assembly.
Replacement Bulbs
Exterior Lamp Bulb Number
Front Parking/Turn
Signal 5702KA
Headlamp,
High‐Beam Lamp H9
Sidemarker Lamp 194LL (W3W)
Stoplamp/Taillamp/
Turn Signal Lamp 3047K
For replacement bulbs not listed
here, contact your dealer.
Electrical System
Electrical System
Overload
The vehicle has fuses and circuit
breakers to protect against an
electrical system overload.
When the current electrical load is
too heavy, the circuit breaker opens
and closes, protecting the circuit
until the current load returns to
normal or the problem is fixed.
This greatly reduces the chance of
circuit overload and fire caused by
electrical problems.
Fuses and circuit breakers protect
power devices in the vehicle.
Replace a bad fuse with a new one
of the identical size and rating.
If there is a problem on the road
and a fuse needs to be replaced,
the same amperage fuse can be
borrowed. Choose some feature of
the vehicle that is not needed to use
and replace it as soon as possible.
Page 424 of 434

Black plate (2,1)Chevrolet Corvette Owner Manual - 2012
i-2 INDEX
B
Battery . . . . . . . . . . . . . . . . . . . . . . . 10-43Exterior Lighting BatterySaver . . . . . . . . . . . . . . . . . . . . . . . . 6-6
Jump Starting . . . . . . . . . . . . . . . 10-82
Power Protection . . . . . . . . . . . . . . 6-6
Voltage and Charging Messages . . . . . . . . . . . . . . . . . . . 5-37
Blade Replacement, Wiper . . . 10-47
Bluetooth . . . . . . . . . . . . . . . . . . . . . . 7-18
Boost Gauge . . . . . . . . . . . . . . . . . . 5-14
Brake System Warning Light . . . 5-22
Brakes . . . . . . . . . . . . . . . . . . . . . . . . 10-38 Antilock . . . . . . . . . . . . . . . . . . . . . . . 9-35
Assist . . . . . . . . . . . . . . . . . . . . . . . . . 9-36
Fluid . . . . . . . . . . . . . . . . . . . . . . . . 10-42
Parking . . . . . . . . . . . . . . . . . . . . . . . 9-36
System Messages . . . . . . . . . . . . 5-37
Braking . . . . . . . . . . . . . . . . . . . . . . . . . 9-4
Break-In, New Vehicle . . . . . . . . . 9-18
Bulb Replacement . . . . . . . . . . . . 10-50 Fog Lamps . . . . . . . . . . . . . . . . . . . . 6-5
Halogen Bulbs . . . . . . . . . . . . . . 10-48
Headlamp Aiming . . . . . . . . . . . 10-48
Headlamps . . . . . . . . . . . . . . . . . 10-48 Bulb Replacement (cont.)
Headlamps, Front Turn
Signal, and Parking
Lamps . . . . . . . . . . . . . . . . . . . . 10-49
High Intensity Discharge (HID) Lighting . . . . . . . . . . . . . 10-48
Taillamps, Turn Signal, and Stoplamps . . . . . . . . . . . . 10-50
Buying New Tires . . . . . . . . . . . . . 10-74
C
Calibration . . . . . . . . . . . . . . . . . . . . . . 5-5
California
Fuel Requirements . . . . . . . . . . . 9-49
Perchlorate MaterialsRequirements . . . . . . . . . . . . . . . 10-3
Warning . . . . . . . . . . . . . . . . . . . . . . 10-3
Canadian Vehicle Owners . . . . . . . . iii
Capacities and Specifications . . . . . . . . . . . . . . . . 12-2
Carbon Monoxide Engine Exhaust . . . . . . . . . . . . . . . 9-26
Hatch . . . . . . . . . . . . . . . . . . . . . . . . . 2-11
Winter Driving . . . . . . . . . . . . . . . . 9-11
Cargo
Cover . . . . . . . . . . . . . . . . . . . . . . . . . . 4-3 Cautions, Danger, and
Warnings . . . . . . . . . . . . . . . . . . . . . . . . iv
CD Player . . . . . . . . . . . . . . . . . . . . . 7-12
Center Console Storage . . . . . . . . 4-3
Chains, Tire . . . . . . . . . . . . . . . . . . 10-80
Check Engine Light . . . . . . . . . . . . . . . . . . 5-19
Child Restraints Infants and YoungChildren . . . . . . . . . . . . . . . . . . . . . 3-30
Lower Anchors and
Tethers for Children . . . . . . . . . 3-35
Older Children . . . . . . . . . . . . . . . . 3-28
Securing . . . . . . . . . . . . . . . . . . . . . . 3-39
Systems . . . . . . . . . . . . . . . . . . . . . . 3-33
Cigarette Lighter . . . . . . . . . . . . . . . . 5-7
Circuit Breakers . . . . . . . . . . . . . . 10-51
Cleaning
Exterior Care . . . . . . . . . . . . . . . 10-86
Interior Care . . . . . . . . . . . . . . . . 10-90
Climate Control Systems
Dual Automatic . . . . . . . . . . . . . . . . 8-1
Clock . . . . . . . . . . . . . . . . . . . . . . . . . . . 5-6
Cluster, Instrument . . . . . . . . . . . . . 5-9
Clutch, Hydraulic . . . . . . . . . . . . . 10-24
Collision Damage Repair . . . . . 13-15