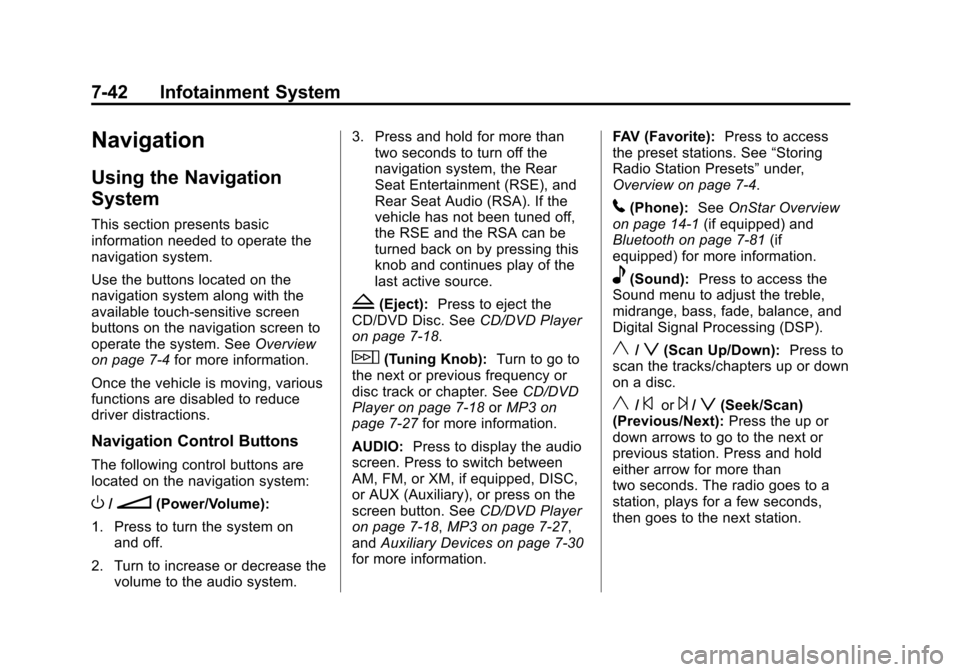
2012 CADILLAC ESCALADE EXT manual radio set
[x] Cancel search: manual radio setPage 221 of 494

Black plate (41,1)Cadillac Escalade EXT Owner Manual - 2012
Infotainment System 7-41
P(Power):Press this button to
turn the RSA on or off.
Volume: Turn this knob to increase
or to decrease the volume of the
wired headphones. The left knob
controls the left headphones and
the right knob controls the right
headphones.
SRCE (Source): Press this button
to switch between the radio (AM/
FM), XM™ (if equipped), CD, and if
the vehicle has these features,
DVD, front auxiliary Jack, USB port,
and rear auxiliary.
© ¨(Seek): When listening to FM,
AM, or XM (if equipped), press the
seek arrows to go to the previous or
to the next station or channels and
stay there. This function is inactive, with some radios, if the front seat
passengers are listening to the
radio.
Press and hold either seek arrow
until the display flashes, to tune to
an individual station. The display
stops flashing after the buttons have
not been pushed for more than
2 seconds. This function is inactive,
with some radios, if the front seat
passengers are listening to the
radio.
While listening to a disc, press the
right seek arrow to go to the next
track or chapter on the disc. Press
the left seek arrow to go back to the
start of the current track or chapter
(if more than 10 seconds have
played). This function is inactive,
with some radios, if the front seat
passengers are listening to the disc.
When a DVD video menu is being
displayed, press the left or right
seek arrow to perform a cursor up
or down on the menu. Hold the left
or right seek arrow to perform a
cursor left or right on the menu.When a USB device is playing, the
right or left seek button can be used
to control the device.
PROG (Program):
Press this
button to go to the next preset radio
station or channel set on the main
radio. This function is inactive, with
some radios, if the front seat
passengers are listening to the
radio.
When a CD or DVD audio disc is
playing, press this button to go to
the beginning of the CD or DVD
audio. This function is inactive, with
some radios, if the front seat
passengers are listening to the disc.
When a disc is playing in the CD or
DVD changer, press this button to
select the next disc, if multiple discs
are loaded. This function is inactive,
with some radios, if the front seat
passengers are listening to the disc.
When a DVD video menu is being
displayed, press the PROG button
to perform the enter menu function.
Page 222 of 494

Black plate (42,1)Cadillac Escalade EXT Owner Manual - 2012
7-42 Infotainment System
Navigation
Using the Navigation
System
This section presents basic
information needed to operate the
navigation system.
Use the buttons located on the
navigation system along with the
available touch-sensitive screen
buttons on the navigation screen to
operate the system. SeeOverview
on page 7‑4 for more information.
Once the vehicle is moving, various
functions are disabled to reduce
driver distractions.
Navigation Control Buttons
The following control buttons are
located on the navigation system:
O/n(Power/Volume):
1. Press to turn the system on and off.
2. Turn to increase or decrease the volume to the audio system. 3. Press and hold for more than
two seconds to turn off the
navigation system, the Rear
Seat Entertainment (RSE), and
Rear Seat Audio (RSA). If the
vehicle has not been tuned off,
the RSE and the RSA can be
turned back on by pressing this
knob and continues play of the
last active source.
Z(Eject): Press to eject the
CD/DVD Disc. See CD/DVD Player
on page 7‑18.
w(Tuning Knob): Turn to go to
the next or previous frequency or
disc track or chapter. See CD/DVD
Player on page 7‑18 orMP3 on
page 7‑27 for more information.
AUDIO: Press to display the audio
screen. Press to switch between
AM, FM, or XM, if equipped, DISC,
or AUX (Auxiliary), or press on the
screen button. See CD/DVD Player
on page 7‑18, MP3 on page 7‑27,
and Auxiliary Devices on page 7‑30
for more information. FAV (Favorite):
Press to access
the preset stations. See “Storing
Radio Station Presets” under,
Overview on page 7‑4.
5(Phone): SeeOnStar Overview
on page 14‑1 (if equipped) and
Bluetooth on page 7‑81 (if
equipped) for more information.
e(Sound): Press to access the
Sound menu to adjust the treble,
midrange, bass, fade, balance, and
Digital Signal Processing (DSP).
y/z(Scan Up/Down): Press to
scan the tracks/chapters up or down
on a disc.
y/©or¨/z(Seek/Scan)
(Previous/Next): Press the up or
down arrows to go to the next or
previous station. Press and hold
either arrow for more than
two seconds. The radio goes to a
station, plays for a few seconds,
then goes to the next station.
Page 244 of 494

Black plate (64,1)Cadillac Escalade EXT Owner Manual - 2012
7-64 Infotainment System
Configure Menu
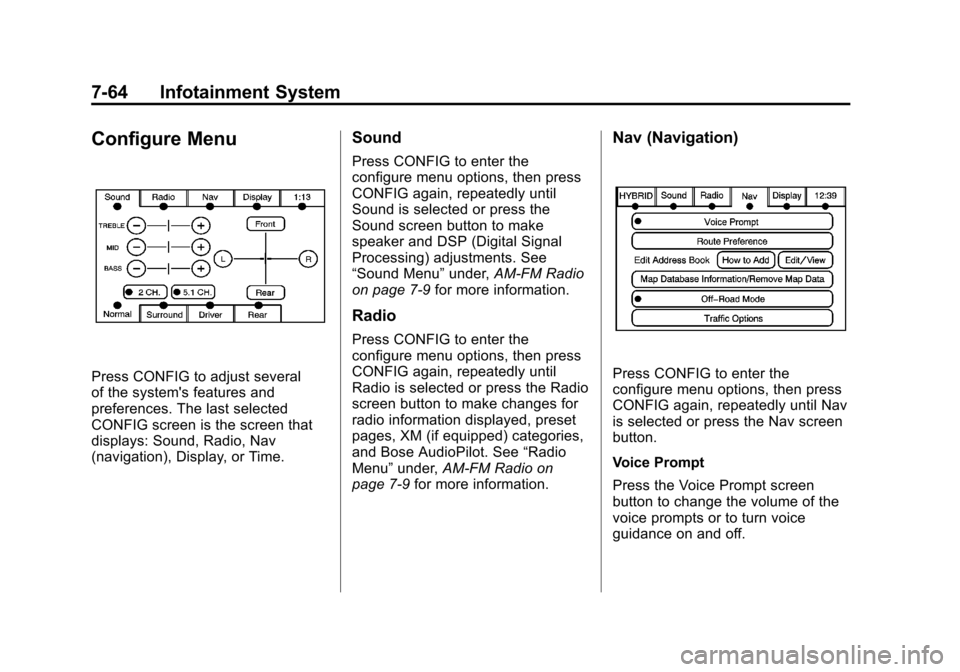
Press CONFIG to adjust several
of the system's features and
preferences. The last selected
CONFIG screen is the screen that
displays: Sound, Radio, Nav
(navigation), Display, or Time.
Sound
Press CONFIG to enter the
configure menu options, then press
CONFIG again, repeatedly until
Sound is selected or press the
Sound screen button to make
speaker and DSP (Digital Signal
Processing) adjustments. See
“Sound Menu”under,AM-FM Radio
on page 7‑9 for more information.
Radio
Press CONFIG to enter the
configure menu options, then press
CONFIG again, repeatedly until
Radio is selected or press the Radio
screen button to make changes for
radio information displayed, preset
pages, XM (if equipped) categories,
and Bose AudioPilot. See “Radio
Menu” under,AM-FM Radio on
page 7‑9 for more information.
Nav (Navigation)
Press CONFIG to enter the
configure menu options, then press
CONFIG again, repeatedly until Nav
is selected or press the Nav screen
button.
Voice Prompt
Press the Voice Prompt screen
button to change the volume of the
voice prompts or to turn voice
guidance on and off.
Page 247 of 494

Black plate (67,1)Cadillac Escalade EXT Owner Manual - 2012
Infotainment System 7-67
1. Press the Map DatabaseInformation/Remove Map Data
screen button to display the Map
Coverage Area screen.
2. Press the Remove Map Data screen button to remove the
map data. A screen showing,
“The Map can now be safely
removed” displays.
3. Press the confirmation screen button to safely remove the
map data.
If the map data is not removed, the
map database will not be available
for that ignition cycle. Map database
functionality can be restored by
cycling the ignition.
Off-Road Mode
To turn the Off-road mode on or off:
1. Press CONFIG.
2. Press the Nav screen button.
3. Press Off-Road mode. The button will be highlighted when
the feature is on. When the off-road mode is turned
on, the navigation system will show
the path being traveled by the
vehicle when not on a marked road.
This path will be a simulation since
the map database coverage will not
have these roads on the DVD. This
path will be stored in the navigation
system's memory, see
“Previous
Destination” underDestination on
page 7‑50 for more information.
See Defensive Driving on page 9‑3
for more information about off-road
driving.
Traffic Options
(US and Canada)
Read the following Options
descriptions to understand how the
XM NavTraffic™ operates.
XM NavTraffic
(USA and Canada)
Vehicles with the navigation system
have an XM NavTraffic receiver. XM
NavTraffic is a subscription service
provided via XM Satellite Radio. XM
NavTraffic provides real-time traffic information fully integrated to the
navigation system to display current
traffic conditions for a driver
’s
chosen route. XM NavTraffic allows
drivers to make the most informed,
timesaving routing decisions.
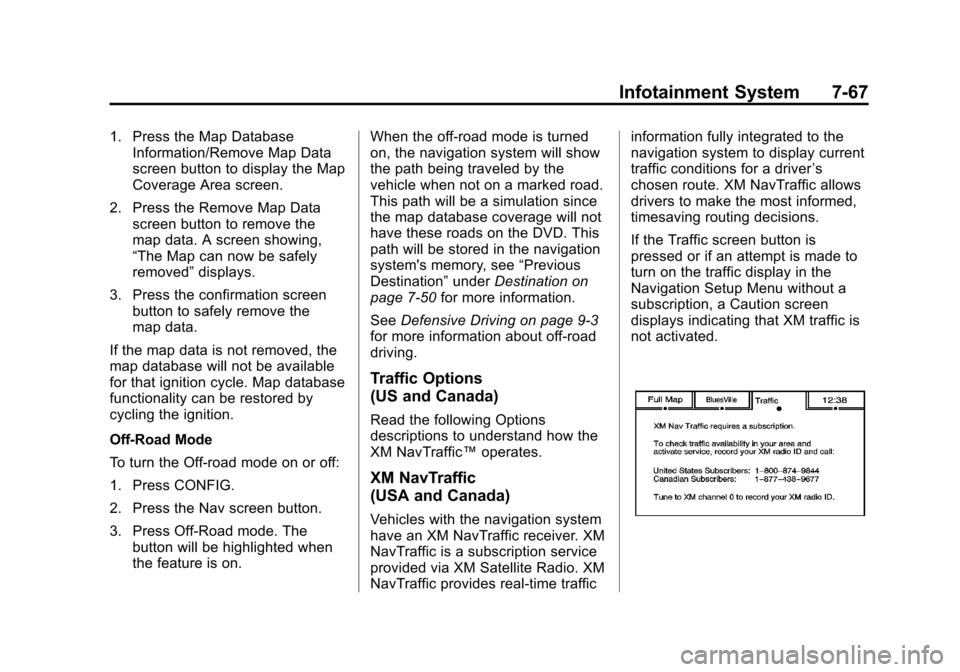
If the Traffic screen button is
pressed or if an attempt is made to
turn on the traffic display in the
Navigation Setup Menu without a
subscription, a Caution screen
displays indicating that XM traffic is
not activated.
Page 260 of 494

Black plate (80,1)Cadillac Escalade EXT Owner Manual - 2012
7-80 Infotainment System
Voice Recognition Commands
The following list shows all of the
voice commands available for the
navigation system with a brief
description of each. The commands
are listed with the optional words in
brackets. To use the voice
commands, refer to the instructions
listed previously.
Voice Tag Commands
The following are voice tag
commands that can be accessed by
clearly stating the commands
exactly as they are written. There
are up to 40 voice tag entries for
destinations.
Navigation go to [destination],
navigation select:These
commands instruct the system to
select a destination saved under the
voice tag you have stored. The
system prompts for a destination
name then waits for you to state
the name. If not currently driving on a route,
the system automatically creates the
voice tag destination as the final
destination. If driving on a route, the
system automatically creates the
voice tag destination as a stopover.
Up to three stopovers can be
created.
Storing Voice Tags
From the address book entry
information page, press the Add
Voice tag screen button. The
system responds
“Name Please?”
and you will have four seconds to
record a name. The system asks for
confirmation of the name before
saving it as a voice tag.
Navigation Help
This command instructs the system
to assist with navigation commands.
Display Commands
Use the following display commands
to set the display mode.
Display [set] day [mode]: Sets the
display to daytime mode. Display [set] night [mode]:
Sets
the display to night mode.
Display [set] auto [mode]: Sets
the display to automatic mode. The
system changes between day and
night mode automatically.
System help: Instructs the system
to assist with display commands.
Radio Commands
The following are radio commands
that can be accessed by clearly
stating the commands exactly as
they are written.
Radio [band] [select] AM, radio
[band] [select] FM, radio [band]
[select] XM (if equipped), radio
[band] [select] satellite (if
equipped): Instructs the system to
go to either the AM, FM, or XM (if
equipped).
Radio [select] (frequency) AM,
radio [select] (frequency) FM:
Instructs the system to go to a
specific frequency on either AM
or FM.
Page 276 of 494

Black plate (2,1)Cadillac Escalade EXT Owner Manual - 2012
9-2 Driving and Operating
Fuel
Fuel . . . . . . . . . . . . . . . . . . . . . . . . . 9-50
Recommended Fuel . . . . . . . . . 9-51
Gasoline Specifications (U.S.and Canada Only) . . . . . . . . . . 9-51
California Fuel
Requirements . . . . . . . . . . . . . . 9-52
Fuels in Foreign Countries . . . 9-52
Fuel Additives . . . . . . . . . . . . . . . 9-52
Fuel E85 (85% Ethanol) . . . . . 9-53
Filling the Tank . . . . . . . . . . . . . . 9-54
Filling a Portable Fuel Container . . . . . . . . . . . . . . . . . . . 9-56
Towing
General TowingInformation . . . . . . . . . . . . . . . . . 9-57
Driving Characteristics and
Towing Tips . . . . . . . . . . . . . . . . 9-57
Trailer Towing . . . . . . . . . . . . . . . . 9-61
Towing Equipment . . . . . . . . . . . 9-64
Trailer Sway Control (TSC) . . . . . . . . . . . . . . 9-67
Conversions and Add-Ons
Add-On ElectricalEquipment . . . . . . . . . . . . . . . . . 9-67
Driving Information
Distracted Driving
Distraction comes in many forms
and can take your focus from the
task of driving. Exercise good
judgment and do not let other
activities divert your attention
away from the road. Many local
governments have enacted laws
regarding driver distraction. Become
familiar with the local laws in
your area.
To avoid distracted driving, always
keep your eyes on the road, hands
on the wheel, and mind on the drive.
.Do not use a phone in
demanding driving situations.
Use a hands-free method to
place or receive necessary
phone calls.
.Watch the road. Do not read,
take notes, or look up
information on phones or
other electronic devices.
.Designate a front seat
passenger to handle potential
distractions.
.Become familiar with vehicle
features before driving, such as
programming favorite radio
stations and adjusting climate
control and seat settings.
Program all trip information into
any navigation device prior to
driving.
.Wait until the vehicle is parked
to retrieve items that have fallen
to the floor.
.Stop or park the vehicle to tend
to children.
.Keep pets in an appropriate
carrier or restraint.
.Avoid stressful conversations
while driving, whether with a
passenger or on a cell phone.
Page 393 of 494

Black plate (51,1)Cadillac Escalade EXT Owner Manual - 2012
Vehicle Care 10-51
Tire Pressure for
High-Speed Operation
{WARNING
Driving at high speeds, 160 km/h
(100 mph) or higher, puts an
additional strain on tires.
Sustained high-speed driving
causes excessive heat buildup
and can cause sudden tire failure.
You could have a crash and you
or others could be killed. Some
high-speed rated tires require
inflation pressure adjustment for
high-speed operation. When
speed limits and road conditions
are such that a vehicle can be
driven at high speeds, make sure
the tires are rated for high-speed
operation, in excellent condition,
and set to the correct cold tire
inflation pressure for the
vehicle load.Vehicles with P265/65R18 or
P285/45R22 size tires require
inflation pressure adjustment when
driving the vehicle at speeds of
160 km/h (100 mph) or higher. Set
the cold inflation pressure to 20 kPa
(3 psi) above the recommended tire
pressure shown on the Tire and
Loading Information Label. Return
the tires to the recommended cold
tire inflation pressure when
high-speed driving has ended. See
Vehicle Load Limits on page 9‑16
and
Tire Pressure on page 10‑49.
Tire Pressure Monitor
System
The Tire Pressure Monitor System
(TPMS) uses radio and sensor
technology to check tire pressure
levels. The TPMS sensors monitor
the air pressure in your tires and
transmit tire pressure readings to a
receiver located in the vehicle.
Each tire, including the spare
(if provided), should be checked
monthly when cold and inflated to the inflation pressure recommended
by the vehicle manufacturer on the
vehicle placard or tire inflation
pressure label. (If your vehicle has
tires of a different size than the size
indicated on the vehicle placard or
tire inflation pressure label, you
should determine the proper tire
inflation pressure for those tires.)
As an added safety feature, your
vehicle has been equipped with a
tire pressure monitoring system
(TPMS) that illuminates a low tire
pressure telltale when one or more
of your tires is significantly under‐
inflated.
Accordingly, when the low tire
pressure telltale illuminates, you
should stop and check your tires as
soon as possible, and inflate them
to the proper pressure. Driving on a
significantly under‐inflated tire
causes the tire to overheat and can
lead to tire failure. Under‐inflation
also reduces fuel efficiency and tire
tread life, and may affect the
vehicle's handling and stopping
ability.
Page 396 of 494

Black plate (54,1)Cadillac Escalade EXT Owner Manual - 2012
10-54 Vehicle Care
.The TPMS sensor matching
process was not done or not
completed successfully after
rotating the tires. The
malfunction light and the DIC
message should go off after
successfully completing the
sensor matching process. See
“TPMS Sensor Matching
Process”later in this section.
.One or more TPMS sensors are
missing or damaged. The
malfunction light and the DIC
message should go off when the
TPMS sensors are installed and
the sensor matching process is
performed successfully. See
your dealer for service.
.Replacement tires or wheels do
not match the original equipment
tires or wheels. Tires and wheels
other than those recommended
could prevent the TPMS from
functioning properly. See Buying
New Tires on page 10‑57.
.Operating electronic devices or
being near facilities using radio
wave frequencies similar to the
TPMS could cause the TPMS
sensors to malfunction.
If the TPMS is not functioning
properly, it cannot detect or signal a
low tire condition. See your dealer
for service if the TPMS malfunction
light and DIC message come on
and stay on.
TPMS Sensor Matching
Process
Each TPMS sensor has a unique
identification code. The identification
code needs to be matched to a new
tire/wheel position after rotating the
vehicle’s tires or replacing one or
more of the TPMS sensors. Also,
the TPMS sensor matching process
should be performed after replacing
a spare tire with a road tire
containing the TPMS sensor. The
malfunction light and the DIC
message should go off at the next
ignition cycle. The sensors are
matched to the tire/wheel positions, using a TPMS relearn tool, in the
following order: driver side front tire,
passenger side front tire, passenger
side rear tire, and driver side rear.
See your dealer for service or to
purchase a relearn tool.
There are two minutes to match the
first tire/wheel position, and
five minutes overall to match all four
tire/wheel positions. If it takes
longer, the matching process stops
and must be restarted.
The TPMS sensor matching
process is:
1. Set the parking brake.
2. Turn the ignition to ON/RUN with
the engine off.
3. Press the Remote Keyless Entry (RKE) transmitter's Qand "
buttons at the same time for
approximately five seconds. The
horn sounds twice to signal the
receiver is in relearn mode and
the TIRE LEARNING ACTIVE
message displays on the DIC
screen.