2012 BUICK LACROSSE section 6
[x] Cancel search: section 6Page 107 of 512
Black plate (49,1)Buick LaCrosse Owner Manual - 2012
Seats and Restraints 3-49
This system is designed to make
installation of child restraints easier.
When using lower anchors, do not
use the vehicle's safety belts.
Instead use the vehicle's anchors
and child restraint attachments to
secure the restraints. Some
restraints also use another vehicle
anchor to secure a top tether.
1. Attach and tighten the lowerattachments to the lower
anchors. If the child restraint
does not have lower
attachments or the desired
seating position does not have
lower anchors, secure the child
restraint with the top tether and
the safety belts. Refer to the
child restraint manufacturer
instructions and the instructions
in this manual.
1.1. Find the lower anchors for the desired seating
position. 1.2. Put the child restraint on
the seat.
If the head restraint
interferes with the proper
installation of the child
restraint, the head restraint
may be removed. See
“Head Restraint Removal
and Reinstallation” at the
end of this section.
1.3. Attach and tighten the lower attachments on the child
restraint to the lower
anchors.
2. If the child restraint manufacturer recommends that the top tether
be attached, attach and tighten
the top tether to the top tether
anchor, if equipped. Refer to the
child restraint instructions and
the following steps:
2.1. Find the top tether anchor.
Open the cover to expose
the anchor. 2.2. Route, attach, and tighten
the top tether according to
the child restraint
instructions and the
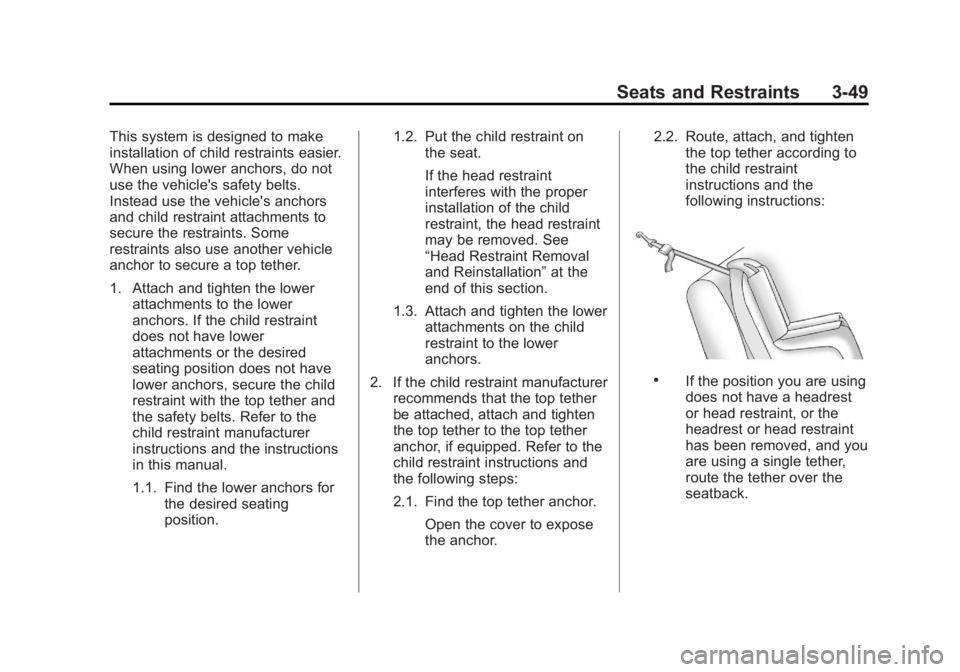
following instructions:
.If the position you are using
does not have a headrest
or head restraint, or the
headrest or head restraint
has been removed, and you
are using a single tether,
route the tether over the
seatback.
Page 127 of 512

Black plate (9,1)Buick LaCrosse Owner Manual - 2012
Instruments and Controls 5-9
equipment that operates within the
limit is plugged into the outlet and a
system fault is not detected.
The power outlet is not designed for
the following equipment, and may
not work properly if any of the
following is plugged in:
.Equipment with high initial peak
wattage such as:
compressor-driven refrigerators
and electric power tools.
.Other equipment requiring an
extremely stable power supply
such as:
microcomputer-controlled
electric blankets, touch sensor
lamps, etc.
Warning Lights,
Gauges, and
Indicators
Warning lights and gauges can
signal that something is wrong
before it becomes serious enough
to cause an expensive repair or
replacement. Paying attention to the
warning lights and gauges could
prevent injury.
Warning lights come on when there
could be a problem with a vehicle
function. Some warning lights come
on briefly when the engine is started
to indicate they are working.Gauges can indicate when there
could be a problem with a vehicle
function. Often gauges and warning
lights work together to indicate a
problem with the vehicle.
When one of the warning lights
comes on and stays on while
driving, or when one of the gauges
shows there may be a problem,
check the section that explains what
to do. Follow this manual's advice.
Waiting to do repairs can be costly
and even dangerous.
Page 132 of 512
Black plate (14,1)Buick LaCrosse Owner Manual - 2012
5-14 Instruments and Controls
Engine Coolant
Temperature Gauge
Metric
English
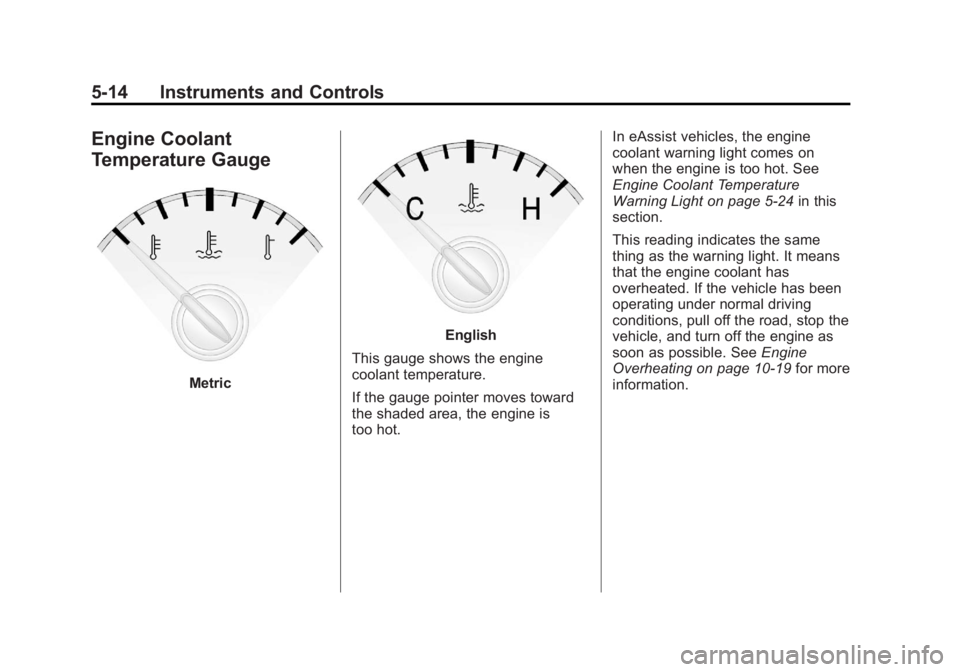
This gauge shows the engine
coolant temperature.
If the gauge pointer moves toward
the shaded area, the engine is
too hot. In eAssist vehicles, the engine
coolant warning light comes on
when the engine is too hot. See
Engine Coolant Temperature
Warning Light on page 5‑24
in this
section.
This reading indicates the same
thing as the warning light. It means
that the engine coolant has
overheated. If the vehicle has been
operating under normal driving
conditions, pull off the road, stop the
vehicle, and turn off the engine as
soon as possible. See Engine
Overheating on page 10‑19 for more
information.
Page 168 of 512
Black plate (50,1)Buick LaCrosse Owner Manual - 2012
5-50 Instruments and Controls
Keep the original hand-held
transmitter for use in other vehicles
as well as for future Universal
Remote system programming. It is
also recommended that upon the
sale of the vehicle, the programmed
Universal Remote system buttons
be erased for security purposes.
See“Erasing Universal Remote
System Buttons” later in this
section.
When programming a garage door,
park outside of the garage. Park
directly in line with and facing the
garage door opener motor-head or
gate motor-head. Be sure that
people and objects are clear of the
garage door or gate being
programmed.
It is recommended that a new
battery be installed in the hand-held
transmitter for quicker and more
accurate transmission of the
radio-frequency signal.Programming the Universal
Remote System
For questions or help programming
the Universal Remote system, call
1‐800‐355‐3515 or go to
www.homelink.com.
Programming a garage door opener
involves time-sensitive actions, so
read the entire procedure before
starting. Otherwise, the device will
time out and the procedure will have
to be repeated.
To program up to three devices:
1. Hold the end of the hand-held transmitter about 3 to 8 cm
(1 to 3 in) away from the
Universal Remote system
buttons while keeping the
indicator light in view. The
hand-held transmitter was
supplied by the manufacturer of
the garage door opener receiver
(motor-head unit). 2. At the same time, press and
hold both the hand-held
transmitter button and one of the
three Universal Remote system
buttons to be used to operate
the garage door. Do not release
the Universal Remote system
button or the hand-held
transmitter button until the
indicator light changes from a
slowly to a rapidly flashing light.
You now may release both
buttons.
Some entry gates and garage
door openers may require
substitution of Step 2 with the
procedure noted in “Gate
Operator and Canadian
Programming” later in this
section.
Page 171 of 512
Black plate (53,1)Buick LaCrosse Owner Manual - 2012
Instruments and Controls 5-53
Reprogramming a Single
Universal Remote System
Button
To reprogram any of the three
Universal Remote system buttons:
1. Press and hold the desiredUniversal Remote system
button. Do not release the
button.
2. The indicator light will begin to flash after 20 seconds. Without
releasing the button, proceed
with Step 1 of the section
“Programming the Universal
Remote System.” If you have questions or need help
programming the Universal Remote
system, call 1‐800‐355‐3515 or go
to www.homelink.com. You may
also call the customer assistance
phone number under
Customer
Assistance Offices (U.S. and
Canada) on page 13‑5 orCustomer
Assistance Offices (Mexico) on
page 13‑5.
Page 187 of 512

Black plate (7,1)Buick LaCrosse Owner Manual - 2012
Infotainment System 7-7
R.5
.Opens the Phone
main menu.
.Mutes the audio system.
S. MEM/DVD/AUX
.Selects MEM (Memory),
CD/DVD, USB, or a
connected front or rear
auxiliary audio source.
Overview (Radio with CD
and Touchscreen)
For vehicles equipped with the
MyLink®or IntelliLink®infotainment
system, see the separate MyLink/
IntelliLink Features and Functions
Guide for more information.
Keeping your eyes on the road and
your mind on the drive is important
for safe driving. The infotainment
system has built-in features
intended to help with this by
disabling some features when driving. A grayed-out function is not
available when the vehicle is
moving.
All functions are available when the
vehicle is parked. Do the following
before driving:
.Become familiar with the
infotainment system operation,
buttons on the faceplate, and
touch-sensitive screen buttons.
.Set up the audio by presetting
favorite stations, setting the
tone, and adjusting the
speakers.
.Set up phone numbers in
advance so they can be called
easily by pressing a single
button or a single voice
command for vehicles equipped
with phone capability.
{WARNING
Taking your eyes off the road too
long or too often while using the
navigation system could cause a
crash and you or others could be
injured or killed. Focus your
attention on driving and limit
glances at the moving map on the
navigation screen. Use voice
guidance whenever possible.
Infotainment System Overview
The infotainment system is
controlled by using the buttons on
the faceplate and the touch screen.
See
“Infotainment Control Buttons”
in this section for more information.
Page 189 of 512
Black plate (9,1)Buick LaCrosse Owner Manual - 2012
Infotainment System 7-9
Q. TONE
R.
5(Phone menu)
Infotainment Control Buttons
The buttons on the faceplate are
used to start primary functions while
using the infotainment system.
VOL/
O(Volume/Power):
1. Press to turn the system on and off.
2. Turn to adjust the volume.
TUNE /
k(Tune/Play/Pause):
Press TUNE /
kto start, pause,
and resume playback. Turn to
manually change radios stations.
See CD Player on page 7‑28 and
MP3 on page 7‑33 for more
information.
SOURCE: Press to change the
audio sources such as AM-FM
Radio, XM™ (if equipped), CD,
and AUX. TONE:
Press to access the sound
menu screen to adjust bass,
midrange, and treble. See AM-FM
Radio (Radio with CD/DVD/MEM)
on page 7‑18 orAM-FM Radio
(Radio with CD and Touchscreen)
on page 7‑21 for more information.
INFO (Information): Press to
toggle through an audio information
screen.
CONFIG (Configure): Press to
adjust features for radio, display,
phone, vehicle, and time.
D/HOME (Home): See“Home
Page” following in this section.
MENU/SEL: Turn to highlight a
feature. Press to activate the
highlighted feature.
5(Phone): SeeBluetooth
(Overview) on page 7‑57 or
Bluetooth (Infotainment Controls) on
page 7‑59 orBluetooth (Voice
Recognition) on page 7‑63 or
Bluetooth (UHP Mexico Only) on
page 7‑69 for more information.
/BACK:Press to return to the
previous screen in a menu.
If on a page accessed directly by a
faceplate button or Home Page
screen button, pressing
/BACK will
go to the previous menu.
FAV (Favorite Pages 1-6): Press
to display the current page number
above the preset buttons. The
stored stations for each list display
on the touch-sensitive preset
buttons at the bottom of the screen.
The number of preset FAV lists can
be changed in the
Configuration Menu.
g(Seek Down):
1. Press to seek to the beginning of the current or previous track.
If the track has been playing for
less than five seconds, it seeks
the previous track. If longer than
five seconds, the current track
starts from the beginning.
2. Press and hold to fast forward through a track.
Page 192 of 512

Black plate (12,1)Buick LaCrosse Owner Manual - 2012
7-12 Infotainment System
Set Time Format:Press the
12 Hours screen button for standard
time; press the 24 Hours screen
button for military time.
Set Date Format: Depending on
the region, the following date
formats may be available: MM/DD/
YYYY, DD.MM.YYYY, or YYYY/
MM/DD.
Display Digital Clock: Press
Display to turn the display of the
clock on the screen On or Off.
Radio Settings
Press the Config button on the
Home Page or the CONFIG button
on the faceplate to enter the menu
options. Turn the MENU knob or
touch-tap the scroll bar to scroll
through the available options. Press
the MENU knob or press Radio
Settings to display the radio settings
menu. Press this feature to make
changes for radio information
displayed, preset pages, Auto
Volume Control, and XM Categories Restore. See
Satellite Radio on
page 7‑24 (if equipped), for more
information about XM Categories.
The Radio Settings are:
Speed Dependent Volume: Select
OFF, Low, Medium, or High
sensitivity to automatically adjust
the volume to minimize the effects
of unwanted background noise that
can result from changing road
surfaces, driving speeds, or open
windows. This feature works best at
lower volume settings where
background noise is typically louder
than the sound system volume.
Startup Volume: Press to set the
maximum volume level for startup
that will be used even if a higher
volume had been set when the radio
was turned off.
Radio Favorites: Press to select
the number of FAV pages to be
used in the system. Add/Remove XM Categories:
Press to customize which available
XM Categories are used and
displayed in the system.
See
AM-FM Radio (Radio with CD/
DVD/MEM) on page 7‑18 orAM-FM
Radio (Radio with CD and
Touchscreen) on page 7‑21 for
more information.
Phone Settings
See Bluetooth (Overview) on
page 7‑57 orBluetooth
(Infotainment Controls) on
page 7‑59 orBluetooth (Voice
Recognition) on page 7‑63 or
Bluetooth (UHP Mexico Only) on
page 7‑69 in the“Phone” section for
more information on phone settings.
Vehicle Settings
See Vehicle Personalization on
page 5‑43 for more information.