2012 BUICK ENCLAVE ERS
[x] Cancel search: ERSPage 1 of 382

Black plate (1,1)Buick Verano Owner Manual - 2013 - crc - 10/17/12
2013 Buick Verano Owner ManualM
In Brief. . . . . . . . . . . . . . . . . . . . . . . . 1-1
Instrument Panel . . . . . . . . . . . . . . 1-2
Initial Drive Information . . . . . . . . 1-4
Vehicle Features . . . . . . . . . . . . . 1-15
Performance and Maintenance . . . . . . . . . . . . . . . . 1-19
Keys, Doors, and Windows . . . . . . . . . . . . . . . . . . . . 2-1
Keys and Locks . . . . . . . . . . . . . . . 2-1
Doors . . . . . . . . . . . . . . . . . . . . . . . . . 2-11
Vehicle Security . . . . . . . . . . . . . . 2-12
Exterior Mirrors . . . . . . . . . . . . . . . 2-15
Interior Mirrors . . . . . . . . . . . . . . . . 2-16
Windows . . . . . . . . . . . . . . . . . . . . . 2-16
Roof . . . . . . . . . . . . . . . . . . . . . . . . . . 2-19
Seats and Restraints . . . . . . . . . 3-1
Head Restraints . . . . . . . . . . . . . . . 3-2
Front Seats . . . . . . . . . . . . . . . . . . . . 3-3
Rear Seats . . . . . . . . . . . . . . . . . . . . 3-7
Safety Belts . . . . . . . . . . . . . . . . . . . . 3-9
Airbag System . . . . . . . . . . . . . . . . 3-18
Child Restraints . . . . . . . . . . . . . . 3-30 Storage
. . . . . . . . . . . . . . . . . . . . . . . 4-1
Storage Compartments . . . . . . . . 4-1
Instruments and Controls . . . . 5-1
Controls . . . . . . . . . . . . . . . . . . . . . . . 5-2
Warning Lights, Gauges, and Indicators . . . . . . . . . . . . . . . . . . . . 5-7
Information Displays . . . . . . . . . . 5-21
Vehicle Messages . . . . . . . . . . . . 5-24
Vehicle Personalization . . . . . . . 5-30
Lighting . . . . . . . . . . . . . . . . . . . . . . . 6-1
Exterior Lighting . . . . . . . . . . . . . . . 6-1
Interior Lighting . . . . . . . . . . . . . . . . 6-5
Lighting Features . . . . . . . . . . . . . . 6-6
Infotainment System . . . . . . . . . 7-1
Introduction . . . . . . . . . . . . . . . . . . . . 7-1
Radio . . . . . . . . . . . . . . . . . . . . . . . . . . 7-7
Audio Players . . . . . . . . . . . . . . . . 7-15
Phone . . . . . . . . . . . . . . . . . . . . . . . . 7-20
Trademarks and License
Agreements . . . . . . . . . . . . . . . . . 7-31 Climate Controls
. . . . . . . . . . . . . 8-1
Climate Control Systems . . . . . . 8-1
Air Vents . . . . . . . . . . . . . . . . . . . . . . . 8-6
Maintenance . . . . . . . . . . . . . . . . . . . 8-6
Driving and Operating . . . . . . . . 9-1
Driving Information . . . . . . . . . . . . . 9-2
Starting and Operating . . . . . . . 9-14
Engine Exhaust . . . . . . . . . . . . . . 9-24
Automatic Transmission . . . . . . 9-25
Manual Transmission . . . . . . . . . 9-28
Brakes . . . . . . . . . . . . . . . . . . . . . . . 9-29
Ride Control Systems . . . . . . . . 9-33
Cruise Control . . . . . . . . . . . . . . . . 9-36
Object Detection Systems . . . . 9-38
Fuel . . . . . . . . . . . . . . . . . . . . . . . . . . 9-45
Towing . . . . . . . . . . . . . . . . . . . . . . . 9-51
Conversions and Add-Ons . . . 9-56
Vehicle Care . . . . . . . . . . . . . . . . . 10-1
General Information . . . . . . . . . . 10-2
Vehicle Checks . . . . . . . . . . . . . . . 10-3
Headlamp Aiming . . . . . . . . . . . 10-25
Bulb Replacement . . . . . . . . . . 10-25
Page 3 of 382

Black plate (3,1)Buick Verano Owner Manual - 2013 - crc - 10/17/12
Introduction iii
The names, logos, emblems,
slogans, vehicle model names, and
vehicle body designs appearing in
this manual including, but not limited
to, GM, the GM logo, BUICK, the
BUICK Emblem, and VERANO are
trademarks and/or service marks of
General Motors LLC, its
subsidiaries, affiliates, or licensors.
This manual describes features that
may or may not be on your specific
vehicle either because they are
options that you did not purchase or
due to changes subsequent to the
printing of this owner manual.Please refer to the purchase
documentation relating to your
specific vehicle to confirm each of
the features found on your vehicle.
For vehicles first sold in Canada,
substitute the name
“General
Motors of Canada Limited” for Buick
Motor Division wherever it appears
in this manual.
Keep this manual in the vehicle for
quick reference.
Canadian Vehicle Owners
Propriétaires Canadiens
A French language manual can be
obtained from your dealer, at
www.helminc.com, or from:
On peut obtenir un exemplaire de
ce guide en français auprès du
concessionnaire ou à l'adresse
savant:
Helm, Incorporated
Attention: Customer Service
47911 Halyard Drive
Plymouth, MI 48170
Litho in U.S.A.
Part No. 22744468 B Second Printing©2012 General Motors LLC. All Rights Reserved.
Page 5 of 382

Black plate (5,1)Buick Verano Owner Manual - 2013 - crc - 10/17/12
Introduction v
Vehicle Symbol Chart
Here are some additional symbols
that may be found on the vehicle
and what they mean. For more
information on the symbol, refer to
the Index.
9:Airbag Readiness Light
#:Air Conditioning
!:Antilock Brake System (ABS)
%:Audio Steering Wheel Controls
or OnStar®
$: Brake System Warning Light
":Charging System
I:Cruise Control
B: Engine Coolant Temperature
O:Exterior Lamps
#:Fog Lamps
.: Fuel Gauge
+:Fuses
3: Headlamp High/Low-Beam
Changer
(: Heated Steering Wheel
j:LATCH System Child
Restraints
*: Malfunction Indicator Lamp
::Oil Pressure
}:Power
/:Remote Vehicle Start
>:Safety Belt Reminders
7:Tire Pressure Monitor
d:Traction Control/StabiliTrak®
M:Windshield Washer Fluid
Page 9 of 382

Black plate (3,1)Buick Verano Owner Manual - 2013 - crc - 10/17/12
In Brief 1-3
1.Air Vents on page 8‑6.
2. Headlamp High/Low-Beam
Changer on page 6‑2.
Turn and Lane-Change Lever.
See Turn and Lane-Change
Signals on page 6‑4.
Driver Information Center (DIC)
Buttons. See Driver Information
Center (DIC) on page 5‑21.
3. Instrument Cluster on page 5‑8.
4. Windshield Wiper/Washer on
page 5‑3.
5. Keyless Access Ignition. See Ignition Positions (Key Access)
on page 9‑14 orIgnition
Positions (Keyless Access) on
page 9‑16.
Traction Control System (TCS)
on page 9‑33. StabiliTrak
®
System on page 9‑34.
6. Light Sensor. See Automatic
Headlamp System on page 6‑3.
7. Hazard Warning Flashers on
page 6‑3. 8. Infotainment Display Screen.
9.
Passenger Airbag Status
Indicator on page 5‑11.
Trunk Release Button. See
Trunk on page 2‑11.
10. Hood Release. See Hood on
page 10‑4.
11. Exterior Lamp Controls on
page 6‑1.
Front Fog Lamps on page 6‑4
(If Equipped).
Instrument Panel Illumination
Control on page 6‑5.
12. Instrument Panel Fuse Block
on page 10‑33.
13. Data Link Connector (DLC) (Out of View). See Malfunction
Indicator Lamp on page 5‑13.
14. Cruise Control on page 9‑36.
15. Steering Wheel Adjustment on
page 5‑2.
16. Horn on page 5‑3. 17.
Steering Wheel Controls on
page 5‑2.
18. Ignition Switch. See Ignition
Positions (Key Access) on
page 9‑14 orIgnition Positions
(Keyless Access) on
page 9‑16.
19. Shift Lever. See Automatic
Transmission on page 9‑25 or
Manual Transmission on
page 9‑28 (If Equipped).
20. Electric Parking Brake. See Parking Brake on page 9‑30.
21. Climate Control Systems on
page 8‑1 (If Equipped).
Dual Automatic Climate Control
System on page 8‑3 (If
Equipped).
Heated Front Seats on
page 3‑6 (If Equipped).
22. Infotainment on page 7‑1.
Satellite Radio (If Equipped).
See infotainment system
manual.
Page 10 of 382

Black plate (4,1)Buick Verano Owner Manual - 2013 - crc - 10/17/12
1-4 In Brief
Initial Drive
Information
This section provides a brief
overview about some of the
important features that may or may
not be on your specific vehicle.
For more detailed information, refer
to each of the features which can be
found later in this owner manual.
Remote Keyless Entry
(RKE) System
The Remote Keyless Entry (RKE)
transmitter may work up to 60 m
(195 ft) away from the vehicle.
RKE without Remote Start
Press the button to extend the key.
The key can be used for all locks.
This key is also used for the
ignition, if the vehicle does not have
pushbutton start.
K: Press to unlock the driver door
or all doors.
Q: Press to lock all doors.
Lock and unlock feedback can be
personalized.
V: Press and hold to release the
trunk.
7: Press and release one time to
initiate vehicle locator. Press and
hold for at least three seconds to
sound the panic alarm. Press again
to cancel the panic alarm.
See Keys on page 2‑1 andRemote
Keyless Entry (RKE) System
Operation on page 2‑3.
Remote Vehicle Start
For vehicles with this feature, the
engine can be started from outside
the vehicle.
Starting the Vehicle
1. Aim the RKE transmitter at the vehicle.
2. Press and release
Q.
3. Immediately after completing Step 2, press and hold
/for at
least two seconds or until the
turn signal lamps flash.
Page 11 of 382

Black plate (5,1)Buick Verano Owner Manual - 2013 - crc - 10/17/12
In Brief 1-5
When the engine starts, the parking
lamps will turn on and remain on as
long as the engine is running. The
doors will be locked and the climate
control system may come on.
The engine will continue to run for
10 minutes. Repeat the steps for a
10-minute time extension. Remote
start can be extended only once.
Canceling a Remote Start
To cancel a remote start, do one of
the following:
.Aim the RKE transmitter at the
vehicle and press and hold
/
until the parking lamps turn off.
.Turn on the hazard warning
flashers.
.Turn the vehicle on and then off.
See Remote Vehicle Start on
page 2‑8.
Door Locks
To lock or unlock the door from
outside the vehicle, press
Kon the
Remote Keyless Entry (RKE)
transmitter or use the key in the
driver door.
From inside the vehicle with the
doors locked, pull once on the door
handle to unlock it, and a second
time to open it.
Push down on the door lock knob
on the top of the door.
Manually locking the driver door
also automatically locks all other
doors.
See Door Locks on page 2‑9 for
additional information.
Power Door Locks
K: Press to unlock the doors.
Q:Press to lock the doors.
See Vehicle Personalization on
page 5‑30 for more information.
Page 15 of 382
Black plate (9,1)Buick Verano Owner Manual - 2013 - crc - 10/17/12
In Brief 1-9
Press the control once for the
highest setting. With each press of
the control, the heated seat will
change to the next lower setting,
and then the off setting. Three lights
indicate the highest setting and one
light the lowest.
SeeHeated Front Seats on
page 3‑6.
Head Restraint
Adjustment
Do not drive until the head restraints
for all occupants are installed and
adjusted properly.
To achieve a comfortable seating
position, change the seatback
recline angle as little as necessary
while keeping the seat and the head
restraint height in the proper
position.
See Head Restraints on page 3‑2
and Seat Adjustment on page 3‑3.
Safety Belts
Refer to the following sections for
important information on how to use
safety belts properly:
.Safety Belts on page 3‑9.
.How to Wear Safety Belts
Properly on page 3‑11.
.Lap-Shoulder Belt on page 3‑12.
.Lower Anchors and Tethers for
Children (LATCH System) on
page 3‑38.
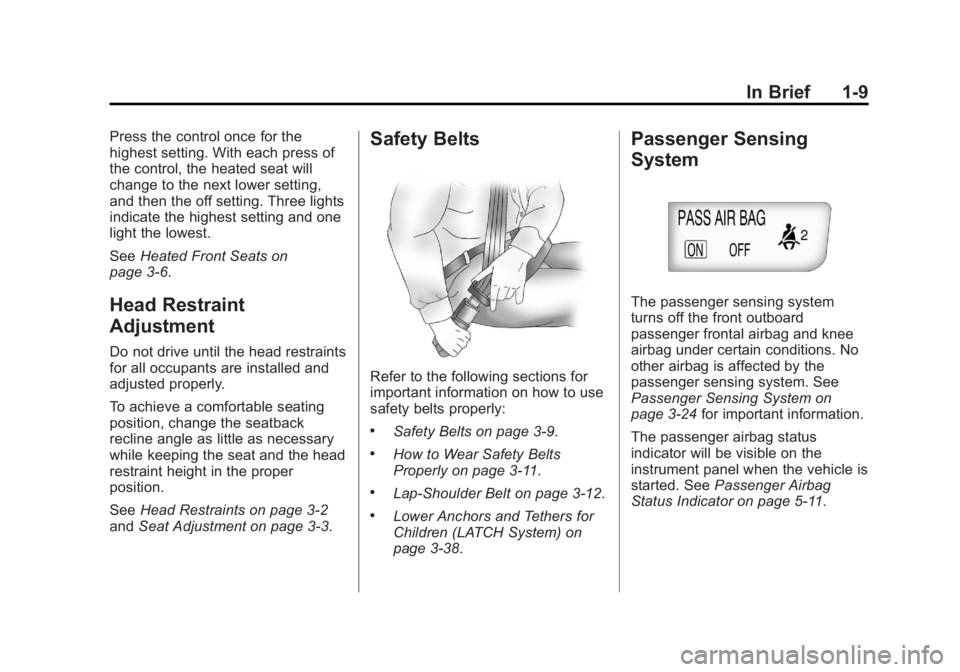
Passenger Sensing
System
The passenger sensing system
turns off the front outboard
passenger frontal airbag and knee
airbag under certain conditions. No
other airbag is affected by the
passenger sensing system. See
Passenger Sensing System on
page 3‑24 for important information.
The passenger airbag status
indicator will be visible on the
instrument panel when the vehicle is
started. See Passenger Airbag
Status Indicator on page 5‑11.
Page 18 of 382

Black plate (12,1)Buick Verano Owner Manual - 2013 - crc - 10/17/12
1-12 In Brief
5:Turns on the headlamps,
parking lamps, taillamps, license
plate lamps, sidemarker lamps, and
instrument panel lights. A warning
chime sounds if the driver door is
opened when the ignition switch is
off and the headlamps are on.
#: For vehicles with fog lamps,
press to turn the lamps on or off.
See:
.Exterior Lamp Controls on
page 6‑1
.Daytime Running Lamps (DRL)
on page 6‑2
.Front Fog Lamps on page 6‑4
Windshield Wiper/Washer
The windshield wiper/washer lever
is on the right side of the steering
column. With the ignition in ACC/
ACCESSORY or ON/RUN, move
the windshield wiper lever to select
the wiper speed.
HI: Use for fast wipes.
LO: Use for slow wipes.
INT: Move the lever up to INT for
intermittent wipes, then turn the
x
INT band up for more frequent
wipes or down for less frequent
wipes.
OFF: Use to turn the wipers off.
8:For a single wipe, briefly move
the wiper lever down. For several
wipes, hold the wiper lever down.
n L: Pull the windshield wiper
lever toward you to spray windshield
washer fluid and activate the wipers.
See Windshield Wiper/Washer on
page 5‑3.