2012 BMW Z4 SDRIVE35I change wheel
[x] Cancel search: change wheelPage 13 of 220

3Opening and closing front win‐
dows 324Exterior mirrors, folding in and out 405Adjust the exterior mirrors, Automatic Curb
Monitor 406Parking lamps 68Low beams 68Automatic headlamp con‐
trol 69
Adaptive light control 70
High-beam Assistant 717Turn signal 50High beams, head‐
lamp flasher 70High-beam Assistant 71Roadside parking lamps 70Computer 62Settings and information about
the vehicle 628Instrument cluster 149Buttons on the steering wheelChange the radio station
Select a music track
Leaf through the phone book and
through lists with stored phone
numbersNext entertainment sourceRecirculated air mode 9410Windshield wipers 51Rain sensor 5111Start/stop the engine and switch
the ignition on/off 4512Ignition lock 4513Steering wheel heating 4214Horn, the entire surface15Adjust the steering wheel 4216Cruise control 8517Buttons on the steering wheelTelephone 134VolumeVoice operation of the tele‐
phone 14118Releasing the hood 16419Open the trunk lid 27Seite 13CockpitAt a glance13
Online Edition for Part no. 01 40 2 609 184 - 09 11 500
Page 30 of 220

Replacing the battery
The remote control for Comfort Access con‐
tains a battery that will need to be replaced from
time to time.1.Take the integrated key out of the remote
control, refer to page 20.2.Remove the cover.3.Insert a battery of the same type with the
positive side facing upwards.4.Press the cover closed.
Return used battery to a recycling collec‐
tion point or to your service center.
Alarm system
The concept
The vehicle alarm system responds to:
▷Opening of a door, the hood or the trunk lid.▷Movements in the vehicle: interior motion
sensor, refer to page 31.▷When the car's inclination changes, for in‐
stance if an attempt is made to jack it up and
steal the wheels or to raise it prior to towing
away.▷Interruptions in battery voltage.
The alarm system signals unauthorized entry
attempts for a short time by means of:
▷By sounding an acoustic alarm.▷By switching on the hazard warning system.▷By flashing the high beams.Arming and disarming the alarm
system
When you lock or unlock the vehicle, either with
the remote control or at the door lock, the alarm
system is armed or disarmed at the same time.
Trunk lid and armed alarm system
The trunk lid can be opened using the remote
control, even if the alarm system is armed.
Press the button on the remote control for
approx. one second.
Note the opening height of the trunk lid
During opening, the trunk lid pivots back
and up. Ensure that there is sufficient clearance
when the trunk lid opens; otherwise, damage
may result.◀
After the lid is closed, it is locked and monitored
again by the alarm system.
Panic mode
You can trigger the alarm system if you find
yourself in a dangerous situation.
Press the button on the remote control for at
least three seconds.
To switch off the alarm: press any button.
Switching off the alarm
▷Unlock the vehicle using the remote control,
refer to page 22.▷Insert the remote control all the way into the
ignition lock.Seite 30ControlsOpening and closing30
Online Edition for Part no. 01 40 2 609 184 - 09 11 500
Page 54 of 220
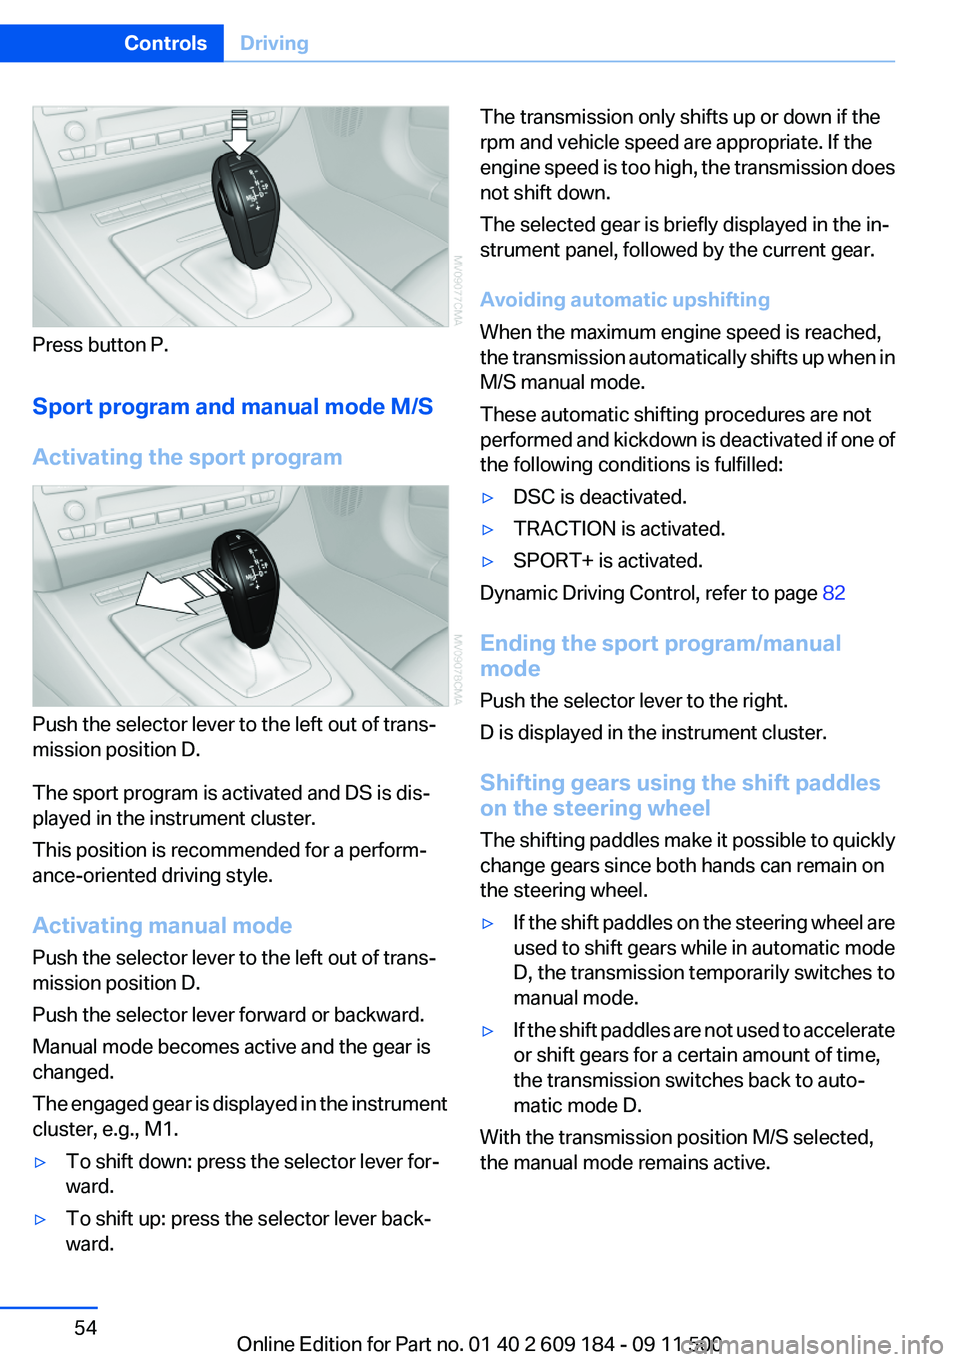
Press button P.
Sport program and manual mode M/S
Activating the sport program
Push the selector lever to the left out of trans‐
mission position D.
The sport program is activated and DS is dis‐
played in the instrument cluster.
This position is recommended for a perform‐
ance-oriented driving style.
Activating manual mode
Push the selector lever to the left out of trans‐
mission position D.
Push the selector lever forward or backward.
Manual mode becomes active and the gear is
changed.
The engaged gear is displayed in the instrument
cluster, e.g., M1.
▷To shift down: press the selector lever for‐
ward.▷To shift up: press the selector lever back‐
ward.The transmission only shifts up or down if the
rpm and vehicle speed are appropriate. If the
engine speed is too high, the transmission does
not shift down.
The selected gear is briefly displayed in the in‐
strument panel, followed by the current gear.
Avoiding automatic upshifting
When the maximum engine speed is reached,
the transmission automatically shifts up when in
M/S manual mode.
These automatic shifting procedures are not
performed and kickdown is deactivated if one of
the following conditions is fulfilled:▷DSC is deactivated.▷TRACTION is activated.▷SPORT+ is activated.
Dynamic Driving Control, refer to page 82
Ending the sport program/manual
mode
Push the selector lever to the right.
D is displayed in the instrument cluster.
Shifting gears using the shift paddles
on the steering wheel
The shifting paddles make it possible to quickly
change gears since both hands can remain on
the steering wheel.
▷If the shift paddles on the steering wheel are
used to shift gears while in automatic mode
D, the transmission temporarily switches to
manual mode.▷If the shift paddles are not used to accelerate
or shift gears for a certain amount of time,
the transmission switches back to auto‐
matic mode D.
With the transmission position M/S selected,
the manual mode remains active.
Seite 54ControlsDriving54
Online Edition for Part no. 01 40 2 609 184 - 09 11 500
Page 55 of 220
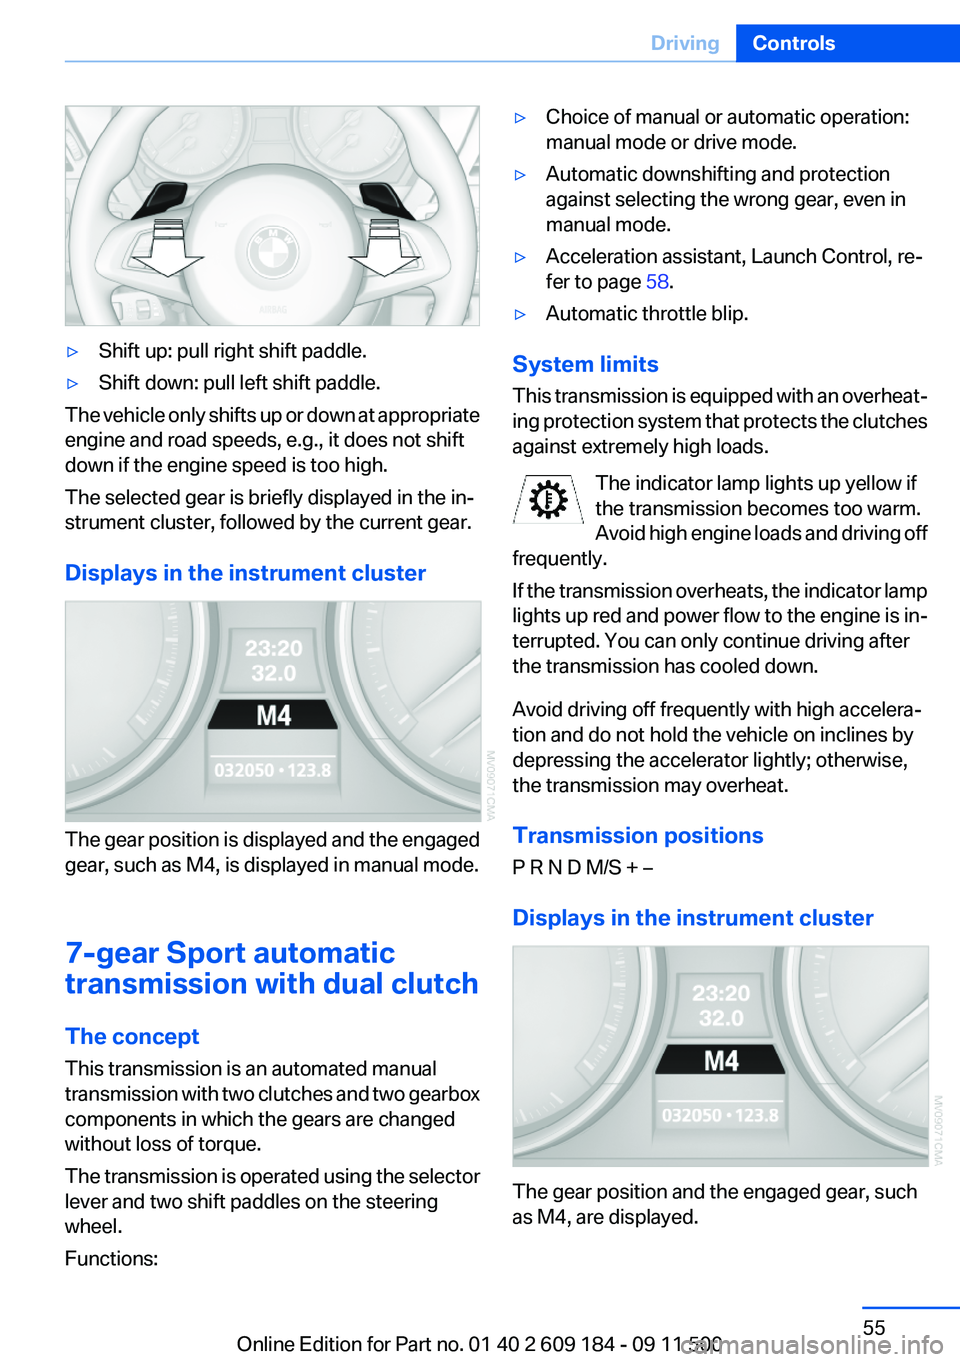
▷Shift up: pull right shift paddle.▷Shift down: pull left shift paddle.
The vehicle only shifts up or down at appropriate
engine and road speeds, e.g., it does not shift
down if the engine speed is too high.
The selected gear is briefly displayed in the in‐
strument cluster, followed by the current gear.
Displays in the instrument cluster
The gear position is displayed and the engaged
gear, such as M4, is displayed in manual mode.
7-gear Sport automatic
transmission with dual clutch
The concept
This transmission is an automated manual
transmission with two clutches and two gearbox
components in which the gears are changed
without loss of torque.
The transmission is operated using the selector
lever and two shift paddles on the steering
wheel.
Functions:
▷Choice of manual or automatic operation:
manual mode or drive mode.▷Automatic downshifting and protection
against selecting the wrong gear, even in
manual mode.▷Acceleration assistant, Launch Control, re‐
fer to page 58.▷Automatic throttle blip.
System limits
This transmission is equipped with an overheat‐
ing protection system that protects the clutches
against extremely high loads.
The indicator lamp lights up yellow if
the transmission becomes too warm.
Avoid high engine loads and driving off
frequently.
If the transmission overheats, the indicator lamp
lights up red and power flow to the engine is in‐
terrupted. You can only continue driving after
the transmission has cooled down.
Avoid driving off frequently with high accelera‐
tion and do not hold the vehicle on inclines by
depressing the accelerator lightly; otherwise,
the transmission may overheat.
Transmission positions
P R N D M/S + –
Displays in the instrument cluster
The gear position and the engaged gear, such
as M4, are displayed.
Seite 55DrivingControls55
Online Edition for Part no. 01 40 2 609 184 - 09 11 500
Page 57 of 220
Sport program and manual mode M/S
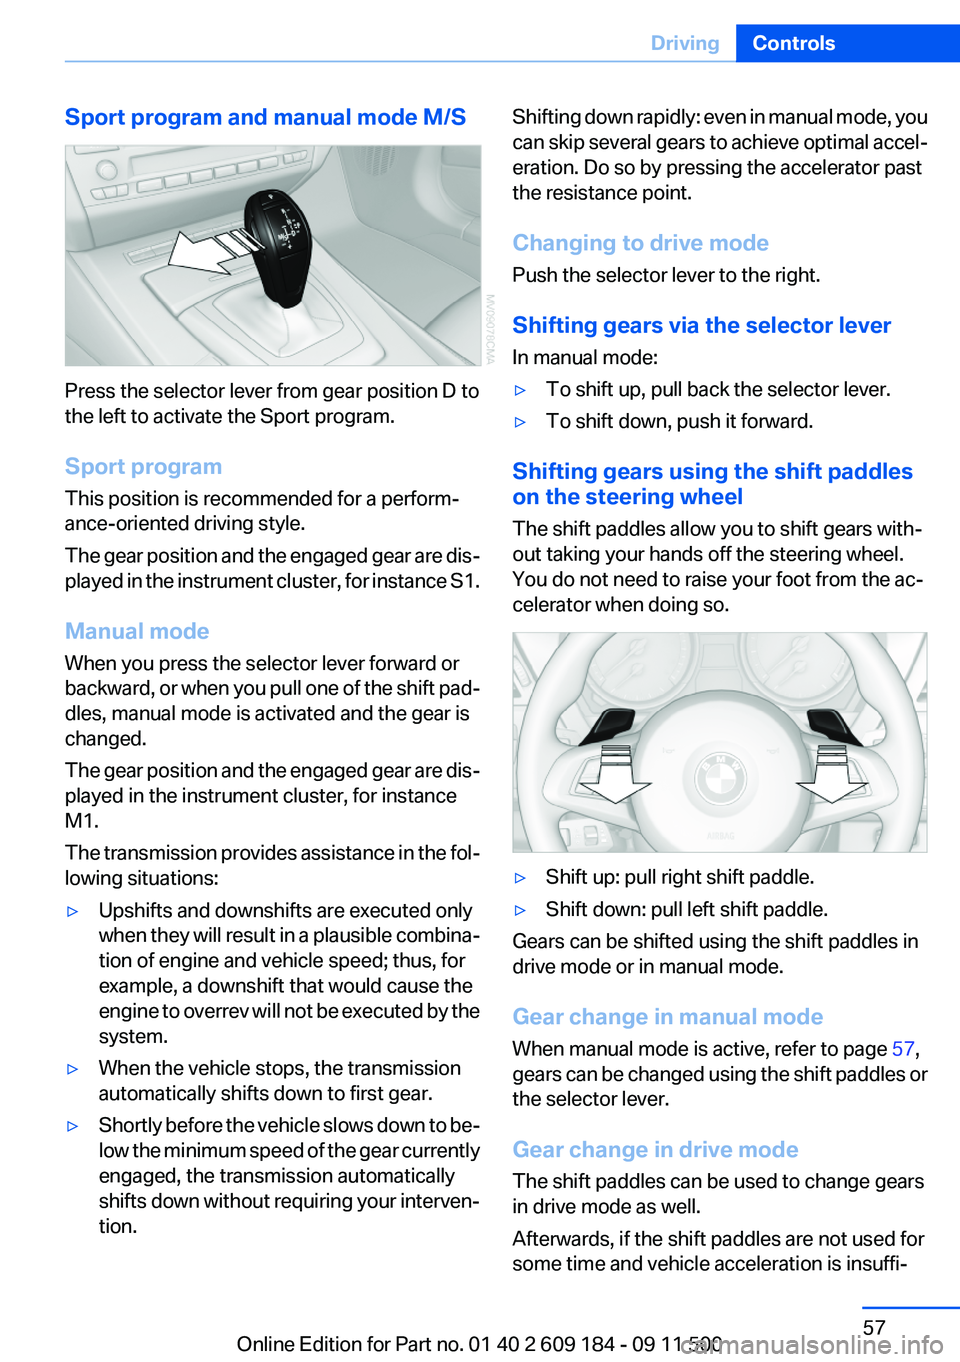
Press the selector lever from gear position D to
the left to activate the Sport program.
Sport program
This position is recommended for a perform‐
ance-oriented driving style.
The gear position and the engaged gear are dis‐
played in the instrument cluster, for instance S1.
Manual mode
When you press the selector lever forward or
backward, or when you pull one of the shift pad‐
dles, manual mode is activated and the gear is
changed.
The gear position and the engaged gear are dis‐
played in the instrument cluster, for instance
M1.
The transmission provides assistance in the fol‐
lowing situations:
▷Upshifts and downshifts are executed only
when they will result in a plausible combina‐
tion of engine and vehicle speed; thus, for
example, a downshift that would cause the
engine to overrev will not be executed by the
system.▷When the vehicle stops, the transmission
automatically shifts down to first gear.▷Shortly before the vehicle slows down to be‐
low the minimum speed of the gear currently
engaged, the transmission automatically
shifts down without requiring your interven‐
tion.Shifting down rapidly: even in manual mode, you
can skip several gears to achieve optimal accel‐
eration. Do so by pressing the accelerator past
the resistance point.
Changing to drive mode
Push the selector lever to the right.
Shifting gears via the selector lever
In manual mode:▷To shift up, pull back the selector lever.▷To shift down, push it forward.
Shifting gears using the shift paddles
on the steering wheel
The shift paddles allow you to shift gears with‐
out taking your hands off the steering wheel.
You do not need to raise your foot from the ac‐
celerator when doing so.
▷Shift up: pull right shift paddle.▷Shift down: pull left shift paddle.
Gears can be shifted using the shift paddles in
drive mode or in manual mode.
Gear change in manual mode
When manual mode is active, refer to page 57,
gears can be changed using the shift paddles or
the selector lever.
Gear change in drive mode
The shift paddles can be used to change gears
in drive mode as well.
Afterwards, if the shift paddles are not used for
some time and vehicle acceleration is insuffi‐
Seite 57DrivingControls57
Online Edition for Part no. 01 40 2 609 184 - 09 11 500
Page 58 of 220
cient, the forward gears are changed again au‐
tomatically.
Launch Control
Launch Control enables you to drive off with an
optimal vehicle acceleration on a high grip road
surface.
Do not use Launch Control too often
Do not use Launch Control too often, as
the higher loads on the vehicle lead to premature
component wear.◀
Launch Control is available when the engine is
at operating temperature, i.e., after driving con‐
tinuously for at least 6 miles/10 km.1.With the engine running, depress the brake
pedal with your left foot.2.Activate the SPORT+ program of the Dy‐
namic Driving Control, refer to page 82.3.With the vehicle stationary, activate manual
mode and select first gear.4.Press the accelerator all the way down. The
engine speed when driving off is controlled.
A flag symbol appears in the instrument
cluster.5.The vehicle accelerates when you release
the brake pedal. Keep the accelerator
pressed all the way down.6.The transmission shifts up automatically as
long as the accelerator is pressed all the way
down.
Launch Control only becomes available again
after a certain distance has been driven.
Launch Control can only be used after the
break-in phase, refer to page 108.
To maintain driving stability, activate DSC
whenever possible.
Manually releasing and engaging the
transmission lock
If a power failure occurs, e.g., if the battery is
discharged or disconnected, the transmission
lock must be released manually, otherwise the
rear wheels are blocked and the vehicle cannot
be towed.
Release the transmission lock manually for tow‐
ing only and set the parking brake beforehand to
prevent the vehicle from rolling. After parking
the vehicle, engage the transmission lock again
manually, refer to page 59.
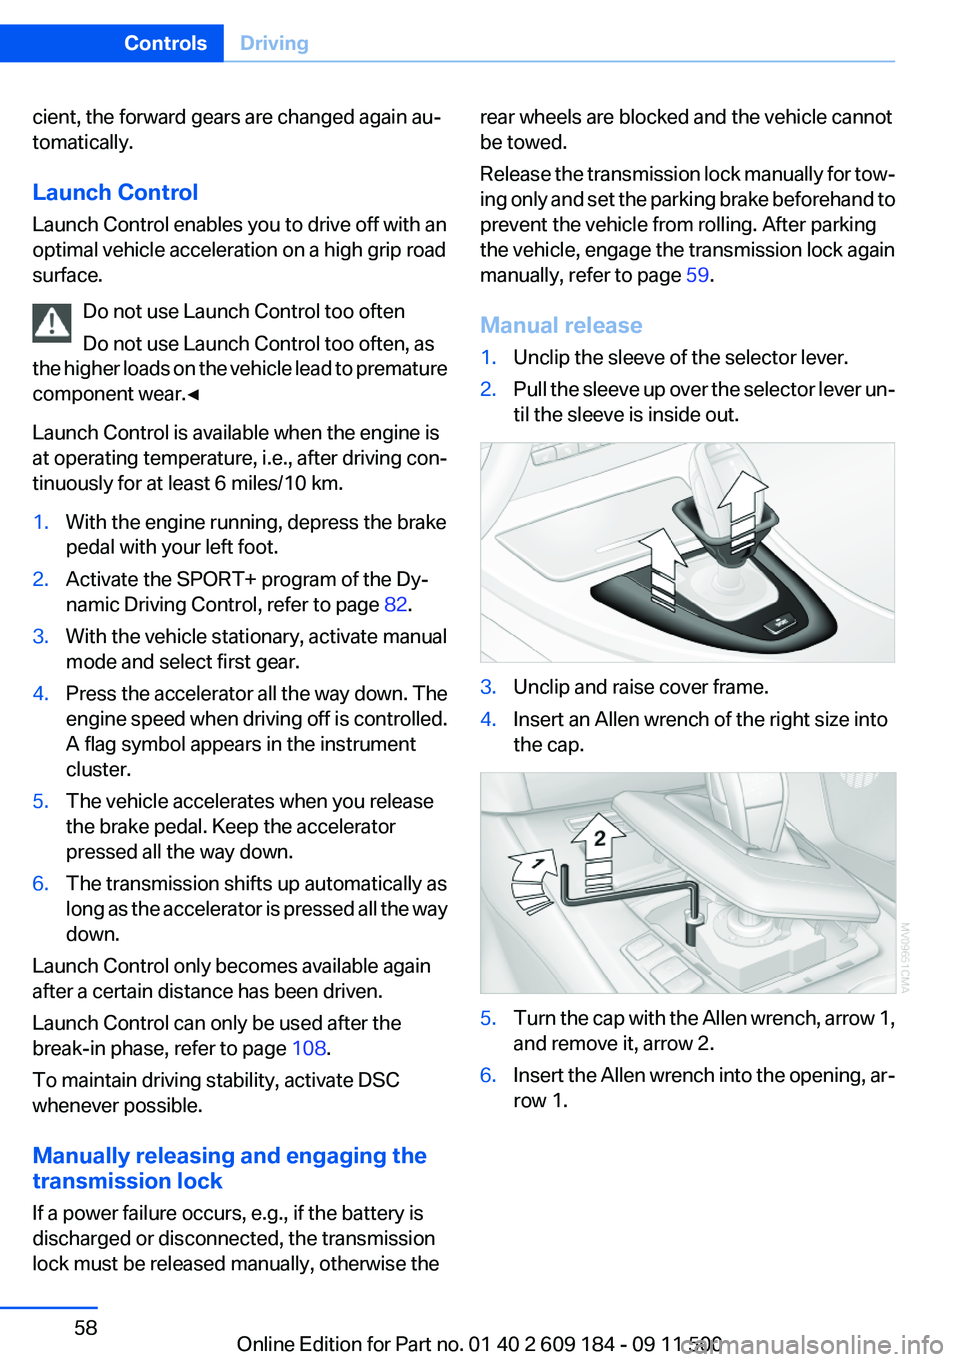
Manual release1.Unclip the sleeve of the selector lever.2.Pull the sleeve up over the selector lever un‐
til the sleeve is inside out.3.Unclip and raise cover frame.4.Insert an Allen wrench of the right size into
the cap.5.Turn the cap with the Allen wrench, arrow 1,
and remove it, arrow 2.6.Insert the Allen wrench into the opening, ar‐
row 1.Seite 58ControlsDriving58
Online Edition for Part no. 01 40 2 609 184 - 09 11 500
Page 74 of 220

▷Do not hang pieces of clothing, such as jack‐
ets, over the backrests.▷Make sure that passengers do not lean their
heads against the side airbag; otherwise, se‐
rious injuries could result if the airbag sud‐
denly deployed.▷Do not remove the airbag restraint system.▷Do not remove the steering wheel.▷Do not apply adhesive materials to the air‐
bag cover panels, cover them or modify
them in any way.▷Never modify either the individual compo‐
nents or the wiring in the airbag system. This
also applies to the covers of the steering
wheel, the dashboard and the seats.◀
In the case of a malfunction, deactivation
and after triggering of the airbags
Do not touch the individual components imme‐
diately after the system has been triggered; oth‐
erwise, there is the danger of burns.
Only have the airbags checked, repaired or dis‐
mantled and the airbag generator scrapped by
your service center or a workshop that has the
necessary authorization for handling explosives.
Non-professional attempts to service the sys‐
tem could lead to failure in an emergency or un‐
desired triggering of the airbag, either of which
could result in injury.◀
Warning notices and information about the air‐
bags can also be found on the sun visors.
Automatic deactivation of the
passenger airbags
The system determines whether the front pas‐
senger seat is occupied by measuring the re‐
sistance of the human body. The front and side
airbags on the front passenger side are acti‐
vated or deactivated accordingly by the system.
The indicator lamp above the interior rearview
mirror shows the current status of the passen‐
ger airbags, deactivated or activated, refer to
Status of passenger airbags below.
Passenger feet in the footwell
Make sure that the front passenger keeps
his or her feet in the footwell; otherwise, the front
passenger airbags may not function properly.◀
Child restraint fixing system in the front
passenger seat
Before transporting a child on the passenger
seat, read the safety and operating instructions
under Transporting children safely, refer to
page 43.◀
Malfunction of the automatic
deactivation system
The front passenger airbags may be deactivated
if adolescents and adults sit in certain positions;
the indicator lamp for the front passenger air‐
bags comes on. In this case, change the sitting
position so that the front passenger airbags are
activated and the indicator lamp goes out. If the
desired airbag status cannot be achieved by
changing the sitting position, do not transport
the passenger in the vehicle.
To make sure that occupation of the seat cush‐
ion can be detected correctly:▷Do not attach seat covers, seat cushion pad‐
ding, ball mats or other items to the passen‐
ger seat unless they are specifically recom‐
mended by BMW.▷Do not place any objects on the front pas‐
senger seat.▷Do not place objects under the seat that
could press against the seat from below.
Status of passenger airbags
Seite 74ControlsSafety74
Online Edition for Part no. 01 40 2 609 184 - 09 11 500
Page 75 of 220
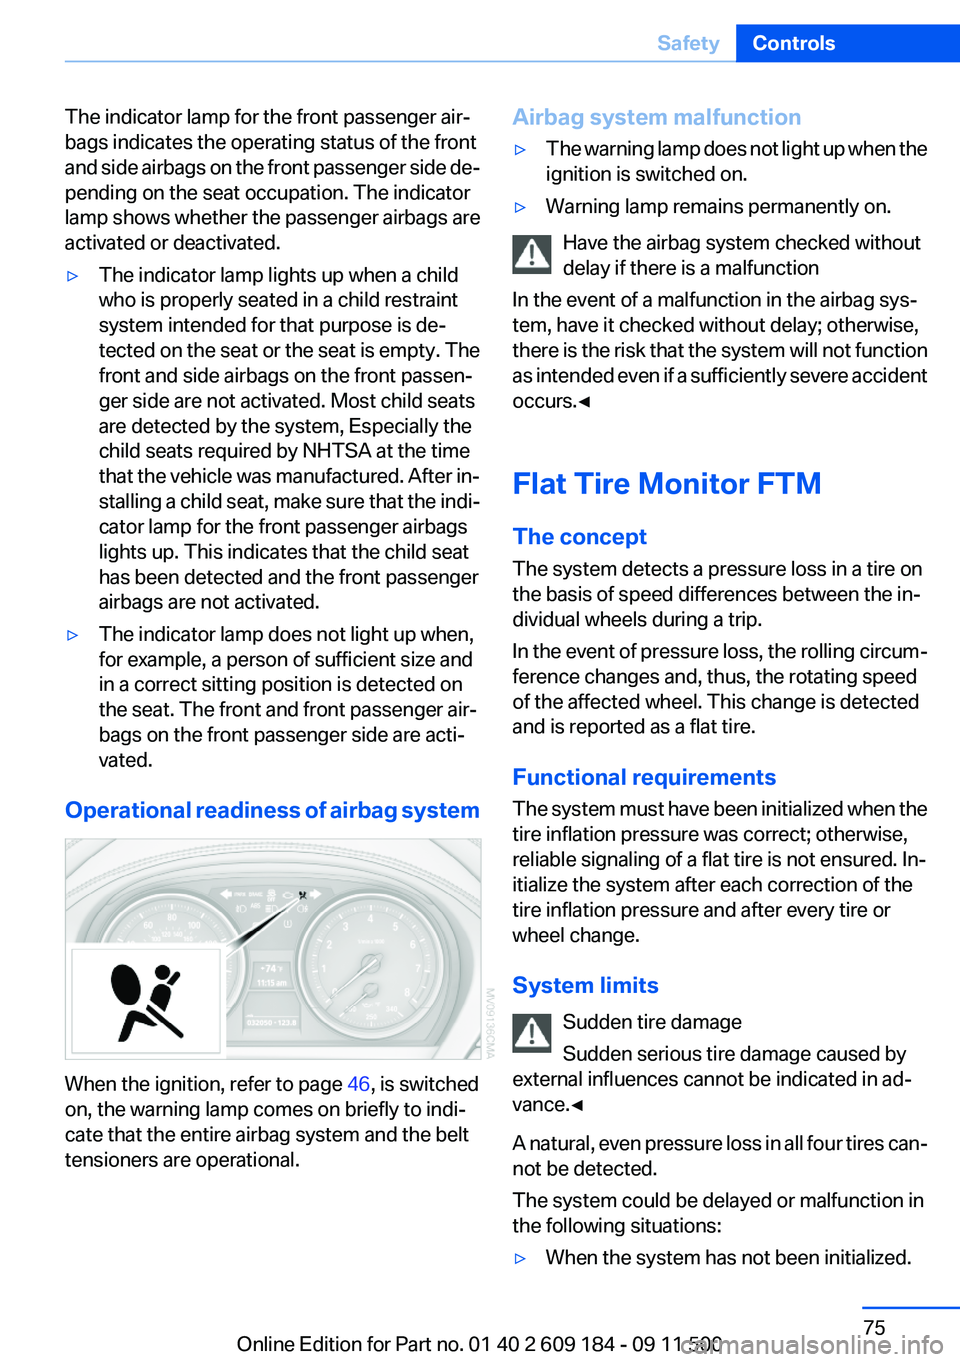
The indicator lamp for the front passenger air‐
bags indicates the operating status of the front
and side airbags on the front passenger side de‐
pending on the seat occupation. The indicator
lamp shows whether the passenger airbags are
activated or deactivated.▷The indicator lamp lights up when a child
who is properly seated in a child restraint
system intended for that purpose is de‐
tected on the seat or the seat is empty. The
front and side airbags on the front passen‐
ger side are not activated. Most child seats
are detected by the system, Especially the
child seats required by NHTSA at the time
that the vehicle was manufactured. After in‐
stalling a child seat, make sure that the indi‐
cator lamp for the front passenger airbags
lights up. This indicates that the child seat
has been detected and the front passenger
airbags are not activated.▷The indicator lamp does not light up when,
for example, a person of sufficient size and
in a correct sitting position is detected on
the seat. The front and front passenger air‐
bags on the front passenger side are acti‐
vated.
Operational readiness of airbag system
When the ignition, refer to page 46, is switched
on, the warning lamp comes on briefly to indi‐
cate that the entire airbag system and the belt
tensioners are operational.
Airbag system malfunction▷The warning lamp does not light up when the
ignition is switched on.▷Warning lamp remains permanently on.
Have the airbag system checked without
delay if there is a malfunction
In the event of a malfunction in the airbag sys‐
tem, have it checked without delay; otherwise,
there is the risk that the system will not function
as intended even if a sufficiently severe accident
occurs.◀
Flat Tire Monitor FTM
The concept
The system detects a pressure loss in a tire on
the basis of speed differences between the in‐
dividual wheels during a trip.
In the event of pressure loss, the rolling circum‐
ference changes and, thus, the rotating speed
of the affected wheel. This change is detected
and is reported as a flat tire.
Functional requirements
The system must have been initialized when the
tire inflation pressure was correct; otherwise,
reliable signaling of a flat tire is not ensured. In‐
itialize the system after each correction of the
tire inflation pressure and after every tire or
wheel change.
System limits Sudden tire damage
Sudden serious tire damage caused by
external influences cannot be indicated in ad‐
vance.◀
A natural, even pressure loss in all four tires can‐
not be detected.
The system could be delayed or malfunction in
the following situations:
▷When the system has not been initialized.Seite 75SafetyControls75
Online Edition for Part no. 01 40 2 609 184 - 09 11 500