2012 BMW X5M belt
[x] Cancel search: beltPage 86 of 317

Safety
Airbags
1
Front airbags
2 Head airbags
3 Side airbags
Front airbags
Front airbags help protect the driver and front
passenger by responding to frontal impacts in
which safety belts alone cannot provide ade‐
quate restraint.
Side airbags
In a lateral impact, the side airbag supports the
side of the body in the chest and lap area.
Head airbags
In
a lateral impact, the head airbag supports the
head.
Protective action
Airbags are not triggered in every impact situa‐
tion, e.g., in less severe accidents or rear-end
collisions.
Information on how to ensure the optimal
protective effect of the airbags
▷ Keep at a distance from the airbags.
▷ Always grasp the steering wheel on the
steering wheel rim, holding your hands at
the
3 o'clock and 9 o'clock positions, to keep
the danger of injury to your hands or arms as
low as possible if the airbag is triggered. ▷
There should be no people, animals, or ob‐
jects between an airbag and a person.
▷ Do not use the cover of the front airbag on
the front passenger side as a storage area.
▷ Keep the dashboard and window on the
front
passenger side clear, i.e., do not cover
with adhesive labels or coverings, and do not
attach holders such as for navigation instru‐
ments and mobile phones.
▷ Make sure that the front passenger is sitting
correctly, i.e., keeps his or her feet and legs
in the footwell; otherwise, leg injuries can
occur if the front airbag is triggered.
▷ Do not place slip covers, seat cushions or
other objects on the front passenger seat
that are not approved specifically for seats
with integrated side airbags.
▷ Do not hang pieces of clothing, such as jack‐
ets, over the backrests.
▷ Make sure that occupants keep their heads
away from the side airbag and do not rest
against the head airbag; otherwise, injuries
can occur if the airbags are triggered.
▷ Do not remove the airbag restraint system.
▷ Do not remove the steering wheel.
Seite 86
86 Online Edition for Part no. 01 40 2 606 735 - 03 11 500
Safety
Page 88 of 317
Depending on the vehicle's equipment, the ar‐
rangement of the switches and indicator lamps
may differ somewhat.
The indicator lamp for the front passenger air‐
bags indicates the operating state of the front
passenger airbags.
The lamp indicates whether the airbags are ac‐
tivated or deactivated.
▷
The indicator lamp lights up when a child in
a child restraint fixing system intended for
the purpose is properly detected on the
seat. The airbags on the front passenger
side are not activated.
▷ The indicator lamp does not light up when,
for example, a correctly seated person of
sufficient size is detected on the seat. The
airbags on the front passenger side are ac‐
tivated.
▷ The indicator lamp does not light up when
the seat is empty. However, the airbags on
the front passenger side are not activated.
The system generally detects children seated in
a child seat, especially in the child seats that
were required by NHTSA when the vehicle was
manufactured.
After installing a child seat, make
sure that the indicator lamp for the front pas‐
senger airbags lights up. This indicates that the
child seat has been detected and the front pas‐
senger airbags are not activated.
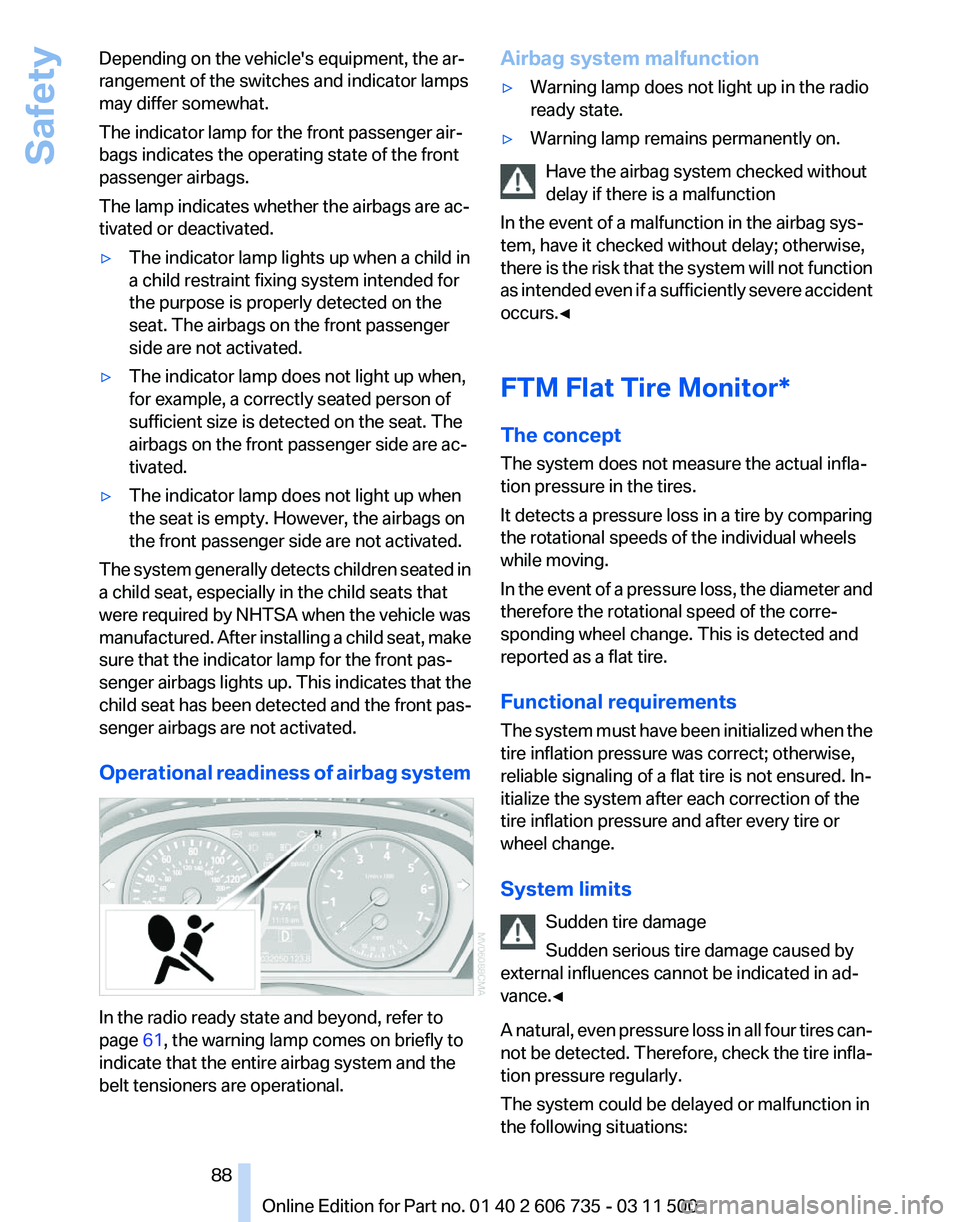
Operational readiness of airbag system In the radio ready state and beyond, refer to
page
61, the warning lamp comes on briefly to
indicate that the entire airbag system and the
belt tensioners are operational. Airbag system malfunction
▷
Warning lamp does not light up in the radio
ready state.
▷ Warning lamp remains permanently on.
Have the airbag system checked without
delay if there is a malfunction
In the event of a malfunction in the airbag sys‐
tem, have it checked without delay; otherwise,
there
is the risk that the system will not function
as intended even if a sufficiently severe accident
occurs.◀
FTM Flat Tire Monitor*
The concept
The system does not measure the actual infla‐
tion pressure in the tires.
It detects a pressure loss in a tire by comparing
the rotational speeds of the individual wheels
while moving.
In the event of a pressure loss, the diameter and
therefore the rotational speed of the corre‐
sponding wheel change. This is detected and
reported as a flat tire.
Functional requirements
The system must have been initialized when the
tire inflation pressure was correct; otherwise,
reliable signaling of a flat tire is not ensured. In‐
itialize the system after each correction of the
tire inflation pressure and after every tire or
wheel change.
System limits
Sudden tire damage
Sudden serious tire damage caused by
external influences cannot be indicated in ad‐
vance.◀
A natural, even pressure loss in all four tires can‐
not be detected. Therefore, check the tire infla‐
tion pressure regularly.
The system could be delayed or malfunction in
the following situations: Seite 88
88 Online Edition for Part no. 01 40 2 606 735 - 03 11 500Safety
Page 104 of 317

Selecting the distance
▷
Press the rocker down briefly:
Increase the distance.
▷ Press the rocker up briefly:
Decrease the distance.
The selected distance is displayed in the instru‐
ment panel.
Distance display Distance 1, closest
Distance 2
Distance 3
Distance 4, furthest
This
distance is set when you ac‐
tivate the system. Selecting an appropriate distance
Use good judgement to select the appro‐
priate following distance given road conditions,
traffic,
applicable laws and State driving recom‐
mendations for safe following distance. Other‐
wise, a violation of the law or risk of an accident
could result.◀ Interrupting the system
Press the lever up or down and additionally de‐
press the brake if the vehicle is stationary. The
mark
in the speedometer changes color and the
distance indicator goes out.
In addition, the system is interrupted:
▷ When the brakes are applied.
▷ When the transmission position D is disen‐
gaged.
▷ When DTC is activated or DSC is deacti‐
vated.
▷ When DSC is activated
▷ When the safety belt and the driver's door
are opened while the vehicle is stationary.
▷ When the system has not detected objects
for an extended period, e.g., on a road with
very
little traffic without road edge line mark‐
ings.
▷ The radar sensor is dirty.
Active intervention if the system is inter‐
rupted
If
the system is interrupted, actively intervene by
braking and, if necessary, with evasive maneu‐
vers; otherwise, there is the danger of an acci‐
dent occurring.◀
Calling up the stored desired speed and
distance
While driving
Press button 4, refer to page 103. All of the dis‐
plays in the instrument panel lights up. Seite 104
104 Online Edition for Part no. 01 40 2 606 735 - 03 11 500
Driving comfort
Page 133 of 317
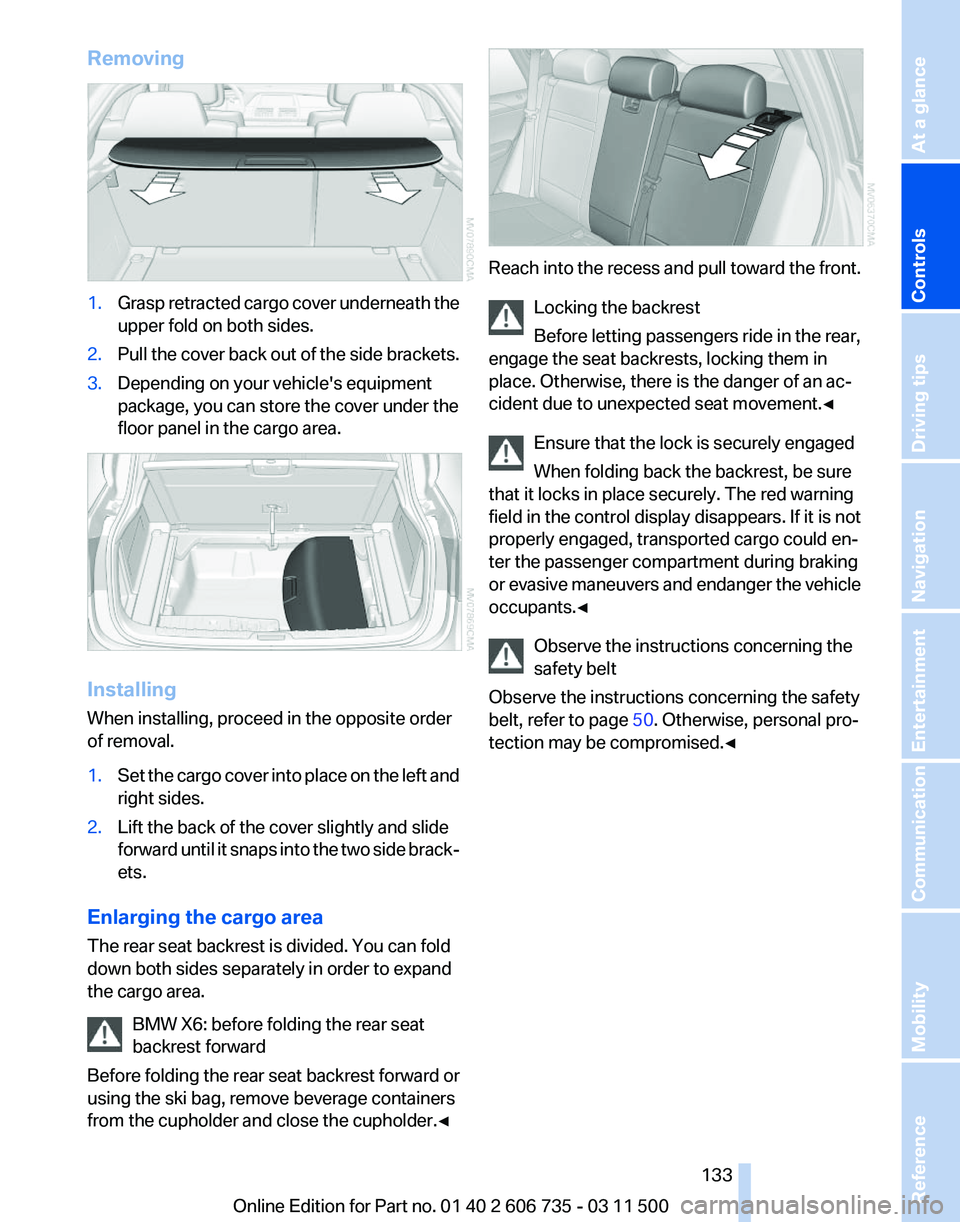
Removing
1.
Grasp retracted cargo cover underneath the
upper fold on both sides.
2. Pull the cover back out of the side brackets.
3. Depending on your vehicle's equipment
package, you can store the cover under the
floor panel in the cargo area. Installing
When installing, proceed in the opposite order
of removal.
1.
Set the cargo cover into place on the left and
right sides.
2. Lift the back of the cover slightly and slide
forward
until it snaps into the two side brack‐
ets.
Enlarging the cargo area
The rear seat backrest is divided. You can fold
down both sides separately in order to expand
the cargo area. BMW X6: before folding the rear seat
backrest forward
Before
folding the rear seat backrest forward or
using the ski bag, remove beverage containers
from the cupholder and close the cupholder.◀ Reach into the recess and pull toward the front.
Locking the backrest
Before letting passengers ride in the rear,
engage the seat backrests, locking them in
place. Otherwise, there is the danger of an ac‐
cident due to unexpected seat movement.
◀
Ensure that the lock is securely engaged
When folding back the backrest, be sure
that it locks in place securely. The red warning
field in the control display disappears. If it is not
properly engaged, transported cargo could en‐
ter the passenger compartment during braking
or evasive maneuvers and endanger the vehicle
occupants.◀
Observe the instructions concerning the
safety belt
Observe the instructions concerning the safety
belt, refer to page 50. Otherwise, personal pro‐
tection may be compromised.◀ Seite 133
133Online Edition for Part no. 01 40 2 606 735 - 03 11 500
Reference Mobility Communication Entertainment Navigation Driving tips
Controls At a glance
Page 138 of 317
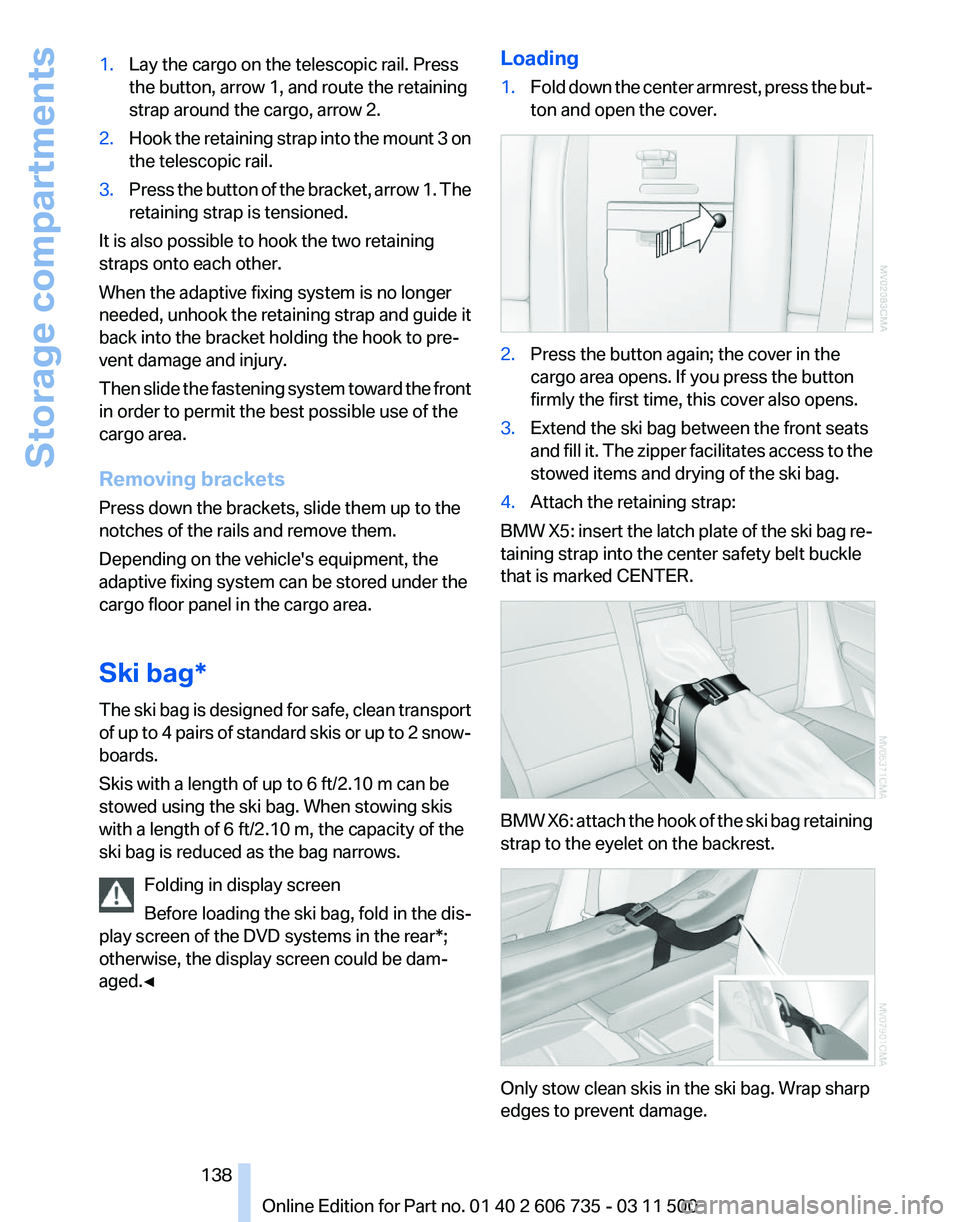
1.
Lay the cargo on the telescopic rail. Press
the button, arrow 1, and route the retaining
strap around the cargo, arrow 2.
2. Hook the retaining strap into the mount 3 on
the telescopic rail.
3. Press the button of the bracket, arrow 1. The
retaining strap is tensioned.
It is also possible to hook the two retaining
straps onto each other.
When the adaptive fixing system is no longer
needed,
unhook the retaining strap and guide it
back into the bracket holding the hook to pre‐
vent damage and injury.
Then slide the fastening system toward the front
in order to permit the best possible use of the
cargo area.
Removing brackets
Press down the brackets, slide them up to the
notches of the rails and remove them.
Depending on the vehicle's equipment, the
adaptive fixing system can be stored under the
cargo floor panel in the cargo area.
Ski bag*
The ski bag is designed for safe, clean transport
of up to 4 pairs of standard skis or up to 2 snow‐
boards.
Skis with a length of up to 6 ft/2.10 m can be
stowed using the ski bag. When stowing skis
with a length of 6 ft/2.10 m, the capacity of the
ski bag is reduced as the bag narrows.
Folding in display screen
Before loading the ski bag, fold in the dis‐
play screen of the DVD systems in the rear*;
otherwise, the display screen could be dam‐
aged.◀ Loading
1.
Fold down the center armrest, press the but‐
ton and open the cover. 2.
Press the button again; the cover in the
cargo area opens. If you press the button
firmly the first time, this cover also opens.
3. Extend the ski bag between the front seats
and
fill it. The zipper facilitates access to the
stowed items and drying of the ski bag.
4. Attach the retaining strap:
BMW X5: insert the latch plate of the ski bag re‐
taining strap into the center safety belt buckle
that is marked CENTER. BMW X6: attach the hook of the ski bag retaining
strap to the eyelet on the backrest.
Only stow clean skis in the ski bag. Wrap sharp
edges to prevent damage.
Seite 138
138 Online Edition for Part no. 01 40 2 606 735 - 03 11 500
Storage compartments
Page 146 of 317
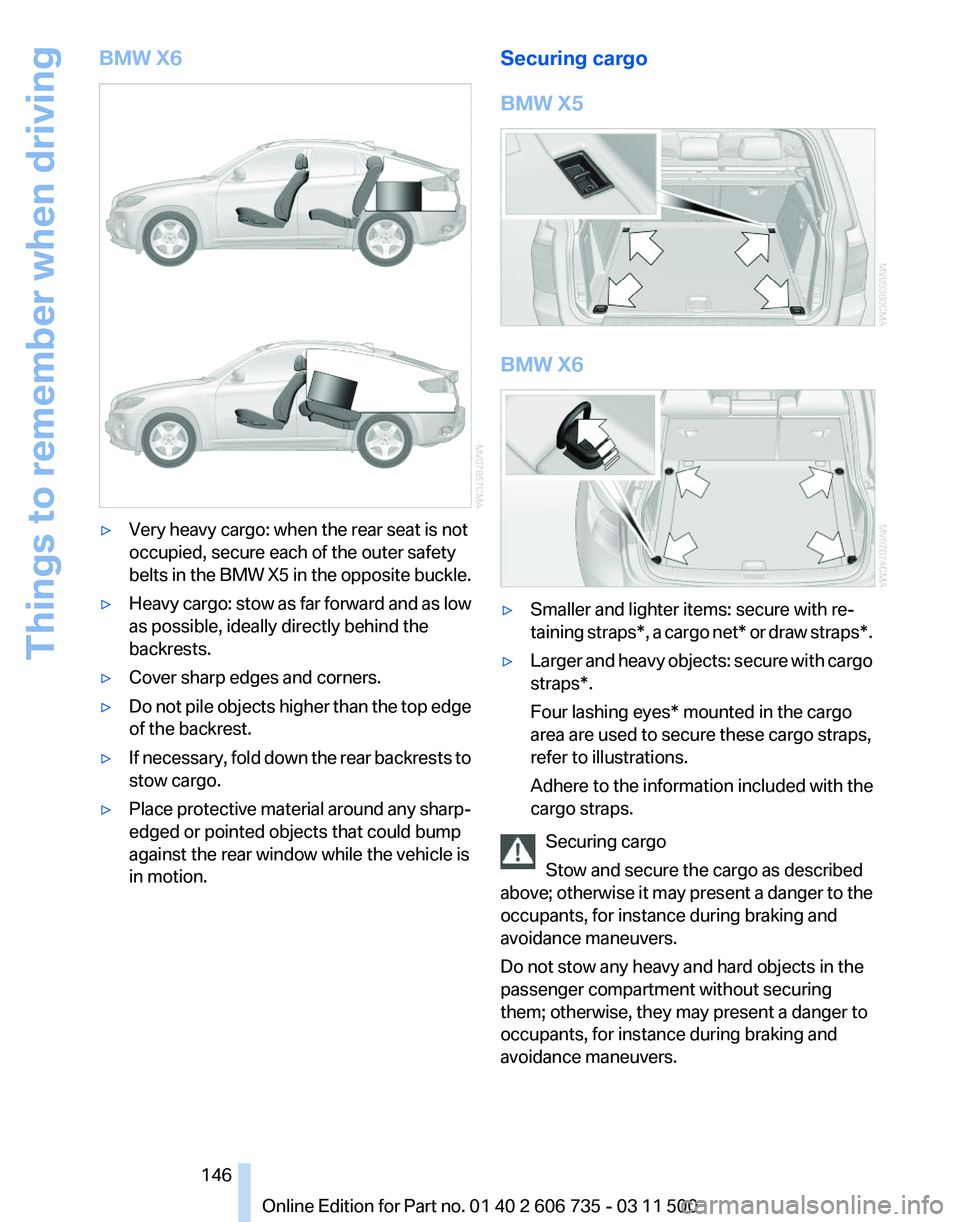
BMW X6
▷
Very heavy cargo: when the rear seat is not
occupied, secure each of the outer safety
belts
in the BMW X5 in the opposite buckle.
▷ Heavy cargo: stow as far forward and as low
as possible, ideally directly behind the
backrests.
▷ Cover sharp edges and corners.
▷ Do not pile objects higher than the top edge
of the backrest.
▷ If necessary, fold down the rear backrests to
stow cargo.
▷ Place protective material around any sharp-
edged or pointed objects that could bump
against the rear window while the vehicle is
in motion. Securing cargo
BMW X5 BMW X6
▷
Smaller and lighter items: secure with re‐
taining
straps*, a cargo net* or draw straps*.
▷ Larger and heavy objects: secure with cargo
straps*.
Four lashing eyes* mounted in the cargo
area are used to secure these cargo straps,
refer to illustrations.
Adhere to the information included with the
cargo straps.
Securing cargo
Stow and secure the cargo as described
above;
otherwise it may present a danger to the
occupants, for instance during braking and
avoidance maneuvers.
Do not stow any heavy and hard objects in the
passenger compartment without securing
them; otherwise, they may present a danger to
occupants, for instance during braking and
avoidance maneuvers. Seite 146
146 Online Edition for Part no. 01 40 2 606 735 - 03 11 500
Things to remember when driving
Page 173 of 317
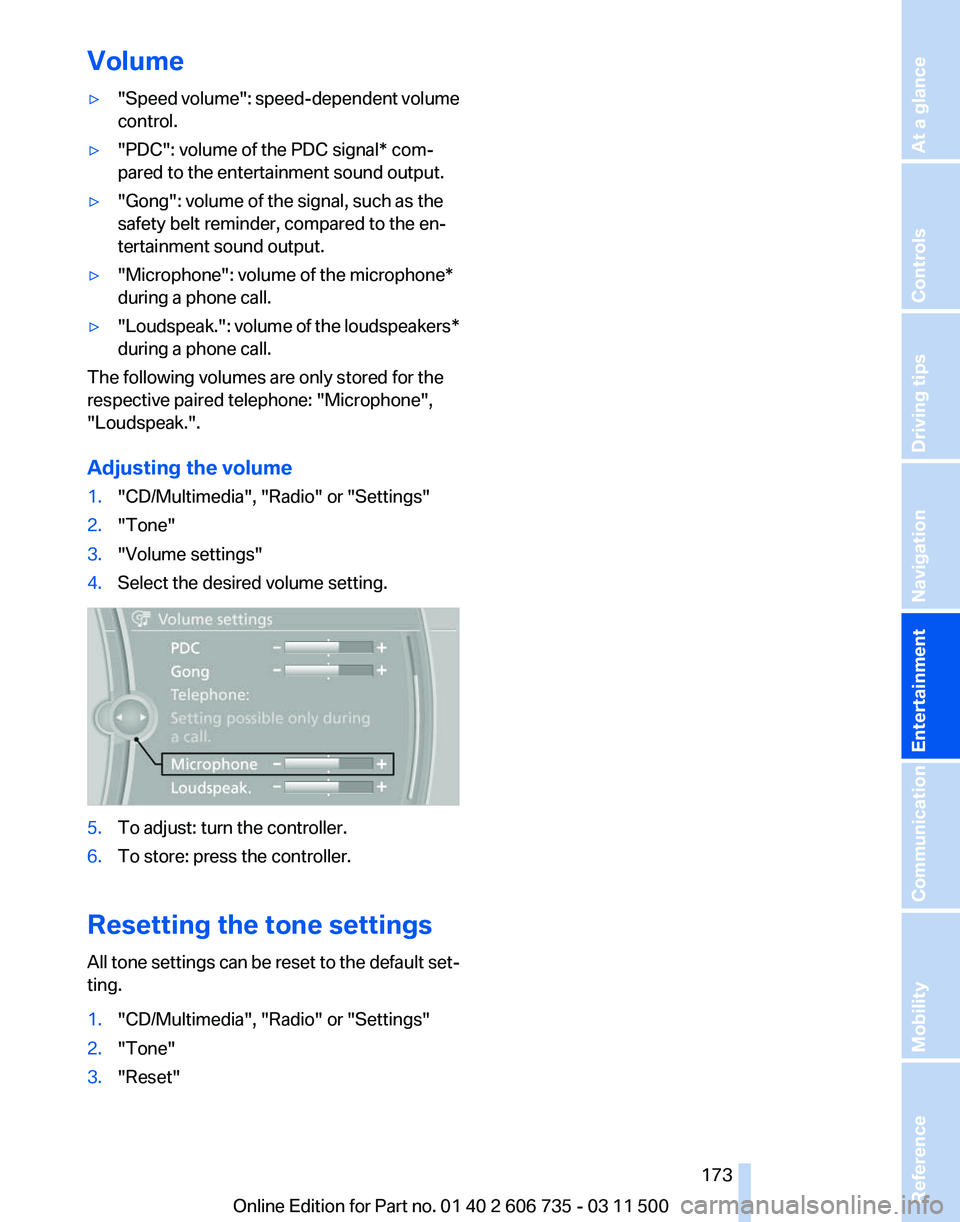
Volume
▷
"Speed volume": speed-dependent volume
control.
▷ "PDC": volume of the PDC signal* com‐
pared to the entertainment sound output.
▷ "Gong": volume of the signal, such as the
safety belt reminder, compared to the en‐
tertainment sound output.
▷ "Microphone": volume of the microphone*
during a phone call.
▷ "Loudspeak.":
volume of the loudspeakers*
during a phone call.
The following volumes are only stored for the
respective paired telephone:
"Microphone",
"Loudspeak.".
Adjusting the volume
1. "CD/Multimedia", "Radio" or "Settings"
2. "Tone"
3. "Volume settings"
4. Select the desired volume setting. 5.
To adjust: turn the controller.
6. To store: press the controller.
Resetting the tone settings
All
tone settings can be reset to the default set‐
ting.
1. "CD/Multimedia", "Radio" or "Settings"
2. "Tone"
3. "Reset"
Seite 173
173Online Edition for Part no. 01 40 2 606 735 - 03 11 500
Reference Mobility Communication
Entertainment Navigation Driving tips Controls At a glance
Page 287 of 317

Fine wood parts*
Clean fine wood facing and fine wood compo‐
nents
only with a moist rag. Then dry with a soft
cloth.
Plastic components
These include:
▷ Imitation leather surfaces.
▷ Headliner.
▷ Lamp lenses.
▷ Instrument cluster cover.
▷ Matte black spray-coated components.
Clean with a microfiber cloth.
Moisten the cloth lightly and use plastic
cleanser, if necessary.
Do not soak the headliner.
Do not use cleansers that contain alcohol
or solvents
Do
not use cleansers that contain alcohol or sol‐
vents, such as lacquer thinners, heavy-duty
grease removers, fuel, or such; this could lead to
surface damage.◀
Safety belts
Dirty belt straps impede the reeling action and
thus have a negative impact on safety.
No chemical cleaning
Do not clean chemically; this can destroy
the webbing.◀
Use only a mild soapy solution, with the safety
belts clipped into their buckles.
Do not allow the reels to retract the safety belts
until they are dry.
Carpets and floor mats*
No objects in the area around the pedals
Keep floor mats, carpets, and any other
objects out of the area of motion of the pedals;
otherwise, the function of the pedals could be
impeded while driving
Do not place additional floor mats over existing
mats or other objects. Only use floor mats that have been approved for
the vehicle and can be properly fixed in place.
Ensure
that the floor mats are securely fastened
again when they are returned after being re‐
moved, such as for cleaning.◀
Floor mats can be removed from the passenger
compartment for cleaning.
When returning the floor mats, secure them
again to prevent slipping.
If the floor carpets are very dirty, clean with a
microfiber cloth and water or a textile cleaner. To
prevent matting of the carpet, rub back and forth
in the direction of travel only.
Sensors/cameras
To clean sensors or cameras, use a cloth mois‐
tened with a small amount of glass cleaner.
Displays/screens
Use a microfiber cloth to clean the Control Dis‐
play or instrument cluster, for example.
Cleaning displays
Do not use chemical or household cleans‐
ers.
Keep all fluids and moisture away from the unit.
Otherwise, they could affect or damage surfa‐
ces or electrical components.
Avoid pressing too hard when cleaning and do
not use abrasive materials; otherwise, damage
can result.◀
Long-term vehicle storage
Your service center can advise you on what to
consider when storing the vehicle for longer
than three months. Seite 287
287Online Edition for Part no. 01 40 2 606 735 - 03 11 500
Reference
Mobility Communication Entertainment Navigation Driving tips Controls At a glance