2012 BMW X5 XDRIVE 50I center console
[x] Cancel search: center consolePage 16 of 317

All around the center console
1
Headliner 17
2 Control Display 19
3 Hazard warning system 280
Central locking system 33
4 Opening glove compartment 134
5 Automatic climate control with 2-zone con‐
trol 120
Automatic climate control with 4-zone con‐
trol* 124
6 Radio and CD/DVD drive* 174 7 Open the tailgate
33 36 Active seat* 49
Park Distance Control
PDC* 110
Top View* 114
Backup camera* 112
HDC Hill Descent Control
97
Seite 16
16 Online Edition for Part no. 01 40 2 606 735 - 03 11 500Cockpit
Page 35 of 317

Adjusting the opening height
When adjusting the opening height, en‐
sure that there is a clearance of at least 4 in/
10
cm above the tailgate. Otherwise, the ceiling
may not be high enough for the open tailgate if
the load situation changes.◀
1. "Settings"
2. "Tailgate"
3. Turn the controller until the desired opening
height is selected. Opening
The tailgate pivots back and up when it opens.
Ensure that adequate clearance is available be‐
fore opening.
The
tailgate opens automatically to the adjusted
opening height. ▷
Press the button on the outside of the tail‐
gate when the vehicle is unlocked.
▷ Press the button in the center con‐
sole.▷ Press the button on the remote control
for approx. 1 second and release.
The opening procedure is interrupted:
▷ When the vehicle starts moving. ▷
By pressing the button in the center
console again. ▷ By pressing the button on the remote
control for a longer period.
▷ By pressing the button on the outside of the
tailgate.
▷ By pressing the button on the inside of the
tailgate.
Closing Danger of pinching
Make
sure that the closing path of the tail‐
gate is clear; otherwise, injuries may result.◀
Function requirement:
The lower tailgate is closed and must be locked
on both sides. The tailgate closes automatically when the but‐
ton on the inside of the tailgate is pressed.
To stop the closing process:
▷
Press the button on the inside of the tailgate.
▷ Press the button on the exterior of the tail‐
gate.
Closing is not canceled when you put the vehicle
into motion.
Manually opening or closing
In case of an electrical defect of the automatic
tailgate operation function:
1. Manually release the tailgate, refer to
page 34.
2. Open or close the tailgate slowly and with‐
out making sudden movements. Seite 35
35Online Edition for Part no. 01 40 2 606 735 - 03 11 500
Reference Mobility Communication Entertainment Navigation Driving tips
Controls At a glance
Page 36 of 317
Do not use force to open or close
If the tailgate offers increased resistance,
do
not forcefully open or close the tailgate; oth‐
erwise, injury or damage may result.◀
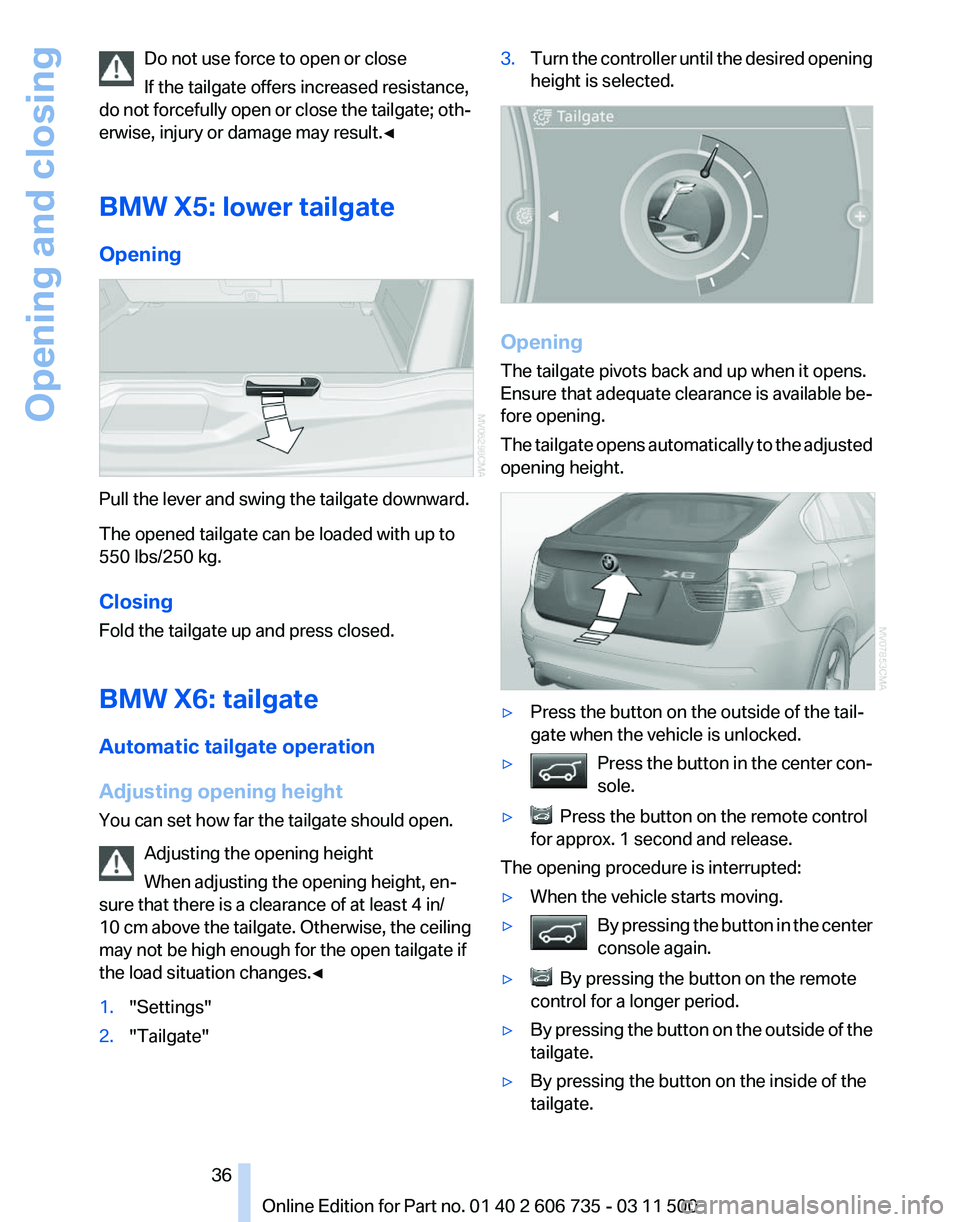
BMW X5: lower tailgate
Opening Pull the lever and swing the tailgate downward.
The opened tailgate can be loaded with up to
550 lbs/250 kg.
Closing
Fold the tailgate up and press closed.
BMW X6: tailgate
Automatic tailgate operation
Adjusting opening height
You can set how far the tailgate should open.
Adjusting the opening height
When adjusting the opening height, en‐
sure that there is a clearance of at least 4 in/
10
cm above the tailgate. Otherwise, the ceiling
may not be high enough for the open tailgate if
the load situation changes.◀
1. "Settings"
2. "Tailgate" 3.
Turn the controller until the desired opening
height is selected. Opening
The tailgate pivots back and up when it opens.
Ensure that adequate clearance is available be‐
fore opening.
The
tailgate opens automatically to the adjusted
opening height. ▷
Press the button on the outside of the tail‐
gate when the vehicle is unlocked.
▷ Press the button in the center con‐
sole. ▷ Press the button on the remote control
for approx. 1 second and release.
The opening procedure is interrupted:
▷ When the vehicle starts moving.
▷ By pressing the button in the center
console again. ▷ By pressing the button on the remote
control for a longer period.
▷ By pressing the button on the outside of the
tailgate.
▷ By pressing the button on the inside of the
tailgate.
Seite 36
36 Online Edition for Part no. 01 40 2 606 735 - 03 11 500
Opening and closing
Page 124 of 317
▷
Activating heating and distributing air in
footwell:
Turn toward front
▷ Distributing air in storage compartment
area between seats:
Turn toward rear
2 Button for switching on the blower: LED is lit
The heating is not ready for operation without
switching on the blower. After the heating is
switched
off, the blower can be used to recircu‐
late the air within the vehicle, for instance at high
temperatures. To do this, turn thumbwheel 1 to‐
ward the rear and switch on the blower, button 2.
Microfilter/activated-charcoal filter
The microfilter traps dust and pollen in the in‐
coming air.
The activated-charcoal filter removes gaseous
pollutants from the outside air that enters the
vehicle.
The service center replaces this combined filter
during routine maintenance.
More information can be found in the service re‐
quirements display, refer to page 75.
Automatic climate control
with 4-zone control*
Front operation
Corresponds to the operation of automatic cli‐
mate control with 2-zone control, refer to
page 120.
Rear operation
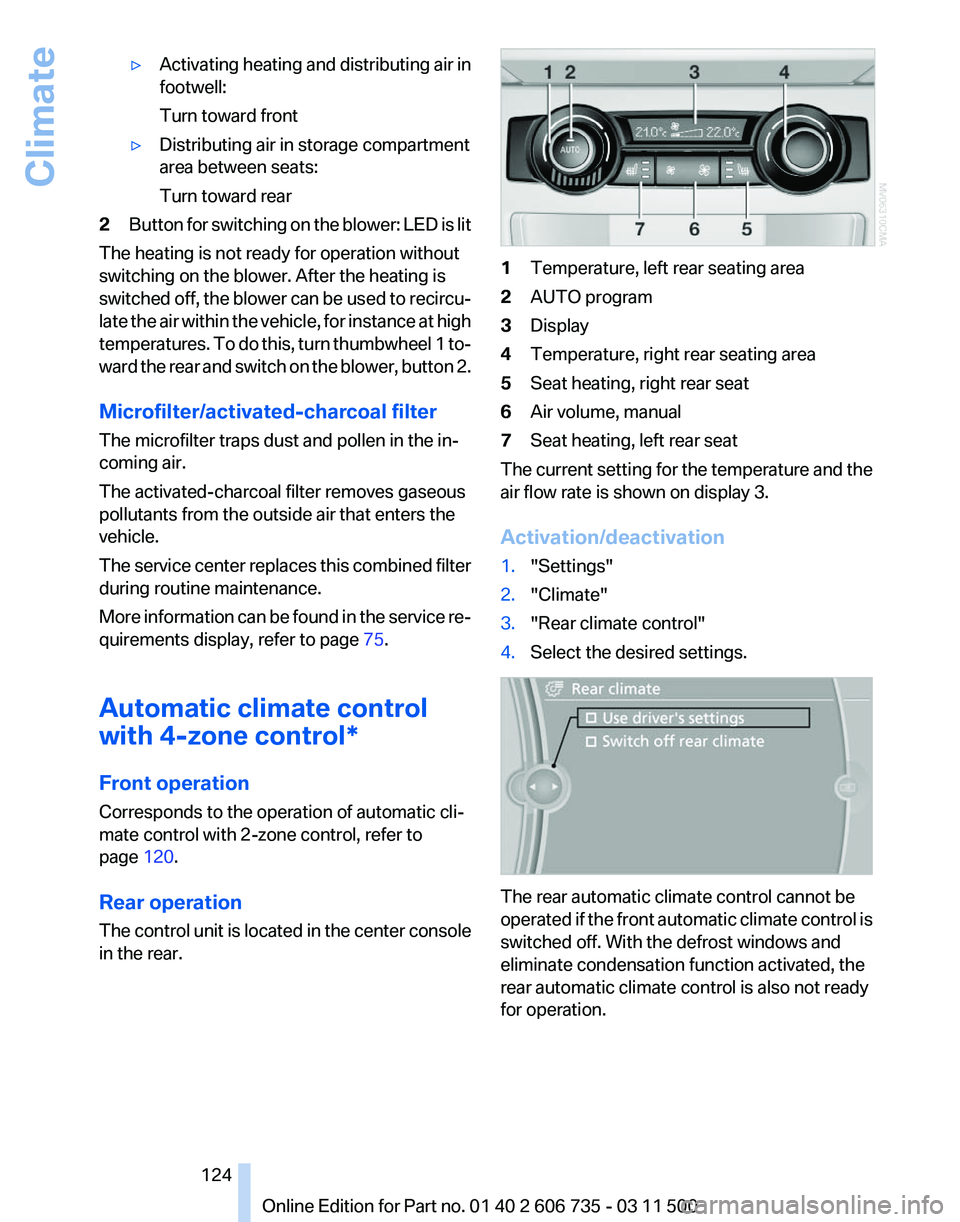
The control unit is located in the center console
in the rear. 1
Temperature, left rear seating area
2 AUTO program
3 Display
4 Temperature, right rear seating area
5 Seat heating, right rear seat
6 Air volume, manual
7 Seat heating, left rear seat
The current setting for the temperature and the
air flow rate is shown on display 3.
Activation/deactivation
1. "Settings"
2. "Climate"
3. "Rear climate control"
4. Select the desired settings. The rear automatic climate control cannot be
operated
if the front automatic climate control is
switched off. With the defrost windows and
eliminate condensation function activated, the
rear automatic climate control is also not ready
for operation.
Seite 124
124 Online Edition for Part no. 01 40 2 606 735 - 03 11 500
Climate
Page 131 of 317
Connecting electrical devices
Sockets
The lighter socket can be used as a socket for
electrical
equipment while the engine is running
or when the ignition is switched on. The total
load of all sockets must not exceed 140 watt at
12 volt.
Avoid damaging the sockets by attempting to
insert plugs of unsuitable shape or size.
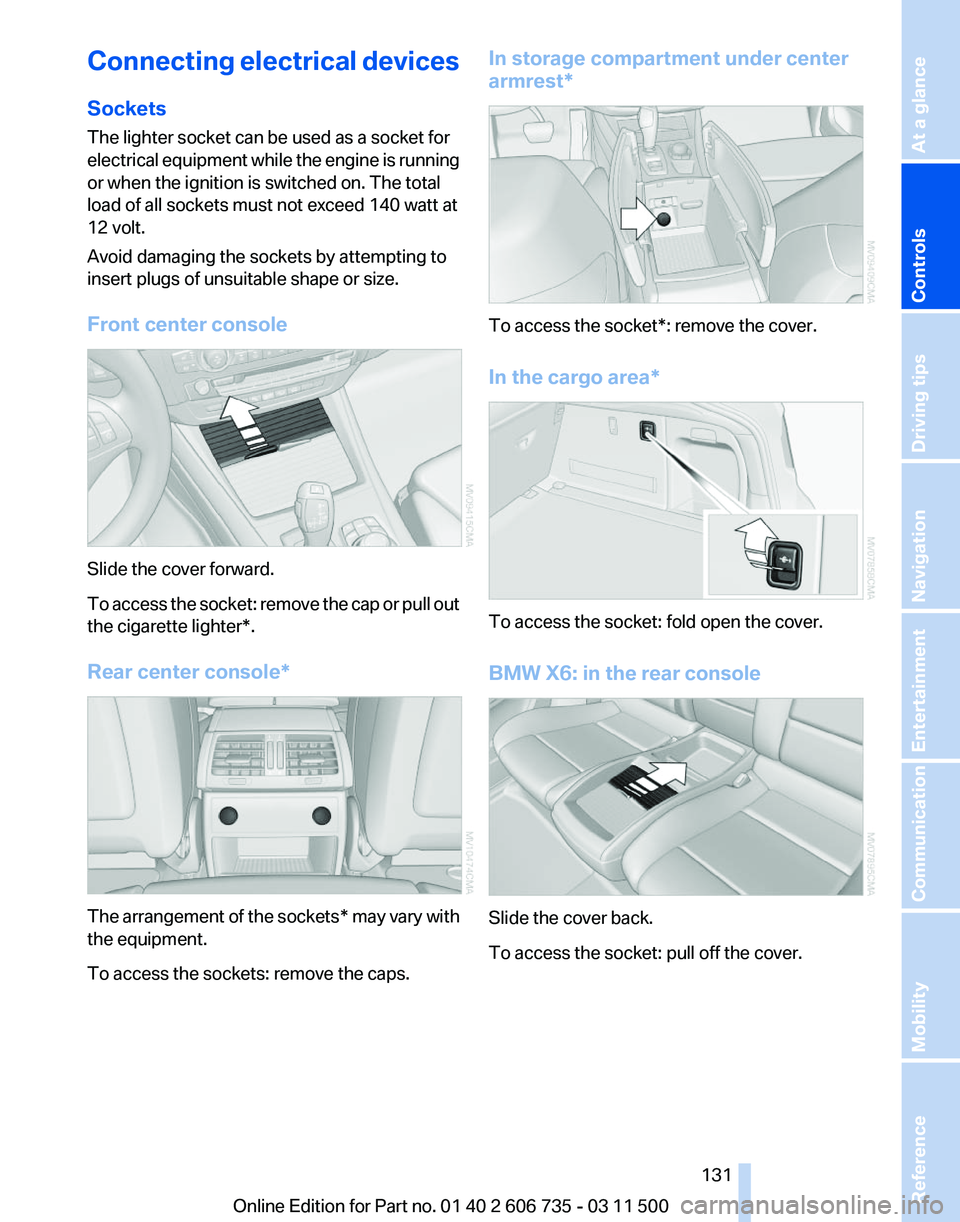
Front center console Slide the cover forward.
To
access the socket: remove the cap or pull out
the cigarette lighter*.
Rear center console* The arrangement of the sockets*
may vary with
the equipment.
To access the sockets: remove the caps. In storage compartment under center
armrest*
To access the socket*: remove the cover.
In the cargo area*
To access the socket: fold open the cover.
BMW X6: in the rear console
Slide the cover back.
To access the socket: pull off the cover.
Seite 131
131Online Edition for Part no. 01 40 2 606 735 - 03 11 500
Reference Mobility Communication Entertainment Navigation Driving tips
Controls At a glance
Page 135 of 317
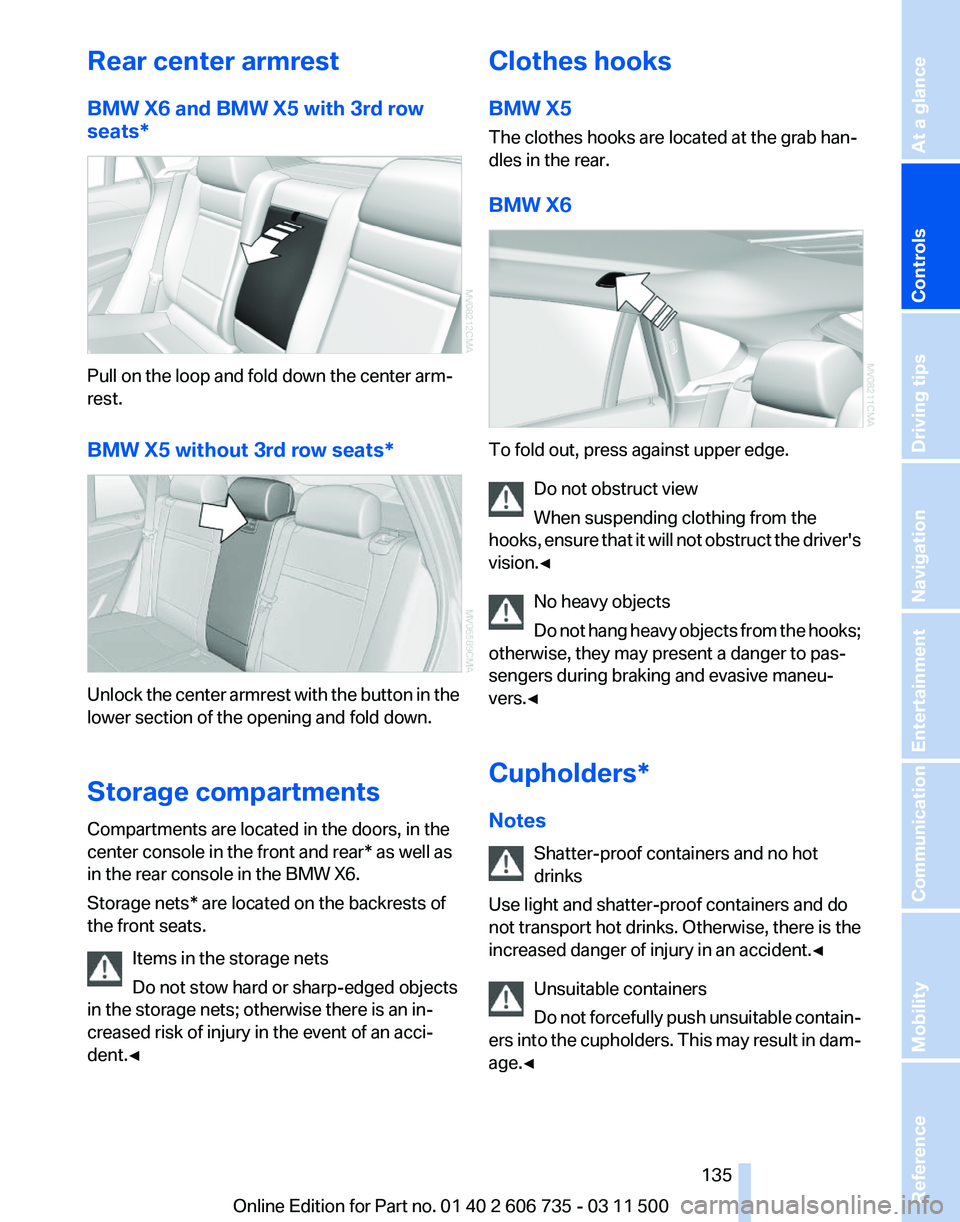
Rear center armrest
BMW X6 and BMW X5 with 3rd row
seats*
Pull on the loop and fold down the center arm‐
rest.
BMW X5 without 3rd row seats*
Unlock the center armrest with the button in the
lower section of the opening and fold down.
Storage compartments
Compartments are located in the doors, in the
center console in the front and rear* as well as
in the rear console in the BMW X6.
Storage nets* are located on the backrests of
the front seats.
Items in the storage nets
Do not stow hard or sharp-edged objects
in the storage nets; otherwise there is an in‐
creased risk of injury in the event of an acci‐
dent.◀ Clothes hooks
BMW X5
The clothes hooks are located at the grab han‐
dles in the rear.
BMW X6
To fold out, press against upper edge.
Do not obstruct view
When suspending clothing from the
hooks,
ensure that it will not obstruct the driver's
vision.◀
No heavy objects
Do not hang heavy objects from the hooks;
otherwise, they may present a danger to pas‐
sengers during braking and evasive maneu‐
vers.◀
Cupholders*
Notes
Shatter-proof containers and no hot
drinks
Use light and shatter-proof containers and do
not transport hot drinks. Otherwise, there is the
increased danger of injury in an accident.◀
Unsuitable containers
Do not forcefully push unsuitable contain‐
ers into the cupholders. This may result in dam‐
age.◀ Seite 135
135Online Edition for Part no. 01 40 2 606 735 - 03 11 500
Reference Mobility Communication Entertainment Navigation Driving tips
Controls At a glance
Page 136 of 317
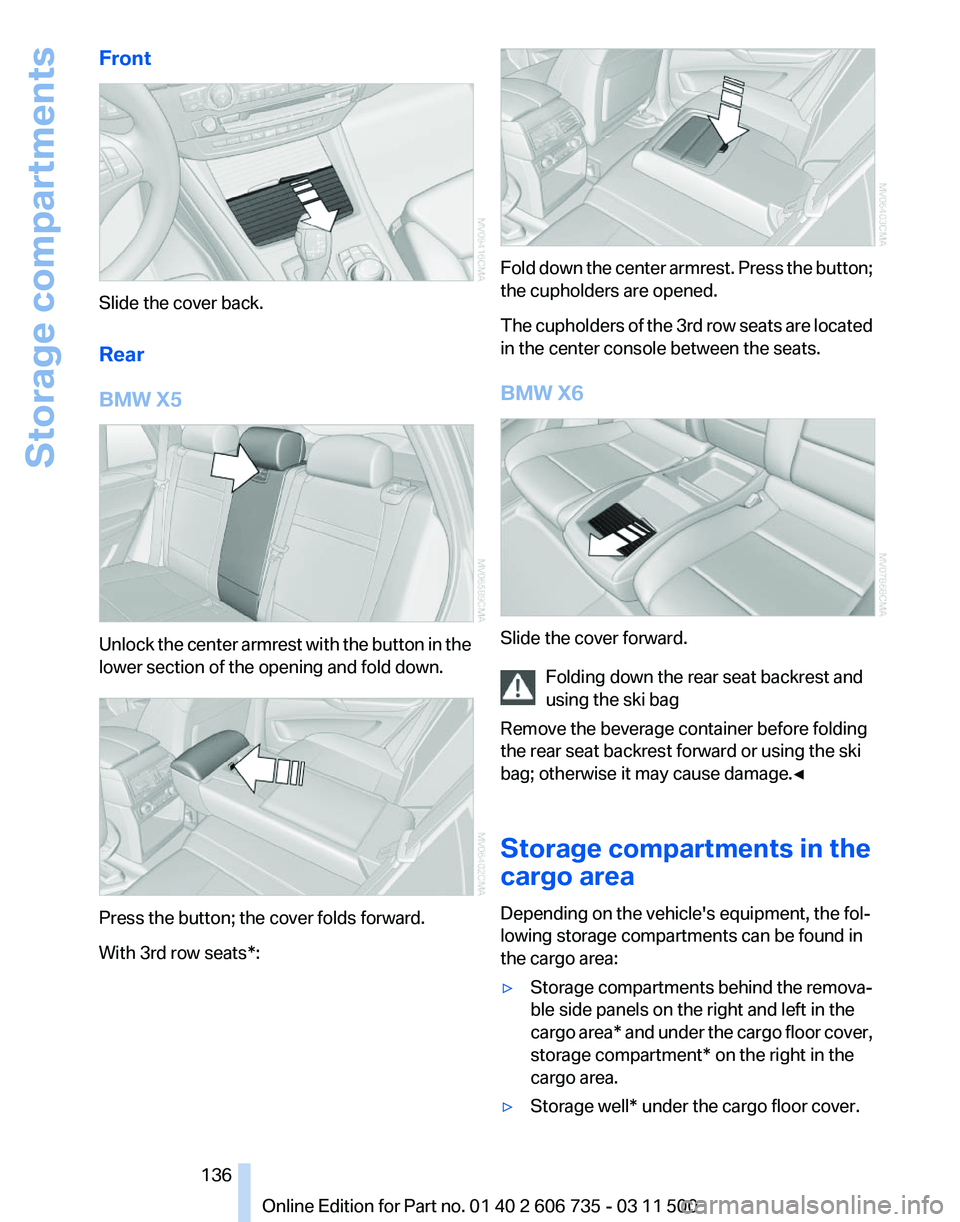
Front
Slide the cover back.
Rear
BMW X5
Unlock the center armrest with the button in the
lower section of the opening and fold down.
Press the button; the cover folds forward.
With 3rd row seats*: Fold down the center armrest. Press the button;
the cupholders are opened.
The
cupholders of the 3rd row seats are located
in the center console between the seats.
BMW X6 Slide the cover forward.
Folding down the rear seat backrest and
using the ski bag
Remove the beverage container before folding
the rear seat backrest forward or using the ski
bag; otherwise it may cause damage.
◀
Storage compartments in the
cargo area
Depending on the vehicle's equipment, the fol‐
lowing storage compartments can be found in
the cargo area:
▷ Storage compartments behind the remova‐
ble side panels on the right and left in the
cargo
area* and under the cargo floor cover,
storage compartment* on the right in the
cargo area.
▷ Storage well* under the cargo floor cover. Seite 136
136 Online Edition for Part no. 01 40 2 606 735 - 03 11 500
Storage compartments
Page 220 of 317
▷
The strength of the Bluetooth signal on the
mobile phone can be adjusted, depending
on the mobile phone.
▷ Insert the mobile phone into the snap-in
adapter* or place it in the area of the center
console.
▷ Adjust the volume of the microphone and
loudspeakers separately.
If all points in this list have been checked and the
required function is still not available, please
contact the hotline or service center.
Controls
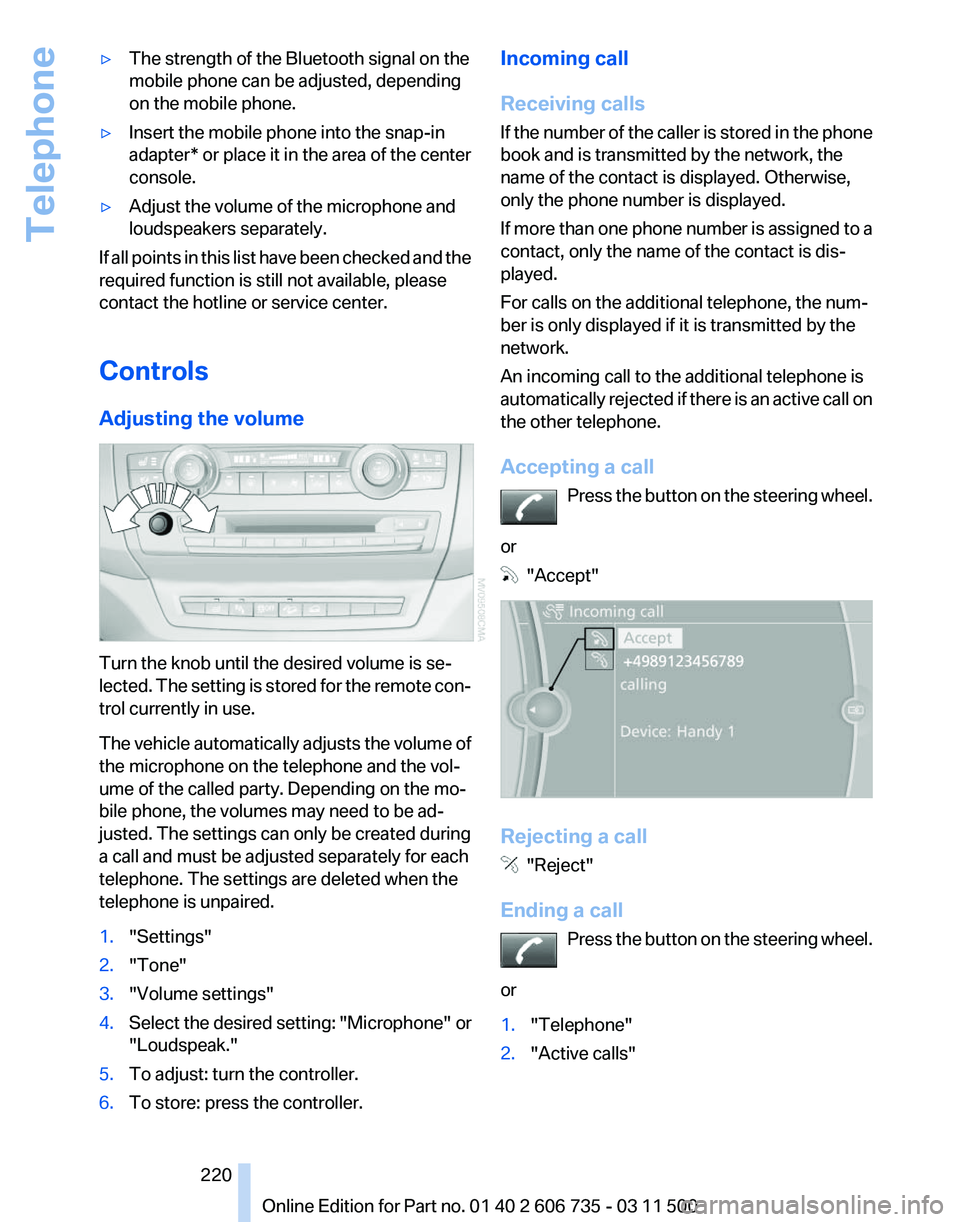
Adjusting the volume Turn the knob until the desired volume is se‐
lected.
The setting is stored for the remote con‐
trol currently in use.
The vehicle automatically adjusts the volume of
the microphone on the telephone and the vol‐
ume of the called party. Depending on the mo‐
bile phone, the volumes may need to be ad‐
justed. The settings can only be created during
a call and must be adjusted separately for each
telephone. The settings are deleted when the
telephone is unpaired.
1. "Settings"
2. "Tone"
3. "Volume settings"
4. Select the desired setting: "Microphone" or
"Loudspeak."
5. To adjust: turn the controller.
6. To store: press the controller. Incoming call
Receiving calls
If
the number of the caller is stored in the phone
book and is transmitted by the network, the
name of the contact is displayed. Otherwise,
only the phone number is displayed.
If more than one phone number is assigned to a
contact, only the name of the contact is dis‐
played.
For calls on the additional telephone, the num‐
ber is only displayed if it is transmitted by the
network.
An incoming call to the additional telephone is
automatically rejected if there is an active call on
the other telephone.
Accepting a call
Press the button on the steering wheel.
or "Accept"
Rejecting a call
"Reject"
Ending a call Press
the button on the steering wheel.
or
1. "Telephone"
2. "Active calls" Seite 220
220 Online Edition for Part no. 01 40 2 606 735 - 03 11 500
Telephone