2012 BMW ACTIVEHYBRID 5 center console
[x] Cancel search: center consolePage 14 of 319

All around the center console1Headliner 152Control Display 163Glove compartment 1464Ventilation 1335Hazard warning system 283Central locking system 396Radio 188
CD/Multimedia 1967Automatic climate control 1308Controller with buttons 169Parking brake 68Auto Hold 6910PDC Park Distance Control 114
Top View 119
Backup camera 116
Parking assistant 121Side View 12011Driving Experience Switch 109DSC Dynamic Stability Con‐
trol 10712Transmission selector leverSeite 14At a glanceCockpit14
Online Edition for Part no. 01 40 2 900 579 - 03 12 490
Page 144 of 319

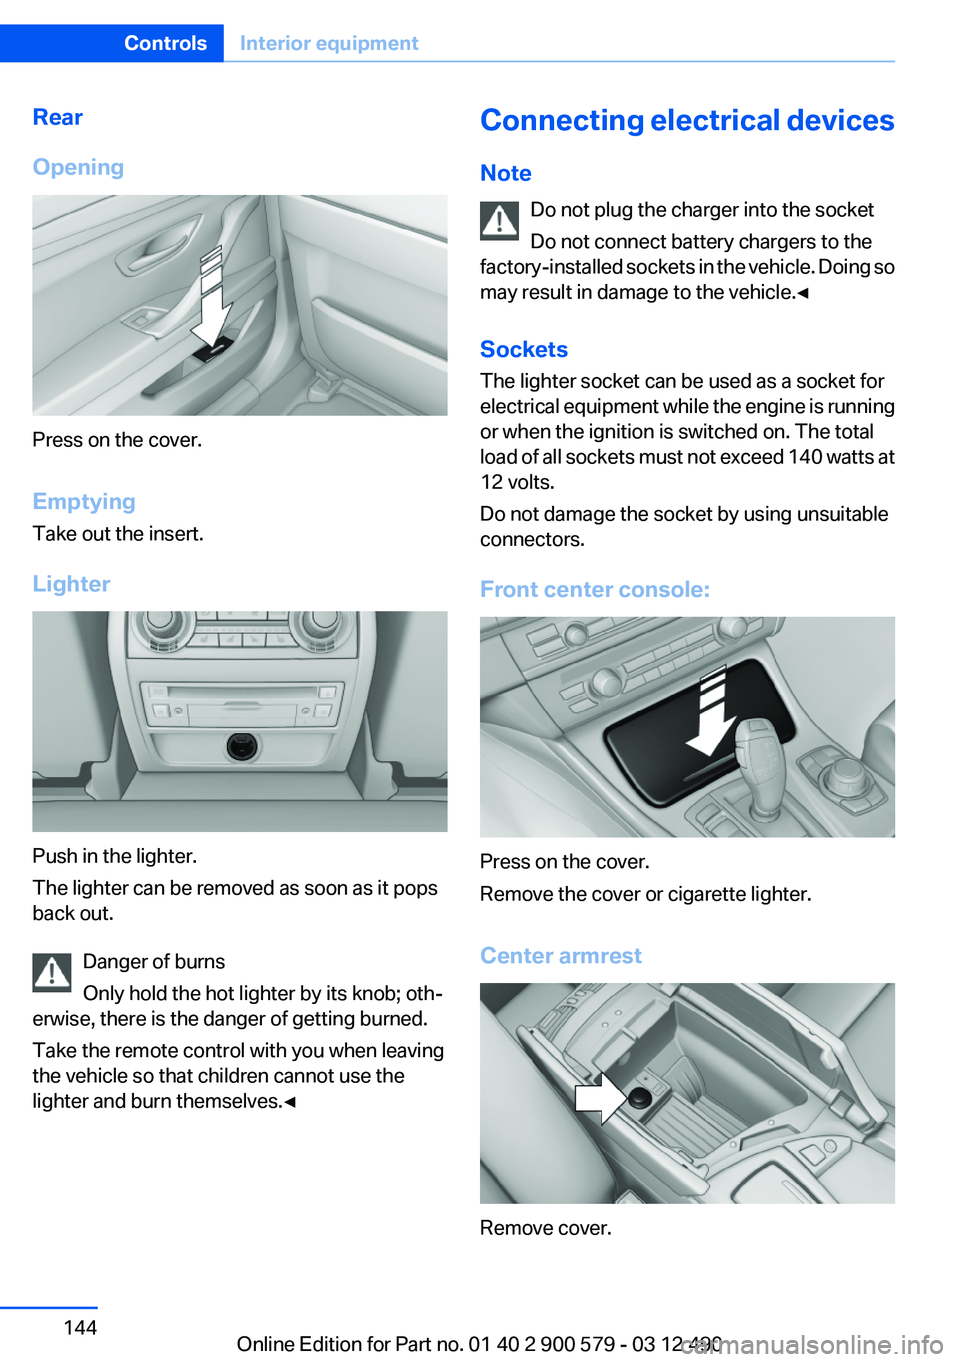
Rear
Opening
Press on the cover.
Emptying
Take out the insert.
Lighter
Push in the lighter.
The lighter can be removed as soon as it pops
back out.
Danger of burns
Only hold the hot lighter by its knob; oth‐
erwise, there is the danger of getting burned.
Take the remote control with you when leaving
the vehicle so that children cannot use the
lighter and burn themselves.◀
Connecting electrical devices
Note Do not plug the charger into the socket
Do not connect battery chargers to the
factory-installed sockets in the vehicle. Doing so
may result in damage to the vehicle.◀
Sockets
The lighter socket can be used as a socket for
electrical equipment while the engine is running
or when the ignition is switched on. The total
load of all sockets must not exceed 140 watts at
12 volts.
Do not damage the socket by using unsuitable
connectors.
Front center console:
Press on the cover.
Remove the cover or cigarette lighter.
Center armrest
Remove cover.
Seite 144ControlsInterior equipment144
Online Edition for Part no. 01 40 2 900 579 - 03 12 490
Page 145 of 319

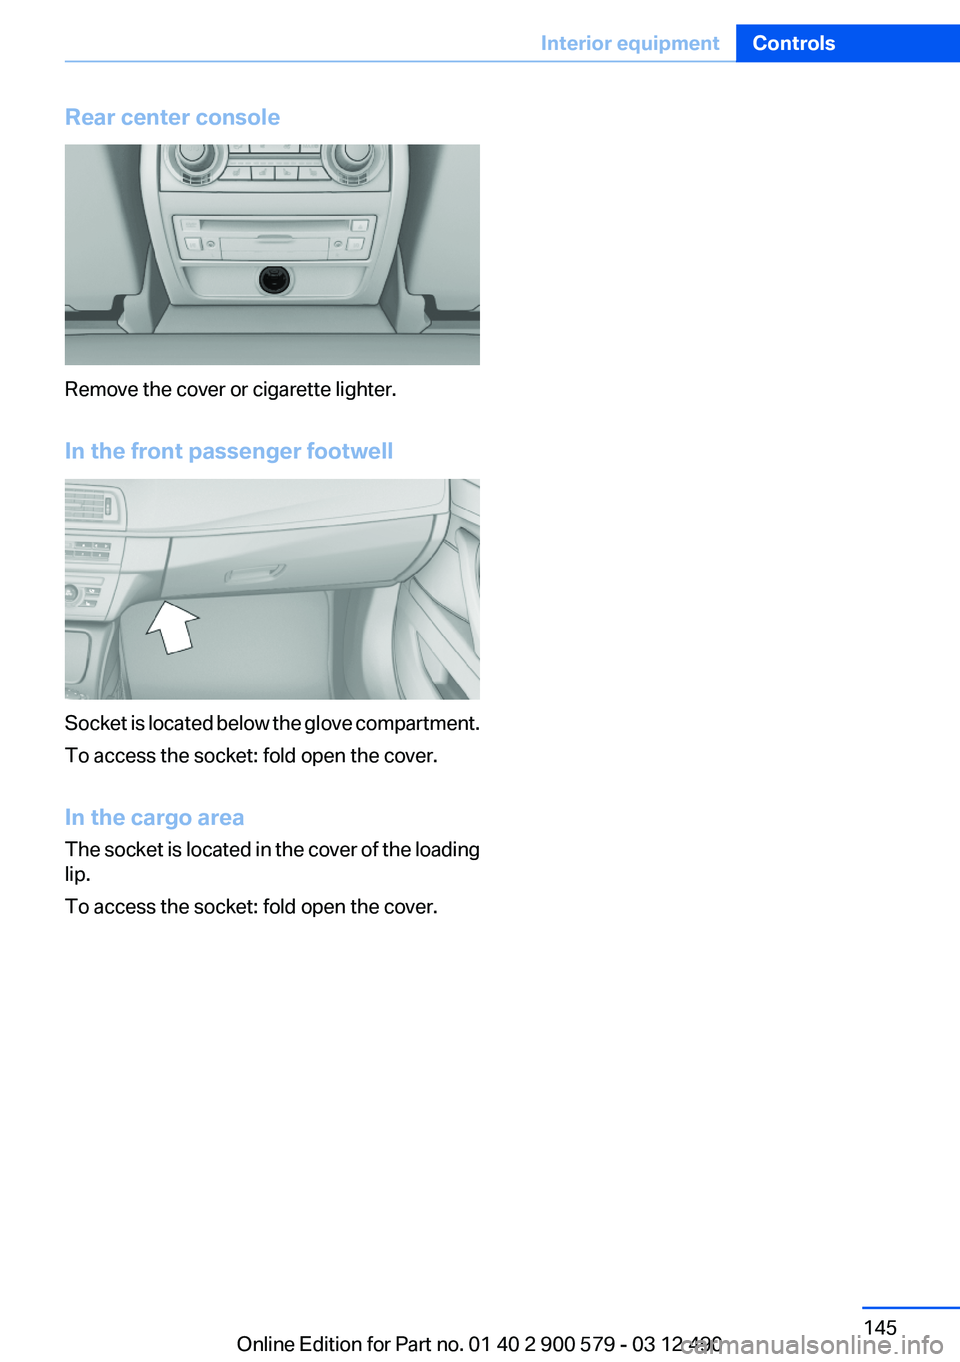
Rear center console
Remove the cover or cigarette lighter.
In the front passenger footwell
Socket is located below the glove compartment.
To access the socket: fold open the cover.
In the cargo area
The socket is located in the cover of the loading
lip.
To access the socket: fold open the cover.
Seite 145Interior equipmentControls145
Online Edition for Part no. 01 40 2 900 579 - 03 12 490
Page 146 of 319

Storage compartmentsVehicle equipment
All standard, country-specific and optional
equipment that is offered in the model series is
described in this chapter. Therefore, equipment
is also described that is not available in a vehicle,
e. g., because of the selected optional equip‐
ment or country variant. This also applies for
safety-related functions and systems.
Notes No loose objects in the passenger com‐
partment
Do not stow any objects in the passenger com‐
partment without securing them; otherwise,
they may present a danger to occupants for in‐
stance during braking and avoidance maneu‐
vers.◀
Do not place anti-slip mats on the dash‐
board
Do not place anti-slip mats on the dashboard.
The mat materials could damage the dash‐
board.◀
Storage compartments
The following storage compartments are avail‐
able in the vehicle interior:▷Glove compartment on the driver's and front
passenger side, refer to page 146.▷Storage compartment, refer to page 149, in
the center console for remote control: auto‐
matic transmission.▷Storage compartment in the center armrest,
refer to page 147, in the front and rear.▷Compartments in the doors.▷Pockets on the backrests of the front seats.▷Net in the front passenger footwell.Glove compartment
Front passenger side
Opening
Pull the handle.
The light in the glove compartment switches on.
Close the glove compartment again im‐
mediately
Close the glove compartment immediately after
use while driving; otherwise, injury may occur
during accidents.◀
Closing
Fold up the cover.
USB interface for data transfer
Connection for importing and exporting data on
USB devices, e.g.:
▷Personal Profile settings, refer to page 33.Seite 146ControlsStorage compartments146
Online Edition for Part no. 01 40 2 900 579 - 03 12 490
Page 191 of 319

3. "Category"4.Select the Unsubscribed Channels cate‐
gory.5.Select the desired channel.
The phone number and an electronic serial
number, ESN, are displayed.6.Select the phone number to have the chan‐
nel enabled.
You can unsubscribe from the channels again
via this phone number.
Unsubscribing from channels
1."Radio"2."Satellite radio"3.Open "Options".4."Manage subscription"5.The phone number and an electronic serial
number, ESN, are displayed.6.Call Sirius to unsubscribe from the chan‐
nels.
Selecting channels
You can only listen to enabled channels.
The selected channel is stored for the remote
control currently in use.
Via iDrive
1."Radio"2."Satellite radio"3.Select "All channels" or the desired cate‐
gory.4.Select the desired channel.
Via the buttons on the center console
Press the button.
The next channel is selected.
Seite 191RadioEntertainment191
Online Edition for Part no. 01 40 2 900 579 - 03 12 490
Page 230 of 319

▷Transmission of the phone book entries is
not yet complete.▷It is possible that only the phone book en‐
tries of the mobile phone or the SIM card are
transmitted.▷It may not be possible to display phone book
entries with special characters.▷The number of phone book entries being
stored is too high.▷Is the data volume of the contact too large,
e.g., due to stored information such as
notes? Reduce the data volume of the con‐
tact.▷Is the mobile phone connected as an audio
source? The mobile phone must be con‐
nected as a telephone.▷Is the mobile phone connected as an audio
source or additional telephone? The mobile
phone must be connected as a telephone.
The phone connection quality is poor.
▷The strength of the Bluetooth signal on the
mobile phone can be adjusted, depending
on the mobile phone.▷Insert the mobile phone into the snap-in
adapter or place it in the area of the center
console.▷Adjust the volume of the microphone and
loudspeakers separately.
If all points in this list have been checked and the
required function is still not available, contact
the hotline or service center.
Controls
Adjusting the volume
Turn the knob until the desired volume is se‐
lected. The setting is stored for the remote con‐
trol currently in use.
The vehicle automatically adjusts the volume of
the microphone on the telephone and the vol‐
ume of the called party. Depending on the mo‐
bile phone, the volumes may need to be ad‐
justed. The settings can only be created during
a call and must be adjusted separately for each
telephone. The settings are deleted when the
telephone is unpaired.1."Settings"2."Tone"3."Volume settings"4.Select the desired setting: "Microphone" or
"Loudspeak."5.To adjust: turn the controller.6.To store: press the controller.
Incoming call
Receiving calls
If the number of the caller is stored in the phone
book and is transmitted by the network, the
name of the contact is displayed. Otherwise,
only the phone number is displayed.
If more than one phone number is assigned to a
contact, only the name of the contact is dis‐
played.
For calls on the additional telephone, the num‐
ber is only displayed if it is transmitted by the
network.
An incoming call to the additional telephone is
automatically rejected if there is an active call on
the other telephone.
Accepting a call
Via iDrive
"Accept"
Seite 230CommunicationTelephone230
Online Edition for Part no. 01 40 2 900 579 - 03 12 490
Page 283 of 319

Breakdown assistanceVehicle equipment
All standard, country-specific and optional
equipment that is offered in the model series is
described in this chapter. Therefore, equipment
is also described that is not available in a vehicle,
e. g., because of the selected optional equip‐
ment or country variant. This also applies for
safety-related functions and systems.
Hazard warning flashers
The button is located in the center console.
Emergency Request
Requirements
▷Equipment version with full preparation
package mobile phone.
An Emergency Request can be made, even
if no mobile phones are paired with the ve‐
hicle.▷BMW Assist is activated.▷The radio ready state is switched on.▷The BMW Assist system is logged in to a
wireless communications network sup‐
ported by BMW Assist.▷The Assist system is functional.
Only press the SOS button in an emergency.
Emergency Request not guaranteed
For technical reasons, the Emergency Re‐
quest cannot be guaranteed under unfavorable
conditions.◀
Service contract▷After your contract with BMW Assist has ex‐
pired, the BMW Assist system can be deac‐
tivated by the service center without you
having to visit a workshop.
After deactivation, an Emergency Request
is no longer possible.▷Under certain circumstances, the system
can be reactivated by a service center after
you sign a new contract.
Initiating an Emergency Request
1.Press the cover briefly to open it.2.Press the SOS button until the LED in the
button lights up.▷The LED lights up: an Emergency Request
was initiated.
If the situation allows, wait in your vehicle
until the voice connection has been estab‐
lished.▷The LED flashes if the connection to the
BMW Assist Response Center has been es‐
tablished.
After the Emergency Request arrives at the
BMW Assist Response Center, the BMWSeite 283Breakdown assistanceMobility283
Online Edition for Part no. 01 40 2 900 579 - 03 12 490
Page 309 of 319

Bar for tow-starting/tow‐ing 286
Bass 186
Battery replacement, auxiliary air conditioning remote con‐
trol 138
Battery replacement, remote control for parked-car heat‐
ing/ventilation 140
Battery replacement, remote control, rear entertain‐
ment 218
Battery replacement, vehicle battery 281
Battery replacement, vehicle remote control 32
Battery, vehicle 281
Belts, safety belts 53
Beverage holder, cu‐ pholder 148
Blinds, sun protection 46
Bluetooth audio 212
Bluetooth connection, activat‐ ing/deactivating 227
BMW ActiveHybrid 27
BMW Assist 249
BMW Homepage 6
BMW Internet page 6
BMW Live 252
BMW Maintenance Sys‐ tem 273
BMW Search 251
Bottle holder, refer to Cu‐ pholder 148
Brake assistant 107
Brake discs, breaking in 154
Brake force display 105
Brake lamps, brake force dis‐ play 105
Brake lamps, bulb replace‐ ment 280
Brake lights, adaptive 105
Brake pads, breaking in 154
Braking, notes 157
Breakdown assis‐ tance 283, 284 Breaking in 154
Brightness of Control Dis‐ play 87
Bulb replacement 275
Bulb replacement, front 276
Bulb replacement, rear 279
Bulbs and lamps 275
Button, Start/Stop 64
Bypassing, refer to Jump- starting 284
C
Calendar 243
California Proposition 65 Warning 7
Camera, backup camera 118
Camera, care 292
Camera, Side View 121
Camera, Top View 120
Can holder, refer to Cu‐ pholder 148
Car battery 281
Car care products 290
Care, displays 292
Care, vehicle 290
Cargo 158
Cargo area lid 39
Cargo area, storage compart‐ ments 149
Cargo straps, securing cargo 159
Car key, refer to Remote con‐ trol 32
Carpet, care 291
Car wash 289
Catalytic converter, refer to Hot exhaust system 156
CBS Condition Based Serv‐ ice 273
CD/DVD 196
CD/DVD player, rear 217
CDs, storing 203
Cell phone 226
Center armrest 147
Center console 14 Central locking system 35
Central screen, refer to Control Display 16
Changes, technical, refer to Safety 7
Changing parts 275
Changing wheels 281
Changing wheels/tires 265
CHARGE, energy recovery 68
Charge indicator, high-voltage battery 81
Check Control 77
Children, seating position 60
Children, transporting safely 60
Child restraint fixing sys‐ tem 60
Child restraint fixing system LATCH 61
Child restraint fixing systems, mounting 60
Child safety locks 63
Child seat, mounting 60
Child seats 60
Chrome parts, care 291
Cigarette lighter 143
Cleaning, displays 292
Climate control 130
Climate control wind‐ shield 156
Clock 80
Closing/opening from in‐ side 39
Closing/opening via door lock 38
Closing/opening with remote control 36
Clothes hooks 149
Combination switch, refer to Turn signals 70
Combination switch, refer to Wiper system 71
Combustion engine, start‐ ing 66
COMFORT+ program, Driving Experience Switch 110 Seite 309Everything from A to ZReference309
Online Edition for Part no. 01 40 2 900 579 - 03 12 490