2012 BMW ACTIVEHYBRID 5 remote control
[x] Cancel search: remote controlPage 178 of 319

Automatically scaled map scale
In the map view facing north, turn the controller
in any direction until the AUTO scale is dis‐
played. The map shows the entire route be‐
tween the current location and the destination.
Settings for the map view
The settings are stored for the remote control
currently in use.1."Navigation"2."Map"3.Open "Options".4."Settings"
Set the map view.
▷"Day/night mode"
Select and create the necessary settings
depending on the light conditions.
"Traffic conditions/gray map" active: the
setting is disregarded.▷With the Professional navigation sys‐
tem:"Satellite images"
Depending on availability and resolution,
satellite images are displayed in a scale of
approx. 1 mile to 600 miles/2 km to
1,000 km.▷With the Professional navigation sys‐
tem:"Perspective view in 3D"
Prominent areas that are contained in the
navigation data are displayed on the map in
3D.▷"Traffic conditions/gray map"
The map is optimized for displaying traffic
bulletins, refer to page 178. Symbols for the
special destinations are no longer displayed.With the Professional navigation
system: map view for split screen
The map view can be selected for the split
screen independently from the main screen.1.Open "Options".2."Split screen"3.Move the controller to the right repeatedly
until the split screen is selected.4.Select "Split screen content" or the scale.5.Select the map view.▷"Arrow display"▷"Map facing north"▷"Map direction of travel"▷"Map view with perspective"▷"Position"▷"Exit ramp view": selected blind drive‐
ways are displayed three dimensionally.
Setting in some cases will affect the dis‐
play in the Head-Up Display.▷"Traffic conditions/gray map"6.To change the scale: select the split screen
and turn the controller.
Traffic bulletins
At a glance
General information
▷Display the traffic bulletins from radio sta‐
tions that broadcast the TI Traffic Informa‐
tion of a traffic information service. Informa‐
tion on traffic obstructions and hazards is
updated continuously.
Certain BMW models equipped with navi‐
gation have the capability to display real-
time traffic information. If your system has
this capability the following additional terms
and conditions apply:
An End-User shall no longer have the right
to use the Traffic Data in the event that theSeite 178NavigationNavigation system178
Online Edition for Part no. 01 40 2 900 579 - 03 12 490
Page 186 of 319
ToneVehicle equipment
All standard, country-specific and optional
equipment that is offered in the model series is
described in this chapter. Therefore, equipment
is also described that is not available in a vehicle,
e. g., because of the selected optional equip‐
ment or country variant. This also applies for
safety-related functions and systems.
General information
The sound settings are stored for the remote
control currently in use.
Treble, bass, balance, and
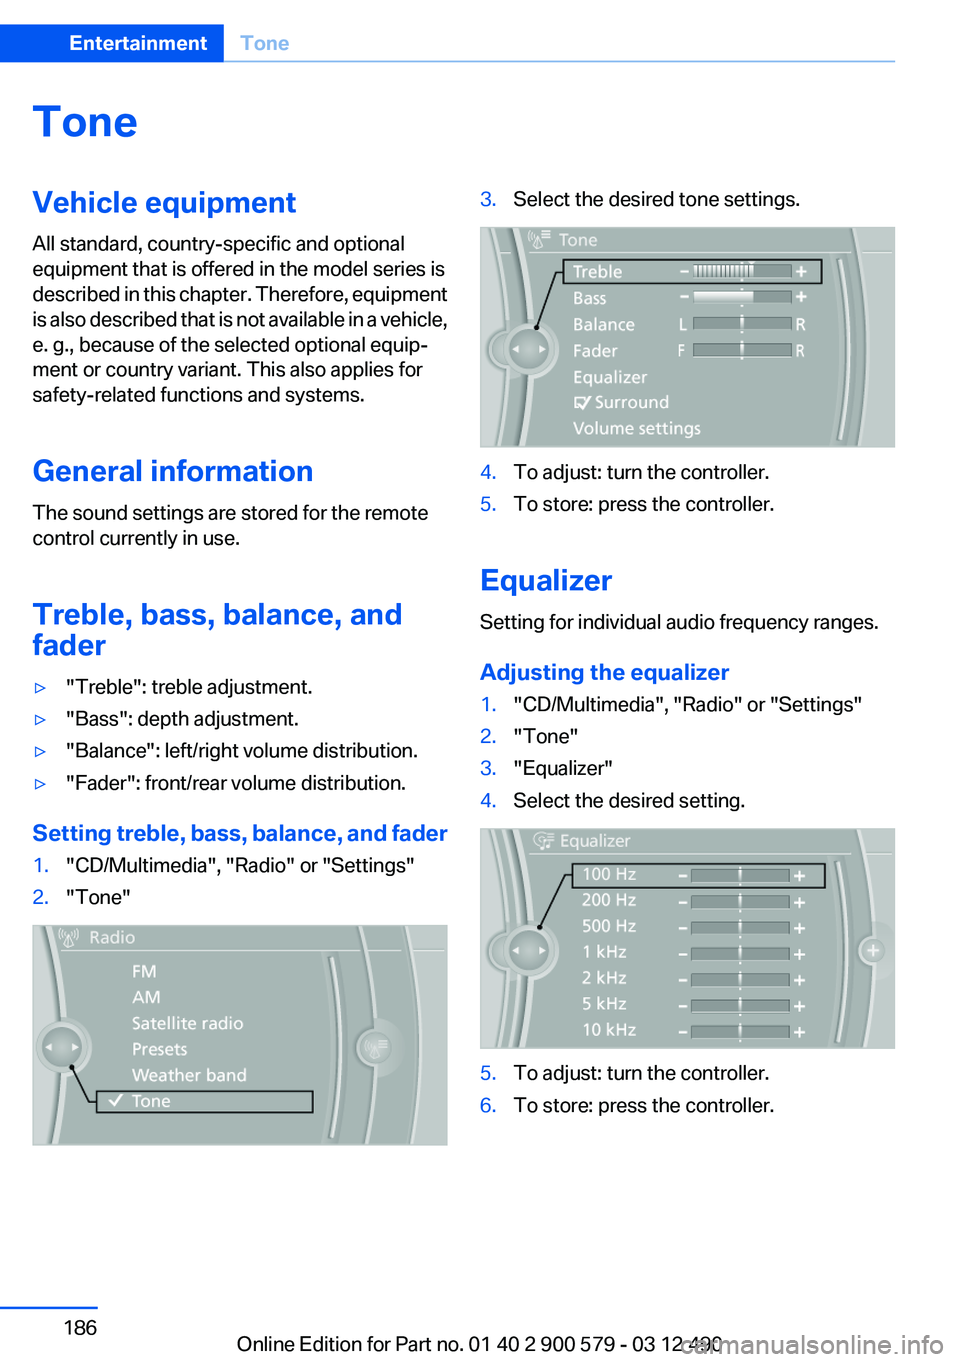
fader▷"Treble": treble adjustment.▷"Bass": depth adjustment.▷"Balance": left/right volume distribution.▷"Fader": front/rear volume distribution.
Setting treble, bass, balance, and fader
1."CD/Multimedia", "Radio" or "Settings"2."Tone"3.Select the desired tone settings.4.To adjust: turn the controller.5.To store: press the controller.
Equalizer
Setting for individual audio frequency ranges.
Adjusting the equalizer
1."CD/Multimedia", "Radio" or "Settings"2."Tone"3."Equalizer"4.Select the desired setting.5.To adjust: turn the controller.6.To store: press the controller.Seite 186EntertainmentTone186
Online Edition for Part no. 01 40 2 900 579 - 03 12 490
Page 188 of 319
RadioVehicle equipment
All standard, country-specific and optional
equipment that is offered in the model series is
described in this chapter. Therefore, equipment
is also described that is not available in a vehicle,
e. g., because of the selected optional equip‐
ment or country variant. This also applies for
safety-related functions and systems.
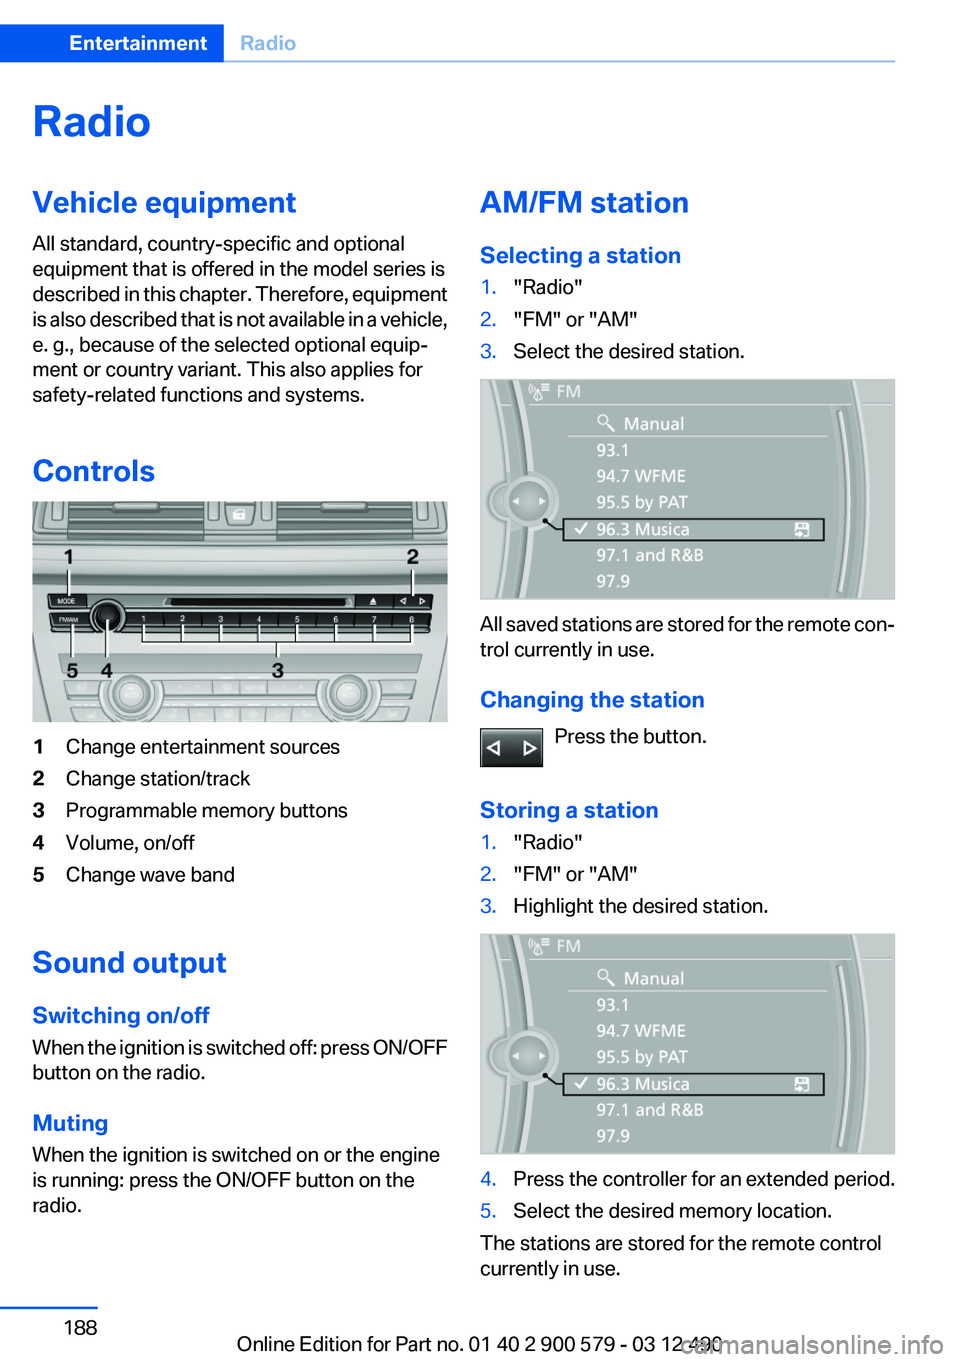
Controls1Change entertainment sources2Change station/track3Programmable memory buttons4Volume, on/off5Change wave band
Sound output
Switching on/off
When the ignition is switched off: press ON/OFF
button on the radio.
Muting
When the ignition is switched on or the engine
is running: press the ON/OFF button on the
radio.
AM/FM station
Selecting a station1."Radio"2."FM" or "AM"3.Select the desired station.
All saved stations are stored for the remote con‐
trol currently in use.
Changing the station Press the button.
Storing a station
1."Radio"2."FM" or "AM"3.Highlight the desired station.4.Press the controller for an extended period.5.Select the desired memory location.
The stations are stored for the remote control
currently in use.
Seite 188EntertainmentRadio188
Online Edition for Part no. 01 40 2 900 579 - 03 12 490
Page 189 of 319

The stations can also be stored on the program‐
mable memory buttons, refer to page 20.
Selecting a station manually
Station selection via the frequency.1."Radio"2."FM" or "AM"3."Manual"4.To select the frequency: turn the controller.
To store the station: press the controller for an
extended period.
Renaming a station
A station with changing station names can be
renamed.
1."Radio"2."FM"3.Select the desired station.4.Open "Options".5."Rename to:"
If necessary, wait until the desired name ap‐
pears.
The selected station name is copied to the list
of current stations and stored stations.
RDS
RDS broadcasts additional information, such as
the station name, in the FM wave band.
Switching the RDS on/off1."Radio"2."FM"3."Options" Open.4."RDS"
The setting is stored for the remote control cur‐
rently in use.
HD Radio™ reception
Many stations broadcast both analog and digital
signals.
License conditions
HD Radio™ technology manufactured under li‐
cense from iBiquity Digital Corp. U. S. and For‐
eign Patents. HD Radio™ and the HD and HD
Radio logos are proprietary trademarks of iBiq‐
uity Digital Corp.
Activating/deactivating digital radio
reception
1."Radio"2."FM" or "AM"3."Options" Open.4."HD Radio Reception"
The setting is stored for the remote control cur‐
rently in use.
This symbol is displayed in the status line
when the audio signal is digital.
When setting a station with a digital signal, it may
take a few seconds before the station plays in
digital quality.
Seite 189RadioEntertainment189
Online Edition for Part no. 01 40 2 900 579 - 03 12 490
Page 191 of 319

3. "Category"4.Select the Unsubscribed Channels cate‐
gory.5.Select the desired channel.
The phone number and an electronic serial
number, ESN, are displayed.6.Select the phone number to have the chan‐
nel enabled.
You can unsubscribe from the channels again
via this phone number.
Unsubscribing from channels
1."Radio"2."Satellite radio"3.Open "Options".4."Manage subscription"5.The phone number and an electronic serial
number, ESN, are displayed.6.Call Sirius to unsubscribe from the chan‐
nels.
Selecting channels
You can only listen to enabled channels.
The selected channel is stored for the remote
control currently in use.
Via iDrive
1."Radio"2."Satellite radio"3.Select "All channels" or the desired cate‐
gory.4.Select the desired channel.
Via the buttons on the center console
Press the button.
The next channel is selected.
Seite 191RadioEntertainment191
Online Edition for Part no. 01 40 2 900 579 - 03 12 490
Page 192 of 319
Via direct channel entry1."Radio"2."Satellite radio"3. "Set channel"4.Turn the controller until the desired channel
is reached and press the controller.
Storing a channel
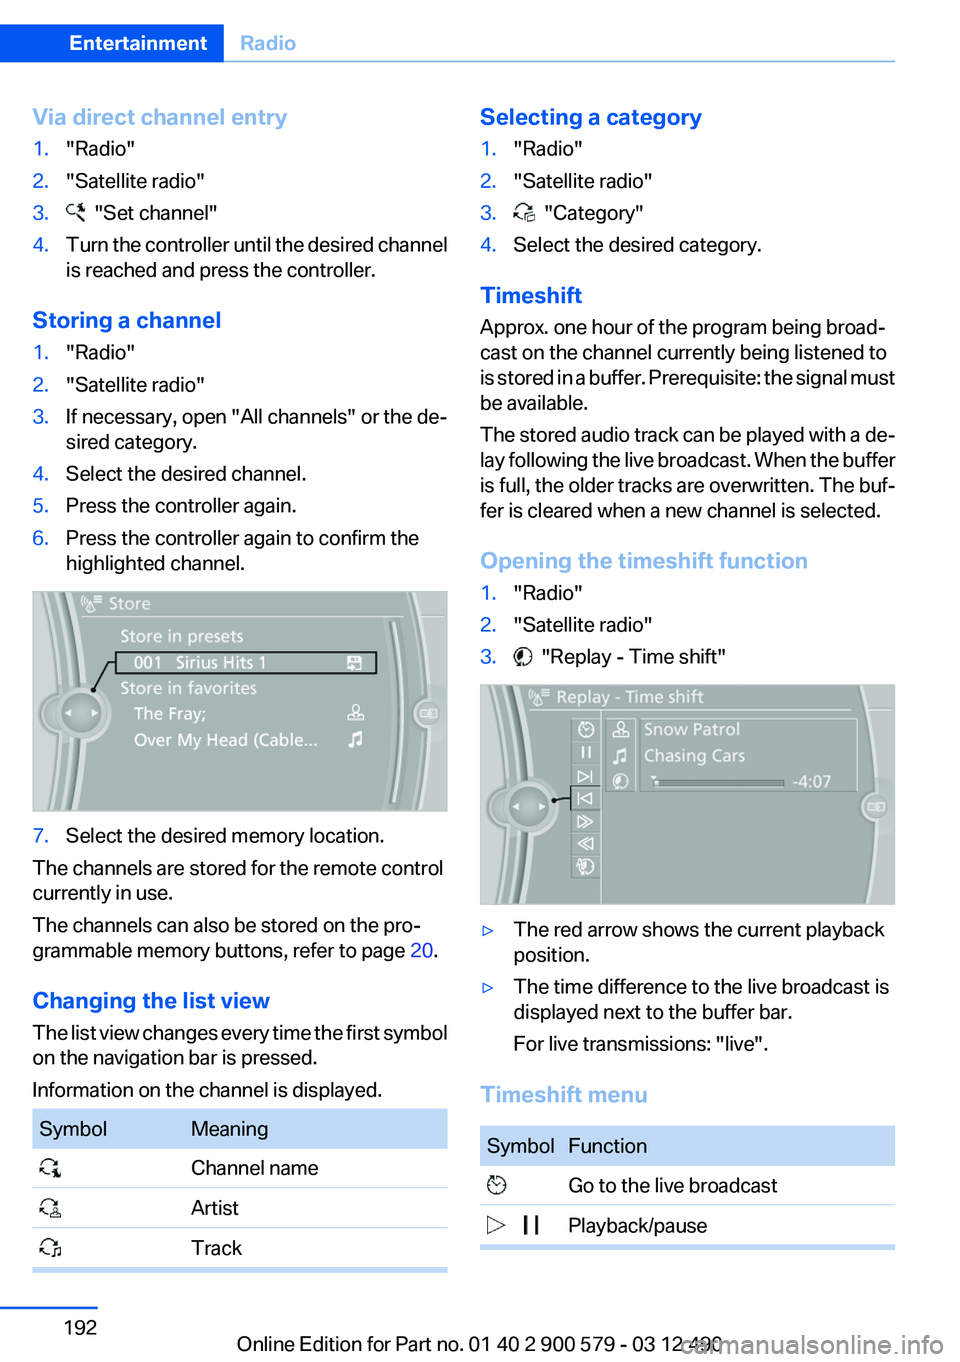
1."Radio"2."Satellite radio"3.If necessary, open "All channels" or the de‐
sired category.4.Select the desired channel.5.Press the controller again.6.Press the controller again to confirm the
highlighted channel.7.Select the desired memory location.
The channels are stored for the remote control
currently in use.
The channels can also be stored on the pro‐
grammable memory buttons, refer to page 20.
Changing the list view
The list view changes every time the first symbol
on the navigation bar is pressed.
Information on the channel is displayed.
SymbolMeaning Channel name Artist TrackSelecting a category1."Radio"2."Satellite radio"3. "Category"4.Select the desired category.
Timeshift
Approx. one hour of the program being broad‐
cast on the channel currently being listened to
is stored in a buffer. Prerequisite: the signal must
be available.
The stored audio track can be played with a de‐
lay following the live broadcast. When the buffer
is full, the older tracks are overwritten. The buf‐
fer is cleared when a new channel is selected.
Opening the timeshift function
1."Radio"2."Satellite radio"3. "Replay - Time shift"▷The red arrow shows the current playback
position.▷The time difference to the live broadcast is
displayed next to the buffer bar.
For live transmissions: "live".
Timeshift menu
SymbolFunction Go to the live broadcast Playback/pauseSeite 192EntertainmentRadio192
Online Edition for Part no. 01 40 2 900 579 - 03 12 490
Page 194 of 319
Managing the favorites
Activating/deactivating the favorites
Favorites can be activated and deactivated
globally and individually.1."Satellite radio"2. "Manage favorites"3.Select "Activate alert" or the desired favor‐
ites.
The setting is stored for the remote control cur‐
rently in use.
Deleting favorites
1."Satellite radio"2. "Manage favorites"3.Highlight the desired favorite.4.Open "Options".5."Delete entry"
Traffic Jump
Traffic and weather information for a selected
region is broadcast every few minutes.
Selecting a region
1."Radio"2."Satellite radio"3.Open "Options".4."Set jump"5.Select the desired region.
The region is stored for the remote control cur‐
rently in use.
Activating/deactivating the jump
1."Radio"2."Satellite radio"3. "Jump to:"
Information for the selected region is broadcast
as soon as it is available.
A new panel opens.
Canceling the Traffic Jump: "Cancel".
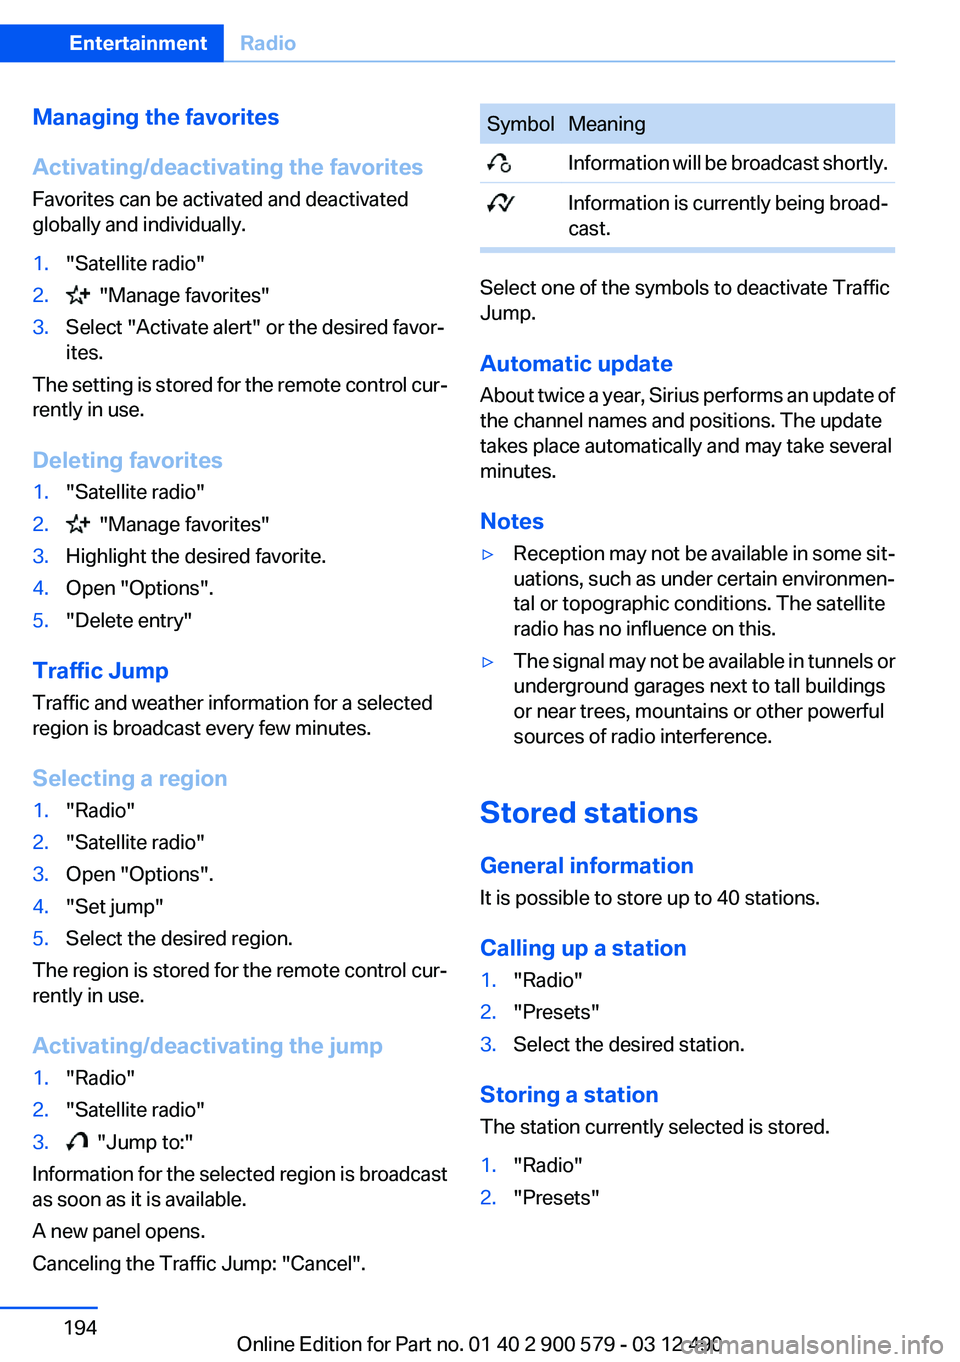
SymbolMeaning Information will be broadcast shortly. Information is currently being broad‐
cast.
Select one of the symbols to deactivate Traffic
Jump.
Automatic update
About twice a year, Sirius performs an update of
the channel names and positions. The update
takes place automatically and may take several
minutes.
Notes
▷Reception may not be available in some sit‐
uations, such as under certain environmen‐
tal or topographic conditions. The satellite
radio has no influence on this.▷The signal may not be available in tunnels or
underground garages next to tall buildings
or near trees, mountains or other powerful
sources of radio interference.
Stored stations
General information
It is possible to store up to 40 stations.
Calling up a station
1."Radio"2."Presets"3.Select the desired station.
Storing a station
The station currently selected is stored.
1."Radio"2."Presets"Seite 194EntertainmentRadio194
Online Edition for Part no. 01 40 2 900 579 - 03 12 490
Page 217 of 319
Rear entertainmentVehicle equipment
All standard, country-specific and optional
equipment that is offered in the model series is
described in this chapter. Therefore, equipment
is also described that is not available in a vehicle,
e. g., because of the selected optional equip‐
ment or country variant. This also applies for
safety-related functions and systems.
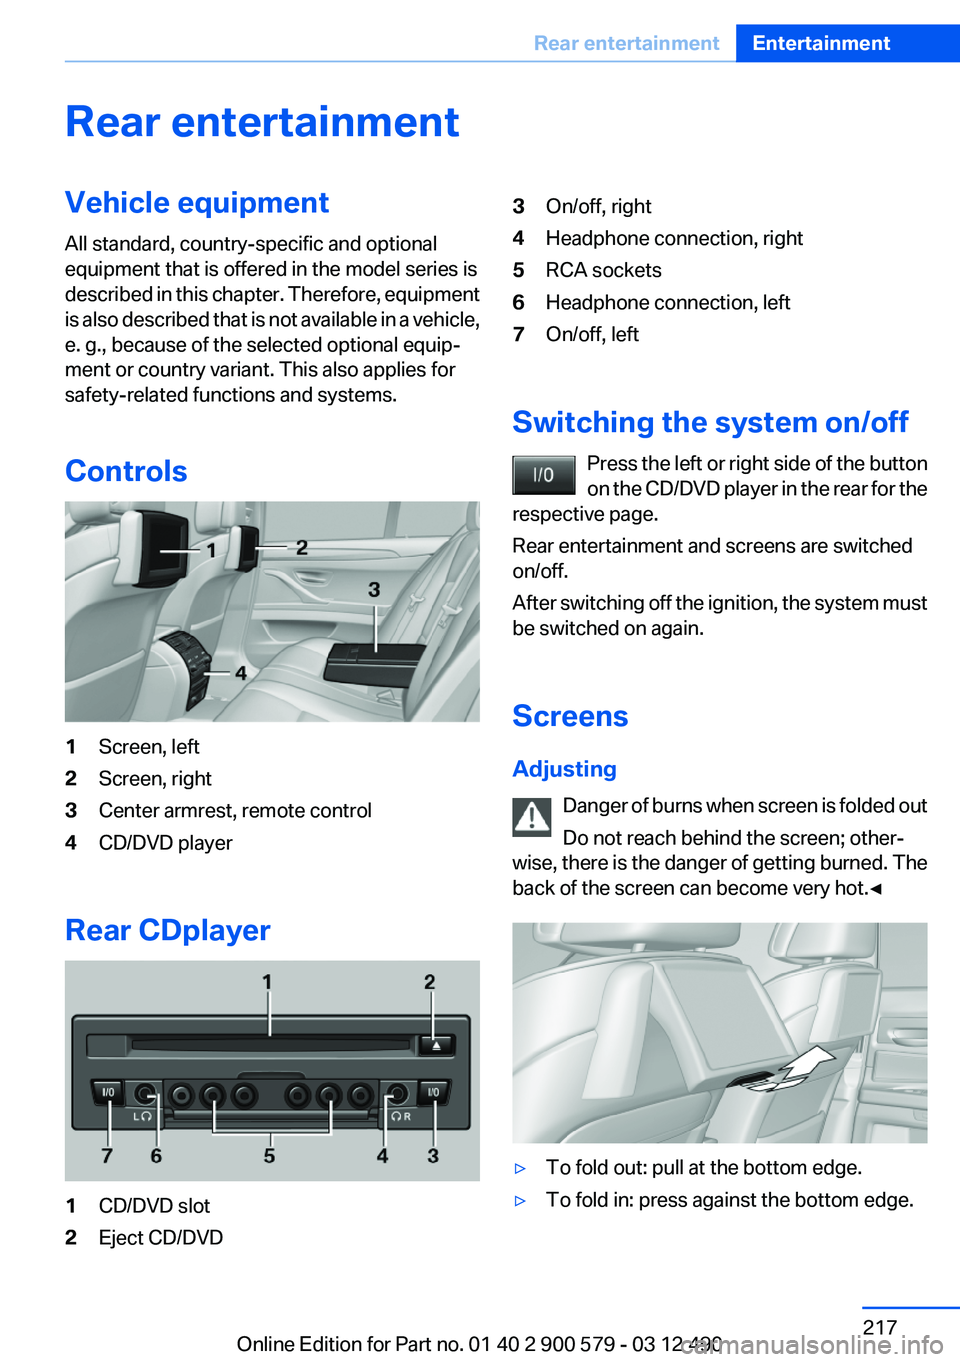
Controls1Screen, left2Screen, right3Center armrest, remote control4CD/DVD player
Rear CDplayer
1CD/DVD slot2Eject CD/DVD3On/off, right4Headphone connection, right5RCA sockets6Headphone connection, left7On/off, left
Switching the system on/off Press the left or right side of the button
on the CD/DVD player in the rear for the
respective page.
Rear entertainment and screens are switched
on/off.
After switching off the ignition, the system must
be switched on again.
Screens
Adjusting Danger of burns when screen is folded out
Do not reach behind the screen; other‐
wise, there is the danger of getting burned. The
back of the screen can become very hot.◀
▷To fold out: pull at the bottom edge.▷To fold in: press against the bottom edge.Seite 217Rear entertainmentEntertainment217
Online Edition for Part no. 01 40 2 900 579 - 03 12 490