2012 BMW 650I XDRIVE COUPE light
[x] Cancel search: lightPage 13 of 303
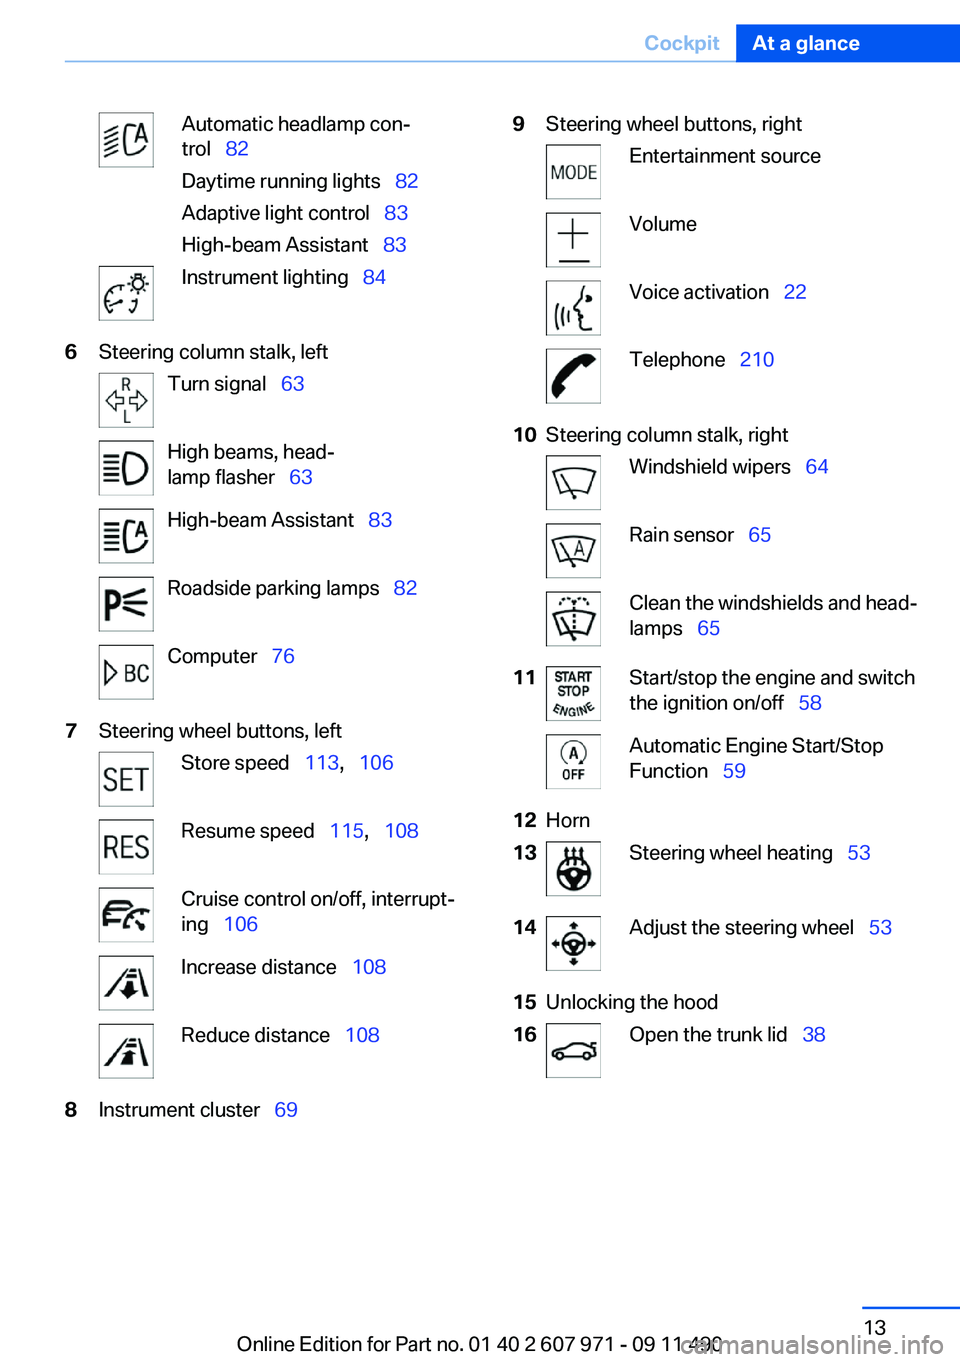
Automatic headlamp con‐
trol 82
Daytime running lights 82
Adaptive light control 83
High-beam Assistant 83Instrument lighting 846Steering column stalk, leftTurn signal 63High beams, head‐
lamp flasher 63High-beam Assistant 83Roadside parking lamps 82Computer 767Steering wheel buttons, leftStore speed 113, 106Resume speed 115, 108Cruise control on/off, interrupt‐
ing 106Increase distance 108Reduce distance 1088Instrument cluster 699Steering wheel buttons, rightEntertainment sourceVolumeVoice activation 22Telephone 21010Steering column stalk, rightWindshield wipers 64Rain sensor 65Clean the windshields and head‐
lamps 6511Start/stop the engine and switch
the ignition on/off 58Automatic Engine Start/Stop
Function 5912Horn13Steering wheel heating 5314Adjust the steering wheel 5315Unlocking the hood16Open the trunk lid 38Seite 13CockpitAt a glance13
Online Edition for Part no. 01 40 2 607 971 - 09 11 490
Page 17 of 303
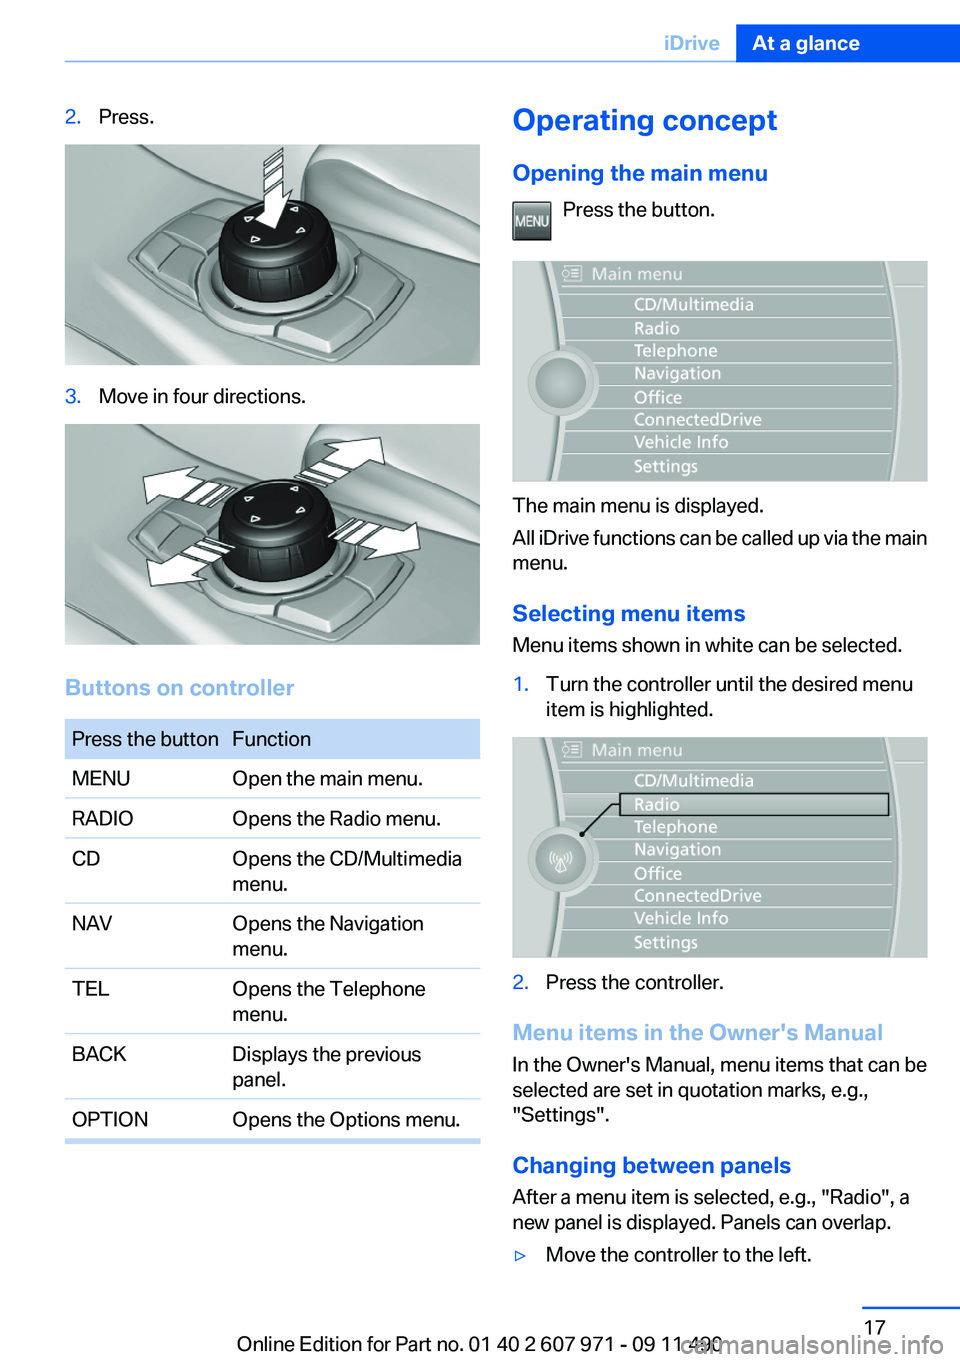
2.Press.3.Move in four directions.
Buttons on controller
Press the buttonFunctionMENUOpen the main menu.RADIOOpens the Radio menu.CDOpens the CD/Multimedia
menu.NAVOpens the Navigation
menu.TELOpens the Telephone
menu.BACKDisplays the previous
panel.OPTIONOpens the Options menu.Operating concept
Opening the main menu Press the button.
The main menu is displayed.
All iDrive functions can be called up via the main
menu.
Selecting menu items
Menu items shown in white can be selected.
1.Turn the controller until the desired menu
item is highlighted.2.Press the controller.
Menu items in the Owner's Manual
In the Owner's Manual, menu items that can be
selected are set in quotation marks, e.g.,
"Settings".
Changing between panels
After a menu item is selected, e.g., "Radio", a
new panel is displayed. Panels can overlap.
▷Move the controller to the left.Seite 17iDriveAt a glance17
Online Edition for Part no. 01 40 2 607 971 - 09 11 490
Page 19 of 303
Example: setting the clock
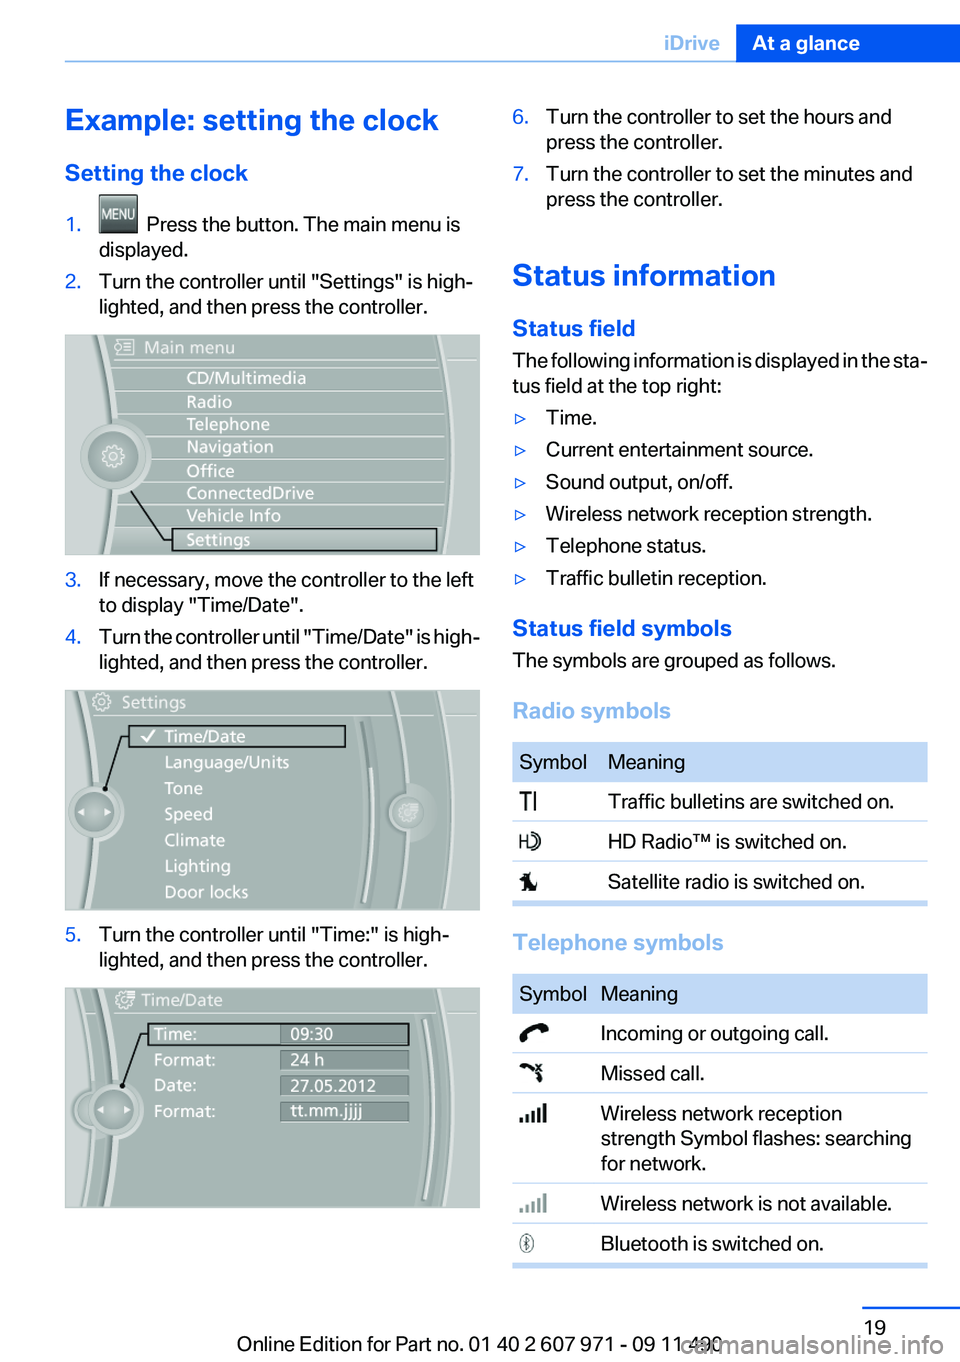
Setting the clock1. Press the button. The main menu is
displayed.2.Turn the controller until "Settings" is high‐
lighted, and then press the controller.3.If necessary, move the controller to the left
to display "Time/Date".4.Turn the controller until "Time/Date" is high‐
lighted, and then press the controller.5.Turn the controller until "Time:" is high‐
lighted, and then press the controller.6.Turn the controller to set the hours and
press the controller.7.Turn the controller to set the minutes and
press the controller.
Status information
Status field
The following information is displayed in the sta‐
tus field at the top right:
▷Time.▷Current entertainment source.▷Sound output, on/off.▷Wireless network reception strength.▷Telephone status.▷Traffic bulletin reception.
Status field symbols
The symbols are grouped as follows.
Radio symbols
SymbolMeaning Traffic bulletins are switched on. HD Radio™ is switched on. Satellite radio is switched on.
Telephone symbols
SymbolMeaning Incoming or outgoing call. Missed call. Wireless network reception
strength Symbol flashes: searching
for network. Wireless network is not available. Bluetooth is switched on.Seite 19iDriveAt a glance19
Online Edition for Part no. 01 40 2 607 971 - 09 11 490
Page 20 of 303
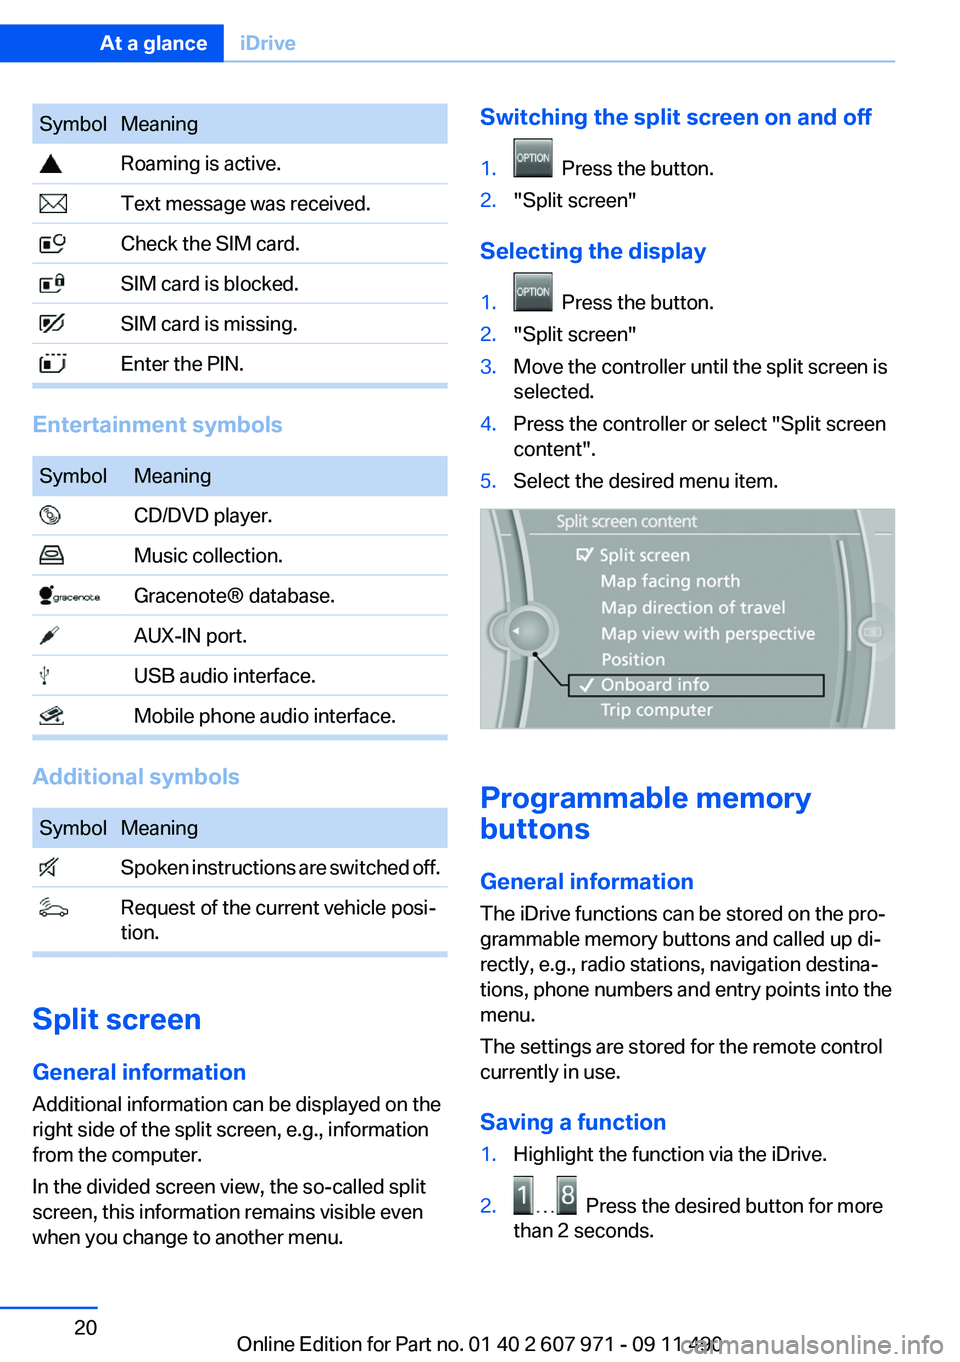
SymbolMeaning Roaming is active. Text message was received. Check the SIM card. SIM card is blocked. SIM card is missing. Enter the PIN.
Entertainment symbols
SymbolMeaning CD/DVD player. Music collection. Gracenote® database. AUX-IN port. USB audio interface. Mobile phone audio interface.
Additional symbols
SymbolMeaning Spoken instructions are switched off. Request of the current vehicle posi‐
tion.
Split screen
General information
Additional information can be displayed on the
right side of the split screen, e.g., information
from the computer.
In the divided screen view, the so-called split
screen, this information remains visible even
when you change to another menu.
Switching the split screen on and off1. Press the button.2."Split screen"
Selecting the display
1. Press the button.2."Split screen"3.Move the controller until the split screen is
selected.4.Press the controller or select "Split screen
content".5.Select the desired menu item.
Programmable memory
buttons
General information
The iDrive functions can be stored on the pro‐
grammable memory buttons and called up di‐
rectly, e.g., radio stations, navigation destina‐
tions, phone numbers and entry points into the
menu.
The settings are stored for the remote control
currently in use.
Saving a function
1.Highlight the function via the iDrive.2. Press the desired button for more
than 2 seconds.
Seite 20At a glanceiDrive20
Online Edition for Part no. 01 40 2 607 971 - 09 11 490
Page 25 of 303
Integrated Owner's Manual in the vehicleVehicle equipment
All standard, country-specific and optional
equipment that is offered in the model series is
described in this chapter. Therefore, equipment
is also described that is not available in a vehicle,
e. g., because of the selected optional equip‐
ment or country variant. This also applies for
safety-related functions and systems.
Integrated Owner's Manual in
the vehicle
The integrated Owner's Manual can be dis‐
played on the Control Display. The equipment
and functions that are in the vehicle are descri‐
bed therein.
Components of the integrated Owner's
Manual
The integrated Owner's Manual consists of
three parts, which offer various levels of infor‐
mation or access possibilities.
Quick Reference Guide
Located in the Quick Reference is important in‐
formation for the operation of the vehicle, the
operation of basic vehicle functions or for what
to do in the event of a flat tire. This information
can also be displayed during driving.
Search by pictures
Information and descriptions based on illustra‐
tions can be searched via search by pictures.
This is helpful, for example, if the description of
an outfitting package that cannot be named is
needed.
Owner's Manual
Information and descriptions can be searched
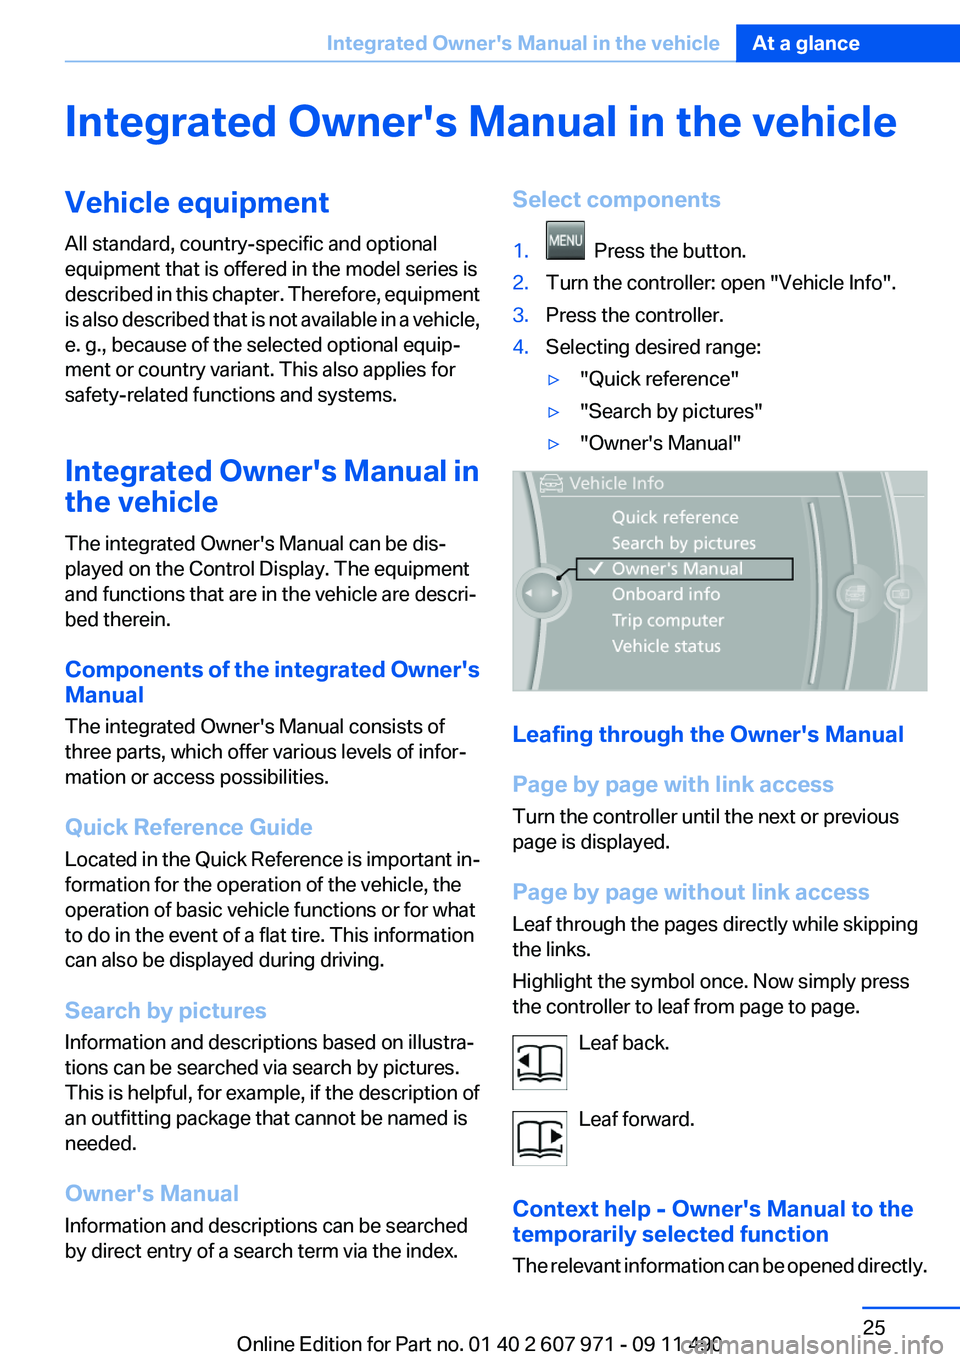
by direct entry of a search term via the index.Select components1. Press the button.2.Turn the controller: open "Vehicle Info".3.Press the controller.4.Selecting desired range:▷"Quick reference"▷"Search by pictures"▷"Owner's Manual"
Leafing through the Owner's Manual
Page by page with link access
Turn the controller until the next or previous
page is displayed.
Page by page without link access
Leaf through the pages directly while skipping
the links.
Highlight the symbol once. Now simply press
the controller to leaf from page to page.
Leaf back.
Leaf forward.
Context help - Owner's Manual to the
temporarily selected function
The relevant information can be opened directly.
Seite 25Integrated Owner's Manual in the vehicleAt a glance25
Online Edition for Part no. 01 40 2 607 971 - 09 11 490
Page 33 of 303
4.Open "Guest".5.Create the settings.
Note: the guest profile cannot be renamed.
Display profile list during start
The profile list can be displayed during each
start for selecting the desired profile.
1."Settings"2."Profiles"3."Options" Open.4."Display user list at startup"
Personal Profile settings
The following functions and settings can be
stored in a profile.
More information on the settings can be found
under:
▷Active Cruise Control: collision warning, re‐
fer to page 112.▷Exterior mirror position, refer to page 51.▷CD/Multimedia, refer to page 187: audio
source listened to last.▷Dynamic Driving Control: sport program, re‐
fer to page 103.▷Driver's seat position, refer to page 35: au‐
tomatic retrieval after unlocking.▷Programmable memory buttons, refer to
page 20: assignment.▷Head-up Display, refer to page 129: selec‐
tion, brightness and position of the display.▷Headlamp courtesy delay feature, refer to
page 82: time setting.▷Tone, refer to page 176: tone settings.▷Automatic climate control, refer to
page 131: settings.▷Steering wheel position, refer to page 53.▷Navigation, refer to page 158: map views,
route criteria, voice output on/off.▷Night Vision with pedestrian detection, refer
to page 126: selection of functions and type
of display.▷Daytime running lights, refer to page 82:
current setting.▷Park Distance Control PDC, refer to
page 177: adjusting the signal tone volume.▷Radio, refer to page 179: stored stations,
station listened to last, special settings.▷Backup camera, refer to page 118: selec‐
tion of functions and type of display.▷Side View, refer to page 122: selection of
the display type.▷Language on the Control Display, refer to
page 79.▷Lane departure warning, refer to page 94:
last setting, on/off.▷Active Blind Spot Detection, refer to
page 96: last setting, on/off.▷Triple turn signal activation, refer to
page 63.▷Locking the vehicle, refer to page 37: after
a brief period or after starting to drive.
Central locking system
The concept
The central locking system becomes active
when the driver's door is closed.
The system simultaneously engages and re‐
leases the locks on the following:
▷Doors.▷Trunk lid.▷Fuel filler flap.
Operating from the outside
▷Via the remote control.▷Via the driver's door lock.▷Via the door handles.▷Via the button in the trunk lid.Seite 33Opening and closingControls33
Online Edition for Part no. 01 40 2 607 971 - 09 11 490
Page 37 of 303
Locking the doors and trunk lid at once
To lock all doors and the trunk lid at once:1.With the doors closed, lock the vehicle using
the button for the central locking system in
the interior.2.Unlock and open the driver's or front pas‐
senger door.3.Lock the vehicle.▷Lock the driver's door using the
integrated key in the door lock, or▷Press down the lock button of the front
passenger door and close the door from
the outside.
The fuel filler flap can only be locked using the
remote control.
Manual operation
If an electrical malfunction occurs, lock or unlock
the vehicle using the integrated key via the door
lock on the driver's door.
Opening and closing: from the
inside
Locking and unlocking
Pressing the buttons locks and unlocks the
doors and the trunk lid when the doors are
closed, but they are not secured against theft.
The fuel filler flap remains unlocked.
Unlocking and opening▷Either unlock the doors together using the
button for the central locking system and
then pull the door handle above the armrest
or▷Pull the door opener twice individually on
each door: the first time unlocks the door,
the second time opens it.
Automatic locking
The setting is stored for the remote control cur‐
rently in use.
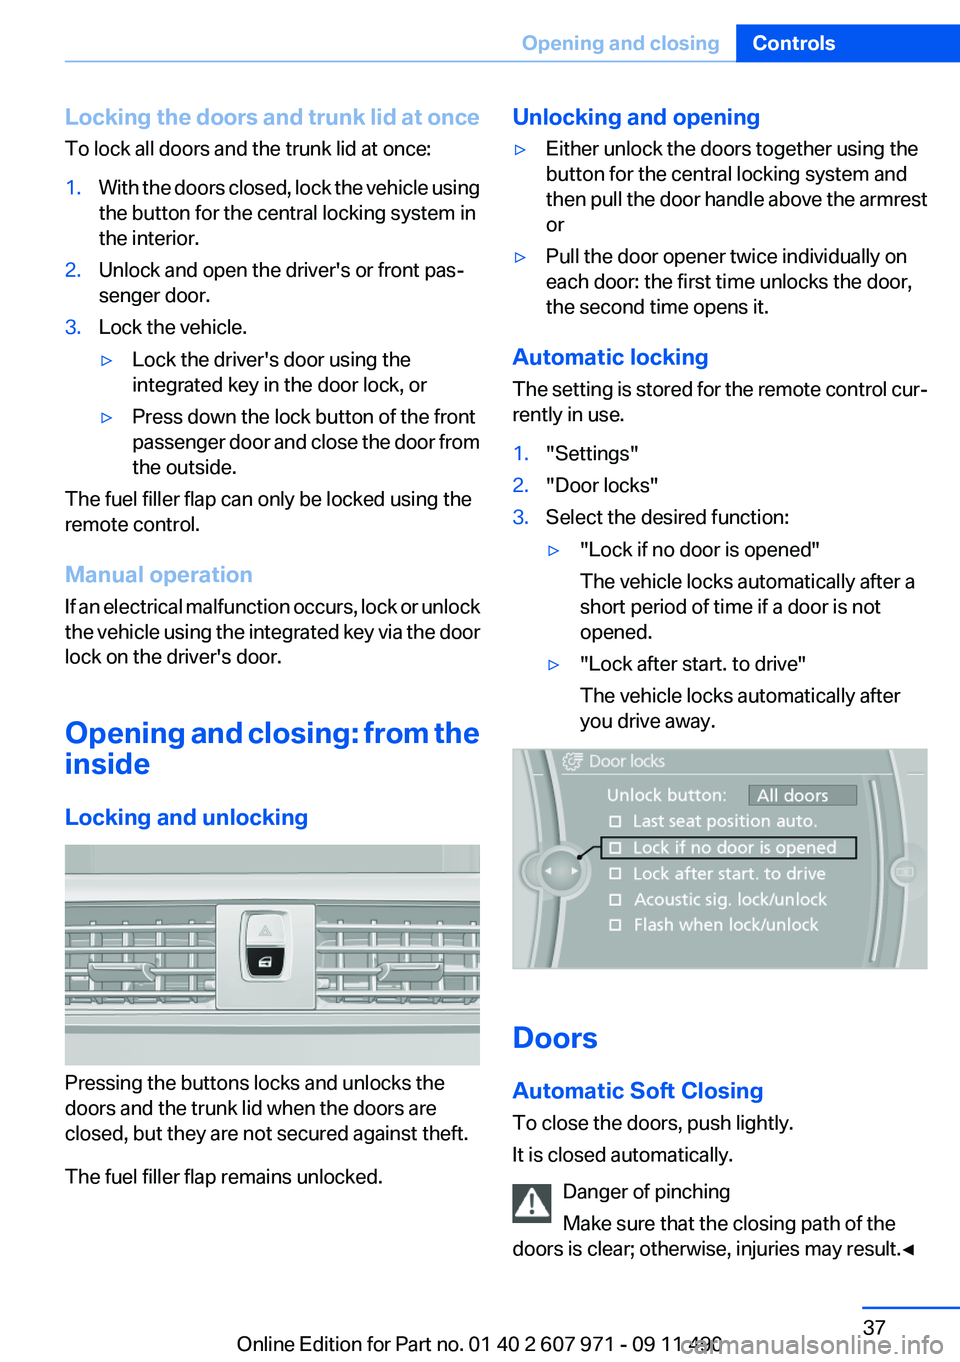
1."Settings"2."Door locks"3.Select the desired function:▷"Lock if no door is opened"
The vehicle locks automatically after a
short period of time if a door is not
opened.▷"Lock after start. to drive"
The vehicle locks automatically after
you drive away.
Doors
Automatic Soft Closing
To close the doors, push lightly.
It is closed automatically.
Danger of pinching
Make sure that the closing path of the
doors is clear; otherwise, injuries may result.◀
Seite 37Opening and closingControls37
Online Edition for Part no. 01 40 2 607 971 - 09 11 490
Page 41 of 303
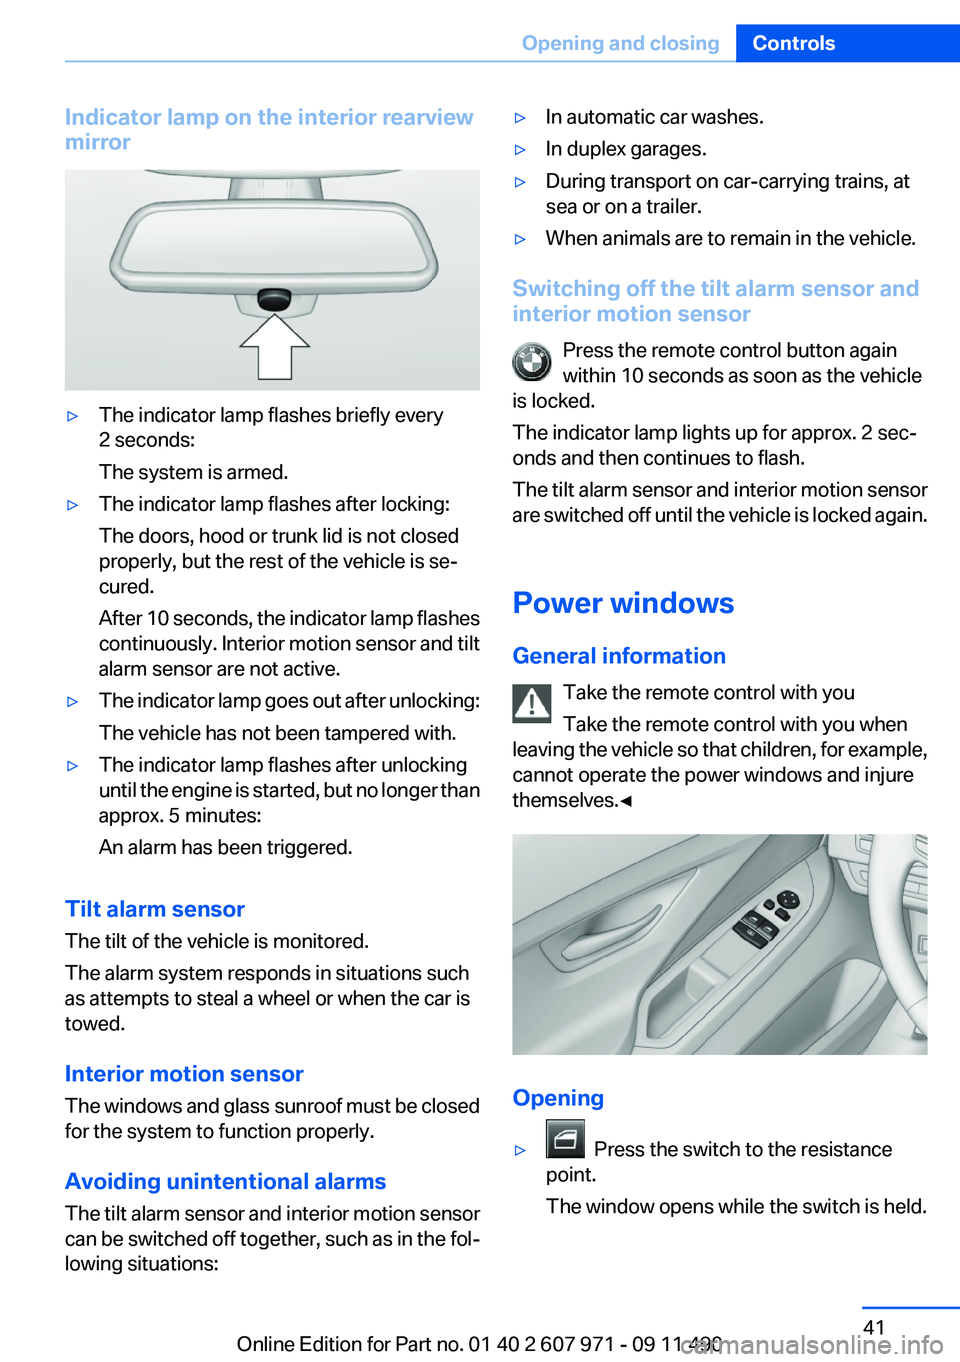
Indicator lamp on the interior rearview
mirror▷The indicator lamp flashes briefly every
2 seconds:
The system is armed.▷The indicator lamp flashes after locking:
The doors, hood or trunk lid is not closed
properly, but the rest of the vehicle is se‐
cured.
After 10 seconds, the indicator lamp flashes
continuously. Interior motion sensor and tilt
alarm sensor are not active.▷The indicator lamp goes out after unlocking:
The vehicle has not been tampered with.▷The indicator lamp flashes after unlocking
until the engine is started, but no longer than
approx. 5 minutes:
An alarm has been triggered.
Tilt alarm sensor
The tilt of the vehicle is monitored.
The alarm system responds in situations such
as attempts to steal a wheel or when the car is
towed.
Interior motion sensor
The windows and glass sunroof must be closed
for the system to function properly.
Avoiding unintentional alarms
The tilt alarm sensor and interior motion sensor
can be switched off together, such as in the fol‐
lowing situations:
▷In automatic car washes.▷In duplex garages.▷During transport on car-carrying trains, at
sea or on a trailer.▷When animals are to remain in the vehicle.
Switching off the tilt alarm sensor and
interior motion sensor
Press the remote control button again
within 10 seconds as soon as the vehicle
is locked.
The indicator lamp lights up for approx. 2 sec‐
onds and then continues to flash.
The tilt alarm sensor and interior motion sensor
are switched off until the vehicle is locked again.
Power windows
General information Take the remote control with you
Take the remote control with you when
leaving the vehicle so that children, for example,
cannot operate the power windows and injure
themselves.◀
Opening
▷ Press the switch to the resistance
point.
The window opens while the switch is held.
Seite 41Opening and closingControls41
Online Edition for Part no. 01 40 2 607 971 - 09 11 490