2012 BMW 650I XDRIVE COUPE steering wheel
[x] Cancel search: steering wheelPage 114 of 303
▷On slippery roads, in fog, snow or rain, or on
a loose road surface.
Otherwise, you could lose control of the vehicle
and cause an accident.◀
Controls
At a glance
Switching on Press the button on the steering wheel.
The marking in the speedometer is set to the
current speed.
Cruise control can be used.
Switching off Deactivated or interrupted system
If the system is deactivated or interrupted,
actively intervene by braking and, if necessary,
with evasive maneuvers; otherwise, there is the
danger of an accident occurring.◀
Press the button.
▷If active: press twice.▷If interrupted: press once.
The displays go out. The stored desired speed
is deleted.
Interrupting When active, press the button.
The system is automatically interrupted if:
▷The brakes are applied.▷The clutch pedal is depressed.▷Transmission position D is disengaged.▷DTC Dynamic Traction Control is activated
or DSC is deactivated.▷DSC is actively controlling stability.▷HDC is activated.Maintaining/storing the current speed
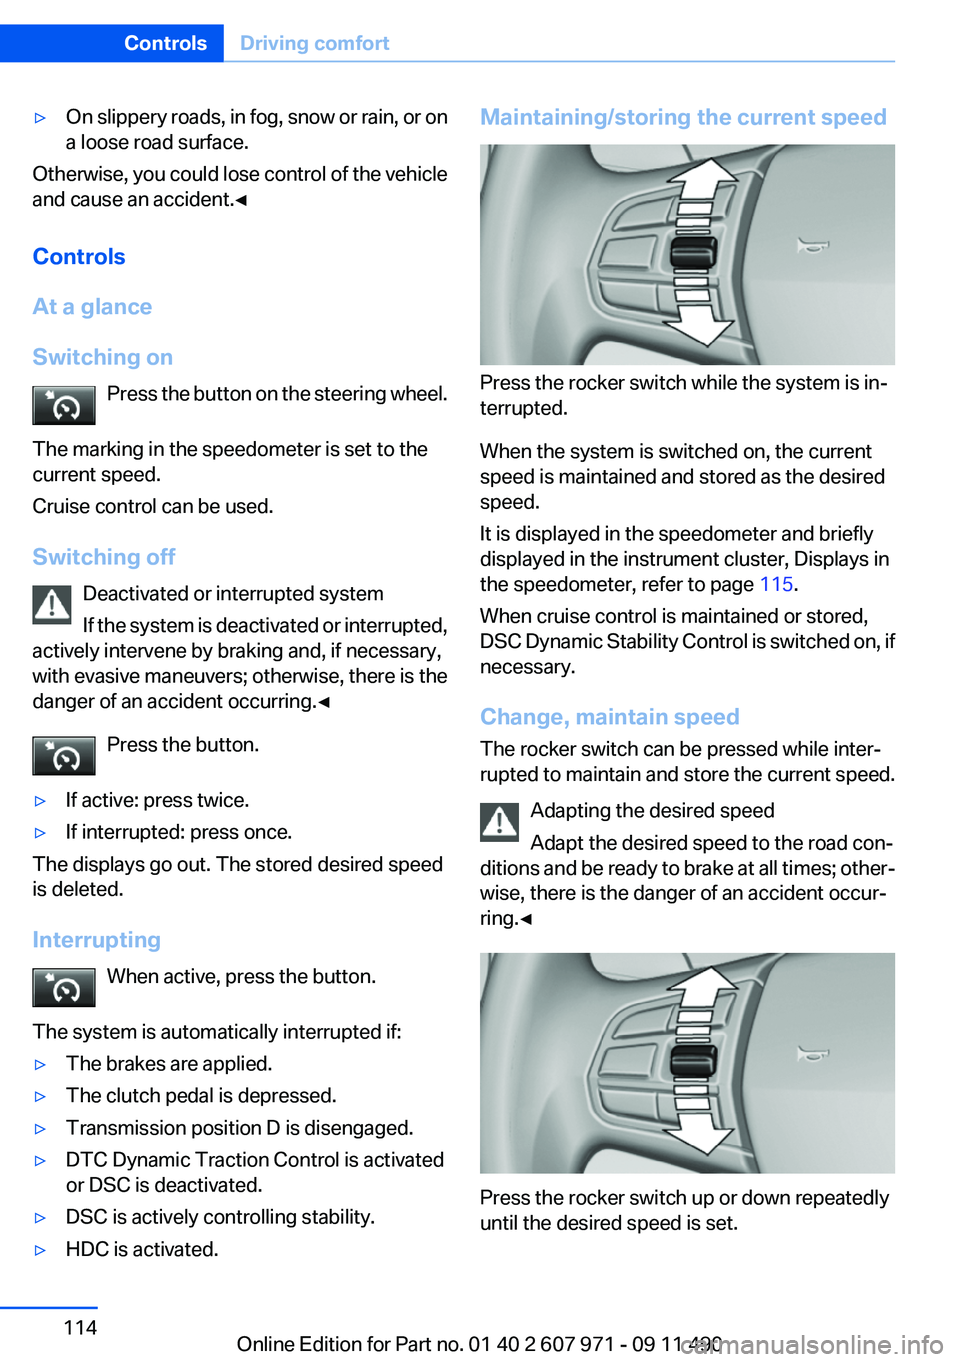
Press the rocker switch while the system is in‐
terrupted.
When the system is switched on, the current
speed is maintained and stored as the desired
speed.
It is displayed in the speedometer and briefly
displayed in the instrument cluster, Displays in
the speedometer, refer to page 115.
When cruise control is maintained or stored,
DSC Dynamic Stability Control is switched on, if
necessary.
Change, maintain speed
The rocker switch can be pressed while inter‐
rupted to maintain and store the current speed.
Adapting the desired speed
Adapt the desired speed to the road con‐
ditions and be ready to brake at all times; other‐
wise, there is the danger of an accident occur‐
ring.◀
Press the rocker switch up or down repeatedly
until the desired speed is set.
Seite 114ControlsDriving comfort114
Online Edition for Part no. 01 40 2 607 971 - 09 11 490
Page 119 of 303
▷Help you to estimate the space required
when parking and maneuvering on level
roads.▷Are dependent on the current steering angle
and are continuously adjusted to the steer‐
ing wheel movements.
Show the parking aid lines, refer to page 119.
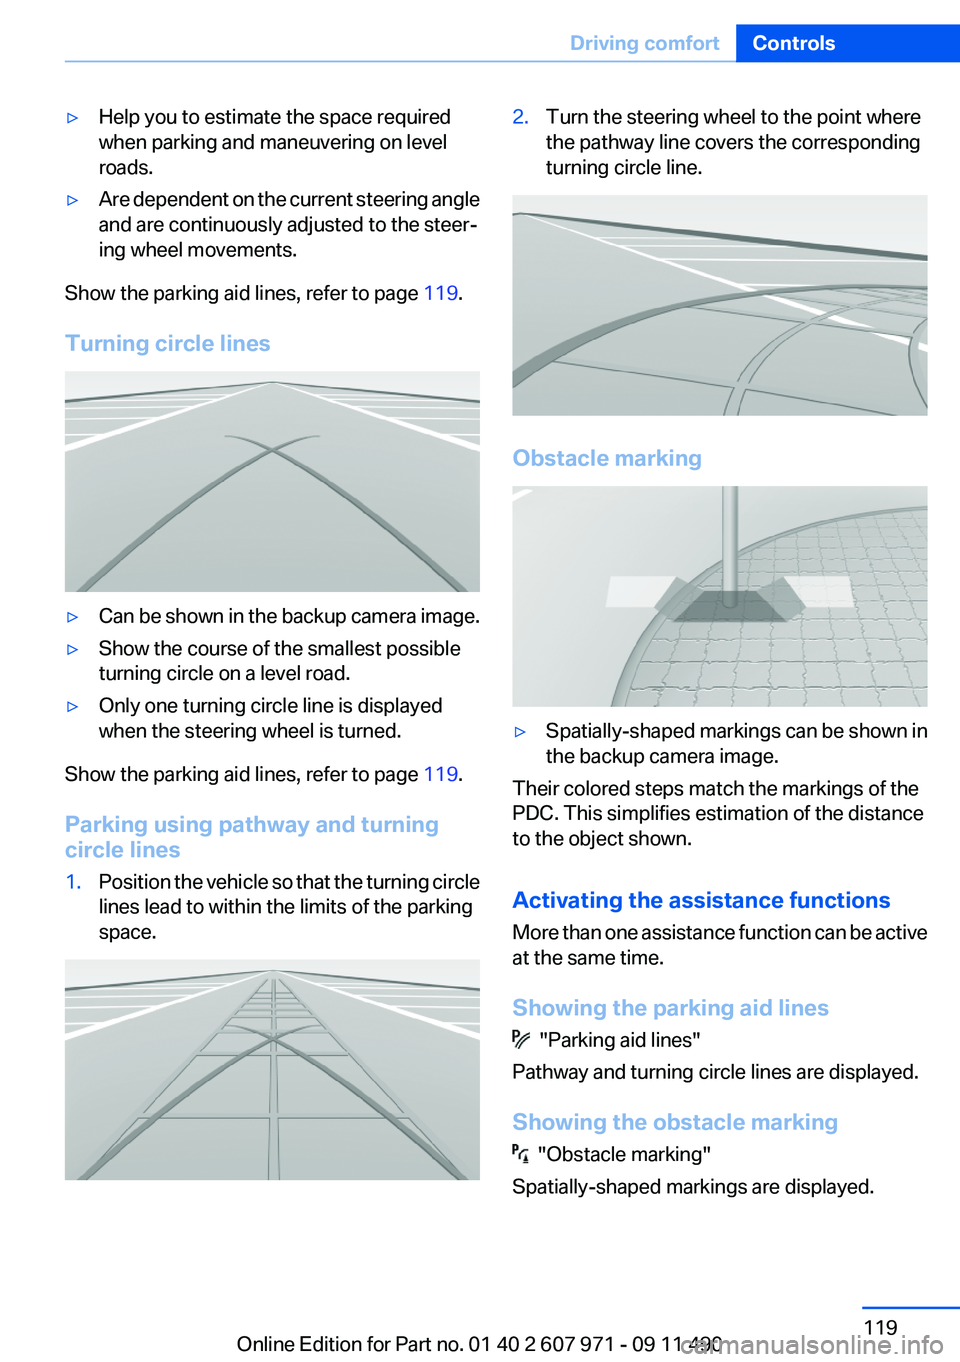
Turning circle lines
▷Can be shown in the backup camera image.▷Show the course of the smallest possible
turning circle on a level road.▷Only one turning circle line is displayed
when the steering wheel is turned.
Show the parking aid lines, refer to page 119.
Parking using pathway and turning
circle lines
1.Position the vehicle so that the turning circle
lines lead to within the limits of the parking
space.2.Turn the steering wheel to the point where
the pathway line covers the corresponding
turning circle line.
Obstacle marking
▷Spatially-shaped markings can be shown in
the backup camera image.
Their colored steps match the markings of the
PDC. This simplifies estimation of the distance
to the object shown.
Activating the assistance functions
More than one assistance function can be active
at the same time.
Showing the parking aid lines
"Parking aid lines"
Pathway and turning circle lines are displayed.
Showing the obstacle marking
"Obstacle marking"
Spatially-shaped markings are displayed.
Seite 119Driving comfortControls119
Online Edition for Part no. 01 40 2 607 971 - 09 11 490
Page 121 of 303
Automatic deactivation during forward
travel
The system switches off when a certain driving
distance or speed is exceeded.
Switch the system back on if necessary.
Switching on/off manually
Press the button.
▷On: the LED lights up.▷Off: the LED goes out.
If Top View is displayed, switch on the backup
camera via the iDrive, refer to page 121.
Visual warning
The approach of the vehicle to an object can be
shown on the Control Display.
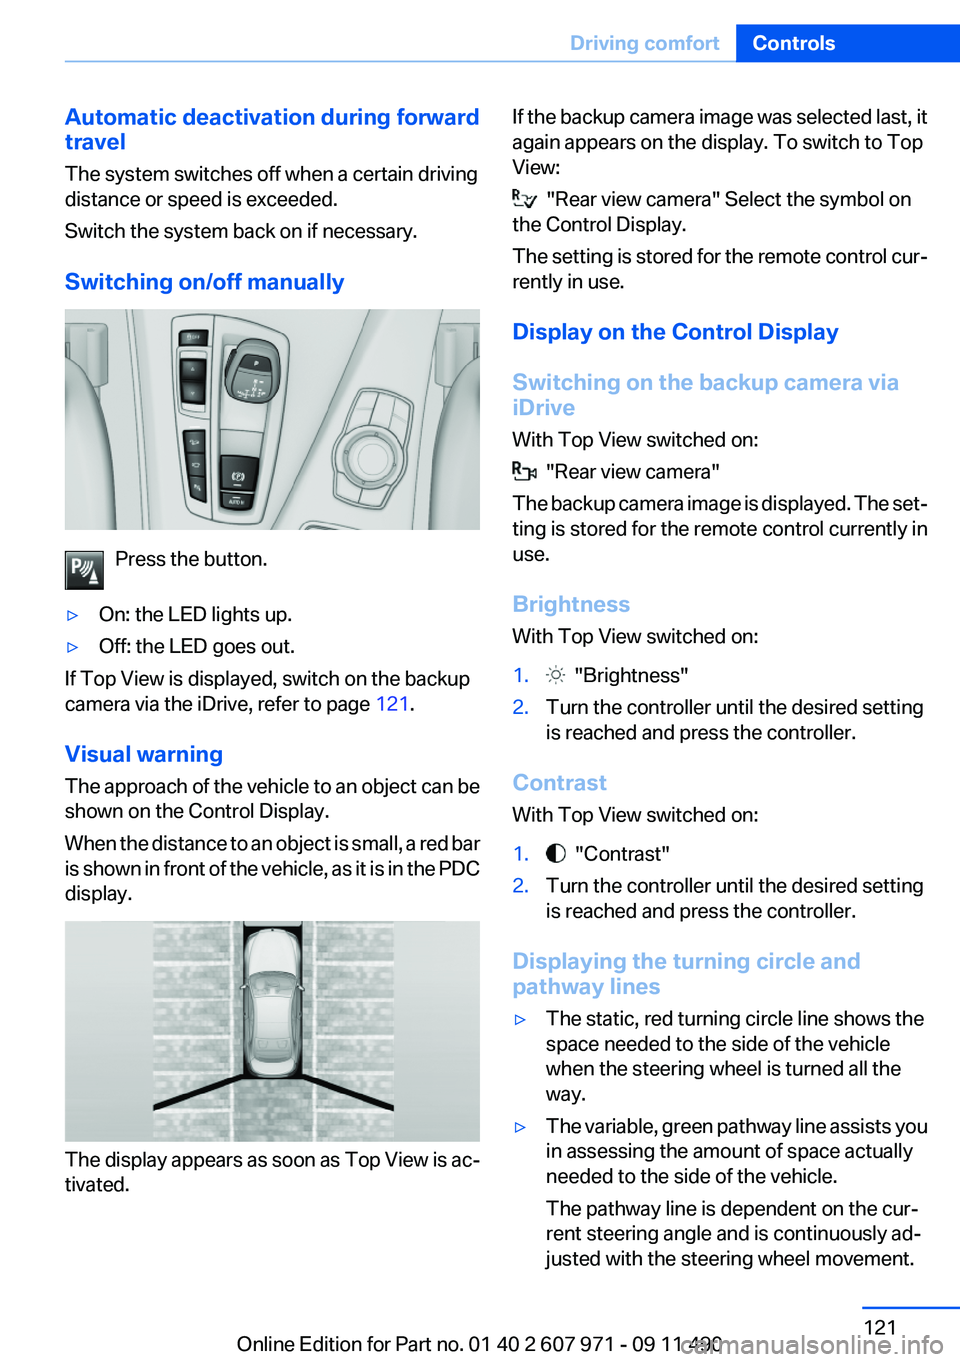
When the distance to an object is small, a red bar
is shown in front of the vehicle, as it is in the PDC
display.
The display appears as soon as Top View is ac‐
tivated.
If the backup camera image was selected last, it
again appears on the display. To switch to Top
View:
"Rear view camera" Select the symbol on
the Control Display.
The setting is stored for the remote control cur‐
rently in use.
Display on the Control Display
Switching on the backup camera via
iDrive
With Top View switched on:
"Rear view camera"
The backup camera image is displayed. The set‐
ting is stored for the remote control currently in
use.
Brightness
With Top View switched on:
1. "Brightness"2.Turn the controller until the desired setting
is reached and press the controller.
Contrast
With Top View switched on:
1. "Contrast"2.Turn the controller until the desired setting
is reached and press the controller.
Displaying the turning circle and
pathway lines
▷The static, red turning circle line shows the
space needed to the side of the vehicle
when the steering wheel is turned all the
way.▷The variable, green pathway line assists you
in assessing the amount of space actually
needed to the side of the vehicle.
The pathway line is dependent on the cur‐
rent steering angle and is continuously ad‐
justed with the steering wheel movement.Seite 121Driving comfortControls121
Online Edition for Part no. 01 40 2 607 971 - 09 11 490
Page 125 of 303
Watch the parking space and parking procedure
closely and intervene if necessary; otherwise,
there is the danger of an accident.◀
Check the traffic situation as well
Loud sounds outside and within the vehi‐
cle can drown out the signal tones of the parking
assistant and PDC.
Check the traffic situation around the vehicle
with your own eyes; otherwise, there is the dan‐
ger of an accident.◀1.Switch on the parking assistant and activate
it if necessary.
The status of the parking space search is in‐
dicated on the Control Display.2.Follow the instructions on the Control Dis‐
play.
The end of the parking procedure is indi‐
cated on the Control Display.3.Adjust the parking position yourself if nec‐
essary.
Notes
▷The parking assistant takes control of steer‐
ing for as long as the symbol for active park‐
ing appears on the display.▷The system maneuvers the vehicle to posi‐
tion it properly in smaller parking spaces, for
example.▷To achieve the best possible parking posi‐
tion, wait for the automatic steering wheel
movement after the gear change when the
vehicle is stationary.▷When parking in parking spaces on the driv‐
er's side, the corresponding turn signal must
be set.
Interrupting manually
The parking assistant can be interrupted at any
time by:
▷Grasping the steering wheel and steering
yourself.▷ " Parking Assistant" Select the symbol on
the Control Display.
Interrupting automatically
The procedure is interrupted automatically:
▷If the vehicle speed exceeds approx. 6 mph/
10 km/h.▷On snow-covered or slippery road surfaces
if necessary.▷If doors are open.
A Check Control message is displayed.
Continuing
An interrupted parking procedure can be con‐
tinued if necessary.
Follow the instructions on the Control Display to
do this.
Switching off
The system can be deactivated as follows:
▷Press the button.▷Switch off the ignition.
Malfunction
A Check Control message is displayed.
The parking assistant failed. Have the system
checked.
System limits Changes to the parking space
Changes to the parking space after it was
measured are not taken into account by the sys‐
tem.
Therefore, always be alert and ready to inter‐
vene; otherwise, there is the danger of an acci‐
dent occurring.◀
Transporting loads
Loads that extend beyond the perimeter
of the vehicle are not taken into account by the
system during the parking procedure.
Seite 125Driving comfortControls125
Online Edition for Part no. 01 40 2 607 971 - 09 11 490
Page 164 of 303
Example: to enter a town/city in a US state
as a whole word, the language of the system
must be English.▷Spell the entry if the spoken language and
the language of the system differ.▷Say the letters smoothly, and avoid exag‐
gerating the pronunciation and inserting
lengthy pauses between the letters.▷The options available for entering data de‐
pend on the navigation data and the country
and language settings.
entering an address using a command
1. Press the button on the steering
wheel.2.›Enter address‹3.Wait for a request from the system.4.Say the address in the suggested order.5.Continue making the entry as prompted by
the system.
If necessary, individually name the separate
components of the address, e.g., the town/city.
Entering a town/city separately
The name of the town/city can be said as a
word or spelled out.
With the destination entry menu displayed:
1. Press the button on the steering
wheel.2.›City‹ or ›Spell city‹.3.Wait for the system to prompt you for the
town/city.4.Say the name of the town/city, or say at least
the first three letters.
Depending on the entry, up to 20 towns/cit‐
ies may be suggested.5.Select the town/city.▷To select a recommended town/
city: ›Yes‹▷To select a different town/city: ›New
entry‹▷Select an entry: ›Entry ...‹ e.g., entry 2▷To spell an entry: ›Spell city‹6.Continue making the entry as prompted by
the system.
If there are several towns/cities with the same
name:
Towns/cities of the same name are grouped in a
list and displayed as one location followed by an
ellipsis.
1.Select an entry: ›Yes‹ or ›Entry ...‹ e.g., En‐
try 2.2.Select the desired town/city.
Entering a street or intersection
separately
Enter a street and intersection in the same way
as you would enter a town/city.
Entering a house number separately
Depending on the data in the navigation system,
house numbers up to number 2,000 can be en‐
tered.
1.›House number‹2.Say the house number.
Say each digit separately.3.Continue making the entry as prompted by
the system.
Planning a trip with intermediate
destinations
New trip
A trip can be planned with several intermediate
destinations.
1."Navigation"2."Map"3.Move the controller to the left if necessary.4. "Guidance"Seite 164NavigationNavigation164
Online Edition for Part no. 01 40 2 607 971 - 09 11 490
Page 196 of 303
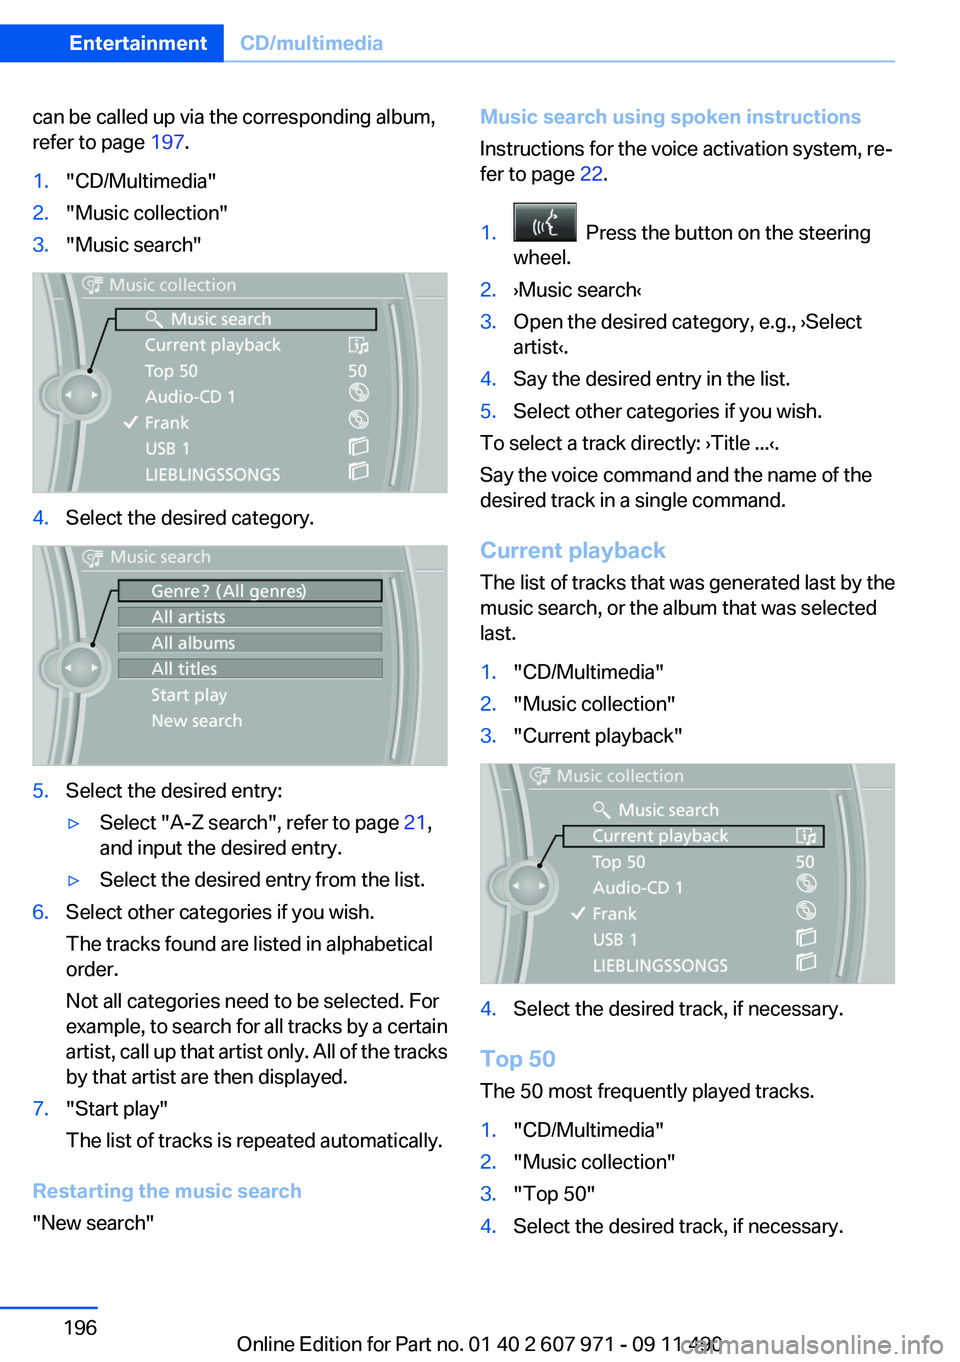
can be called up via the corresponding album,
refer to page 197.1."CD/Multimedia"2."Music collection"3."Music search"4.Select the desired category.5.Select the desired entry:▷Select "A-Z search", refer to page 21,
and input the desired entry.▷Select the desired entry from the list.6.Select other categories if you wish.
The tracks found are listed in alphabetical
order.
Not all categories need to be selected. For
example, to search for all tracks by a certain
artist, call up that artist only. All of the tracks
by that artist are then displayed.7."Start play"
The list of tracks is repeated automatically.
Restarting the music search
"New search"
Music search using spoken instructions
Instructions for the voice activation system, re‐
fer to page 22.1. Press the button on the steering
wheel.2.›Music search‹3.Open the desired category, e.g., ›Select
artist‹.4.Say the desired entry in the list.5.Select other categories if you wish.
To select a track directly: ›Title ...‹.
Say the voice command and the name of the
desired track in a single command.
Current playback
The list of tracks that was generated last by the
music search, or the album that was selected
last.
1."CD/Multimedia"2."Music collection"3."Current playback"4.Select the desired track, if necessary.
Top 50
The 50 most frequently played tracks.
1."CD/Multimedia"2."Music collection"3."Top 50"4.Select the desired track, if necessary.Seite 196EntertainmentCD/multimedia196
Online Edition for Part no. 01 40 2 607 971 - 09 11 490
Page 210 of 303
TelephoneVehicle equipment
All standard, country-specific and optional
equipment that is offered in the model series is
described in this chapter. Therefore, equipment
is also described that is not available in a vehicle,
e. g., because of the selected optional equip‐
ment or country variant. This also applies for
safety-related functions and systems.
At a glance
The concept
Mobile phones or other external devices such as
audio players can be connected to the vehicle
via Bluetooth.
After these devices are paired once, they are
recognized automatically when the ignition is
switched on as soon as they are inside the ve‐
hicle and can be operated via iDrive, the buttons
on the steering wheel, and via voice activation.
Depending on their functionality, external devi‐
ces can be used via the vehicle as a telephone
or as an audio source.
The telephone functions are described in the
following. Operation of the audio functions, refer
to page 202.
Up to four external devices can be paired.
Certain functions may need to be enabled by the
mobile phone provider or service provider.
Using the mobile phone while driving
Make entries only when traffic and road
conditions allow. Do not hold the mobile phone
in your hand while you are driving; use the
hands-free system instead. If you do not ob‐
serve this precaution, you can endanger the ve‐
hicle occupants and other road users.◀Snap-in adapter
The snap-in adapter is used to:▷Hold the mobile phone.▷Recharge the battery.▷Connect the mobile phone to an outside an‐
tenna of the vehicle.
This provides for better network reception
and consistent sound quality.
Approved mobile phones
Details on which mobile phones and external
devices with a Bluetooth interface are sup‐
ported by the mobile phone preparation pack‐
age can be obtained at www.bmwusa.com/blue‐
tooth.
Displaying the vehicle identification
number and software part number
The vehicle identification number and software
part number are needed to determine which mo‐
bile phones are supported by the mobile phone
preparation package. The software version of
the mobile phone may also be required.
1."Telephone"2.Open "Options".3."Bluetooth® info"4."Display system information"
These approved mobile phones with a certain
software version, support the vehicle functions
described below.
Malfunctions may occur with other mobile
phones or software versions.
Do not operate a mobile phone that is connected
to the vehicle on the mobile phone keypad, as
this may lead to a malfunction.
A software update can be performed if neces‐
sary.
Seite 210CommunicationTelephone210
Online Edition for Part no. 01 40 2 607 971 - 09 11 490
Page 214 of 303
notes? Reduce the data volume of the con‐
tact.▷Is the mobile phone connected as an audio
source or additional telephone? The mobile
phone must be connected as a telephone.
The phone connection quality is poor.
▷The strength of the Bluetooth signal on the
mobile phone can be adjusted, depending
on the mobile phone.▷Insert the mobile phone into the snap-in
adapter or place it in the area of the center
console.▷Adjust the volume of the microphone and
loudspeakers separately.
If all points in this list have been checked and the
required function is still not available, contact
the hotline or service center.
Controls
Adjusting the volume
Turn the knob until the desired volume is se‐
lected. The setting is stored for the remote con‐
trol currently in use.
The vehicle automatically adjusts the volume of
the microphone on the telephone and the vol‐
ume of the called party. Depending on the mo‐
bile phone, the volumes may need to be ad‐
justed. The settings can only be created during
a call and must be adjusted separately for each
telephone. The settings are deleted when the
telephone is unpaired.
1."Settings"2."Tone"3."Volume settings"4.Select the desired setting: "Microphone" or
"Loudspeak."5.To adjust: turn the controller.6.To store: press the controller.Incoming call
Receiving calls
If the number of the caller is stored in the phone
book and is transmitted by the network, the
name of the contact is displayed. Otherwise,
only the phone number is displayed.
If more than one phone number is assigned to a
contact, only the name of the contact is dis‐
played.
For calls on the additional telephone, the num‐
ber is only displayed if it is transmitted by the
network.
An incoming call to the additional telephone is
automatically rejected if there is an active call on
the other telephone.
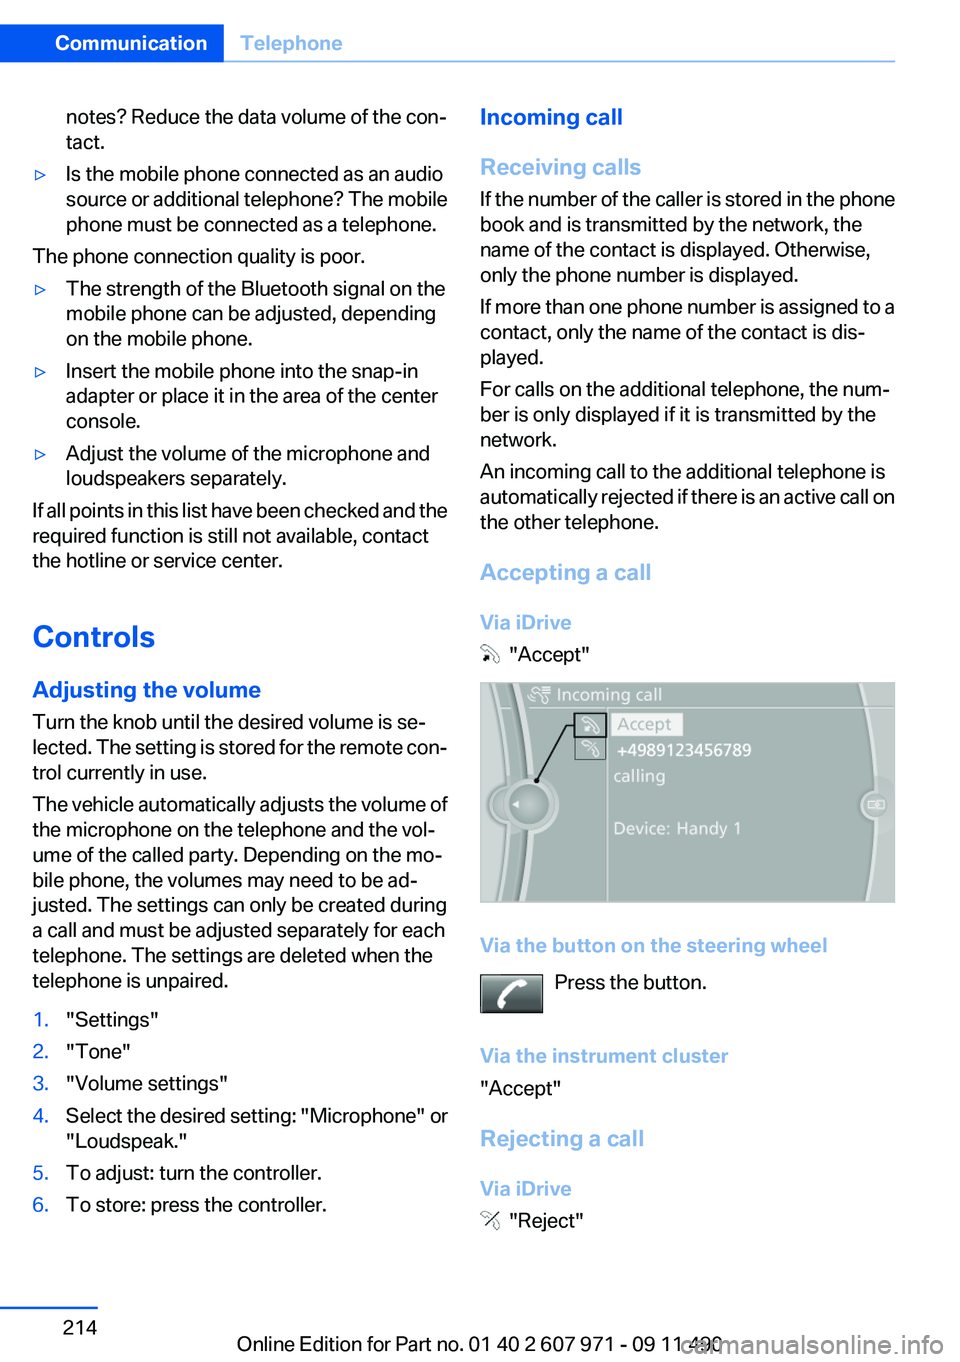
Accepting a call
Via iDrive
"Accept"
Via the button on the steering wheel Press the button.
Via the instrument cluster
"Accept"
Rejecting a call
Via iDrive
"Reject"
Seite 214CommunicationTelephone214
Online Edition for Part no. 01 40 2 607 971 - 09 11 490