2012 BMW 650I XDRIVE CONVERTIBLE ESP
[x] Cancel search: ESPPage 232 of 282
Temperature
The temperature grades are A, the highest, B,
and C, representing the tire's resistance to the
generation of heat and its ability to dissipate
heat when tested under controlled conditions
on
a specified indoor laboratory test wheel. Sus‐
tained high temperature can cause the material
of the tire to degenerate and reduce tire life, and
excessive temperature can lead to sudden tire
failure. The grade C corresponds to a level of
performance which all passenger car tires must
meet under the Federal Motor Vehicle Safety
Standard No. 109. Grades Band A represent
higher levels of performance on the laboratory
test wheel than the minimum required by law.
Temperature grade for this tire
The temperature grade for this tire is es‐
tablished for a tire that is properly inflated and
not overloaded. Excessive speed, underinfla‐
tion, or excessive loading, either separately or in
combination, can cause heat buildup and pos‐
sible tire failure.
If necessary, have the vehicle towed.◀
RSC – Run-flat tires
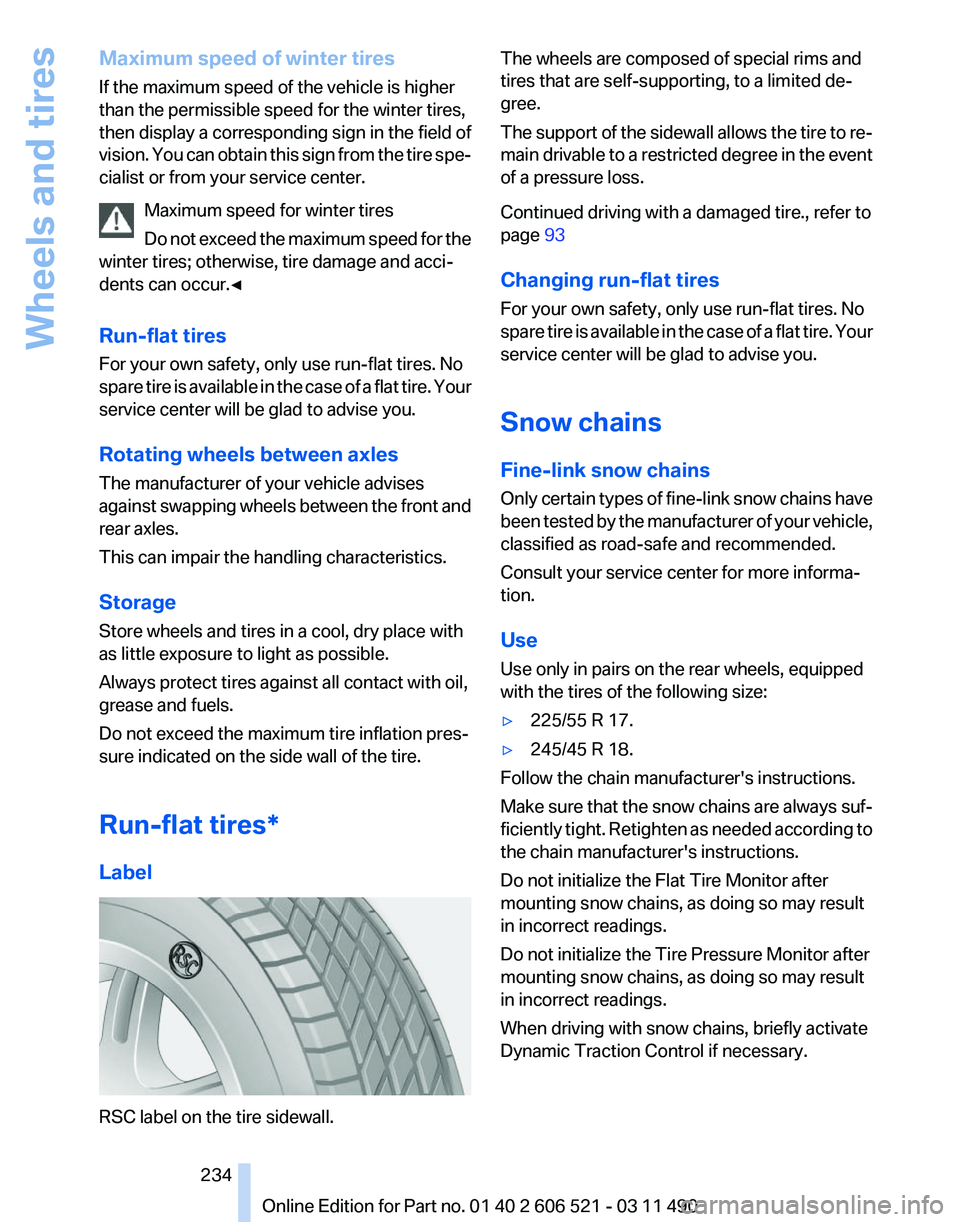
Run-flat tires, refer to page 234, are labeled with
a circular symbol containing the letters RSC
marked on the sidewall.
M+S
Winter and all-season tires with better cold
weather performance than summer tires.
Tire tread
Summer tires
Do not drive with a tire tread depth of less than
0.12 in/3 mm.
There is an increased danger of hydroplaning if
the tread depth is less than 0.12 in/3 mm.
Winter tires
Do not drive with a tire tread depth of less than
0.16 in/4 mm. Below a tread depth of 0.16 in/4 mm, tires are
less suitable for winter operation.
Minimum tread depth
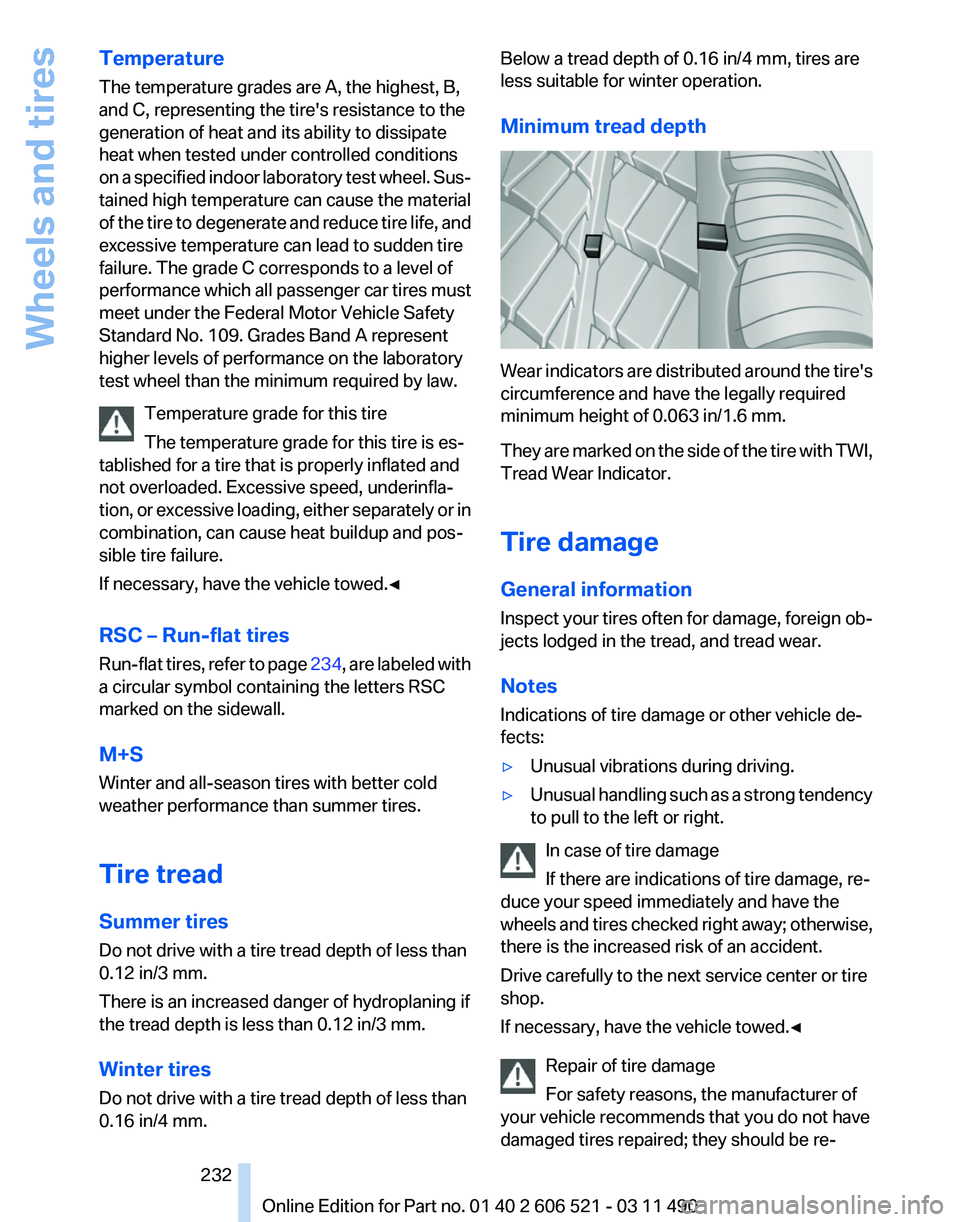
Wear indicators are distributed around the tire's
circumference and have the legally required
minimum height of 0.063 in/1.6 mm.
They
are marked on the side of the tire with TWI,
Tread Wear Indicator.
Tire damage
General information
Inspect your tires often for damage, foreign ob‐
jects lodged in the tread, and tread wear.
Notes
Indications of tire damage or other vehicle de‐
fects:
▷ Unusual vibrations during driving.
▷ Unusual handling such as a strong tendency
to pull to the left or right.
In case of tire damage
If there are indications of tire damage, re‐
duce your speed immediately and have the
wheels
and tires checked right away; otherwise,
there is the increased risk of an accident.
Drive carefully to the next service center or tire
shop.
If necessary, have the vehicle towed.◀
Repair of tire damage
For safety reasons, the manufacturer of
your vehicle recommends that you do not have
damaged tires repaired; they should be re‐ Seite 232
232 Online Edition for Part no. 01 40 2 606 521 - 03 11 490
Wheels and tires
Page 233 of 282
placed. Otherwise, damage can occur as a re‐
sult.◀
Changing wheels and tires
Mounting
Information on mounting tires
Have mounting and balancing performed
only by a service center or tire specialist.
If this work is not carried out properly, there is
the danger of subsequent damage and related
safety hazards.◀
Wheel and tire combination
Information on the correct wheel-tire combina‐
tion
and rim versions for your vehicle can be ob‐
tained from your service center.
Incorrect wheel and tire combinations impair the
function of a variety of systems such as ABS or
DSC.
To maintain good handling and vehicle re‐
sponse, use only tires with a single tread con‐
figuration from a single manufacturer.
Following tire damage, have the original wheel
and tire combination remounted on the vehicle
as soon as possible.
Approved wheels and tires
The manufacturer of your vehicle recom‐
mends that you use only wheels and tires that
have been approved for your particular vehicle
model.
For example, despite having the same official
size ratings, variations can lead to body contact
and with it, the risk of severe accidents.
The manufacturer of your vehicle cannot evalu‐
ate non-approved wheels and tires to determine
if they are suited for use, and therefore cannot
ensure the operating safety of the vehicle if they
are mounted.◀ Recommended tire brands
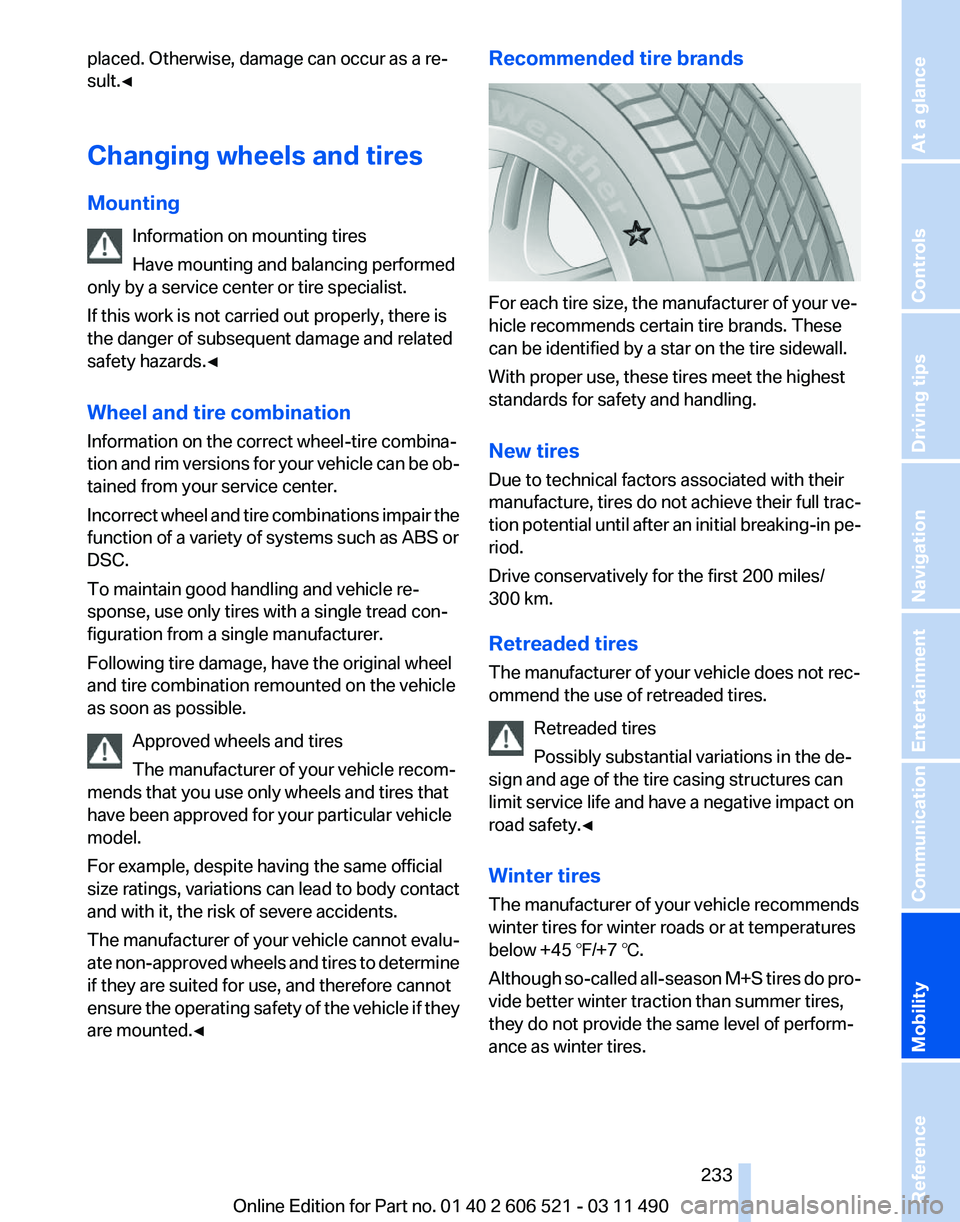
For each tire size, the manufacturer of your ve‐
hicle recommends certain tire brands. These
can be identified by a star on the tire sidewall.
With proper use, these tires meet the highest
standards for safety and handling.
New tires
Due to technical factors associated with their
manufacture,
tires do not achieve their full trac‐
tion potential until after an initial breaking-in pe‐
riod.
Drive conservatively for the first 200 miles/
300 km.
Retreaded tires
The manufacturer of your vehicle does not rec‐
ommend the use of retreaded tires.
Retreaded tires
Possibly substantial variations in the de‐
sign and age of the tire casing structures can
limit service life and have a negative impact on
road safety.◀
Winter tires
The manufacturer of your vehicle recommends
winter tires for winter roads or at temperatures
below +45 ℉/+7 ℃.
Although so-called all-season M+S tires do pro‐
vide better winter traction than summer tires,
they do not provide the same level of perform‐
ance as winter tires. Seite 233
233Online Edition for Part no. 01 40 2 606 521 - 03 11 490
Reference
Mobility Communication Entertainment Navigation Driving tips Controls At a glance
Page 234 of 282
Maximum speed of winter tires
If the maximum speed of the vehicle is higher
than the permissible speed for the winter tires,
then display a corresponding sign in the field of
vision.
You can obtain this sign from the tire spe‐
cialist or from your service center.
Maximum speed for winter tires
Do not exceed the maximum speed for the
winter tires; otherwise, tire damage and acci‐
dents can occur.◀
Run-flat tires
For your own safety, only use run-flat tires. No
spare tire is available in the case of a flat tire. Your
service center will be glad to advise you.
Rotating wheels between axles
The manufacturer of your vehicle advises
against swapping wheels between the front and
rear axles.
This can impair the handling characteristics.
Storage
Store wheels and tires in a cool, dry place with
as little exposure to light as possible.
Always protect tires against all contact with oil,
grease and fuels.
Do not exceed the maximum tire inflation pres‐
sure indicated on the side wall of the tire.
Run-flat tires*
Label RSC label on the tire sidewall. The wheels are composed of special rims and
tires that are self-supporting, to a limited de‐
gree.
The
support of the sidewall allows the tire to re‐
main drivable to a restricted degree in the event
of a pressure loss.
Continued driving with a damaged tire., refer to
page 93
Changing run-flat tires
For your own safety, only use run-flat tires. No
spare tire is available in the case of a flat tire. Your
service center will be glad to advise you.
Snow chains
Fine-link snow chains
Only certain types of fine-link snow chains have
been tested by the manufacturer of your vehicle,
classified as road-safe and recommended.
Consult your service center for more informa‐
tion.
Use
Use only in pairs on the rear wheels, equipped
with the tires of the following size:
▷ 225/55 R 17.
▷ 245/45 R 18.
Follow the chain manufacturer's instructions.
Make
sure that the snow chains are always suf‐
ficiently tight. Retighten as needed according to
the chain manufacturer's instructions.
Do not initialize the Flat Tire Monitor after
mounting snow chains, as doing so may result
in incorrect readings.
Do not initialize the Tire Pressure Monitor after
mounting snow chains, as doing so may result
in incorrect readings.
When driving with snow chains, briefly activate
Dynamic Traction Control if necessary.
Seite 234
234 Online Edition for Part no. 01 40 2 606 521 - 03 11 490
Wheels and tires
Page 243 of 282
Replacing components
Tool kit
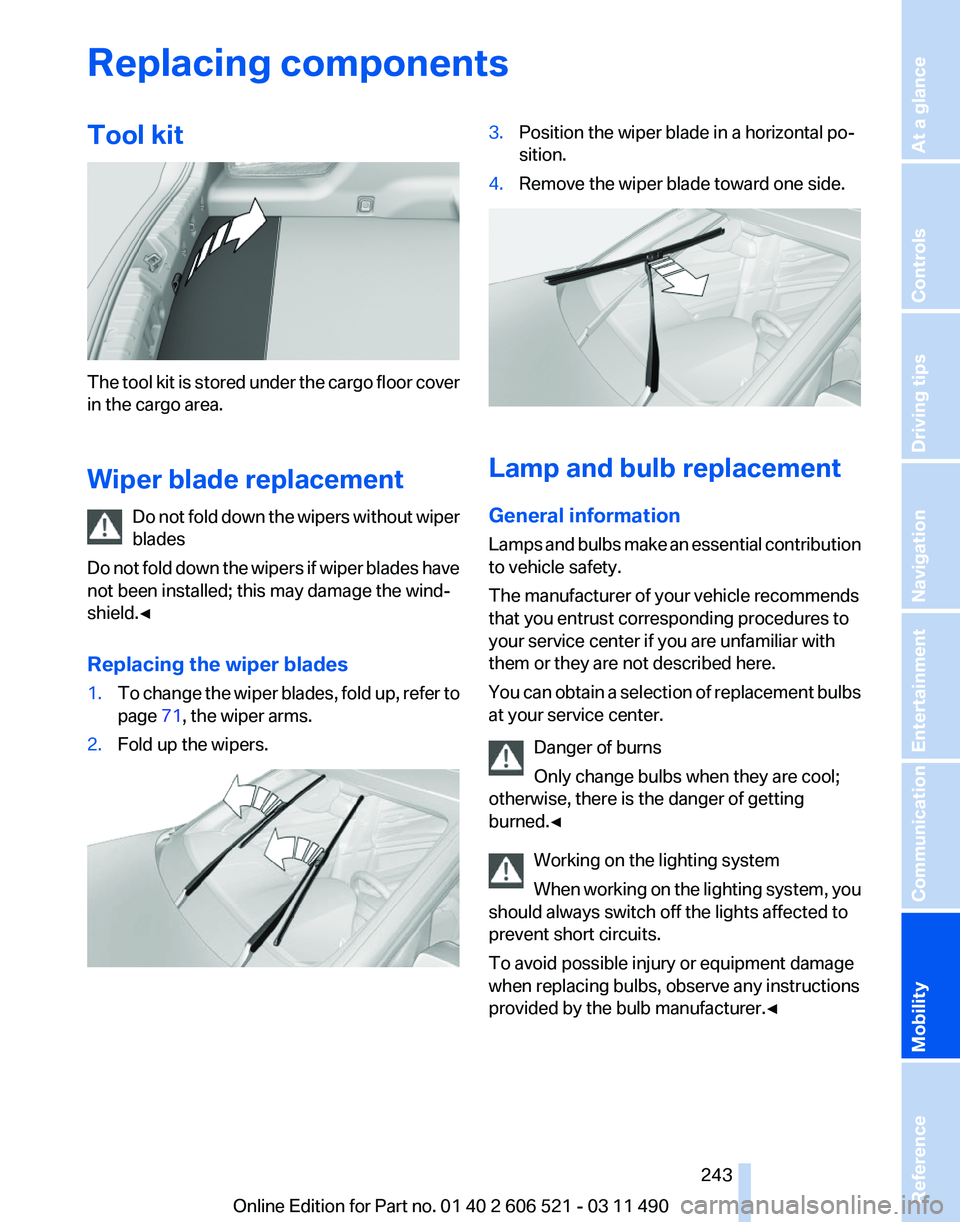
The tool kit is stored under the cargo floor cover
in the cargo area.
Wiper blade replacement
Do
not fold down the wipers without wiper
blades
Do not fold down the wipers if wiper blades have
not been installed; this may damage the wind‐
shield.◀
Replacing the wiper blades
1. To change the wiper blades, fold up, refer to
page 71, the wiper arms.
2. Fold up the wipers. 3.
Position the wiper blade in a horizontal po‐
sition.
4. Remove the wiper blade toward one side. Lamp and bulb replacement
General information
Lamps
and bulbs make an essential contribution
to vehicle safety.
The manufacturer of your vehicle recommends
that you entrust corresponding procedures to
your service center if you are unfamiliar with
them or they are not described here.
You can obtain a selection of replacement bulbs
at your service center.
Danger of burns
Only change bulbs when they are cool;
otherwise, there is the danger of getting
burned.◀
Working on the lighting system
When working on the lighting system, you
should always switch off the lights affected to
prevent short circuits.
To avoid possible injury or equipment damage
when replacing bulbs, observe any instructions
provided by the bulb manufacturer.◀ Seite 243
243Online Edition for Part no. 01 40 2 606 521 - 03 11 490
Reference
Mobility Communication Entertainment Navigation Driving tips Controls At a glance
Page 248 of 282
Breakdown assistance
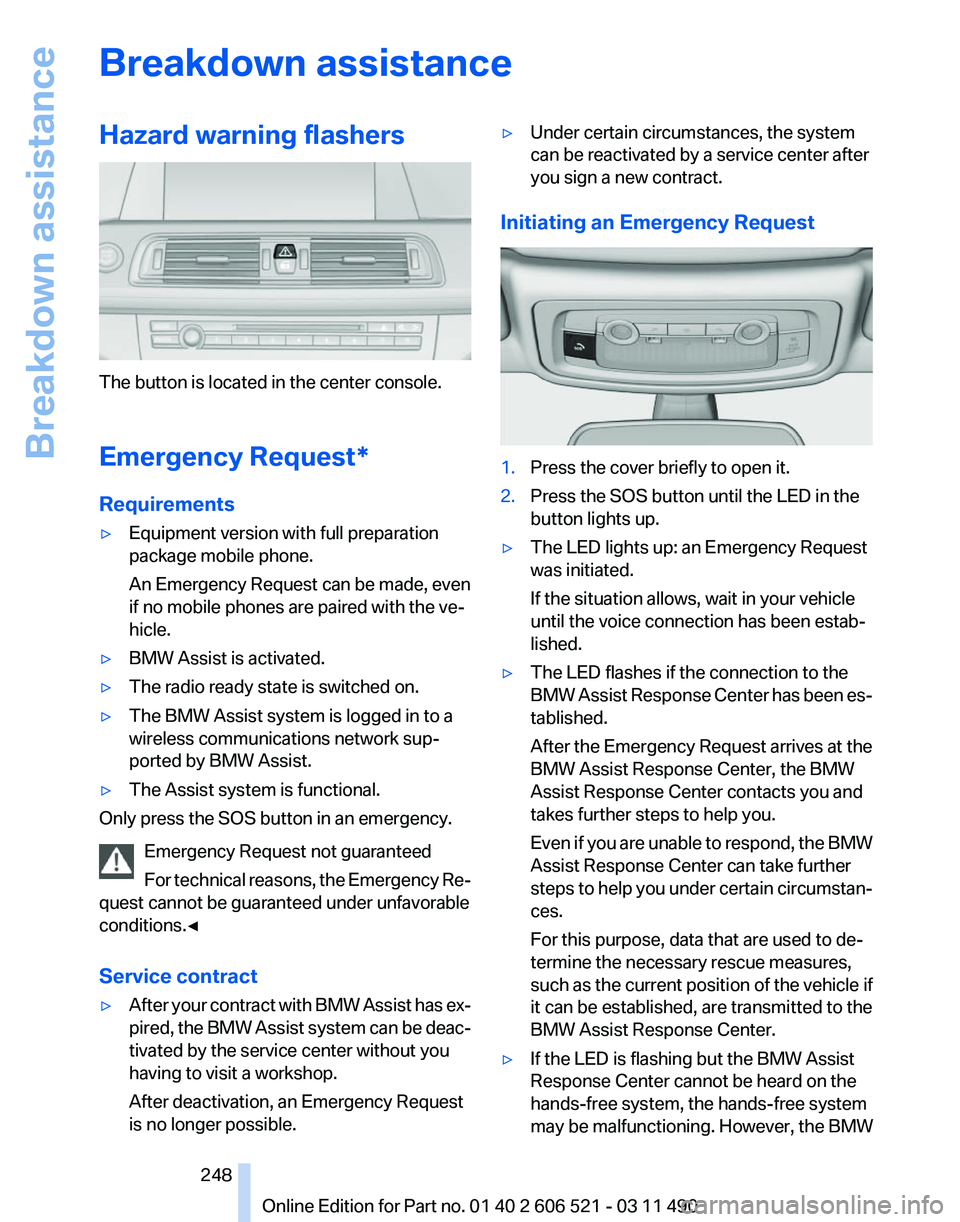
Hazard warning flashers
The button is located in the center console.
Emergency Request
*
Requirements
▷ Equipment version with full preparation
package mobile phone.
An Emergency Request can be made, even
if no mobile phones are paired with the ve‐
hicle.
▷ BMW Assist is activated.
▷ The radio ready state is switched on.
▷ The BMW Assist system is logged in to a
wireless communications network sup‐
ported by BMW Assist.
▷ The Assist system is functional.
Only press the SOS button in an emergency.
Emergency Request not guaranteed
For
technical reasons, the Emergency Re‐
quest cannot be guaranteed under unfavorable
conditions.◀
Service contract
▷ After your contract with BMW Assist has ex‐
pired,
the BMW Assist system can be deac‐
tivated by the service center without you
having to visit a workshop.
After deactivation, an Emergency Request
is no longer possible. ▷
Under certain circumstances, the system
can be reactivated by a service center after
you sign a new contract.
Initiating an Emergency Request 1.
Press the cover briefly to open it.
2. Press the SOS button until the LED in the
button lights up.
▷ The LED lights up: an Emergency Request
was initiated.
If the situation allows, wait in your vehicle
until the voice connection has been estab‐
lished.
▷ The LED flashes if the connection to the
BMW
Assist Response Center has been es‐
tablished.
After the Emergency Request arrives at the
BMW Assist Response Center, the BMW
Assist Response Center contacts you and
takes further steps to help you.
Even if you are unable to respond, the BMW
Assist Response Center can take further
steps to help you under certain circumstan‐
ces.
For this purpose, data that are used to de‐
termine the necessary rescue measures,
such as the current position of the vehicle if
it can be established, are transmitted to the
BMW Assist Response Center.
▷ If the LED is flashing but the BMW Assist
Response Center cannot be heard on the
hands-free system, the hands-free system
may be malfunctioning. However, the BMW
Seite 248
248 Online Edition for Part no. 01 40 2 606 521 - 03 11 490
Breakdown assistance
Page 249 of 282
Assist Response Center may still be able to
hear you.
Initiating an Emergency Request
automatically
Under certain conditions, an Emergency Re‐
quest is automatically initiated immediately after
a severe accident. Automatic Collision Notifica‐
tion is not affected by pressing the SOS button.
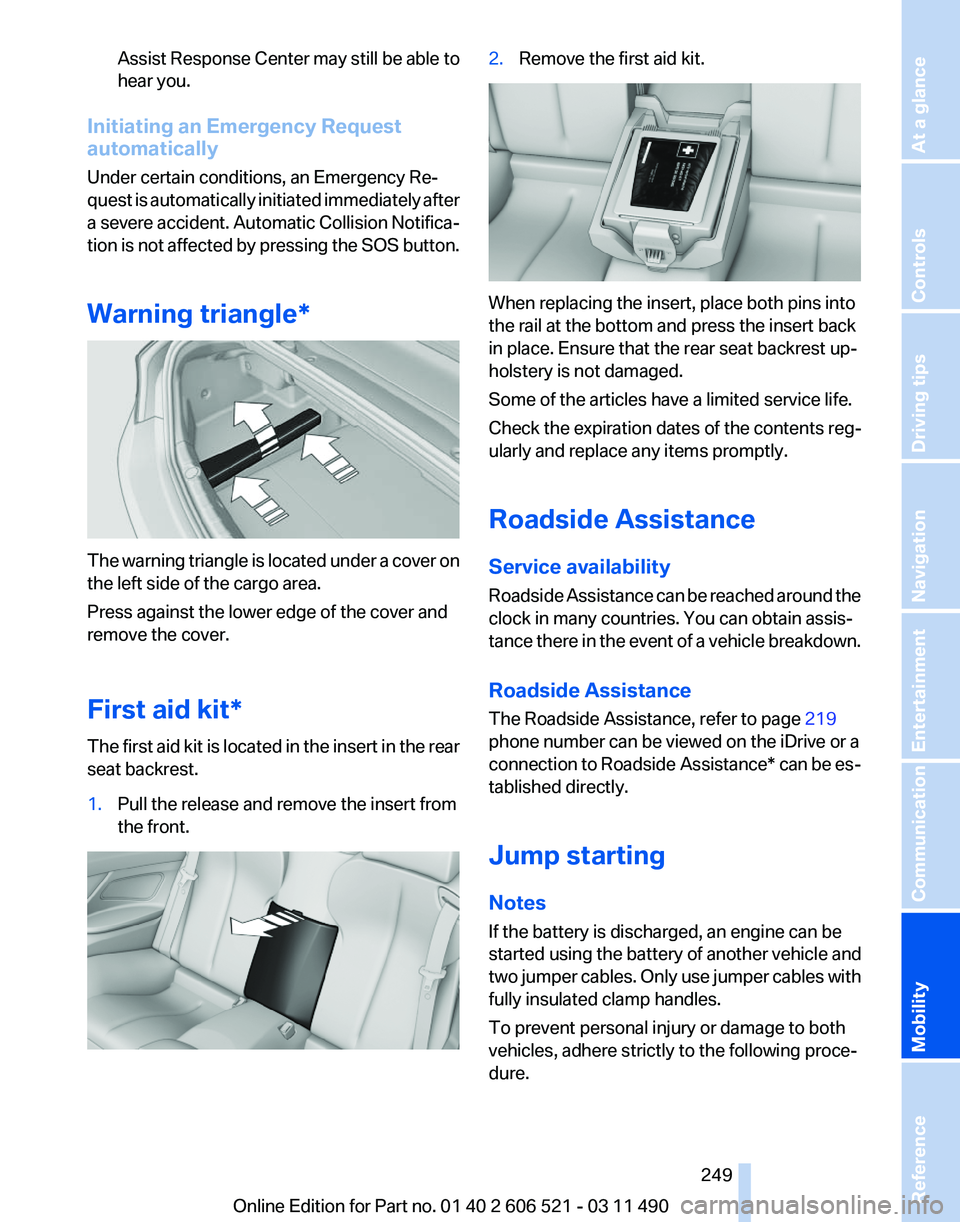
Warning triangle* The warning triangle is located under a cover on
the left side of the cargo area.
Press against the lower edge of the cover and
remove the cover.
First aid kit*
The first aid kit is located in the insert in the rear
seat backrest.
1.
Pull the release and remove the insert from
the front. 2.
Remove the first aid kit. When replacing the insert, place both pins into
the rail at the bottom and press the insert back
in place. Ensure that the rear seat backrest up‐
holstery is not damaged.
Some of the articles have a limited service life.
Check the expiration dates of the contents reg‐
ularly and replace any items promptly.
Roadside Assistance
Service availability
Roadside Assistance can be reached around the
clock in many countries. You can obtain assis‐
tance there in the event of a vehicle breakdown.
Roadside Assistance
The Roadside Assistance, refer to page
219
phone number can be viewed on the iDrive or a
connection to Roadside Assistance* can be es‐
tablished directly.
Jump starting
Notes
If the battery is discharged, an engine can be
started using the battery of another vehicle and
two jumper cables. Only use jumper cables with
fully insulated clamp handles.
To prevent personal injury or damage to both
vehicles, adhere strictly to the following proce‐
dure.
Seite 249
249Online Edition for Part no. 01 40 2 606 521 - 03 11 490
Reference
Mobility Communication Entertainment Navigation Driving tips Controls At a glance
Page 250 of 282
Do not touch live parts
To avoid the risk of potentially fatal injury,
always avoid all contact with electrical compo‐
nents while the engine is running.◀
Preparation
1. Check whether the battery of the other ve‐
hicle
has a voltage of 12 volts. This informa‐
tion can be found on the battery.
2. Switch off the engine of the assisting vehi‐
cle.
3. Switch off any electronic systems/power
consumers in both vehicles.
Bodywork contact between vehicles
Make sure that there is no contact be‐
tween the bodywork of the two vehicles; other‐
wise, there is the danger of short circuits.◀
Starting aid terminals
Connecting order
Connect the jumper cables in the correct
order; otherwise, there is the danger of injury
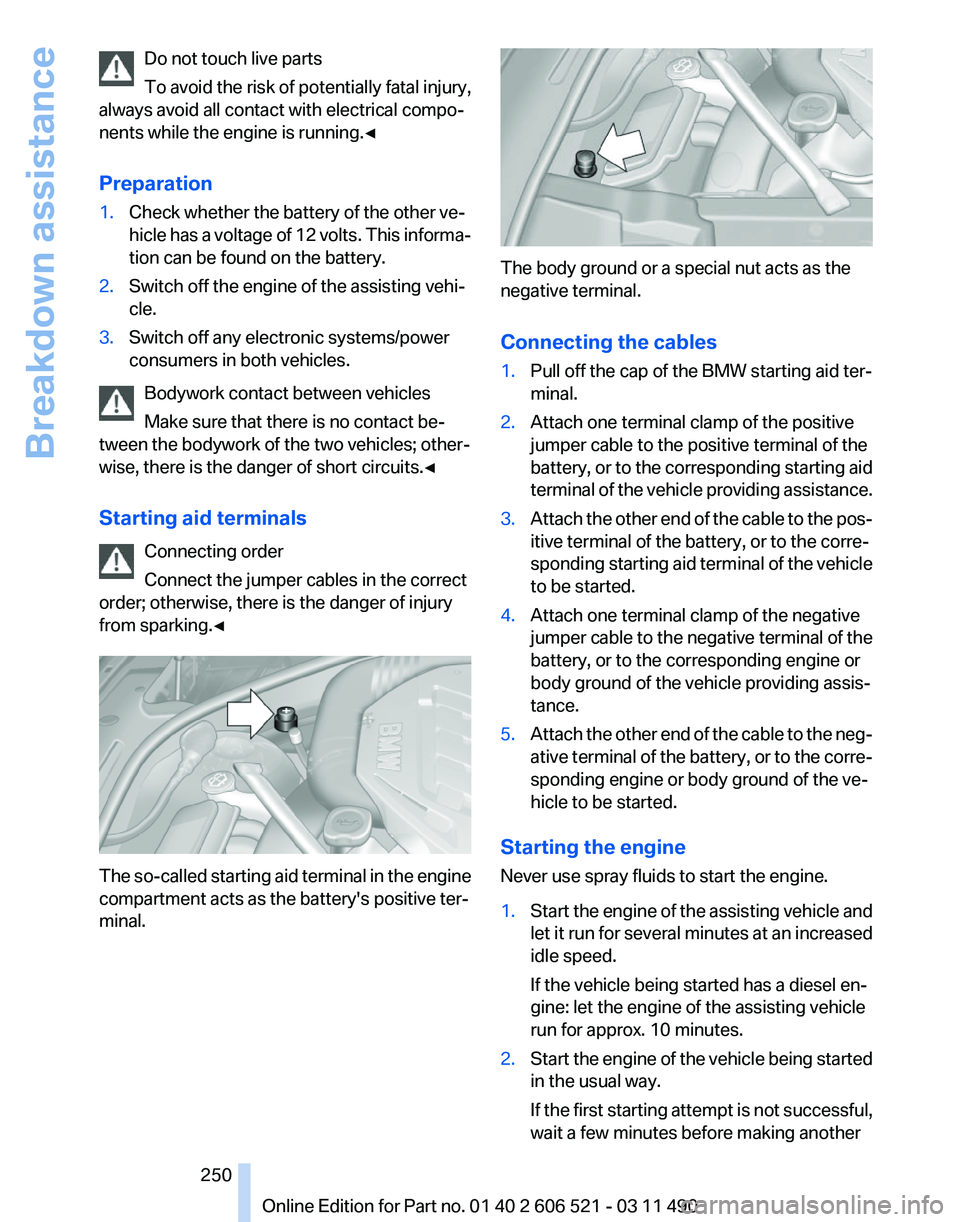
from sparking.◀ The so-called starting aid terminal in the engine
compartment acts as the battery's positive ter‐
minal. The body ground or a special nut acts as the
negative terminal.
Connecting the cables
1.
Pull off the cap of the BMW starting aid ter‐
minal.
2. Attach one terminal clamp of the positive
jumper cable to the positive terminal of the
battery,
or to the corresponding starting aid
terminal of the vehicle providing assistance.
3. Attach the other end of the cable to the pos‐
itive terminal of the battery, or to the corre‐
sponding
starting aid terminal of the vehicle
to be started.
4. Attach one terminal clamp of the negative
jumper
cable to the negative terminal of the
battery, or to the corresponding engine or
body ground of the vehicle providing assis‐
tance.
5. Attach the other end of the cable to the neg‐
ative
terminal of the battery, or to the corre‐
sponding engine or body ground of the ve‐
hicle to be started.
Starting the engine
Never use spray fluids to start the engine.
1. Start the engine of the assisting vehicle and
let
it run for several minutes at an increased
idle speed.
If the vehicle being started has a diesel en‐
gine: let the engine of the assisting vehicle
run for approx. 10 minutes.
2. Start the engine of the vehicle being started
in the usual way.
If
the first starting attempt is not successful,
wait a few minutes before making another
Seite 250
250 Online Edition for Part no. 01 40 2 606 521 - 03 11 490
Breakdown assistance
Page 252 of 282
Towing other vehicles
General information
Light towing vehicle
Your vehicle must not be lighter than the
vehicle being towed; otherwise, it will not be
possible to control vehicle response.◀
Attaching the tow bar/tow rope correctly
Attach the tow bar or tow rope to the tow
fitting; connecting it to other vehicle parts may
cause damage.◀
▷ Switch on the hazard warning system, de‐
pending on local regulations.
▷ If the electrical system has failed, clearly
identify the vehicle being towed by placing
a sign or a warning triangle in the rear win‐
dow.
Tow bar
The tow fittings used should be on the same
side on both vehicles.
Should it prove impossible to avoid mounting
the tow bar at an offset angle, please observe
the following:
▷ Maneuvering capability is limited during cor‐
nering.
▷ The tow bar will generate lateral forces if it
is secured with an offset.
Tow rope
When starting to tow the vehicle, make sure that
the tow rope is taut.
To avoid jerking and the associated stresses on
the vehicle components when towing, always
use nylon ropes or nylon straps.
Attaching the tow rope correctly
Only secure the tow rope on the tow fit‐
ting; otherwise, damage can occur when it is se‐
cured on other parts of the vehicle.◀ Tow fitting
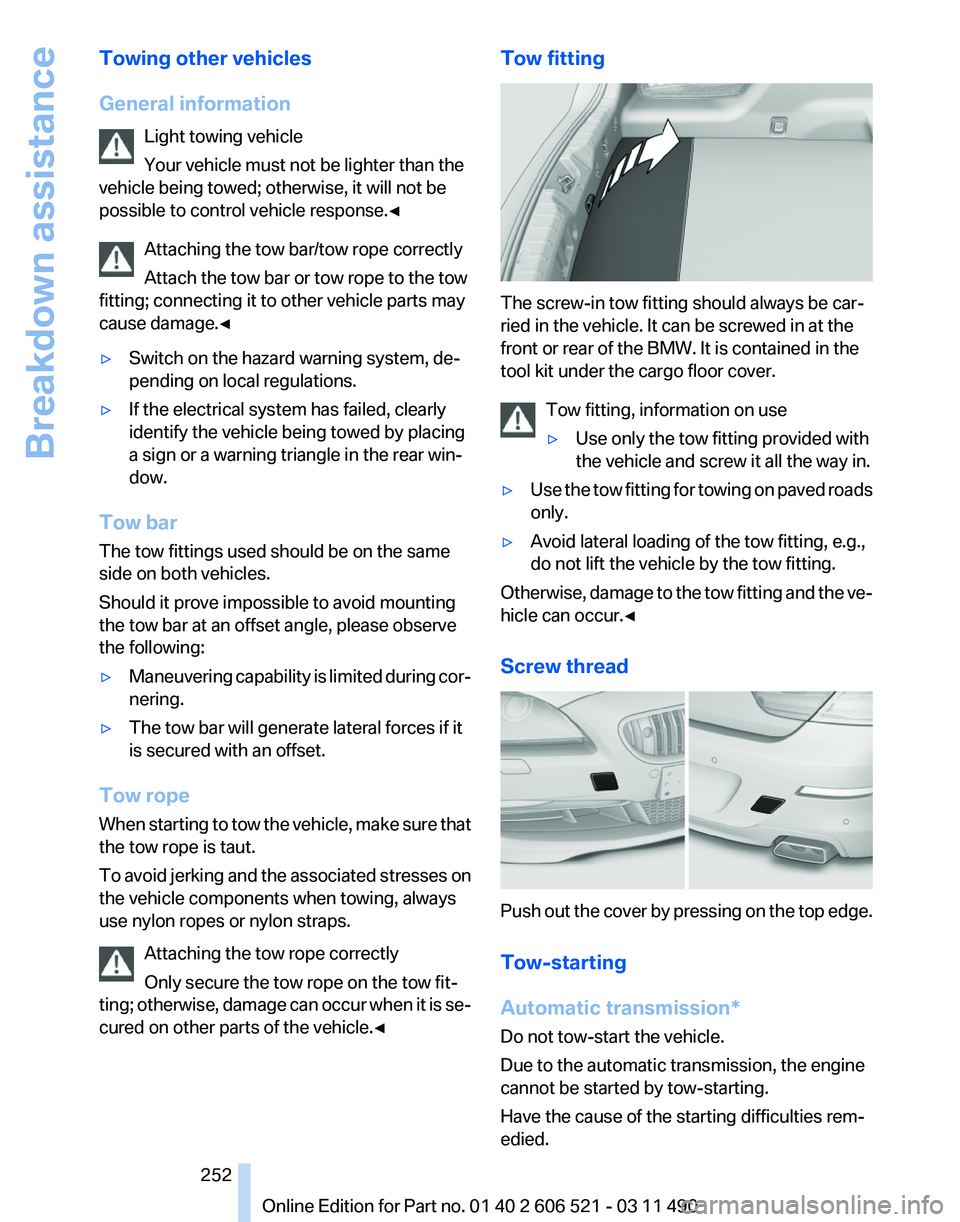
The screw-in tow fitting should always be car‐
ried in the vehicle. It can be screwed in at the
front or rear of the BMW. It is contained in the
tool kit under the cargo floor cover.
Tow fitting, information on use
▷Use only the tow fitting provided with
the vehicle and screw it all the way in.
▷ Use the tow fitting for towing on paved roads
only.
▷ Avoid lateral loading of the tow fitting, e.g.,
do not lift the vehicle by the tow fitting.
Otherwise, damage to the tow fitting and the ve‐
hicle can occur.◀
Screw thread Push out the cover by pressing on the top edge.
Tow-starting
Automatic transmission
*
Do not tow-start the vehicle.
Due to the automatic transmission, the engine
cannot be started by tow-starting.
Have the cause of the starting difficulties rem‐
edied. Seite 252
252 Online Edition for Part no. 01 40 2 606 521 - 03 11 490
Breakdown assistance