2012 BMW 650I XDRIVE CONVERTIBLE navigation
[x] Cancel search: navigationPage 37 of 282

Locking
Press the button on the remote control.
Do not lock from the outside
Do
not lock the vehicle from the outside if
there are people in it, as the vehicle cannot be
unlocked from inside without special knowl‐
edge.◀
Convenient closing*
With Comfort Access*, the remote control can
be used to close the convertible top, the side
windows, and the rear window when in the vi‐
cinity of the vehicle.
Hold down the remote control button until
the closing operation is completed.
The convertible top, the side windows, and the
rear window close. Monitor the closing process
Monitor the closing process to ensure that
no one becomes trapped.◀
Releasing the button or leaving the vicinity of the
vehicle stops the motion.
After a short period, the convertible top and the
convertible top well storage cover are lowered
slowly. The convertible top and the convertible
top well storage cover are not locked. Press the
button again until the convertible top operation
is completed.
Switching on the interior lamps,
courtesy lamps*, and welcome lamps
Press the button on the remote control
with the vehicle locked.
Panic mode*
You can trigger the alarm system if you find
yourself in a dangerous situation. Press the button on the remote control
for at least 3 seconds.
To switch off the alarm: press any button. Switching on the headlamp courtesy
delay feature
Briefly press the button on the remote
control.
The duration can be set in the Control Display.
Opening the trunk lid Press
the button on the remote control
for approx. 1 second and release.
The trunk lid opens, regardless of whether it was
previously locked or unlocked.
In some vehicle equipment variants, the trunk lid
can only be opened using the remote control if
the vehicle was unlocked first.
To avoid locking yourself out of the vehicle, do
not place the remote control into the cargo area.
The trunk lid is locked again as soon as it is
pushed closed.
Confirmation signals from the vehicle
1. "Settings"
2. "Door locks"
3. Deactivate or activate the desired confirma‐
tion signals.
▷"Acoustic sig. lock/unlock"
▷ "Flash when lock/unlock" Retrieving the seat, mirror, and
steering wheel settings
The driver's seat, exterior mirror, and steering
wheel positions selected last are stored for the
currently used remote control.
When the vehicle is unlocked, these positions
are automatically retrieved if this function was
activated. Seite 37
37Online Edition for Part no. 01 40 2 606 521 - 03 11 490
Reference Mobility Communication Entertainment Navigation Driving tips
Controls At a glance
Page 39 of 282
Manual operation
If
an electrical malfunction occurs, lock or unlock
the vehicle using a key via the door lock on the
driver's door.
Locking the doors and trunk lid at
once*
In some vehicle equipment versions, only the
driver's door can be locked via the door lock.
To lock all doors and the trunk lid at once:
1. With the doors closed, lock the vehicle using
the button for the central locking system in
the interior.
2. Unlock and open the driver's or front pas‐
senger door.
3. Lock the vehicle.
▷Lock the driver's door using the
integrated key in the door lock, or
▷ Press down the lock button of the front
passenger
door and close the door from
the outside.
The fuel filler flap can only be locked using the
remote control.
Opening
and closing: from the
inside Unlocking and opening*
▷
Either unlock the doors together using the
button for the central locking system and
then
pull the door handle above the armrest
or ▷
Pull the door opener twice individually on
each door: the first time unlocks the door,
the second time opens it.
Locking and unlocking Press the button in the vehicle.
The doors and the trunk lid are locked
or
unlocked when the doors are closed, but they
are not secured against theft.
The fuel filler flap remains unlocked.
Automatic locking
The setting is stored for the remote control cur‐
rently in use.
1. "Settings"
2. "Door locks"
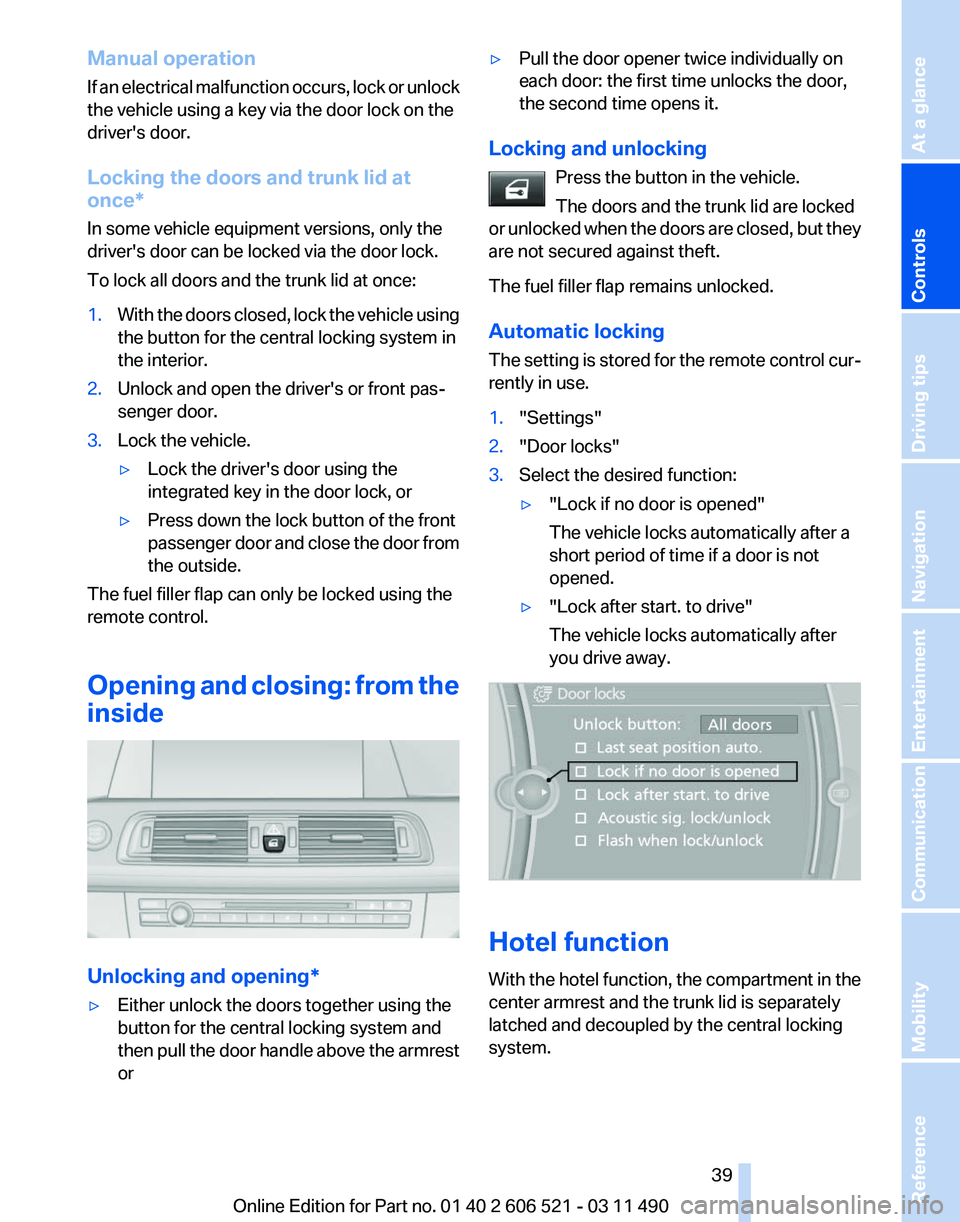
3. Select the desired function:
▷"Lock if no door is opened"
The vehicle locks automatically after a
short period of time if a door is not
opened.
▷ "Lock after start. to drive"
The vehicle locks automatically after
you drive away. Hotel function
With
the hotel function, the compartment in the
center armrest and the trunk lid is separately
latched and decoupled by the central locking
system. Seite 39
39Online Edition for Part no. 01 40 2 606 521 - 03 11 490
Reference Mobility Communication Entertainment Navigation Driving tips
Controls At a glance
Page 41 of 282
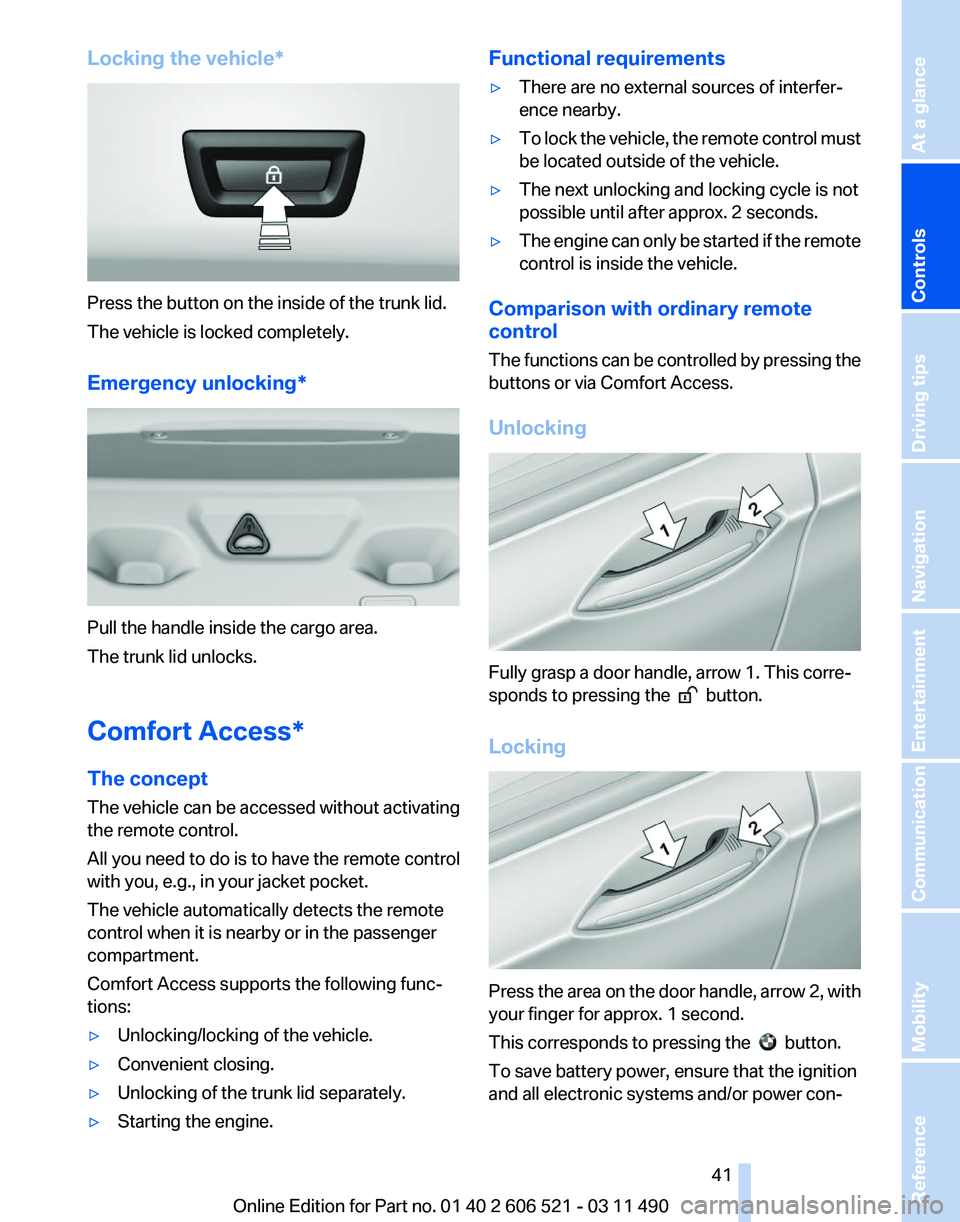
Locking the vehicle*
Press the button on the inside of the trunk lid.
The vehicle is locked completely.
Emergency unlocking*
Pull the handle inside the cargo area.
The trunk lid unlocks.
Comfort Access*
The concept
The vehicle can be accessed without activating
the remote control.
All you need to do is to have the remote control
with you, e.g., in your jacket pocket.
The vehicle automatically detects the remote
control when it is nearby or in the passenger
compartment.
Comfort Access supports the following func‐
tions:
▷
Unlocking/locking of the vehicle.
▷ Convenient closing.
▷ Unlocking of the trunk lid separately.
▷ Starting the engine. Functional requirements
▷
There are no external sources of interfer‐
ence nearby.
▷ To lock the vehicle, the remote control must
be located outside of the vehicle.
▷ The next unlocking and locking cycle is not
possible until after approx. 2 seconds.
▷ The engine can only be started if the remote
control is inside the vehicle.
Comparison with ordinary remote
control
The
functions can be controlled by pressing the
buttons or via Comfort Access.
Unlocking Fully grasp a door handle, arrow 1. This corre‐
sponds to pressing the
button.
Locking Press the area on the door handle, arrow 2, with
your finger for approx. 1 second.
This corresponds to pressing the
button.
To save battery power, ensure that the ignition
and all electronic systems and/or power con‐
Seite 41
41Online Edition for Part no. 01 40 2 606 521 - 03 11 490
Reference Mobility Communication Entertainment Navigation Driving tips
Controls At a glance
Page 43 of 282

Switching off the alarm
▷
Unlock the vehicle using the remote control.
▷ With Comfort Access: If you are carrying the
remote control with you, pull on the door
handle.
Indicator lamp on the interior rearview
mirror ▷
The indicator lamp flashes briefly every
2 seconds:
The system is armed.
▷ The indicator lamp flashes after locking:
The doors, hood or trunk lid is not closed
properly, but the rest of the vehicle is se‐
cured.
After
10 seconds, the indicator lamp flashes
continuously. The interior motion sensor is
not active.
▷ The indicator lamp goes out after unlocking:
The vehicle has not been tampered with.
▷ The indicator lamp flashes after unlocking
until
the engine is started, but no longer than
approx. 5 minutes:
An alarm has been triggered.
Tilt alarm sensor
The tilt of the vehicle is monitored.
The alarm system responds in situations such
as attempts to steal a wheel or tow the car.
Interior motion sensor
The
interior is monitored to the height of the seat
cushions. The alarm system is armed together
with the interior motion sensor even when the convertible top is open. Falling objects such as
leaves can trigger the alarm unintentionally.
Avoiding unintentional alarms
The
tilt alarm sensor and interior motion sensor
can be switched off together, such as in the fol‐
lowing situations:
▷ In automatic car washes
▷ In duplex garages.
▷ During transport on car-carrying trains, at
sea or on a trailer.
▷ When animals are to remain in the vehicle.
Switching off the tilt alarm sensor and
interior motion sensor Press the button on the remote control
twice in succession.
The indicator lamp lights up for approx. 2 sec‐
onds and then flashes continuously.
The
tilt alarm sensor and interior motion sensor
are switched off until the vehicle is locked again.
Power windows
General information
Take the remote control with you
Take the remote control with you when
leaving the vehicle so that children, for example,
cannot operate the power windows and injure
themselves.◀
Closing the windows when driving
To close the side windows when driving,
first close the rear windows or all four windows
at the same time; otherwise, the windows may
not close tightly at high speeds.◀ Seite 43
43Online Edition for Part no. 01 40 2 606 521 - 03 11 490
Reference Mobility Communication Entertainment Navigation Driving tips
Controls At a glance
Page 45 of 282
wise, the closing action may not stop in certain
situations, e.g., if thin objects are present.
◀
Window accessories
Do not install any accessories in the range
of movement of the windows; otherwise, the
pinch protection system will be impaired.◀
Closing without the pinch protection
system
Danger of pinching
Monitor the closing process and make
sure that the closing path of the window is clear;
otherwise, injuries may result.◀
For example, if there is an external danger or if
ice on the windows prevents a window from
closing normally, proceed as follows:
1. Pull the switch past the resistance point and
hold it there.
Pinch protection is limited and the window
reopens
slightly if the closing force exceeds
a certain value.
2. Pull the switch past the resistance point
again within approx. 4 seconds and hold it
there.
The window closes without pinch protec‐
tion.
Convertible top
General information
The convertible top can be opened or closed at
speeds up to approx. 25 mph/40 km/h.
If the vehicle is accelerated above a speed of
approx. 30 mph/50 km/h while the convertible
top is being moved, the convertible top move‐
ment stops.
Tips about the convertible top:
▷ If possible, close the convertible top when
the vehicle is parked. A closed convertible
top protects it from weather-related dam‐
age and to some extent from theft. ▷
Event when the convertible top is closed,
only
store valuables in the locked cargo area.
▷ At higher speeds, vacuum produced in the
passenger compartment cause the conver‐
tible top to begin to flatten. Increase the
amount
of air via the automatic climate con‐
trol so that no vacuum is produced in the ve‐
hicle.
Notes
The
trunk lid cannot be opened if the convertible
top is not fully opened or closed.
Safety information about the convertible
top
▷ With temperatures below +14 ℉/-10 ℃ do
not open the convertible top; otherwise
damages could result.
▷ Do not leave the open convertible top in the
convertible top well longer than one day
while the top is still wet; otherwise, damage
could result due to moisture.
▷ The convertible top pivots up during open‐
ing
and closing. When the top is moved, e.g.
in garages, make sure that there is a mini‐
mum height of 79 inches/2 meters; other‐
wise, it damages may result.
▷ Do not place any objects on the convertible
top, otherwise, they could fall and cause
damage or injuries.
▷ When the rollover protection system is ex‐
tended, do not under any circumstances
move the convertible top.
▷ Always open or close the convertible top
completely.
Convertible top and convertible
top well storage cover are locked in the final
positions. Driving with the convertible tope
or convertible top well storage cover un‐
locked can result in damage.
▷ Do not reach into the convertible top mech‐
anism
during the opening and closing oper‐
ation. Keep children away from the opening
path of the convertible top, otherwise, there
is a risk of injury. Seite 45
45Online Edition for Part no. 01 40 2 606 521 - 03 11 490
Reference Mobility Communication Entertainment Navigation Driving tips
Controls At a glance
Page 47 of 282
▷
Right LED flashes red after the switch is re‐
leased:
operating sequence has not yet con‐
cluded.
▷ Right LED comes on red when the switch is
pulled: cargo area partition is flipped up,
trunk lid is not closed or there is a malfunc‐
tion. Convertible top cannot be moved.
In addition to the red LED, a check control mes‐
sage is displayed.
Interruption
Always open/close the convertible top
completely
A convertible top that is not opened or closed
completely is not locked and represents a haz‐
ard.◀
The convertible top movement is interrupted if
the switch is released. The sequence can be
continued in the desired direction using the
switch.
If there is a longer interruption, convertible top
and convertible top well storage cover remain
approx. 10 minutes in the current position be‐
fore they slowly go down. The convertible top
and the convertible top well storage cover are
not locked. Operate switch again until the con‐
vertible operation is terminated.
Convenient operation* from outside
When
equipped with Comfort Access* the con‐
vertible top can also be operated from outside:
▷ Convenient opening with remote operation,
refer to page 36.
▷ Convenient closing with the remote control,
refer to page 37.
▷ Convenient closing via the door handles, re‐
fer to page 42. Cargo area partition
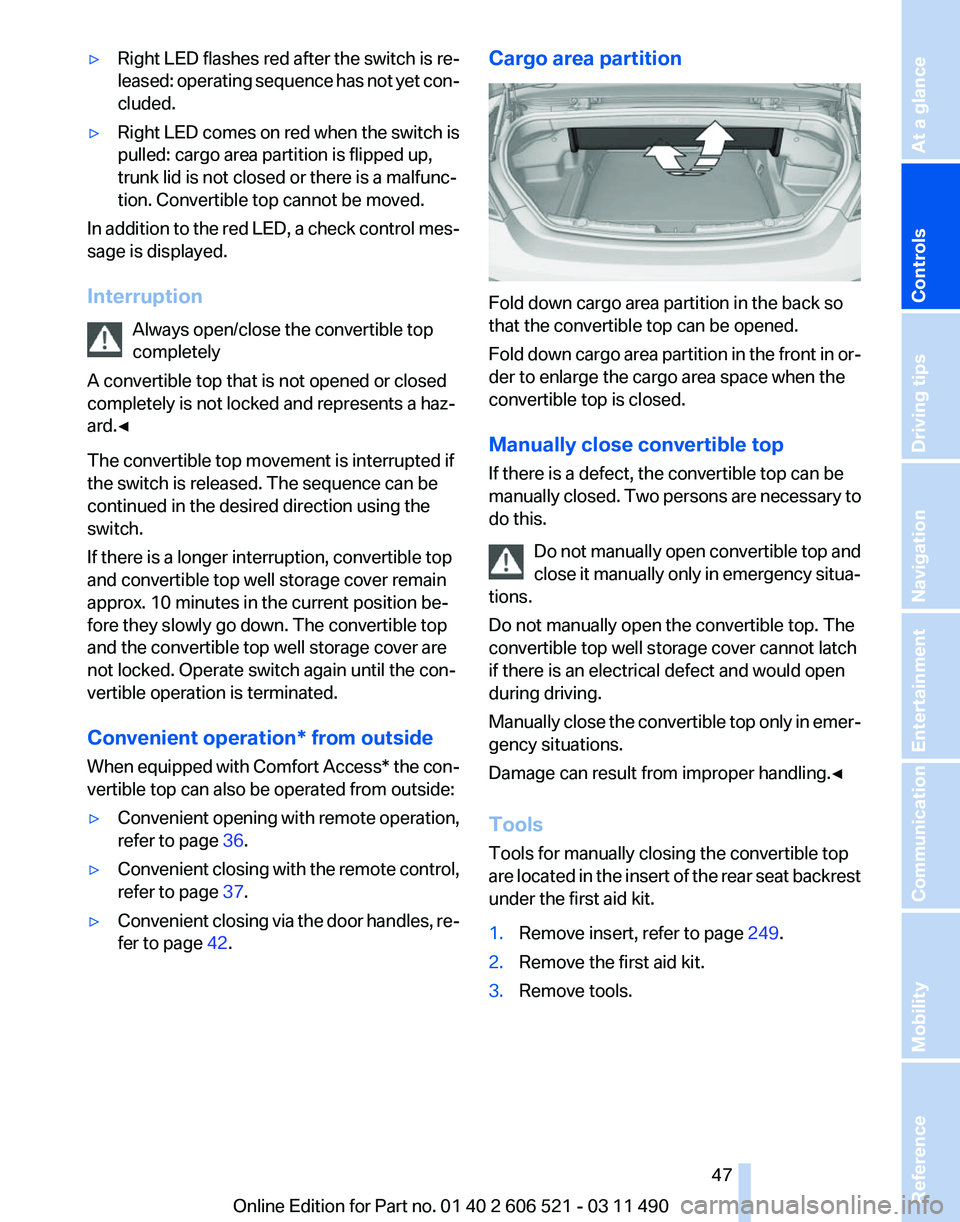
Fold down cargo area partition in the back so
that the convertible top can be opened.
Fold
down cargo area partition in the front in or‐
der to enlarge the cargo area space when the
convertible top is closed.
Manually close convertible top
If there is a defect, the convertible top can be
manually closed. Two persons are necessary to
do this.
Do not manually open convertible top and
close it manually only in emergency situa‐
tions.
Do not manually open the convertible top. The
convertible top well storage cover cannot latch
if there is an electrical defect and would open
during driving.
Manually close the convertible top only in emer‐
gency situations.
Damage can result from improper handling.◀
Tools
Tools for manually closing the convertible top
are located in the insert of the rear seat backrest
under the first aid kit.
1. Remove insert, refer to page 249.
2. Remove the first aid kit.
3. Remove tools. Seite 47
47Online Edition for Part no. 01 40 2 606 521 - 03 11 490
Reference Mobility Communication Entertainment Navigation Driving tips
Controls At a glance
Page 49 of 282
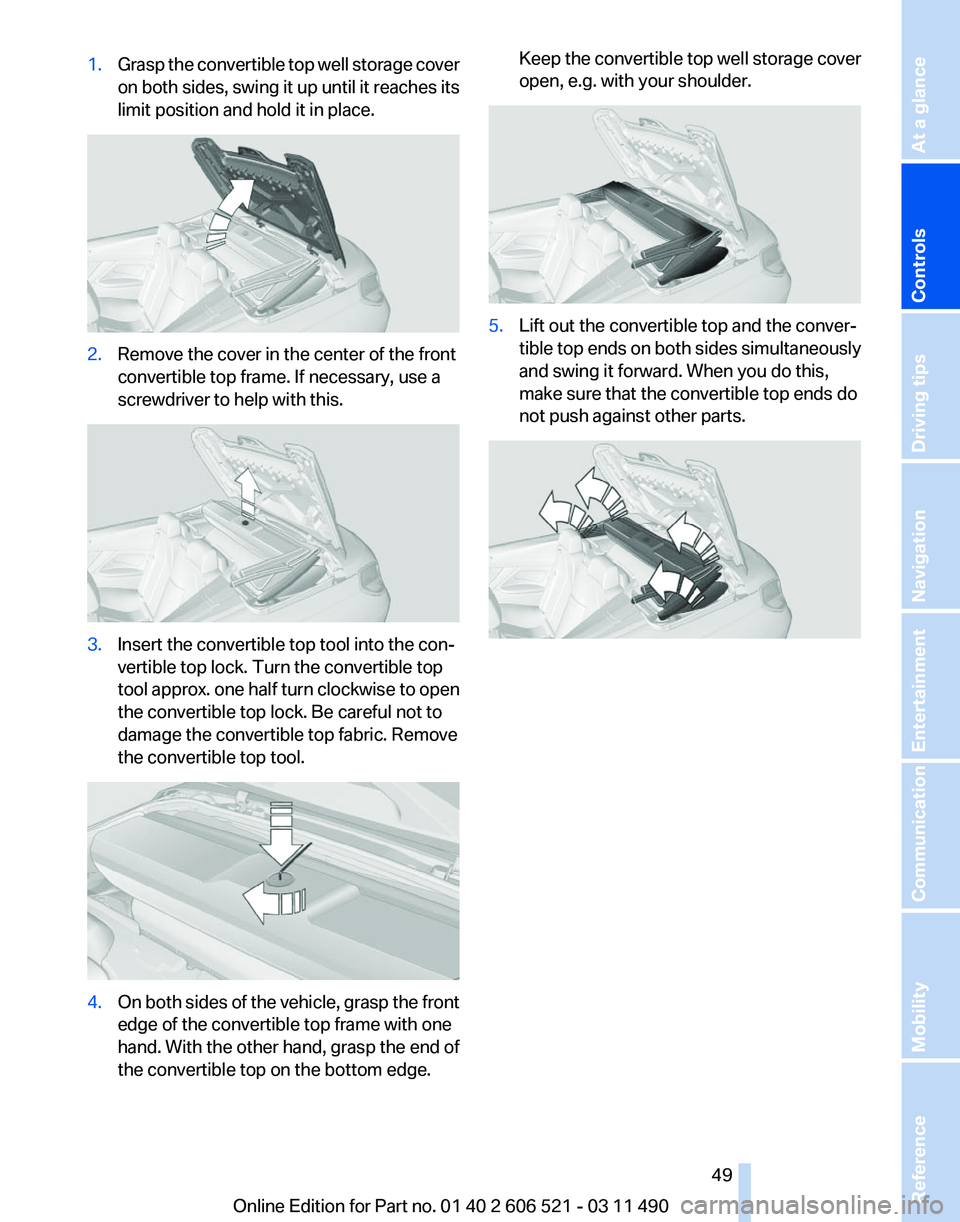
1.
Grasp the convertible top well storage cover
on
both sides, swing it up until it reaches its
limit position and hold it in place. 2.
Remove the cover in the center of the front
convertible top frame. If necessary, use a
screwdriver to help with this. 3.
Insert the convertible top tool into the con‐
vertible top lock. Turn the convertible top
tool
approx. one half turn clockwise to open
the convertible top lock. Be careful not to
damage the convertible top fabric. Remove
the convertible top tool. 4.
On both sides of the vehicle, grasp the front
edge of the convertible top frame with one
hand. With the other hand, grasp the end of
the convertible top on the bottom edge. Keep the convertible top well storage cover
open, e.g. with your shoulder.
5.
Lift out the convertible top and the conver‐
tible
top ends on both sides simultaneously
and swing it forward. When you do this,
make sure that the convertible top ends do
not push against other parts. Seite 49
49Online Edition for Part no. 01 40 2 606 521 - 03 11 490
Reference Mobility Communication Entertainment Navigation Driving tips
Controls At a glance
Page 51 of 282
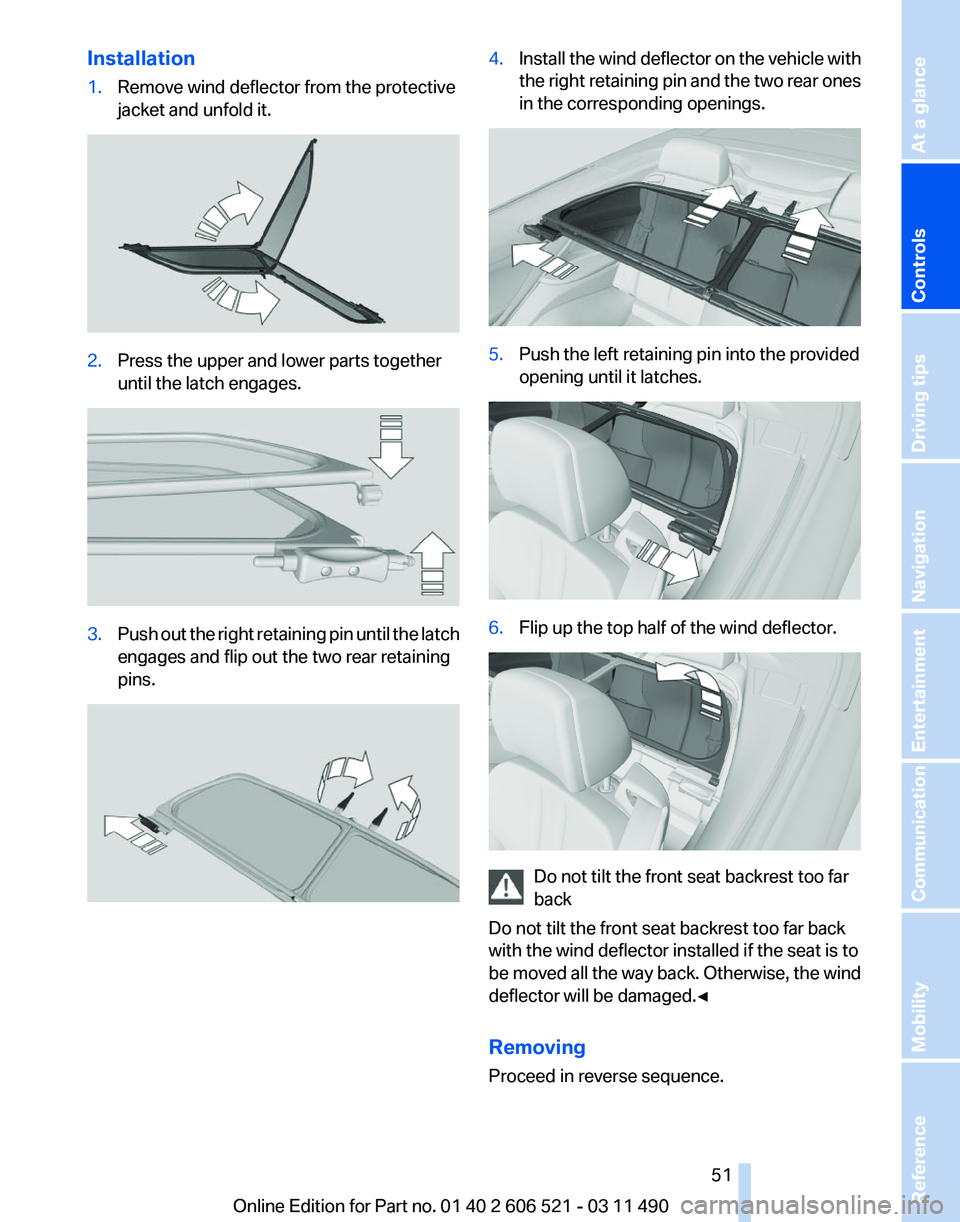
Installation
1.
Remove wind deflector from the protective
jacket and unfold it. 2.
Press the upper and lower parts together
until the latch engages. 3.
Push out the right retaining pin until the latch
engages and flip out the two rear retaining
pins. 4.
Install the wind deflector on the vehicle with
the
right retaining pin and the two rear ones
in the corresponding openings. 5.
Push the left retaining pin into the provided
opening until it latches. 6.
Flip up the top half of the wind deflector. Do not tilt the front seat backrest too far
back
Do not tilt the front seat backrest too far back
with the wind deflector installed if the seat is to
be
moved all the way back. Otherwise, the wind
deflector will be damaged.◀
Removing
Proceed in reverse sequence. Seite 51
51Online Edition for Part no. 01 40 2 606 521 - 03 11 490
Reference Mobility Communication Entertainment Navigation Driving tips
Controls At a glance