2012 BMW 650I navigation
[x] Cancel search: navigationPage 165 of 282
When surround is activated, multi-channel play‐
back is simulated when a stereo audio track is
played.
Volume
▷
"Speed volume": speed-dependent volume
control.
▷ "PDC": volume of the PDC signal* com‐
pared to the entertainment sound output.
▷ "Gong": volume of the signal, such as the
safety belt reminder, compared to the en‐
tertainment sound output.
▷ "Microphone": volume of the microphone*
during a phone call.
▷ "Loudspeak.":
volume of the loudspeakers*
during a phone call.
The following volumes are only stored for the
respective paired telephone:
"Microphone",
"Loudspeak.".
Adjusting the volume
1. "CD/Multimedia", "Radio" or "Settings"
2. "Tone"
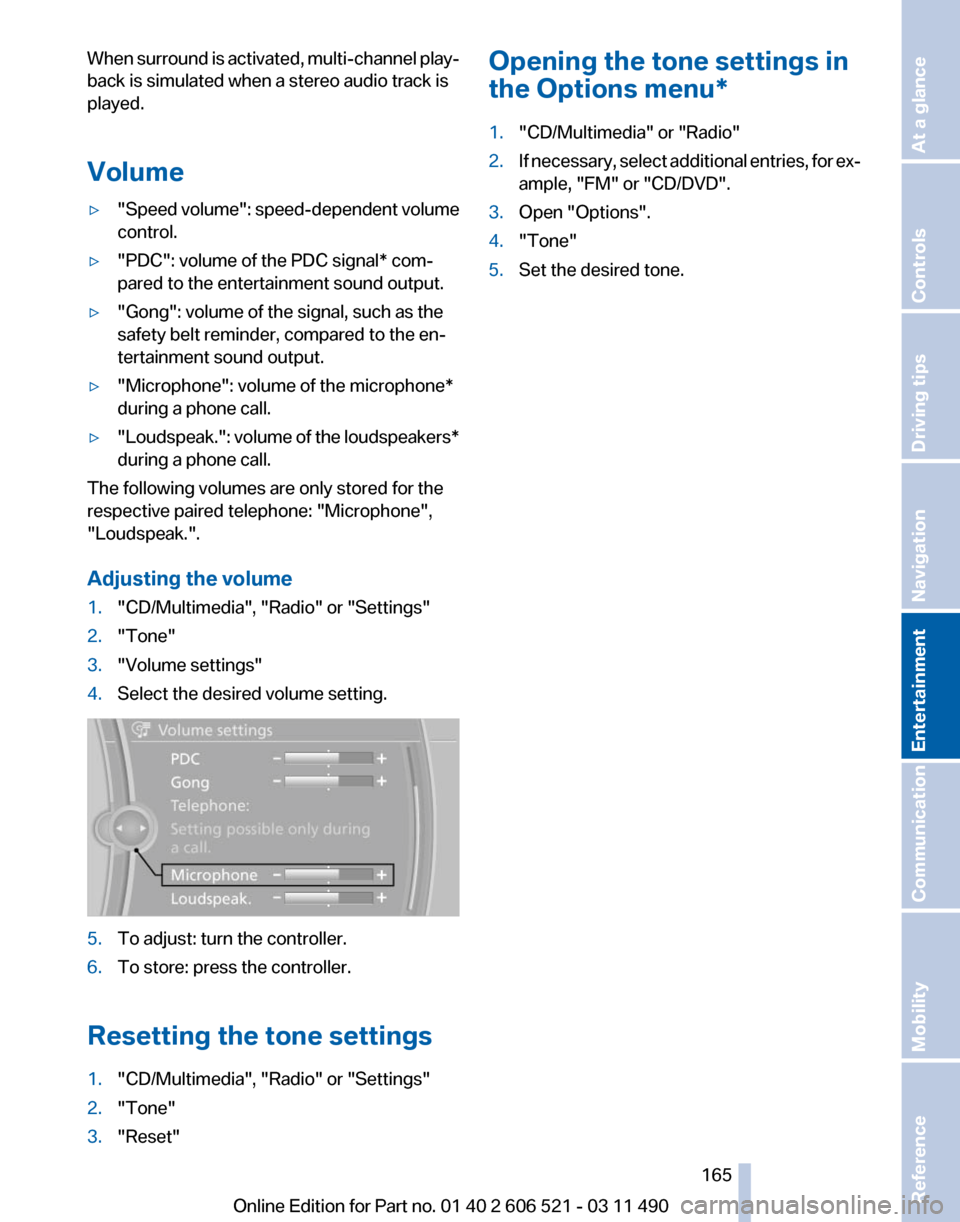
3. "Volume settings"
4. Select the desired volume setting. 5.
To adjust: turn the controller.
6. To store: press the controller.
Resetting the tone settings
1. "CD/Multimedia", "Radio" or "Settings"
2. "Tone"
3. "Reset" Opening the tone settings in
the Options menu
*
1. "CD/Multimedia" or "Radio"
2. If necessary, select additional entries, for ex‐
ample, "FM" or
"CD/DVD".
3. Open "Options".
4. "Tone"
5. Set the desired tone.
Seite 165
165Online Edition for Part no. 01 40 2 606 521 - 03 11 490
Reference Mobility Communication
Entertainment Navigation Driving tips Controls At a glance
Page 167 of 282
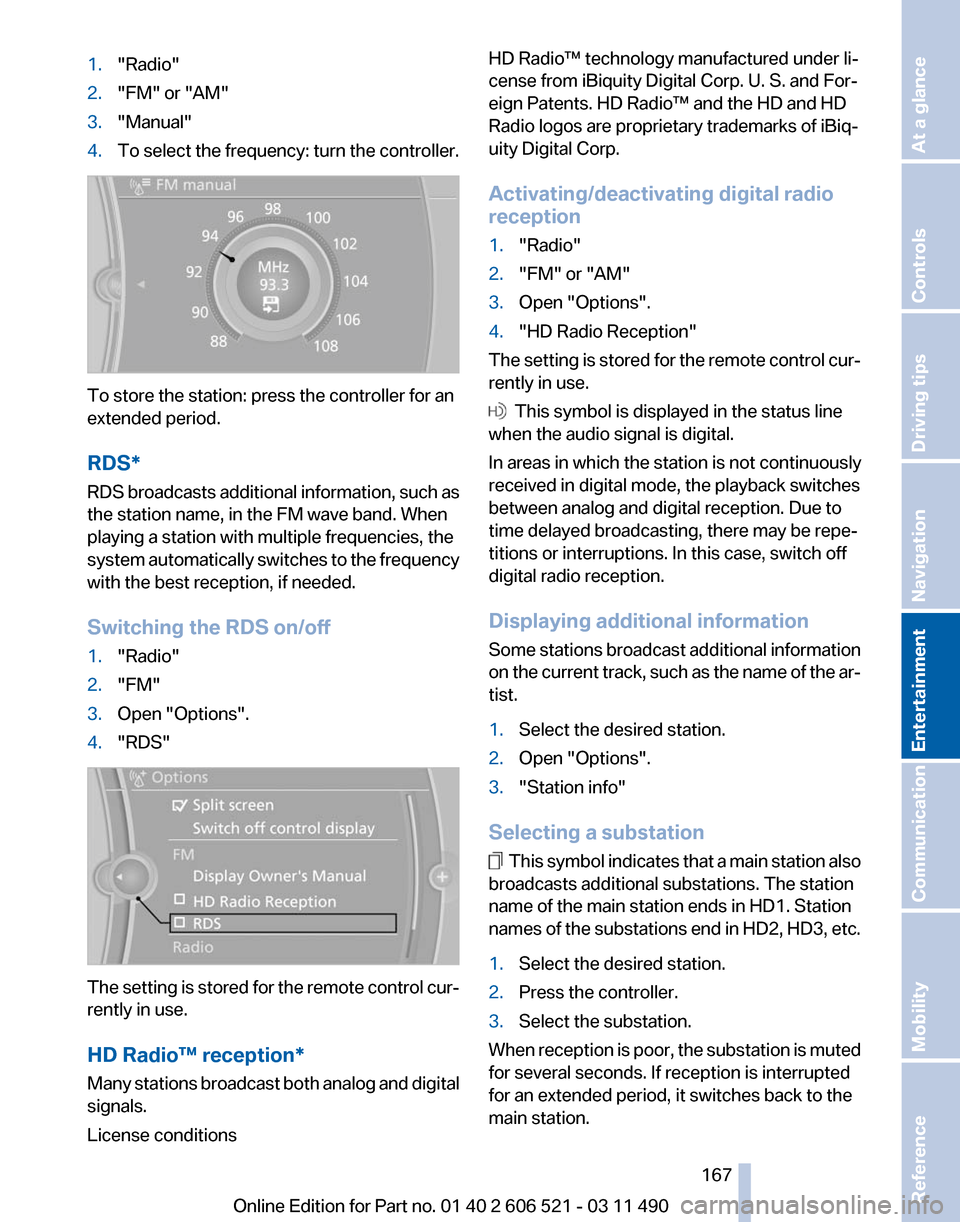
1.
"Radio"
2. "FM" or "AM"
3. "Manual"
4. To select the frequency: turn the controller. To store the station: press the controller for an
extended period.
RDS*
RDS
broadcasts additional information, such as
the station name, in the FM wave band. When
playing a station with multiple frequencies, the
system automatically switches to the frequency
with the best reception, if needed.
Switching the RDS on/off
1. "Radio"
2. "FM"
3. Open "Options".
4. "RDS" The setting is stored for the remote control cur‐
rently in use.
HD Radio™ reception
*
Many stations broadcast both analog and digital
signals.
License conditions HD Radio™ technology manufactured under li‐
cense from iBiquity Digital Corp. U. S. and For‐
eign Patents. HD Radio™ and the HD and HD
Radio logos are proprietary trademarks of iBiq‐
uity Digital Corp.
Activating/deactivating digital radio
reception
1.
"Radio"
2. "FM" or "AM"
3. Open "Options".
4. "HD Radio Reception"
The setting is stored for the remote control cur‐
rently in use. This symbol is displayed in the status line
when the audio signal is digital.
In areas in which the station is not continuously
received in digital mode, the playback switches
between analog and digital reception. Due to
time delayed broadcasting, there may be repe‐
titions or interruptions. In this case, switch off
digital radio reception.
Displaying additional information
Some
stations broadcast additional information
on the current track, such as the name of the ar‐
tist.
1. Select the desired station.
2. Open "Options".
3. "Station info"
Selecting a substation This symbol indicates that a main station also
broadcasts additional substations. The station
name of the main station ends in HD1. Station
names
of the substations end in HD2, HD3, etc.
1. Select the desired station.
2. Press the controller.
3. Select the substation.
When reception is poor, the substation is muted
for several seconds. If reception is interrupted
for an extended period, it switches back to the
main station.
Seite 167
167Online Edition for Part no. 01 40 2 606 521 - 03 11 490
Reference Mobility Communication
Entertainment Navigation Driving tips Controls At a glance
Page 168 of 282

Weather Band*
General information
The availability of the Weather Band and the
number of available channels can vary depend‐
ing on the region.
Switching on the Weather Band
1.
"Radio"
2. "Weather band"
3. Select the desired channel.
Additional information
Weather Band is a service of the National Oce‐
anic and Atmospheric Administration (NOAA).
Additional information on the Internet:
www.nws.noaa.gov.
Satellite radio
*
General information
The channels are offered in predefined pack‐
ages. The packages must be enabled by tele‐
phone.
Navigation bar overview Symbol Function
Change the list view.
Select the category.
Direct channel entry
Timeshift
Open the My Favorites category/
open a favorite. Manage the favorites.
Traffic Jump
The functions of the navigation bar symbols can
also be stored on the programmable memory
buttons, refer to page
23. Managing a subscription
To be able to enable or unsubscribe from the
channels, you must have reception. It is usually
at
its best when you have an unobstructed view
of the sky. The channel name is displayed in the
status line.
Enabling channels
The Unsubscribed Channels category contains
all disabled channels.
1. "Radio"
2. "Satellite radio"
3. "Category"
4.
Select the Unsubscribed Channels cate‐
gory.
5. Select the desired channel.
The phone number and an electronic serial
number, ESN, are displayed.
6. Select the phone number to have the chan‐
nel enabled. You can unsubscribe from the channels again
via this phone number.
Unsubscribing from channels
1.
"Radio"
2. "Satellite radio"
Seite 168
168 Online Edition for Part no. 01 40 2 606 521 - 03 11 490
Radio
Page 169 of 282

3.
Open "Options".
4. "Manage subscription" 5.
The phone number and an electronic serial
number, ESN, are displayed.
6. Call Sirius to unsubscribe from the chan‐
nels.
Selecting channels
You can only listen to enabled channels.
The selected channel is stored for the remote
control currently in use.
Via iDrive
1. "Radio"
2. "Satellite radio"
3. Select "All channels" or the desired cate‐
gory.
4. Select the desired channel. Via the buttons on the center console
Press the button.
The next channel is selected. Via direct channel entry
1.
"Radio"
2. "Satellite radio"
3. "Set channel"
4. Turn the controller until the desired channel
is reached and press the controller.
Storing a channel
1. "Radio"
2. "Satellite radio"
3. If necessary, open "All channels" or the de‐
sired category.
4. Select the desired channel.
5. Press the controller again.
6. Press the controller again to confirm the
highlighted channel. 7.
Select the desired memory location.
The channels are stored for the remote control
currently in use.
The channels can also be stored on the pro‐
grammable memory buttons, refer to page 23.
Changing the list view
The
list view changes every time the first symbol
on the navigation bar is pressed.
Information on the channel is displayed. Symbol Meaning
Channel name
Artist
Track Seite 169
169Online Edition for Part no. 01 40 2 606 521 - 03 11 490
Reference Mobility Communication
Entertainment Navigation Driving tips Controls At a glance
Page 171 of 282
Storing the league or team
Leagues
or teams can be added to the favorites
from a selection list.
1. "Radio"
2. "Satellite radio"
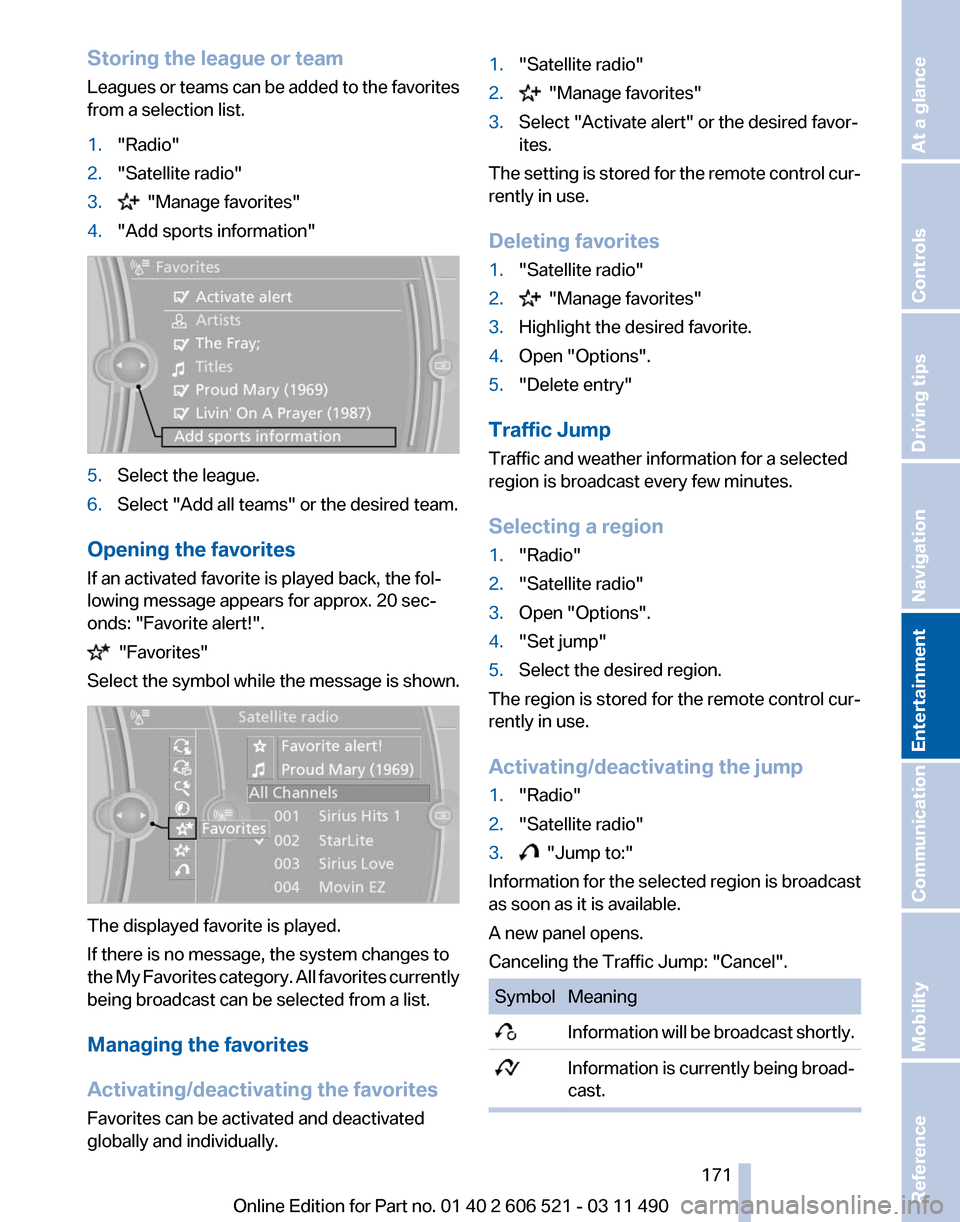
3. "Manage favorites"
4. "Add sports information" 5.
Select the league.
6. Select "Add all teams" or the desired team.
Opening the favorites
If an activated favorite is played back, the fol‐
lowing message appears for approx. 20 sec‐
onds: "Favorite alert!". "Favorites"
Select the symbol while the message is shown. The displayed favorite is played.
If there is no message, the system changes to
the
My Favorites category. All favorites currently
being broadcast can be selected from a list.
Managing the favorites
Activating/deactivating the favorites
Favorites can be activated and deactivated
globally and individually. 1.
"Satellite radio"
2. "Manage favorites"
3. Select "Activate alert" or the desired favor‐
ites.
The setting is stored for the remote control cur‐
rently in use.
Deleting favorites
1. "Satellite radio"
2. "Manage favorites"
3. Highlight the desired favorite.
4. Open "Options".
5. "Delete entry"
Traffic Jump
Traffic and weather information for a selected
region is broadcast every few minutes.
Selecting a region
1. "Radio"
2. "Satellite radio"
3. Open "Options".
4. "Set jump"
5. Select the desired region.
The region is stored for the remote control cur‐
rently in use.
Activating/deactivating the jump
1. "Radio"
2. "Satellite radio"
3. "Jump to:"
Information for the selected region is broadcast
as soon as it is available.
A new panel opens.
Canceling the Traffic Jump: "Cancel". Symbol Meaning
Information will be broadcast shortly.
Information is currently being broad‐
cast. Seite 171
171Online Edition for Part no. 01 40 2 606 521 - 03 11 490
Reference Mobility Communication
Entertainment Navigation Driving tips Controls At a glance
Page 173 of 282

CD/multimedia
Controls
1
Change the entertainment source
2 CD/DVD* drive
3 Eject CD/DVD
4 Change station/track
5 Programmable memory buttons
6 Volume, on/off
Sound output
Switching on/off
When
the ignition is switched off: press ON/OFF
button on the radio.
Muting
When the ignition is switched on or the engine
is running: press the ON/OFF button on the
radio.
CD/DVD*
Playback
Filling the CD/DVD* player
Insert the CD/DVD with the printed side up.
Playback begins automatically.
Reading can take a few minutes with com‐
pressed audio files. Starting playback
A CD/DVD is located in the CD/DVD player or
DVD changer*.
1.
"CD/Multimedia"
2. "CD/DVD"
3. Select the desired CD or DVD. Symbol Meaning
CD/DVD* player ... DVD changer*
Playable formats
▷
DVD: DVD-ROM, DVD-R, DVD+R, DVD-
RW,
DVD+RW, DVD-R DL, DVD+R DL, DVD
audio (video part only), DVD video*.
▷ CD: CD-ROM, CD-R, CD-RW, CD-DA,
VCD*, SVCD*.
▷ Compressed audio files: MP3, WMA, AAC*,
M4A*.
Audio playback
Selecting the track using the button Press the button repeatedly until the
desired track is played. Seite 173
173Online Edition for Part no. 01 40 2 606 521 - 03 11 490
Reference Mobility Communication
Entertainment Navigation Driving tips Controls At a glance
Page 175 of 282
Automatic repeat*
The selected CDs or DVDs are repeated auto‐
matically.
Video playback*
Country codes
Only
DVDs with the code of the home region can
be played back; also refer to the information on
the DVD. Code Region
1 USA, Canada
2 Japan, Europe, Middle East, South Af‐
rica
3 Southeast Asia
4 Australia, Central and South America, New Zealand
5 Northwest Asia, North Africa
6 China
0 All regions Playback
The video image is displayed on the front Con‐
trol
Display up to a speed of approx. 2 mph/3 km/
h; in some countries, it is only displayed if the
parking brake is set or if the automatic trans‐
mission is in position P.
DVD video
1. "CD/Multimedia"
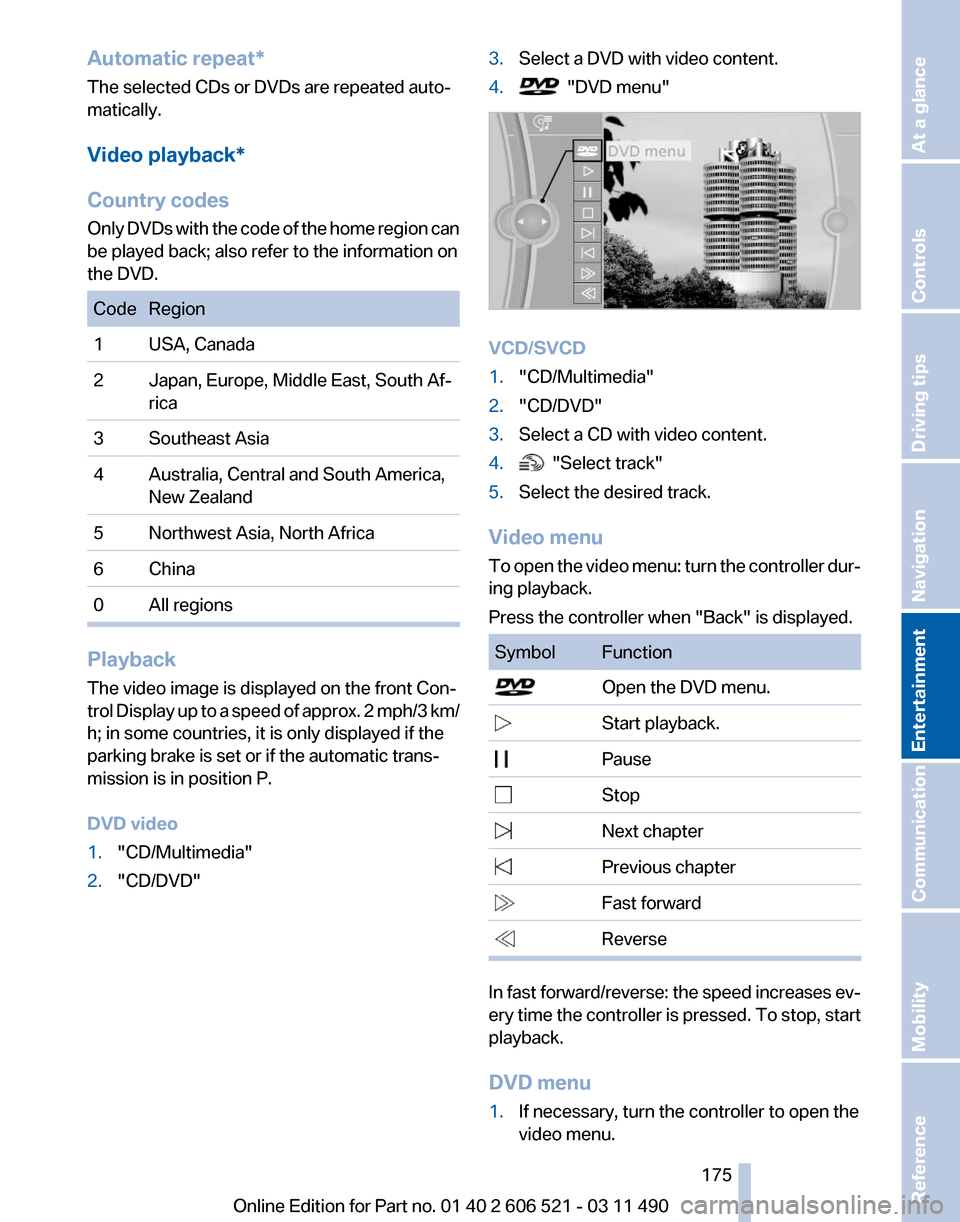
2. "CD/DVD" 3.
Select a DVD with video content.
4. "DVD menu"
VCD/SVCD
1.
"CD/Multimedia"
2. "CD/DVD"
3. Select a CD with video content.
4. "Select track"
5. Select the desired track.
Video menu
To
open the video menu: turn the controller dur‐
ing playback.
Press the controller when "Back" is displayed. Symbol Function
Open the DVD menu.
Start playback.
Pause Stop
Next chapter
Previous chapter
Fast forward
Reverse
In fast forward/reverse: the speed increases ev‐
ery
time the controller is pressed. To stop, start
playback.
DVD menu
1. If necessary, turn the controller to open the
video menu.
Seite 175
175Online Edition for Part no. 01 40 2 606 521 - 03 11 490
Reference Mobility Communication
Entertainment Navigation Driving tips Controls At a glance
Page 177 of 282
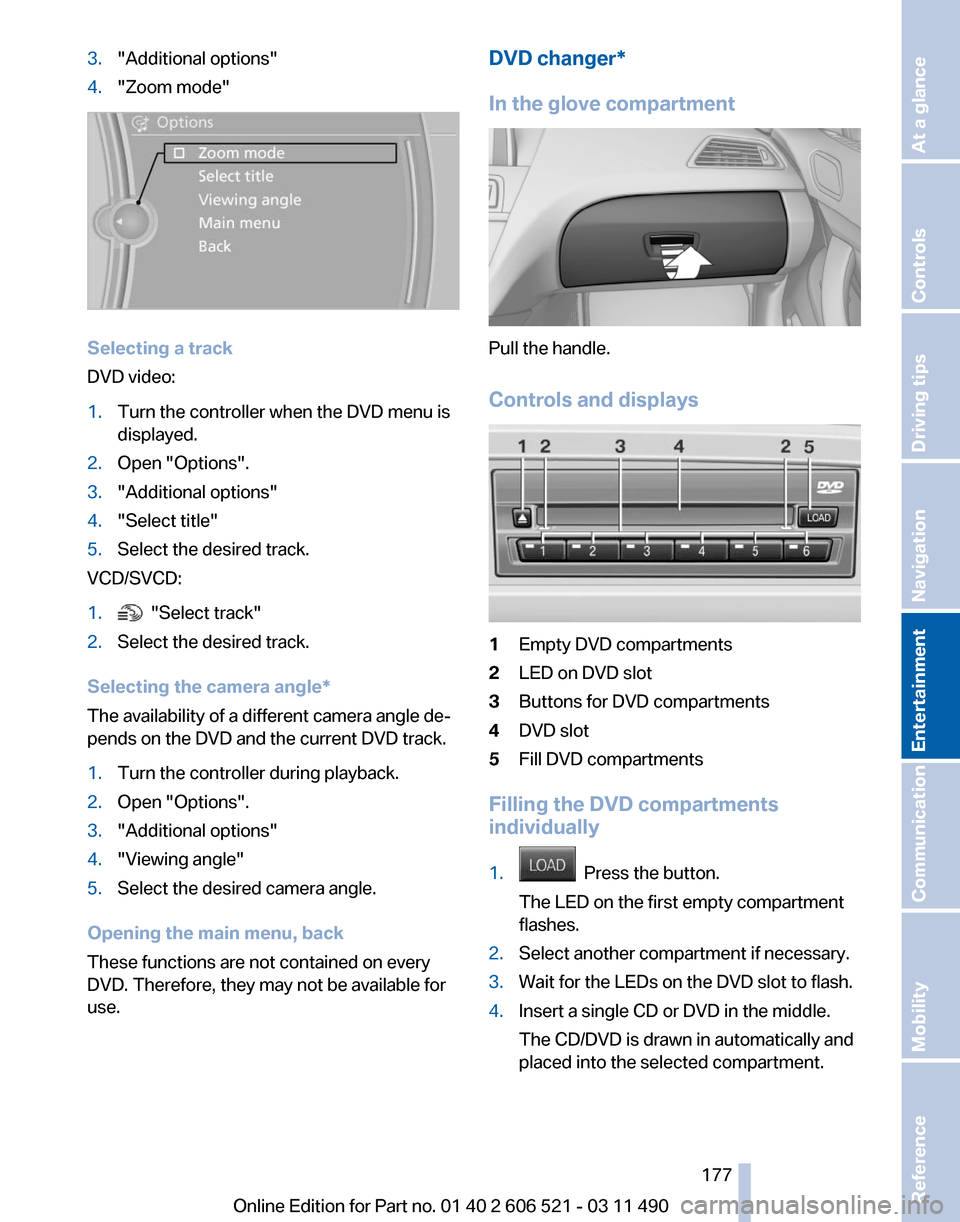
3.
"Additional options"
4. "Zoom mode" Selecting a track
DVD video:
1.
Turn the controller when the DVD menu is
displayed.
2. Open "Options".
3. "Additional options"
4. "Select title"
5. Select the desired track.
VCD/SVCD:
1. "Select track"
2. Select the desired track.
Selecting the camera angle*
The availability of a different camera angle de‐
pends on the DVD and the current DVD track.
1. Turn the controller during playback.
2. Open "Options".
3. "Additional options"
4. "Viewing angle"
5. Select the desired camera angle.
Opening the main menu, back
These functions are not contained on every
DVD. Therefore, they may not be available for
use. DVD changer*
In the glove compartment
Pull the handle.
Controls and displays
1
Empty DVD compartments
2 LED on DVD slot
3 Buttons for DVD compartments
4 DVD slot
5 Fill DVD compartments
Filling the DVD compartments
individually
1. Press the button.
The LED on the first empty compartment
flashes.
2. Select another compartment if necessary.
3. Wait for the LEDs on the DVD slot to flash.
4. Insert a single CD or DVD in the middle.
The CD/DVD is drawn in automatically and
placed into the selected compartment.
Seite 177
177Online Edition for Part no. 01 40 2 606 521 - 03 11 490
Reference Mobility Communication
Entertainment Navigation Driving tips Controls At a glance