2012 BMW 650I seats
[x] Cancel search: seatsPage 53 of 282

Adjusting
Sitting safely
The
ideal seating position can make a vital con‐
tribution to relaxed, fatigue-free driving.
The seating position plays an important role in
an accident in combination with:
▷ Safety belts, refer to page 56.
▷ Head restraints, refer to page 57.
▷ Airbags, refer to page 88.
Seats
Adjusting
General information Do not adjust the seat while driving
Never attempt to adjust the driver's seat
while driving.
The
seat could respond with unexpected move‐
ment and the ensuing loss of vehicle control
could lead to an accident.◀
Do not incline the backrest too far to the
rear
Do not incline the backrest on the front passen‐
ger side too far to the rear during driving. Oth‐
erwise, there is the danger of sliding under the
safety belt in an accident. This would eliminate
the protection normally provided by the belt.◀
The seat setting is stored for the remote control
currently in use. When the vehicle is unlocked
via the remote control, the position is automati‐
cally retrieved if this function, refer to page 37,
was activated. At a glance
1
Active seat*
2 Seat, mirror, and steering wheel memory*
3 Backrest width*
4 Lumbar support*
5 Backrest, head restraint*
6 Shoulder support*
7 Forward/back, height, tilt*
8 Thigh support*
Adjustments in detail
1. Forward/back. 2.
Height. Seite 53
53Online Edition for Part no. 01 40 2 606 521 - 03 11 490
Reference Mobility Communication Entertainment Navigation Driving tips
Controls At a glance
Page 56 of 282

Safety belts
Seats with safety belt
The vehicle has four seats, each of which is
equipped with a safety belt.
Notes
Always make sure that safety belts are being
worn by all occupants before driving away.
Although airbags enhance safety by providing
added protection, they are not a substitute for
safety belts.
One person per safety belt
Never
allow more than one person to wear
a single safety belt. Never allow infants or small
children to ride on a passenger's lap.◀
Putting on the belt
Lay the belt, without twisting, snugly
across the lap and shoulders, as close to the
body as possible. Make sure that the belt lies low
around the hips in the lap area and does not
press on the abdomen. Otherwise, the belt can
slip over the hips in the lap area in a frontal im‐
pact and injure the abdomen.
The safety belt must not lie across the neck, rub
on sharp edges, be routed over solid or breaka‐
ble objects, or be pinched.◀
Reduction of restraining effect
Avoid wearing clothing that prevents the
belt from fitting properly, and pull the shoulder
belt periodically to readjust the tension across
your lap; otherwise, the retention effect of the
safety belt may be reduced.◀ Buckling the belt
Make sure you hear the latch plate engage in the
belt buckle.
Unbuckling the belt
1.
Hold the belt firmly.
2. Press the red button in the belt buckle.
3. Guide the belt back into its reel.
Safety belt reminder for the driver's and
front passenger seat The indicator lamp flashes or lights up
and a signal sounds. Make sure that the
safety belts are positioned correctly.
The safety belt reminder is active at speeds
above approx. 5 mph/8 km/h. It can also be ac‐
tivated if objects are placed on the front pas‐
senger seat.
Damage to safety belts
In the case of strain caused by accidents or
damage:
Have the safety belts, including the safety belt
tensioners, replaced and have the belt anchors
checked.
Checking and replacing safety belts
Have the work performed only by your
service center; otherwise, it cannot be ensured
that this safety feature will function properly.◀ Seite 56
56 Online Edition for Part no. 01 40 2 606 521 - 03 11 490
Adjusting
Page 57 of 282

Front head restraints
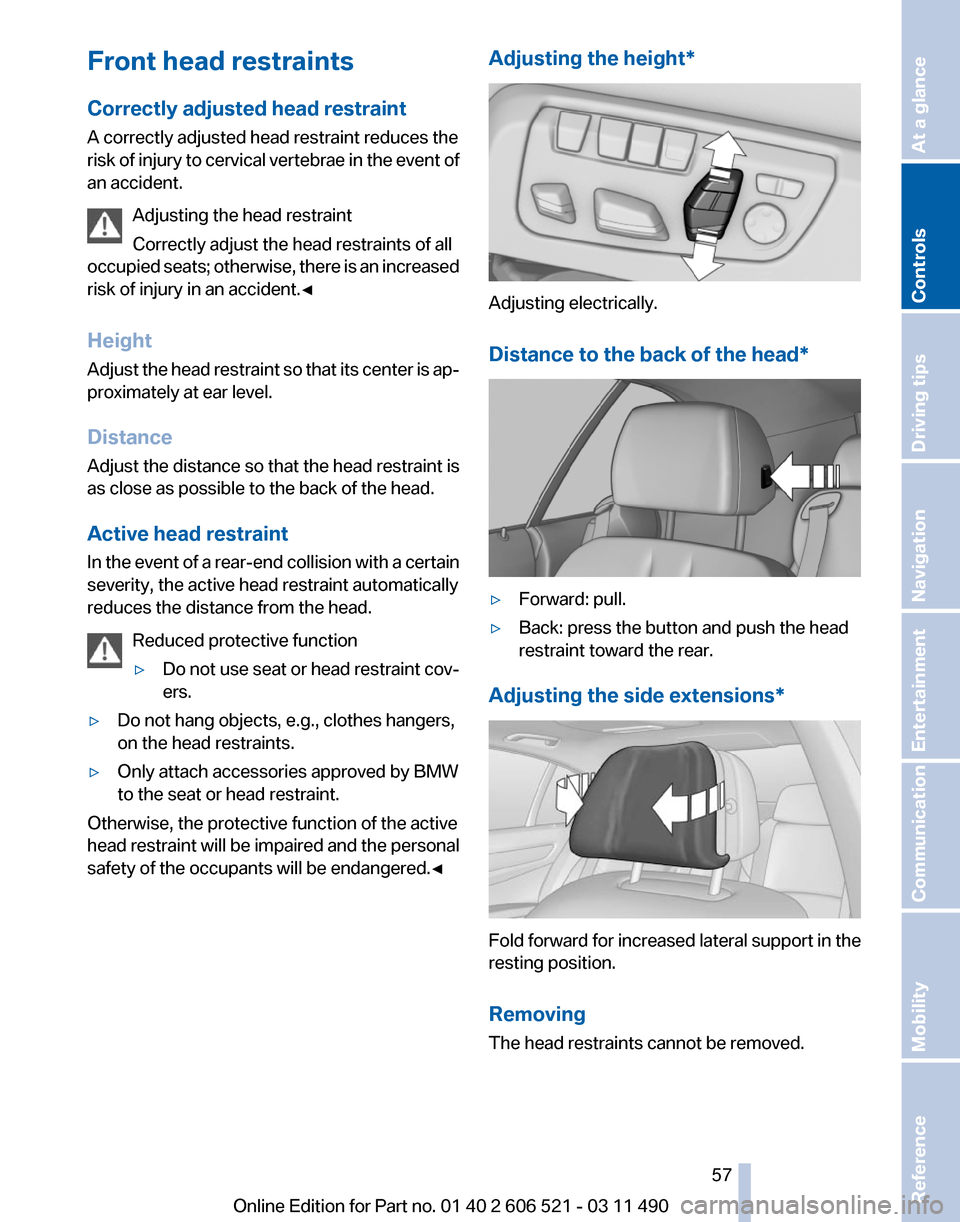
Correctly adjusted head restraint
A correctly adjusted head restraint reduces the
risk
of injury to cervical vertebrae in the event of
an accident.
Adjusting the head restraint
Correctly adjust the head restraints of all
occupied seats; otherwise, there is an increased
risk of injury in an accident.◀
Height
Adjust the head restraint so that its center is ap‐
proximately at ear level.
Distance
Adjust the distance so that the head restraint is
as close as possible to the back of the head.
Active head restraint
In the event of a rear-end collision with a certain
severity, the active head restraint automatically
reduces the distance from the head.
Reduced protective function
▷Do not use seat or head restraint cov‐
ers.
▷ Do not hang objects, e.g., clothes hangers,
on the head restraints.
▷ Only attach accessories approved by BMW
to the seat or head restraint.
Otherwise, the protective function of the active
head
restraint will be impaired and the personal
safety of the occupants will be endangered.◀ Adjusting the height*
Adjusting electrically.
Distance to the back of the head
* ▷
Forward: pull.
▷ Back: press the button and push the head
restraint toward the rear.
Adjusting the side extensions* Fold forward for increased lateral support in the
resting position.
Removing
The head restraints cannot be removed.
Seite 57
57Online Edition for Part no. 01 40 2 606 521 - 03 11 490
Reference Mobility Communication Entertainment Navigation Driving tips
Controls At a glance
Page 89 of 282

▷
Make sure that the front passenger is sitting
correctly, i.e., keeps his or her feet and legs
in the footwell; otherwise, leg injuries can
occur if the front airbag is triggered.
▷ Do not place slip covers, seat cushions or
other objects on the front passenger seat
that are not approved specifically for seats
with integrated side airbags.
▷ Do not hang pieces of clothing, such as jack‐
ets, over the backrests.
▷ Make sure that occupants keep their heads
away from the side airbag; otherwise, inju‐
ries can occur if the airbags are deployed.
▷ Do not remove the airbag restraint system.
▷ Do not remove the steering wheel.
▷ Do not apply adhesive materials to the air‐
bag cover panels, cover them or modify
them in any way.
▷ Never modify either the individual compo‐
nents
or the wiring in the airbag system. This
also applies to steering wheel covers, the
dashboard, and the seats.◀
Even when all instructions are followed closely,
injury from contact with the airbags cannot be
ruled out in certain situations.
The ignition and inflation noise may lead to
short-term
and, in most cases, temporary hear‐
ing impairment in sensitive individuals.
In the case of a malfunction, deactivation
and after triggering of the airbags
Do not touch the individual components imme‐
diately after the system has been triggered; oth‐
erwise, there is the danger of burns.
Only have the airbags checked, repaired or dis‐
mantled and the airbag generator scrapped by
your service center or a workshop that has the
necessary authorization for handling explosives.
Non-professional attempts to service the sys‐
tem could lead to failure in an emergency or un‐
desired triggering of the airbag, either of which
could result in injury.◀
Warnings and information on the airbags are
also found on the sun visors. Functional readiness of the airbag
system
When
the ignition is switch on, the warn‐
ing lamp in the instrument cluster lights
up briefly and thereby indicates the op‐
erational readiness of the entire airbag system
and the belt tensioner.
Airbag system malfunctioning
▷ In radio ready state, the warning lamp does
not come on.
▷ The warning lamp lights up continuously.
When there is a malfunction, have the air‐
bag system checked immediately
When there is a malfunction, have the airbag
system checked immediately; otherwise, there
is
a risk that the system does not function as ex‐
pected in the event of an accident despite cor‐
responding severity of the accident.◀
Automatic deactivation of the front
passenger airbags
The system determines whether the front pas‐
senger seat is occupied by measuring the re‐
sistance of the human body.
The front, knee, and side airbag on the front
passenger side are activated or deactivated ac‐
cordingly.
Leave feet in the footwell
Make sure that the front passenger keeps
his or her feet in the footwell; otherwise, the front
passenger airbags may not function properly.◀
Child restraint fixing system in the front
passenger seat
Before transporting a child on the front passen‐
ger seat, see the safety notes and instructions
under Children on the front passenger seat.◀
Malfunction of the automatic
deactivation system
When transporting older children and adults, the
front passenger airbags may be deactivated in
certain sitting positions. In this case, the indica‐ Seite 89
89Online Edition for Part no. 01 40 2 606 521 - 03 11 490
Reference Mobility Communication Entertainment Navigation Driving tips
Controls At a glance
Page 90 of 282

tor lamp for the front passenger airbags lights
up.
In this case, change the sitting position so that
the front passenger airbags are activated and
the indicator lamp goes out.
If it is not possible to activate the airbags, have
the person sit in the rear.
To make sure that the occupied seat cushion
can be evaluated correctly
▷
Do not attach covers, cushions, ball mats or
other items to the front passenger seat un‐
less they are specifically recommended by
the manufacturer of your vehicle.
▷ Do not place any objects on the front pas‐
senger seat.
▷ Do not place objects under the seat that
could press against the seat from below.
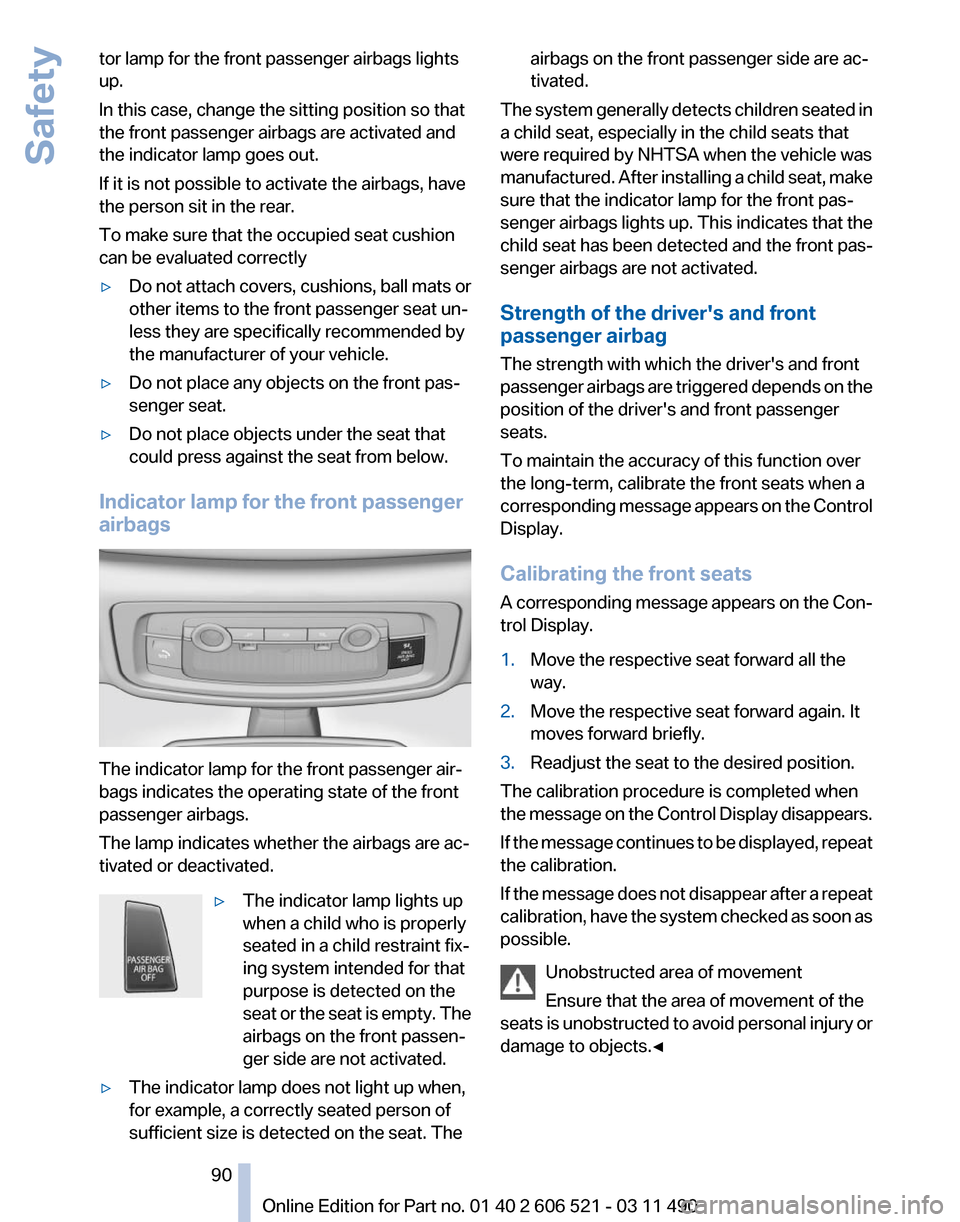
Indicator lamp for the front passenger
airbags The indicator lamp for the front passenger air‐
bags indicates the operating state of the front
passenger airbags.
The lamp indicates whether the airbags are ac‐
tivated or deactivated.
▷The indicator lamp lights up
when a child who is properly
seated in a child restraint fix‐
ing system intended for that
purpose is detected on the
seat
or the seat is empty. The
airbags on the front passen‐
ger side are not activated.
▷ The indicator lamp does not light up when,
for example, a correctly seated person of
sufficient size is detected on the seat. The airbags on the front passenger side are ac‐
tivated.
The system generally detects children seated in
a child seat, especially in the child seats that
were required by NHTSA when the vehicle was
manufactured.
After installing a child seat, make
sure that the indicator lamp for the front pas‐
senger airbags lights up. This indicates that the
child seat has been detected and the front pas‐
senger airbags are not activated.
Strength of the driver's and front
passenger airbag
The strength with which the driver's and front
passenger airbags are triggered depends on the
position of the driver's and front passenger
seats.
To maintain the accuracy of this function over
the long-term, calibrate the front seats when a
corresponding message appears on the Control
Display.
Calibrating the front seats
A corresponding message appears on the Con‐
trol Display.
1. Move the respective seat forward all the
way.
2. Move the respective seat forward again. It
moves forward briefly.
3. Readjust the seat to the desired position.
The calibration procedure is completed when
the
message on the Control Display disappears.
If the message continues to be displayed, repeat
the calibration.
If the message does not disappear after a repeat
calibration, have the system checked as soon as
possible.
Unobstructed area of movement
Ensure that the area of movement of the
seats is unobstructed to avoid personal injury or
damage to objects.◀ Seite 90
90 Online Edition for Part no. 01 40 2 606 521 - 03 11 490
Safety
Page 132 of 282

Storage compartments
Storage compartments
The following storage compartments are avail‐
able in the vehicle interior:
▷
Glove compartment on the front passenger
side, refer to page 132.
▷ Storage compartment on the center con‐
sole: manual transmission.
▷ Storage compartment in the center armrest,
refer to page 132.
▷ Compartments in the doors.
▷ Pockets* on the backrests of the front seats.
▷ Net* in the front passenger footwell.
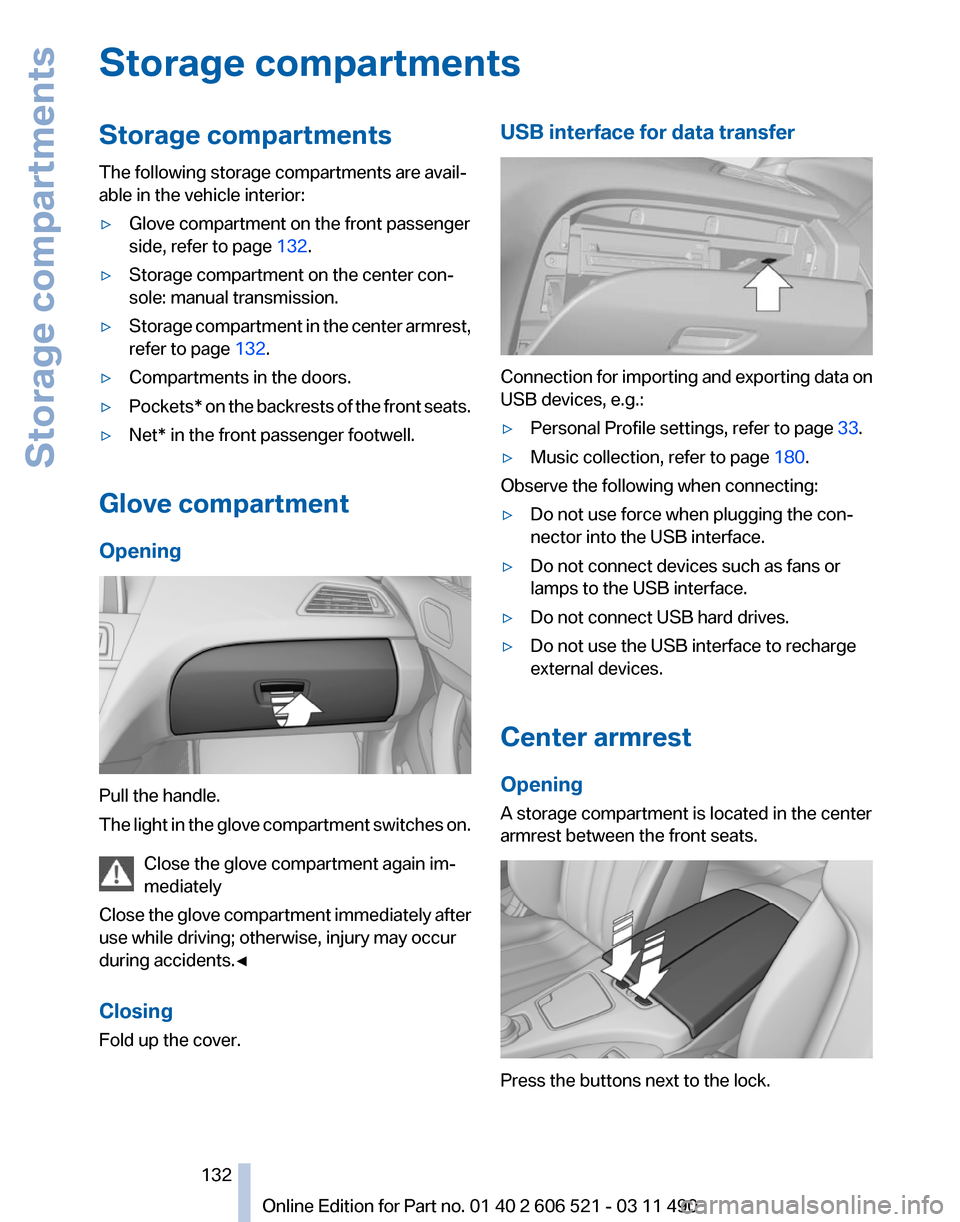
Glove compartment
Opening Pull the handle.
The
light in the glove compartment switches on.
Close the glove compartment again im‐
mediately
Close the glove compartment immediately after
use while driving; otherwise, injury may occur
during accidents.◀
Closing
Fold up the cover. USB interface for data transfer
Connection for importing and exporting data on
USB devices, e.g.:
▷
Personal Profile settings, refer to page 33.
▷ Music collection, refer to page 180.
Observe the following when connecting:
▷ Do not use force when plugging the con‐
nector into the USB interface.
▷ Do not connect devices such as fans or
lamps to the USB interface.
▷ Do not connect USB hard drives.
▷ Do not use the USB interface to recharge
external devices.
Center armrest
Opening
A storage compartment is located in the center
armrest between the front seats. Press the buttons next to the lock.
Seite 132
132 Online Edition for Part no. 01 40 2 606 521 - 03 11 490
Storage compartments
Page 272 of 282

Everything from A to Z
Index
A
ABS, Antilock Brake Sys‐
tem 101
Activated-charcoal filter 126
Active Blind Spot Detec‐ tion 98
Active seat, front 55
Active seat ventilation, front 55
Active Steering, integral 102
Adaptive brake lights, refer to Brake force display 100
Adaptive drive 102
Adaptive light control 85
Additional telephone 196
Additives, oil 239
Adjustments, seats/head re‐ straints 53
Airbags 88
Airbags, indicator/warning light 89
Air circulation, refer to Recir‐ culated-air mode 125
Air distribution, manual 123
Air drying, refer to Cooling function 125
Air pressure, tires 229
Air vents, refer to Ventila‐ tion 126
Air volume, automatic climate control 124
Alarm system 42
Alarm, unintentional 43
All around the center con‐ sole 17
All
around the interior rearview
mirror 18
All around the steering wheel 12
ALL program, automatic cli‐ mate control 125 All-season tires, refer to Win‐
ter tires 233
Alternating-code hand-held transmitter 129
Alternative oil types 239
AM/FM station 166
Announcement, navigation, refer to Spoken instruc‐
tions 155
Antifreeze, washer fluid 71
Antilock Brake System, ABS 101
Anti-slip control, refer to DSC 101
Appointments 212
Approved engine oils 239
Apps 222
Armrest, refer to Center arm‐ rest 132
Arrival time 78
Ashtray 129
Assist 218
Assistance, Roadside Assis‐ tance 249
Assistance when driving off 101
Audio playback 173
Audio playback, Blue‐ tooth 188
AUTO intensity 124
Automatic car wash 254
Automatic Curb Monitor 59
Automatic deactivation, front passenger airbags 89
Automatic headlamp con‐ trol 85
Automatic Hold 67
Automatic locking 39
Automatic recirculated-air control 125
Automatic Soft Closing, doors 40 Automatic transmission with
Steptronic 72
AUTO program, automatic cli‐ mate control 124
AUTO program, intensity 124
AUX-IN port 184
Average fuel consumption 77
Average speed 77
Axle loads, weights 261
B
Backrest curvature, refer to Lumbar support 54
Backrest, seats 53
Backrest, width 54
Backup camera 110
Backup lamps, bulb replace‐ ment 245
Balance 164
Band-Aids, refer to First aid kit 249
Bar for tow-starting/tow‐ ing 252
Bass 164
Battery replacement, vehicle battery 247
Battery replacement, vehicle remote control 32
Battery, vehicle 247
Before entering the car wash 254
Belts, safety belts 56
Beverage holder, cu‐ pholder 133
Bluetooth audio 188
BMW Apps 222
BMW Apps, video play‐ back 187
BMW Assist 218
BMW EfficientDynamics, refer to Saving fuel 141
BMW homepage 6
Seite 272
272 Online Edition for Part no. 01 40 2 606 521 - 03 11 490
Everything from A to Z
Page 273 of 282

BMW Internet page
6
BMW Maintenance Sys‐ tem 241
BMW Online 220
Bottle holder, refer to Cu‐ pholder 133
Brake assistant 101
Brake discs, breaking in 138
Brake force display 100
Brake lamps, brake force dis‐ play 100
Brake lamps, bulb replace‐ ment 245
Brake lights, adaptive 100
Brake pads, breaking in 138
Braking, notes 139
Breakdown assis‐ tance 248, 249
Breaking in 138
Brightness of Control Dis‐ play 80
Bulb replacement 243
Bulb replacement, front 244
Bulb replacement, rear 245
Bulbs and lamps 243
Button, Start/Stop 65
Bypassing, refer to starting aid 249
C
Calendar 212
California Proposition 65 Warning 7
Camera, backup camera 112
Camera, care 257
Camera, Side View 115
Camera, Top View 114
Can holder, refer to Cu‐ pholder 133
Car battery 247
Car care products 255
Care, displays 257
Care, vehicle 255
Cargo 140
Cargo area, cargo area parti‐ tion 47
Cargo area lid 40 Cargo area partition
47
Cargo area, storage compart‐ ments 134
Cargo straps, securing cargo 141
Car key, refer to Remote con‐ trol 32
Carpet, care 256
Car wash 254
Catalytic converter, refer to Hot exhaust system 138
CBS Condition Based Serv‐ ice 241
CD/DVD 173
CDs, storing 180
Cell phone 196
Center armrest 132
Center console 17
Central locking system 35
Central
screen, refer to Control
Display 19
Changes, technical, refer to Safety 7
Changing parts 243
Changing wheels/tires 233
Check Control 82
Children, seating position 62
Children, transporting safely 62
Child restraint fixing sys‐ tem 62
Child restraint fixing system LATCH 63
Child restraint fixing systems, mounting 62
Child seat, mounting 62
Child seats 62
Chrome parts, care 256
Cigarette lighter 129
Cleaning, displays 257
Climate control 123
Climate control wind‐ shield 139
Clock 76
Closing/opening from in‐ side 39
Closing/opening via door lock 38 Closing/opening with remote
control 36
Combination instrument 14
Combination
instrument, elec‐
tronic displays 16
Combination switch, refer to Turn signals 69
Combination switch, refer to Wiper system 69
Comfort Access 41
COMFORT program, Dynamic Driving Control 105
Computer 76
Concierge service 219
Condensation on win‐ dows 124
Condensation under the vehi‐ cle 140
Condition Based Service CBS 241
Confirmation signal 37
Contacts 207, 216
Control Display 19
Control Display, settings 79
Controller 19
Control systems, driving sta‐ bility 101
Convenient closing 37
Convenient opening 36
Convertible, convertible top 45
Convertible mode, automatic climate control 124
Convertible program, auto‐ matic climate control 124
Convertible top 45
Convertible top, care 255
Convertible top, cargo area partition 47
Convertible top, emergency operation 47
Convertible top, rollover pro‐ tection system 91
Convertible top tool 47
Coolant 239
Coolant temperature 75
Cooling function 125
Cooling, maximum 124
Seite 273
273Online Edition for Part no. 01 40 2 606 521 - 03 11 490
Reference Mobility Communication Entertainment Navigation Driving tips Controls At a glance