2012 BMW 650I COUPE CD changer
[x] Cancel search: CD changerPage 187 of 303
CD/multimediaVehicle equipment
All standard, country-specific and optional
equipment that is offered in the model series is
described in this chapter. Therefore, equipment
is also described that is not available in a vehicle,
e. g., because of the selected optional equip‐
ment or country variant. This also applies for
safety-related functions and systems.
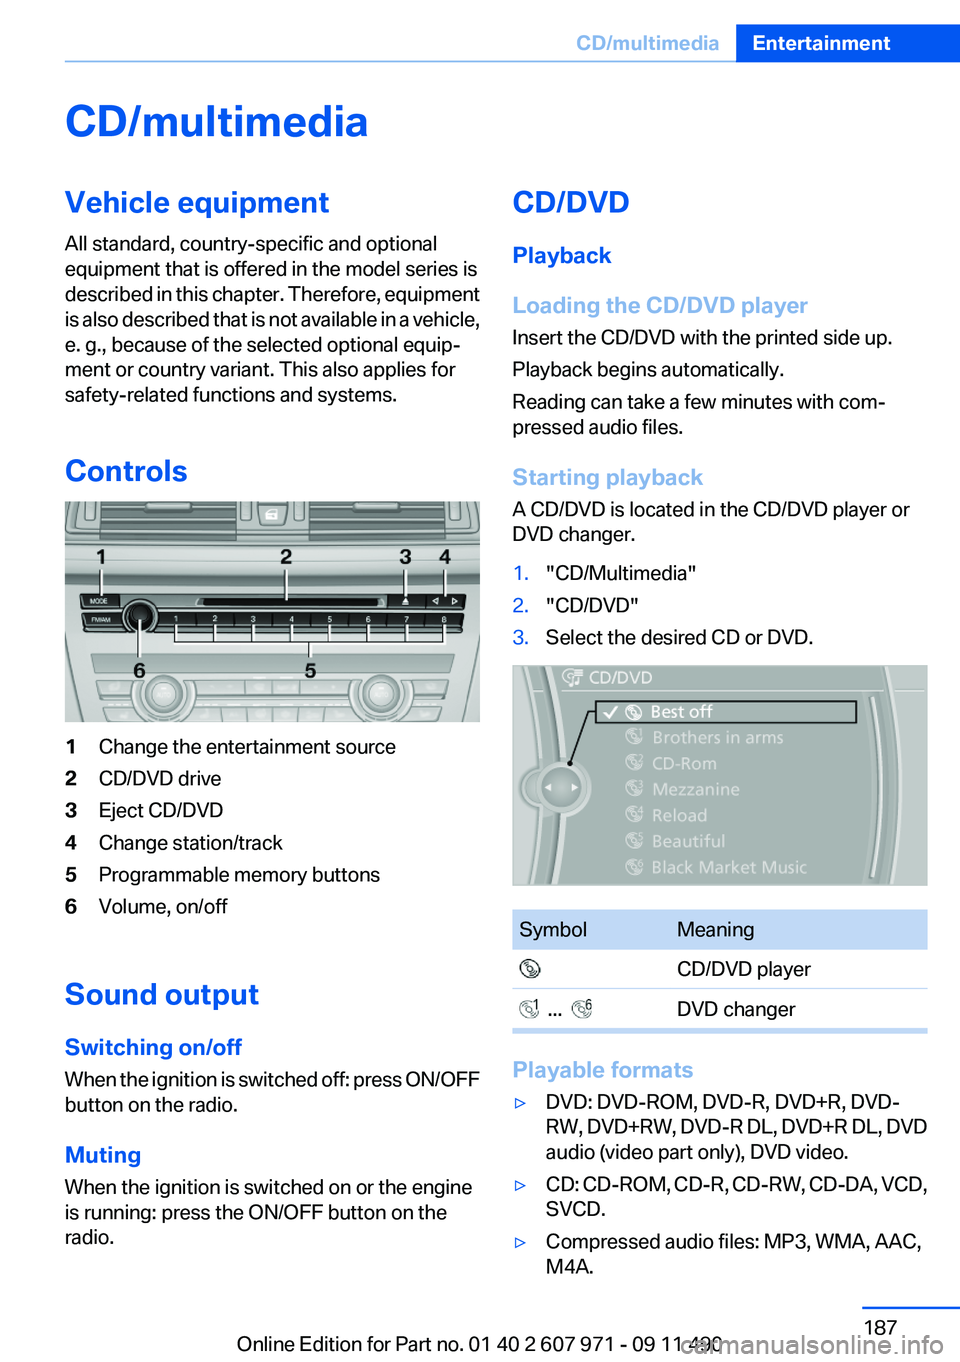
Controls1Change the entertainment source2CD/DVD drive3Eject CD/DVD4Change station/track5Programmable memory buttons6Volume, on/off
Sound output
Switching on/off
When the ignition is switched off: press ON/OFF
button on the radio.
Muting
When the ignition is switched on or the engine
is running: press the ON/OFF button on the
radio.
CD/DVD
Playback
Loading the CD/DVD player
Insert the CD/DVD with the printed side up.
Playback begins automatically.
Reading can take a few minutes with com‐
pressed audio files.
Starting playback
A CD/DVD is located in the CD/DVD player or
DVD changer.1."CD/Multimedia"2."CD/DVD"3.Select the desired CD or DVD.SymbolMeaning CD/DVD player ... DVD changer
Playable formats
▷DVD: DVD-ROM, DVD-R, DVD+R, DVD-
RW, DVD+RW, DVD-R DL, DVD+R DL, DVD
audio (video part only), DVD video.▷CD: CD-ROM, CD-R, CD-RW, CD-DA, VCD,
SVCD.▷Compressed audio files: MP3, WMA, AAC,
M4A.Seite 187CD/multimediaEntertainment187
Online Edition for Part no. 01 40 2 607 971 - 09 11 490
Page 191 of 303
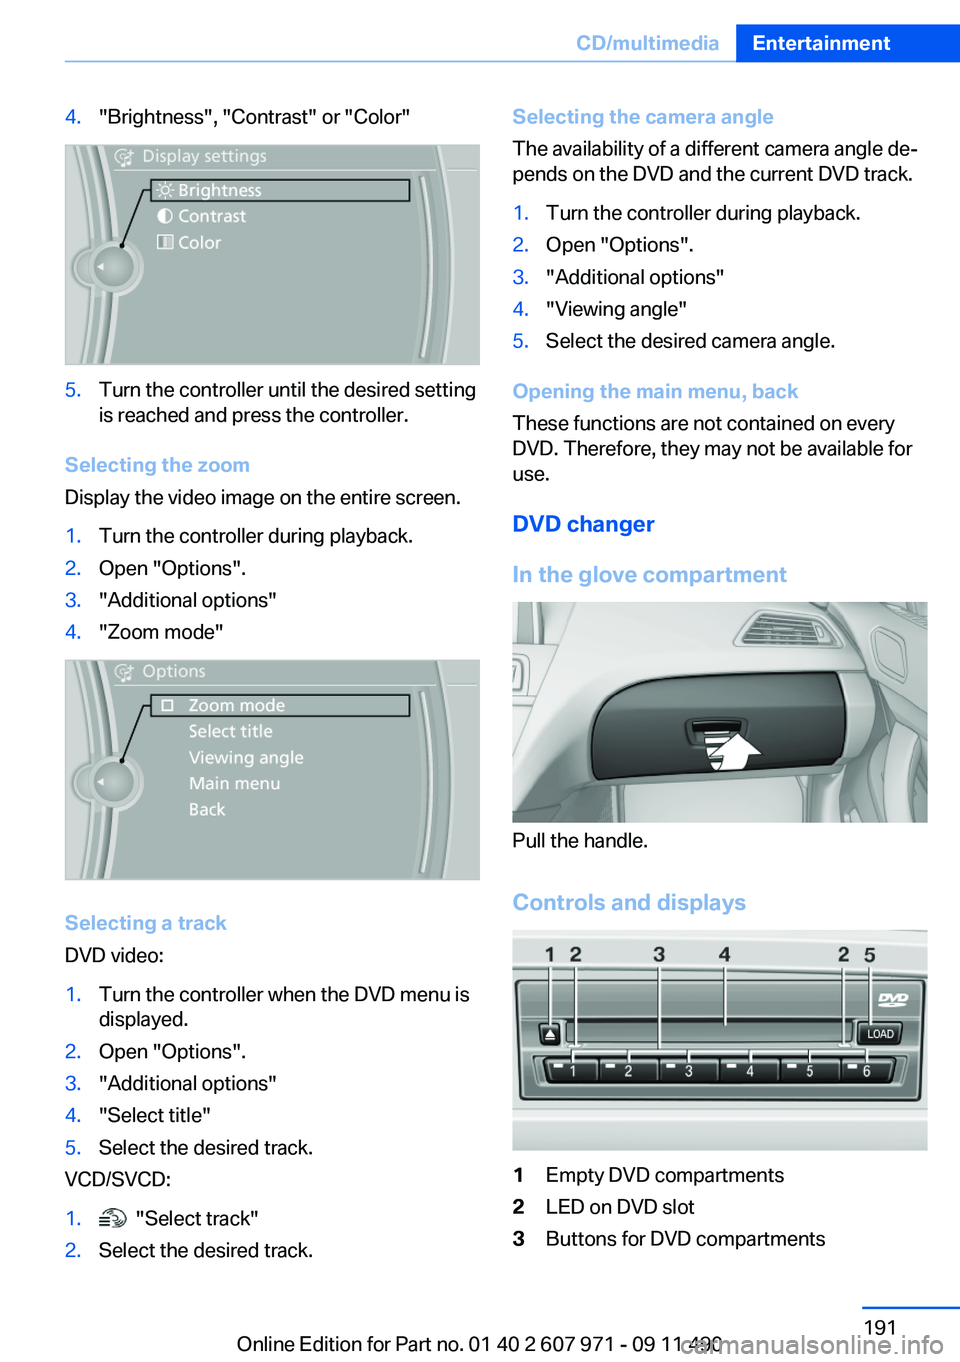
4."Brightness", "Contrast" or "Color"5.Turn the controller until the desired setting
is reached and press the controller.
Selecting the zoom
Display the video image on the entire screen.
1.Turn the controller during playback.2.Open "Options".3."Additional options"4."Zoom mode"
Selecting a track
DVD video:
1.Turn the controller when the DVD menu is
displayed.2.Open "Options".3."Additional options"4."Select title"5.Select the desired track.
VCD/SVCD:
1. "Select track"2.Select the desired track.Selecting the camera angle
The availability of a different camera angle de‐
pends on the DVD and the current DVD track.1.Turn the controller during playback.2.Open "Options".3."Additional options"4."Viewing angle"5.Select the desired camera angle.
Opening the main menu, back
These functions are not contained on every
DVD. Therefore, they may not be available for
use.
DVD changer
In the glove compartment
Pull the handle.
Controls and displays
1Empty DVD compartments2LED on DVD slot3Buttons for DVD compartmentsSeite 191CD/multimediaEntertainment191
Online Edition for Part no. 01 40 2 607 971 - 09 11 490
Page 192 of 303
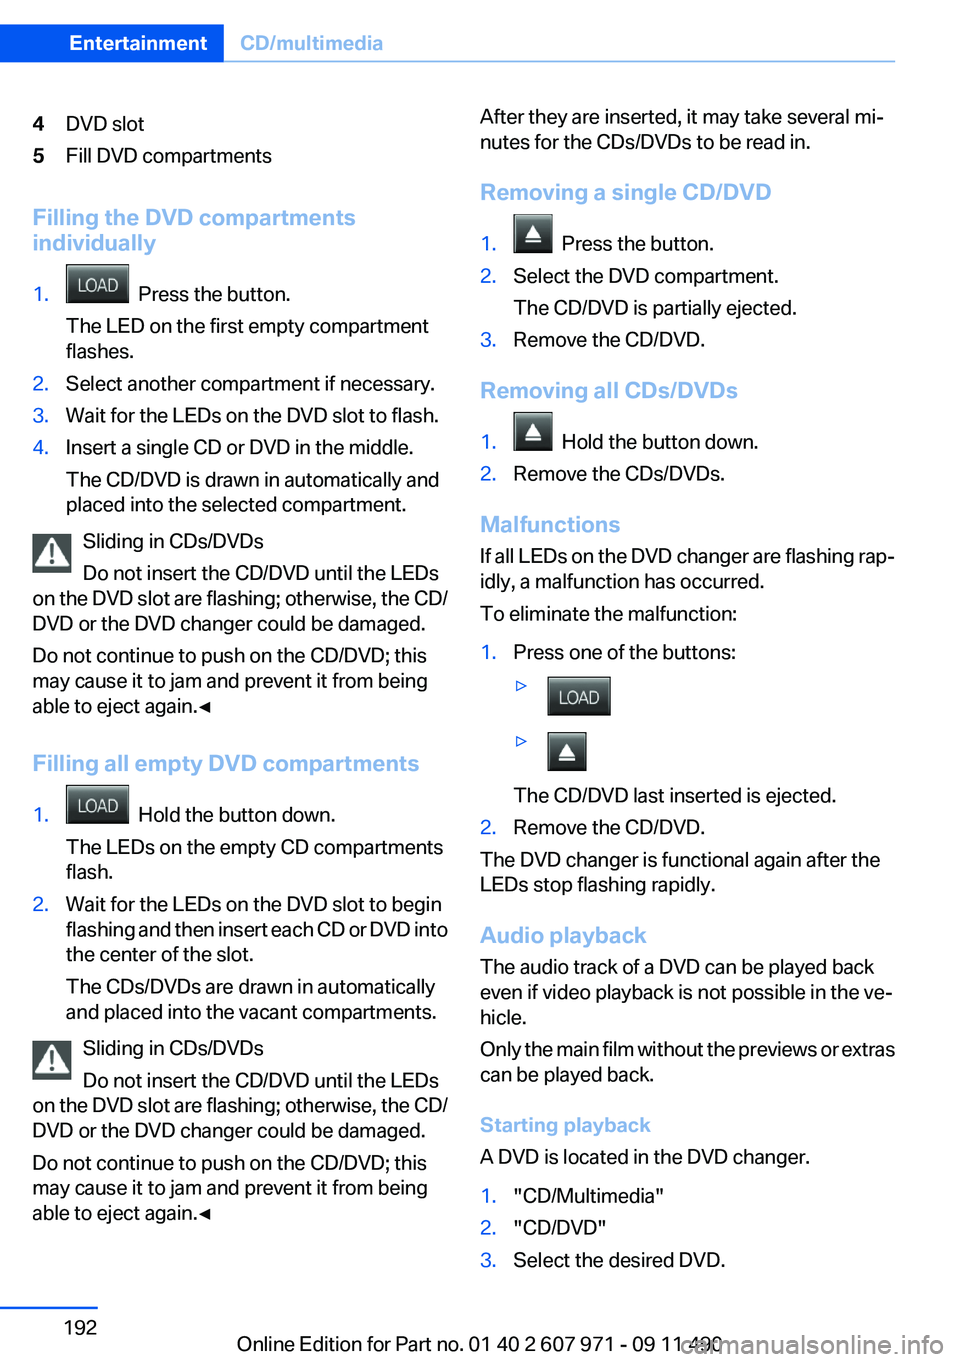
4DVD slot5Fill DVD compartments
Filling the DVD compartments
individually
1. Press the button.
The LED on the first empty compartment
flashes.2.Select another compartment if necessary.3.Wait for the LEDs on the DVD slot to flash.4.Insert a single CD or DVD in the middle.
The CD/DVD is drawn in automatically and
placed into the selected compartment.
Sliding in CDs/DVDs
Do not insert the CD/DVD until the LEDs
on the DVD slot are flashing; otherwise, the CD/
DVD or the DVD changer could be damaged.
Do not continue to push on the CD/DVD; this
may cause it to jam and prevent it from being
able to eject again.◀
Filling all empty DVD compartments
1. Hold the button down.
The LEDs on the empty CD compartments
flash.2.Wait for the LEDs on the DVD slot to begin
flashing and then insert each CD or DVD into
the center of the slot.
The CDs/DVDs are drawn in automatically
and placed into the vacant compartments.
Sliding in CDs/DVDs
Do not insert the CD/DVD until the LEDs
on the DVD slot are flashing; otherwise, the CD/
DVD or the DVD changer could be damaged.
Do not continue to push on the CD/DVD; this
may cause it to jam and prevent it from being
able to eject again.◀
After they are inserted, it may take several mi‐
nutes for the CDs/DVDs to be read in.
Removing a single CD/DVD1. Press the button.2.Select the DVD compartment.
The CD/DVD is partially ejected.3.Remove the CD/DVD.
Removing all CDs/DVDs
1. Hold the button down.2.Remove the CDs/DVDs.
Malfunctions
If all LEDs on the DVD changer are flashing rap‐
idly, a malfunction has occurred.
To eliminate the malfunction:
1.Press one of the buttons:▷▷
The CD/DVD last inserted is ejected.
2.Remove the CD/DVD.
The DVD changer is functional again after the
LEDs stop flashing rapidly.
Audio playback
The audio track of a DVD can be played back
even if video playback is not possible in the ve‐
hicle.
Only the main film without the previews or extras
can be played back.
Starting playback
A DVD is located in the DVD changer.
1."CD/Multimedia"2."CD/DVD"3.Select the desired DVD.Seite 192EntertainmentCD/multimedia192
Online Edition for Part no. 01 40 2 607 971 - 09 11 490
Page 193 of 303
Selecting a chapter using the buttonPress the button repeatedly until the
desired chapter is played.
Selecting a chapter using iDrive1."CD/Multimedia"2."CD/DVD"3.Select the desired DVD.4.Select the desired chapter.
Fast forward/reverse Press and hold the button.
Selecting the language
The languages that are available depend on the
DVD.
1."CD/Multimedia"2."CD/DVD"3.Select the desired DVD.4.Open "Options".5."Audio/language"6.Select the desired language.
Notes
CD/DVD player and changer Do not remove the cover
BMW CD/DVD players and changers are
officially designated Class 1 laser products. Do
not operate if the cover is damaged; otherwise,
severe eye damage may occur.◀
CDs and DVDs Use of CDs/DVDs
▷Do not use self-recorded CDs/DVDs
with labels applied, as these can be‐
come detached during playback due
to heat buildup and can cause irrepar‐
able damage to the device.▷Only use round CDs/DVDs with a standard
diameter of 4.7 in/12 cm and do not play
CDs/DVDs with an adapter, e.g., single CDs;
otherwise, the CDs or the adapter may jam
and no longer eject.▷Do not use combined CDs/DVDs, e.g., DVD
Plus, as the CDs/DVDs can jam and will no
longer eject.◀
General malfunctions
▷CD/DVD changers and players have been
optimized for performance in vehicles. In
some instances they may be more sensitive
to faulty CDs/DVDs than stationary devices
would be.▷If a CD/DVD cannot be played, first check
whether it has been inserted correctly.
Humidity
High levels of humidity can lead to condensation
on the CD/DVD or the laser's scan lens, and
temporarily prevent playback.
Malfunctions involving individual CDs/
DVDs
If malfunctions occur only with particular CDs/
DVDs, this can be due to one of the following
causes:
Home-recorded CDs/DVDs
▷Possible reasons for malfunctions with
home-recorded CDs/DVDs are inconsistent
data creation or recording processes, or
poor quality or old age of the blank CD/DVD.▷Only label CDs/DVDs on the upper side with
a pen intended for this purpose.
Damage
▷Avoid fingerprints, dust, scratches and
moisture.▷Store CDs/DVDs in a sleeve.▷Do not subject CDs/DVDs to temperatures
over 122 ℉/50 ℃, high humidity or direct
sunlight.Seite 193CD/multimediaEntertainment193
Online Edition for Part no. 01 40 2 607 971 - 09 11 490
Page 294 of 303
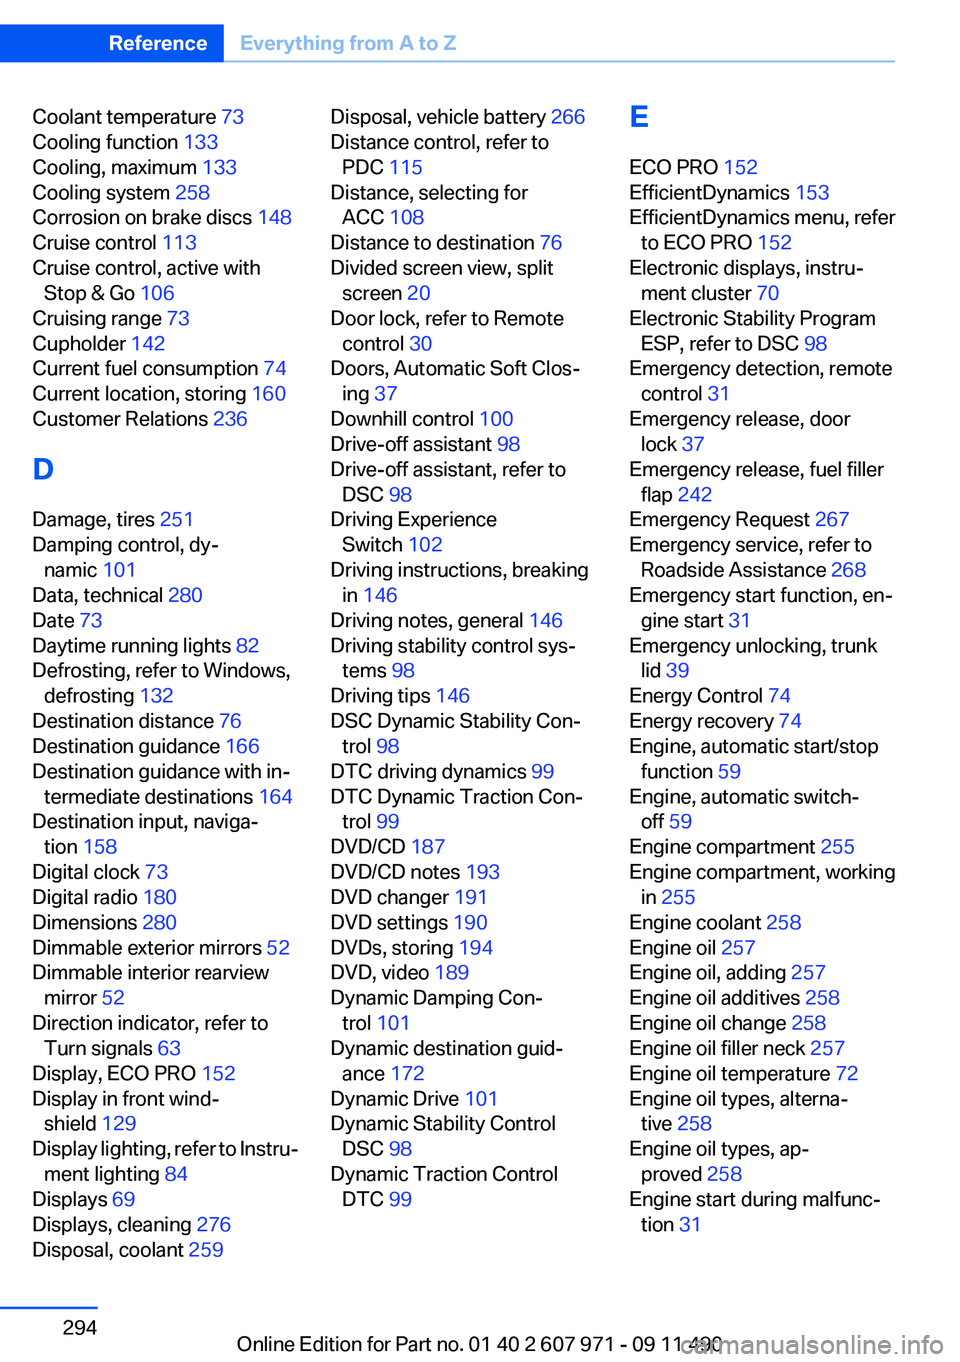
Coolant temperature 73
Cooling function 133
Cooling, maximum 133
Cooling system 258
Corrosion on brake discs 148
Cruise control 113
Cruise control, active with Stop & Go 106
Cruising range 73
Cupholder 142
Current fuel consumption 74
Current location, storing 160
Customer Relations 236
D
Damage, tires 251
Damping control, dy‐ namic 101
Data, technical 280
Date 73
Daytime running lights 82
Defrosting, refer to Windows, defrosting 132
Destination distance 76
Destination guidance 166
Destination guidance with in‐ termediate destinations 164
Destination input, naviga‐ tion 158
Digital clock 73
Digital radio 180
Dimensions 280
Dimmable exterior mirrors 52
Dimmable interior rearview mirror 52
Direction indicator, refer to Turn signals 63
Display, ECO PRO 152
Display in front wind‐ shield 129
Display lighting, refer to Instru‐ ment lighting 84
Displays 69
Displays, cleaning 276
Disposal, coolant 259 Disposal, vehicle battery 266
Distance control, refer to PDC 115
Distance, selecting for ACC 108
Distance to destination 76
Divided screen view, split screen 20
Door lock, refer to Remote control 30
Doors, Automatic Soft Clos‐ ing 37
Downhill control 100
Drive-off assistant 98
Drive-off assistant, refer to DSC 98
Driving Experience Switch 102
Driving instructions, breaking in 146
Driving notes, general 146
Driving stability control sys‐ tems 98
Driving tips 146
DSC Dynamic Stability Con‐ trol 98
DTC driving dynamics 99
DTC Dynamic Traction Con‐ trol 99
DVD/CD 187
DVD/CD notes 193
DVD changer 191
DVD settings 190
DVDs, storing 194
DVD, video 189
Dynamic Damping Con‐ trol 101
Dynamic destination guid‐ ance 172
Dynamic Drive 101
Dynamic Stability Control DSC 98
Dynamic Traction Control DTC 99 E
ECO PRO 152
EfficientDynamics 153
EfficientDynamics menu, refer to ECO PRO 152
Electronic displays, instru‐ ment cluster 70
Electronic Stability Program ESP, refer to DSC 98
Emergency detection, remote control 31
Emergency release, door lock 37
Emergency release, fuel filler flap 242
Emergency Request 267
Emergency service, refer to Roadside Assistance 268
Emergency start function, en‐ gine start 31
Emergency unlocking, trunk lid 39
Energy Control 74
Energy recovery 74
Engine, automatic start/stop function 59
Engine, automatic switch- off 59
Engine compartment 255
Engine compartment, working in 255
Engine coolant 258
Engine oil 257
Engine oil, adding 257
Engine oil additives 258
Engine oil change 258
Engine oil filler neck 257
Engine oil temperature 72
Engine oil types, alterna‐ tive 258
Engine oil types, ap‐ proved 258
Engine start during malfunc‐ tion 31 Seite 294ReferenceEverything from A to Z294
Online Edition for Part no. 01 40 2 607 971 - 09 11 490