2012 BMW 640I COUPE mirror
[x] Cancel search: mirrorPage 122 of 303
"Parking aid lines"
Turning circle and pathway lines are displayed.
Cameras
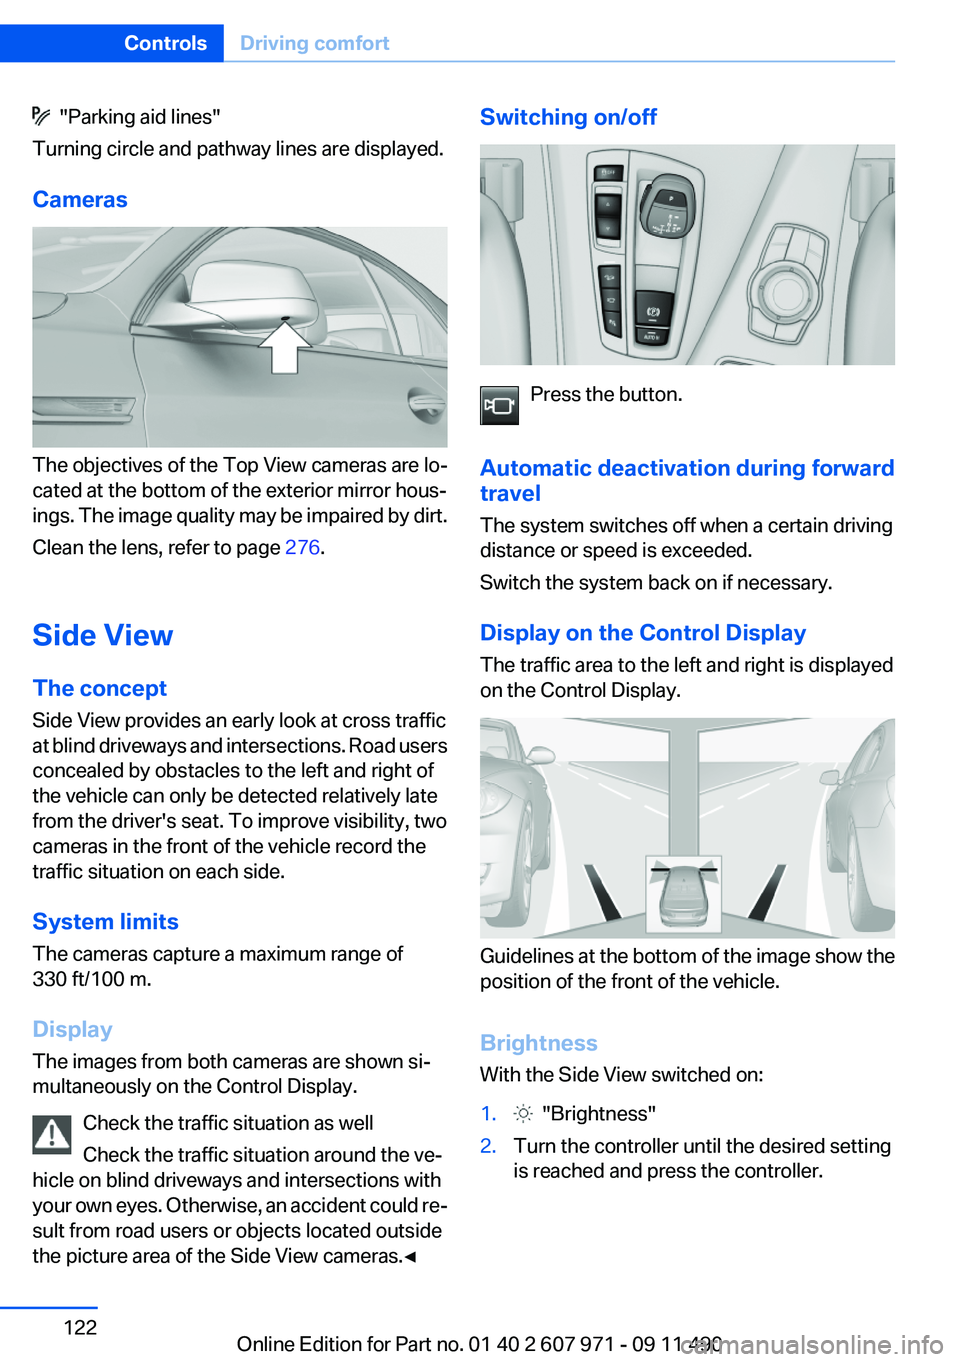
The objectives of the Top View cameras are lo‐
cated at the bottom of the exterior mirror hous‐
ings. The image quality may be impaired by dirt.
Clean the lens, refer to page 276.
Side View
The concept
Side View provides an early look at cross traffic
at blind driveways and intersections. Road users
concealed by obstacles to the left and right of
the vehicle can only be detected relatively late
from the driver's seat. To improve visibility, two
cameras in the front of the vehicle record the
traffic situation on each side.
System limits
The cameras capture a maximum range of
330 ft/100 m.
Display
The images from both cameras are shown si‐
multaneously on the Control Display.
Check the traffic situation as well
Check the traffic situation around the ve‐
hicle on blind driveways and intersections with
your own eyes. Otherwise, an accident could re‐
sult from road users or objects located outside
the picture area of the Side View cameras.◀
Switching on/off
Press the button.
Automatic deactivation during forward
travel
The system switches off when a certain driving
distance or speed is exceeded.
Switch the system back on if necessary.
Display on the Control Display
The traffic area to the left and right is displayed
on the Control Display.
Guidelines at the bottom of the image show the
position of the front of the vehicle.
Brightness
With the Side View switched on:
1. "Brightness"2.Turn the controller until the desired setting
is reached and press the controller.Seite 122ControlsDriving comfort122
Online Edition for Part no. 01 40 2 607 971 - 09 11 490
Page 153 of 303
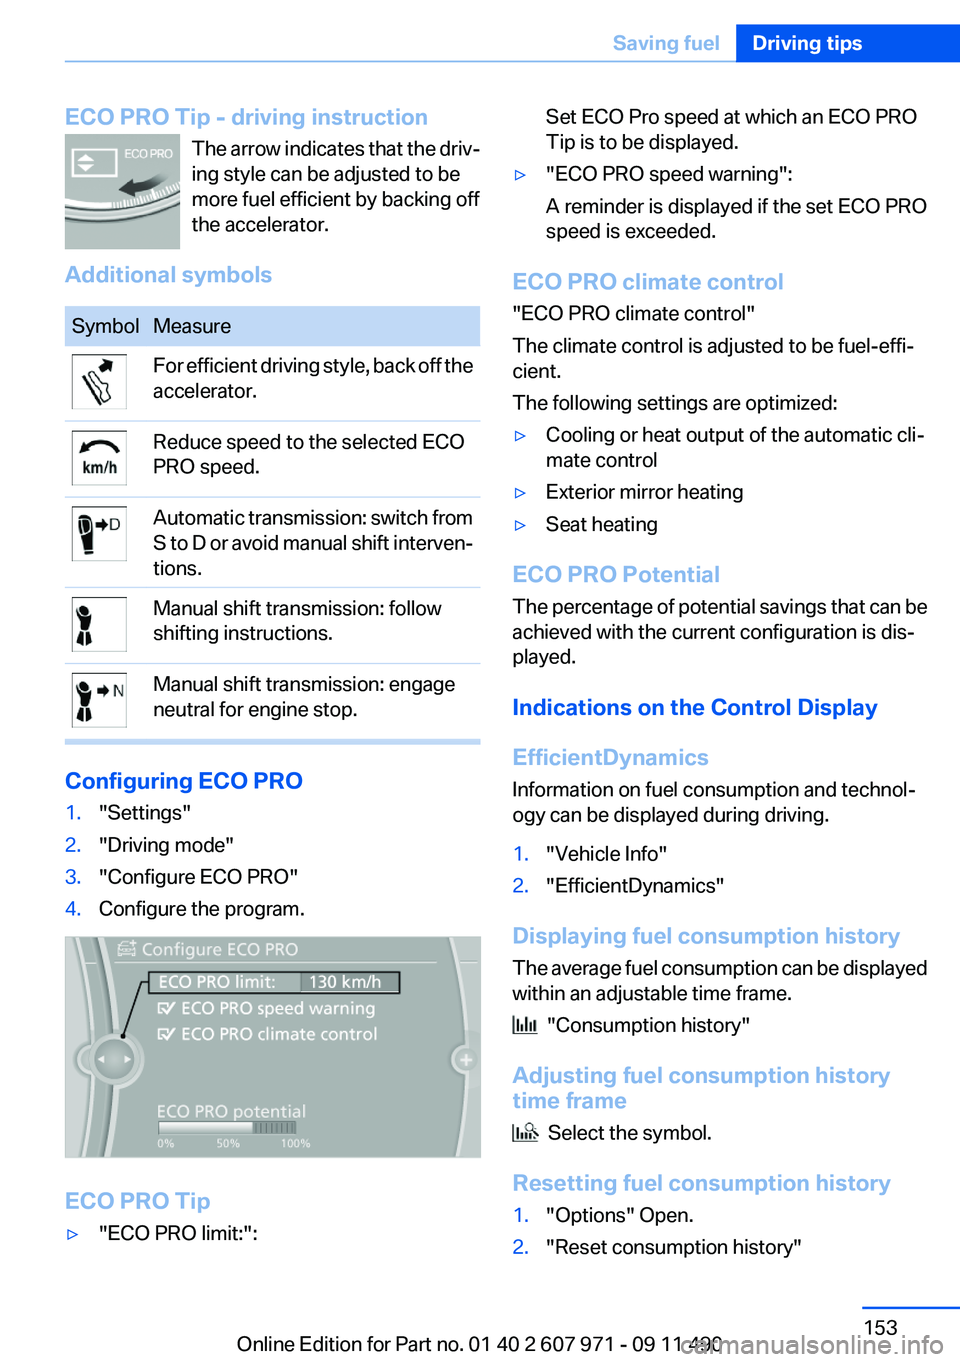
ECO PRO Tip - driving instructionThe arrow indicates that the driv‐
ing style can be adjusted to be
more fuel efficient by backing off
the accelerator.
Additional symbolsSymbolMeasureFor efficient driving style, back off the
accelerator.Reduce speed to the selected ECO
PRO speed.Automatic transmission: switch from
S to D or avoid manual shift interven‐
tions.Manual shift transmission: follow
shifting instructions.Manual shift transmission: engage
neutral for engine stop.
Configuring ECO PRO
1."Settings"2."Driving mode"3."Configure ECO PRO"4.Configure the program.
ECO PRO Tip
▷"ECO PRO limit:":Set ECO Pro speed at which an ECO PRO
Tip is to be displayed.▷"ECO PRO speed warning":
A reminder is displayed if the set ECO PRO
speed is exceeded.
ECO PRO climate control
"ECO PRO climate control"
The climate control is adjusted to be fuel-effi‐
cient.
The following settings are optimized:
▷Cooling or heat output of the automatic cli‐
mate control▷Exterior mirror heating▷Seat heating
ECO PRO Potential
The percentage of potential savings that can be
achieved with the current configuration is dis‐
played.
Indications on the Control Display
EfficientDynamics
Information on fuel consumption and technol‐
ogy can be displayed during driving.
1."Vehicle Info"2."EfficientDynamics"
Displaying fuel consumption history
The average fuel consumption can be displayed
within an adjustable time frame.
"Consumption history"
Adjusting fuel consumption history
time frame
Select the symbol.
Resetting fuel consumption history
1."Options" Open.2."Reset consumption history"Seite 153Saving fuelDriving tips153
Online Edition for Part no. 01 40 2 607 971 - 09 11 490
Page 220 of 303
Deleting an entry1.›Delete name‹2.Say the name after being prompted to do so.3.Confirm the query with ›Yes‹.
Deleting all entries
1.›Delete phonebook‹
The dialog for deleting the phone book is
opened.2.Confirm the query with ›Yes‹.3.Confirm the query again with ›Yes‹.
Reading and selecting entries
1.›Read phonebook‹
The dialog for reading the phone book is
opened.2.Say ›Dial number‹ when the desired entry is
read.
Selecting an entry
1.›Dial name‹2.Say the name after being prompted to do so.3.Confirm the query with ›Yes‹.
Adjusting the volume
Turn the knob during an announcement.
▷The volume remains constant even if the
volume of other audio sources is changed.▷The volume is stored for the remote control
currently in use.
Notes
Do not use the voice operation to initiate an
Emergency Request. In stressful situations, the
voice and vocal pitch can change. This can un‐
necessarily delay the establishment of a tele‐
phone connection.
Instead, use the SOS button, refer to
page 267, in the vicinity of the interior mirror.
Environmental conditions▷Say the commands, numbers, and letters
smoothly and with normal volume, empha‐
sis, and speed.▷Always say commands in the language of
the system. The language for the mobile
phone voice operation is preset and cannot
be changed in the Control Display.▷Keep the doors, windows, and glass sun‐
roof closed to prevent noise interference.▷Avoid making other noise in the vehicle
while speaking.
Snap-in adapter
General information
Detailed information about snap-in adapter,
which supports the functions of the mobile
phone, available from the service center.
Notes
At high temperatures, the charge function of the
mobile phone can be limited where appropriate
and the functions are no longer executed.
When the mobile phone is used via the vehicle,
heed the operating manual of the mobile phone.
Installation position
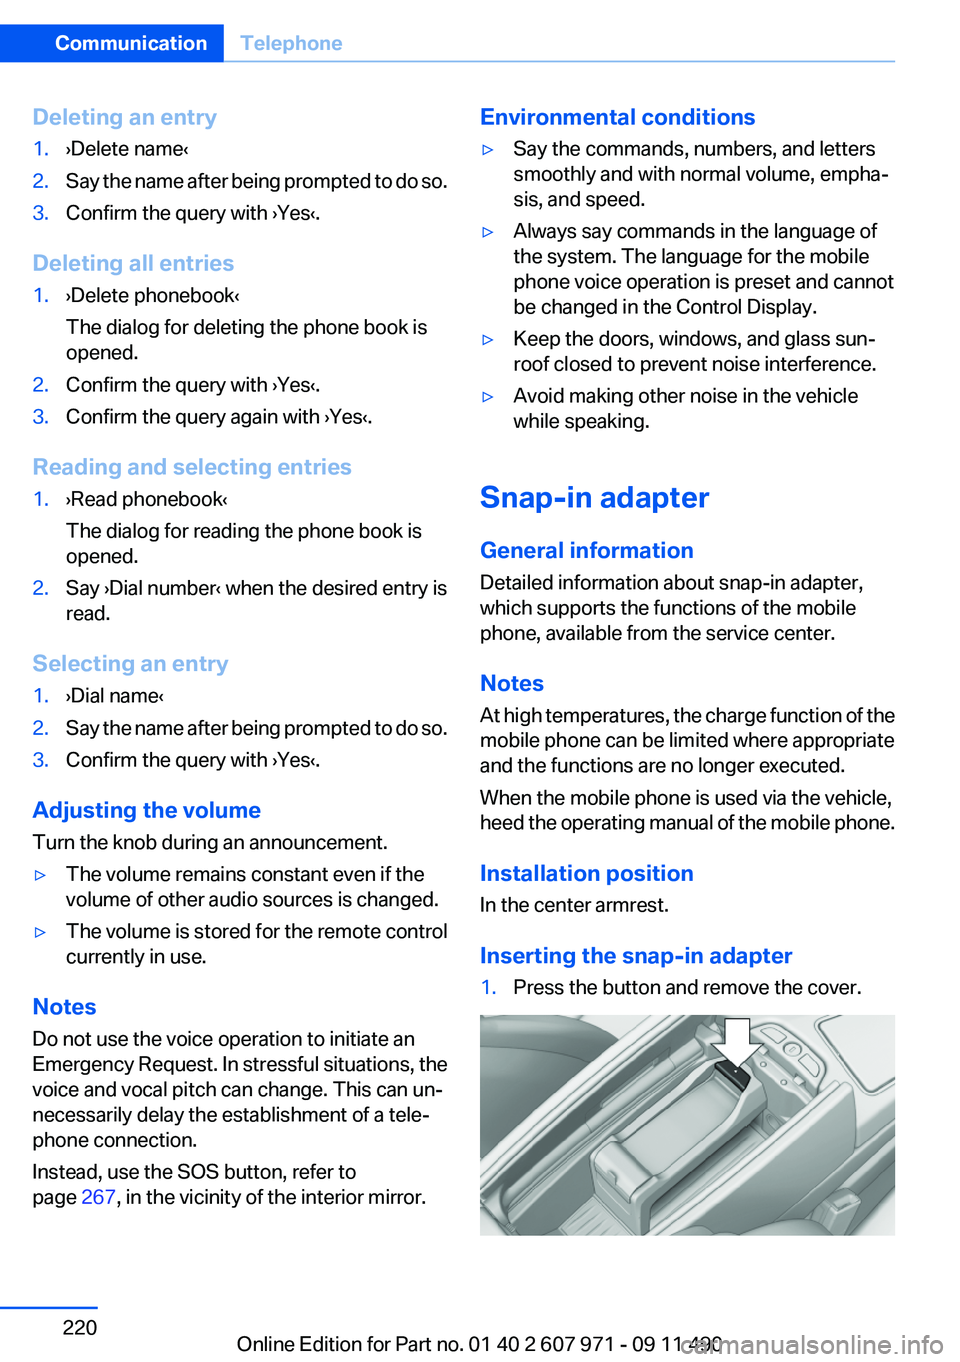
In the center armrest.
Inserting the snap-in adapter
1.Press the button and remove the cover.Seite 220CommunicationTelephone220
Online Edition for Part no. 01 40 2 607 971 - 09 11 490
Page 266 of 303
to ensure that all comfort functions are fully
available and that any Check Control messages
are no longer displayed.
Charging the battery
In the vehicle, only charge the battery via the
terminals, refer to page 269, in the engine com‐
partment with the engine off.
Power failure
After a temporary power loss, some equipment
needs to be reinitialized.
Individual settings need to be reprogrammed:▷Seat, mirror, and steering wheel memory:
store the positions again.▷Time: update.▷Date: update.▷Radio station: save again.▷Navigation system: wait for the operability of
the navigation.
Disposing of old batteries
Have old batteries disposed of by your
service center or bring them to a recy‐
cling center.
Maintain the battery in an upright position for
transport and storage. Secure the battery so
that it does not tip over during transport.
Fuses
Notes Replacing fuses
Never attempt to repair a blown fuse and
do not replace a defective fuse with a substitute
of another color or amperage rating; this could
lead to a circuit overload, ultimately resulting in
a fire in the vehicle.◀
Plastic tweezers and information on the fuse
types and locations are stored in the fuse box in
the cargo area.
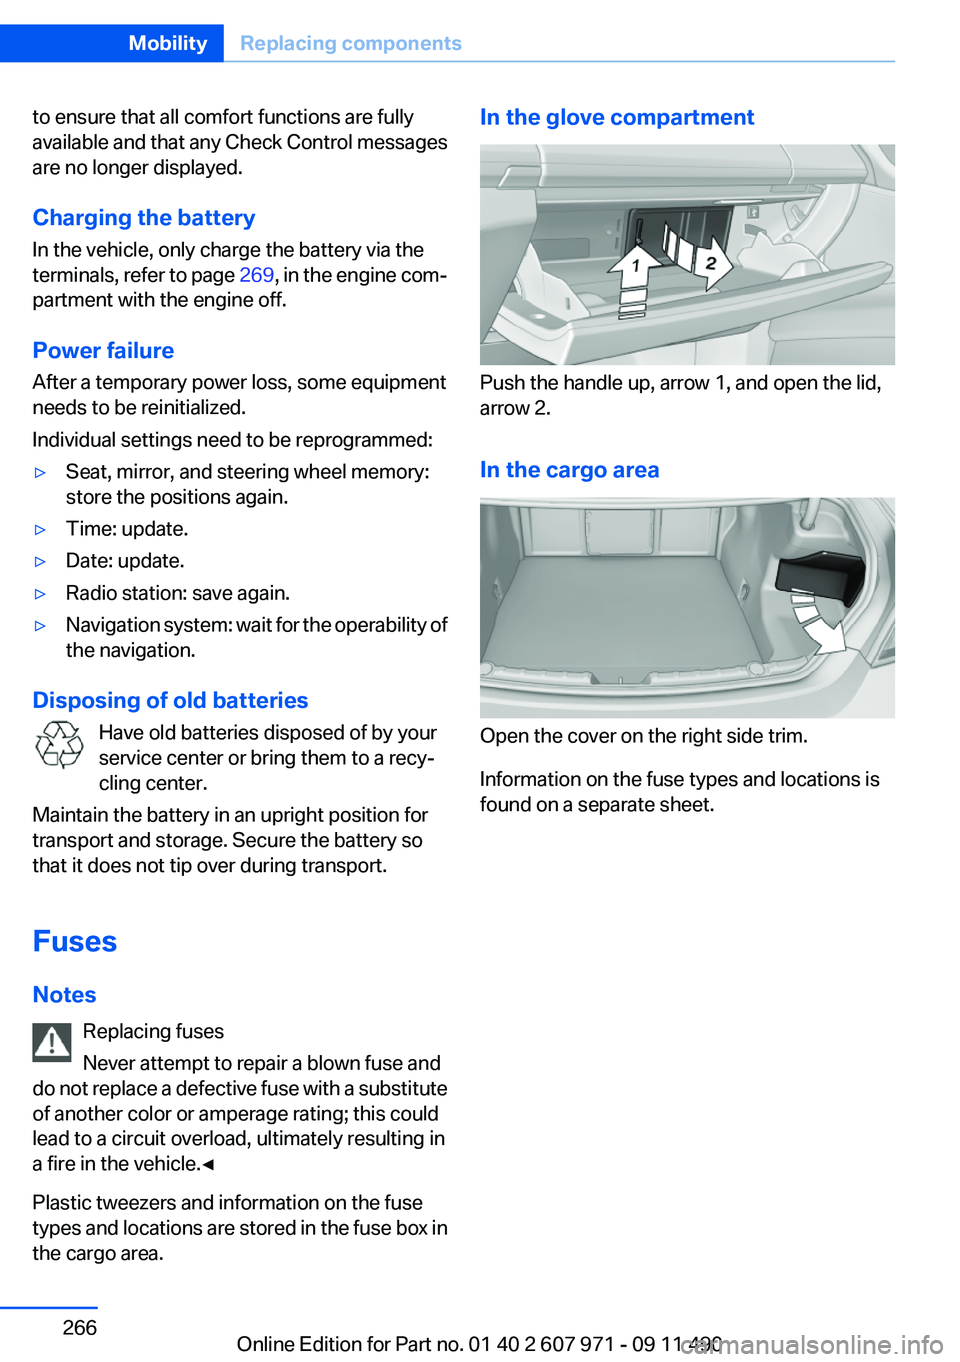
In the glove compartment
Push the handle up, arrow 1, and open the lid,
arrow 2.
In the cargo area
Open the cover on the right side trim.
Information on the fuse types and locations is
found on a separate sheet.
Seite 266MobilityReplacing components266
Online Edition for Part no. 01 40 2 607 971 - 09 11 490
Page 273 of 303
CareVehicle equipment
All standard, country-specific and optional
equipment that is offered in the model series is
described in this chapter. Therefore, equipment
is also described that is not available in a vehicle,
e. g., because of the selected optional equip‐
ment or country variant. This also applies for
safety-related functions and systems.
Car washes
Notes Steam jets or high-pressure washers
When using steam jets or high-pressure
washers, hold them a sufficient distance away
and use a maximum temperature of 140 ℉/
60 ℃.
Holding them too close or using excessively
high pressures or temperatures can cause dam‐
age or preliminary damage that may then lead to
long-term damage.
Follow the operating instructions for the high-
pressure washer.◀
Cleaning sensors/cameras with high-
pressure washers
When using high-pressure washers, do not
spray the exterior sensors and cameras, e.g.,
Park Distance Control, for extended periods of
time and only from a distance of at least 12 in/
30 cm.◀
Wash your vehicle frequently, particularly in win‐
ter.
Intense soiling and road salt can damage the ve‐
hicle.Washing in automatic car washes
Give preference to cloth car washes or those
that use soft brushes in order to avoid paint
damage.
Notes
Note the following:▷Make sure that the wheels and tires are not
damaged by the transport mechanisms.▷Fold in the exterior mirrors; otherwise, they
may be damaged, depending on the width of
the vehicle.▷Deactivate the rain sensor, refer to page 65,
to avoid unintentional wiper activation.▷In some cases, an unintentional alarm can be
triggered by the interior motion sensor of the
alarm system. Follow the instructions on
avoiding an unintentional alarm, refer to
page 41.
Guide rails in car washes
Avoid car washes with guide rails higher
than 4 in/10 cm; otherwise, the vehicle body
could be damaged.◀
Before driving into a car wash
In order to ensure that the vehicle can roll in a car
wash, take the following steps:
Manual transmission:
1.Release the parking brake, refer to page 61.2.Drive into the car wash.3.Shift to neutral.4.Switch the engine off.5.Switch on the ignition.Seite 273CareMobility273
Online Edition for Part no. 01 40 2 607 971 - 09 11 490
Page 280 of 303
Technical dataVehicle equipment
All standard, country-specific and optional
equipment that is offered in the model series is
described in this chapter. Therefore, equipmentis also described that is not available in a vehicle,
e. g., because of the selected optional equip‐
ment or country variant. This also applies for
safety-related functions and systems.
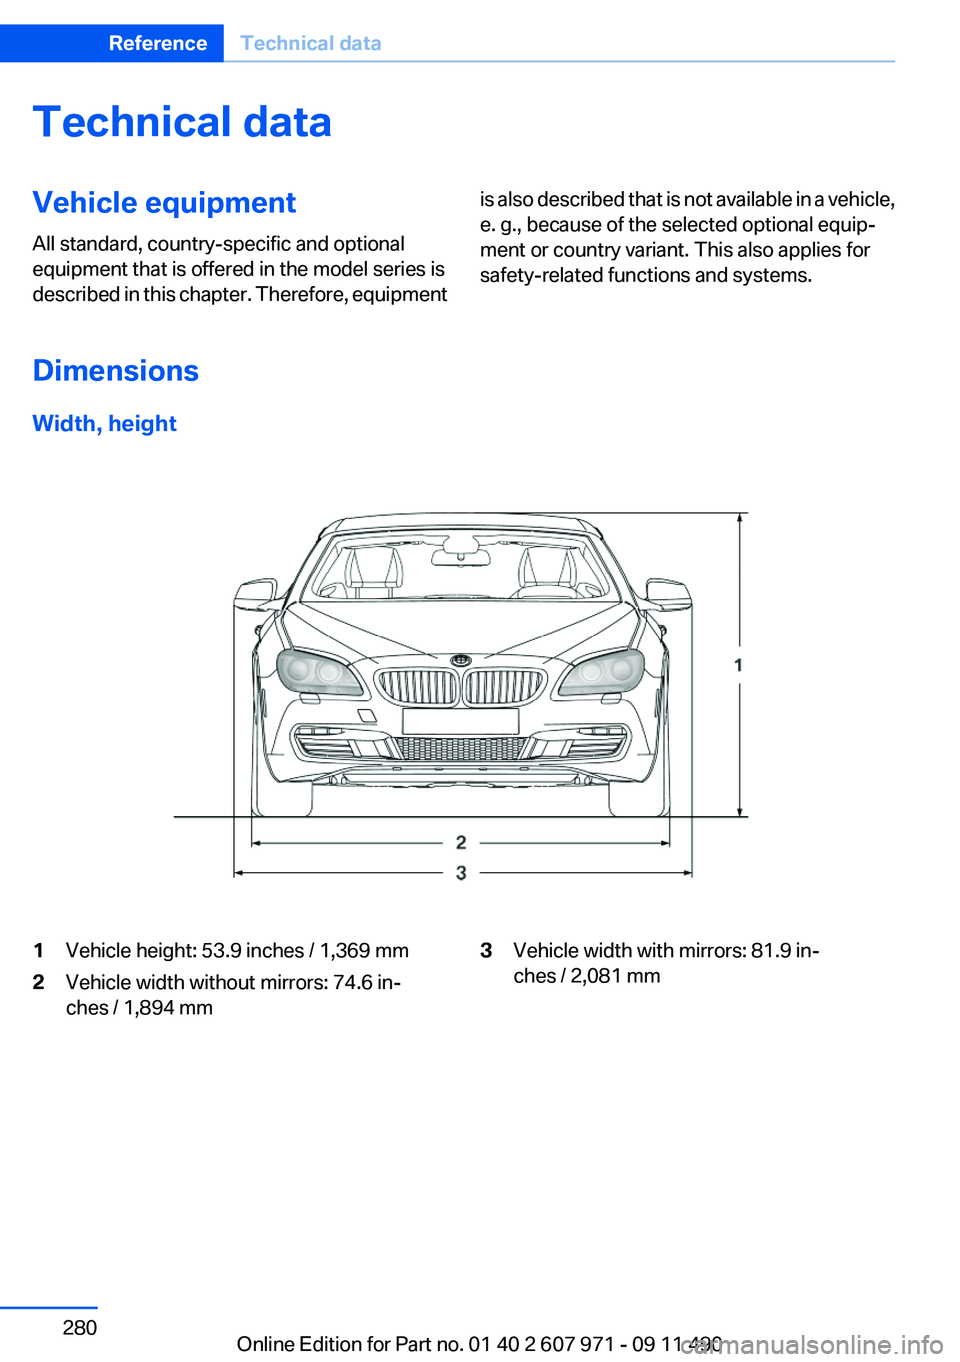
Dimensions
Width, height
1Vehicle height: 53.9 inches / 1,369 mm2Vehicle width without mirrors: 74.6 in‐
ches / 1,894 mm3Vehicle width with mirrors: 81.9 in‐
ches / 2,081 mmSeite 280ReferenceTechnical data280
Online Edition for Part no. 01 40 2 607 971 - 09 11 490
Page 294 of 303
Coolant temperature 73
Cooling function 133
Cooling, maximum 133
Cooling system 258
Corrosion on brake discs 148
Cruise control 113
Cruise control, active with Stop & Go 106
Cruising range 73
Cupholder 142
Current fuel consumption 74
Current location, storing 160
Customer Relations 236
D
Damage, tires 251
Damping control, dy‐ namic 101
Data, technical 280
Date 73
Daytime running lights 82
Defrosting, refer to Windows, defrosting 132
Destination distance 76
Destination guidance 166
Destination guidance with in‐ termediate destinations 164
Destination input, naviga‐ tion 158
Digital clock 73
Digital radio 180
Dimensions 280
Dimmable exterior mirrors 52
Dimmable interior rearview mirror 52
Direction indicator, refer to Turn signals 63
Display, ECO PRO 152
Display in front wind‐ shield 129
Display lighting, refer to Instru‐ ment lighting 84
Displays 69
Displays, cleaning 276
Disposal, coolant 259 Disposal, vehicle battery 266
Distance control, refer to PDC 115
Distance, selecting for ACC 108
Distance to destination 76
Divided screen view, split screen 20
Door lock, refer to Remote control 30
Doors, Automatic Soft Clos‐ ing 37
Downhill control 100
Drive-off assistant 98
Drive-off assistant, refer to DSC 98
Driving Experience Switch 102
Driving instructions, breaking in 146
Driving notes, general 146
Driving stability control sys‐ tems 98
Driving tips 146
DSC Dynamic Stability Con‐ trol 98
DTC driving dynamics 99
DTC Dynamic Traction Con‐ trol 99
DVD/CD 187
DVD/CD notes 193
DVD changer 191
DVD settings 190
DVDs, storing 194
DVD, video 189
Dynamic Damping Con‐ trol 101
Dynamic destination guid‐ ance 172
Dynamic Drive 101
Dynamic Stability Control DSC 98
Dynamic Traction Control DTC 99 E
ECO PRO 152
EfficientDynamics 153
EfficientDynamics menu, refer to ECO PRO 152
Electronic displays, instru‐ ment cluster 70
Electronic Stability Program ESP, refer to DSC 98
Emergency detection, remote control 31
Emergency release, door lock 37
Emergency release, fuel filler flap 242
Emergency Request 267
Emergency service, refer to Roadside Assistance 268
Emergency start function, en‐ gine start 31
Emergency unlocking, trunk lid 39
Energy Control 74
Energy recovery 74
Engine, automatic start/stop function 59
Engine, automatic switch- off 59
Engine compartment 255
Engine compartment, working in 255
Engine coolant 258
Engine oil 257
Engine oil, adding 257
Engine oil additives 258
Engine oil change 258
Engine oil filler neck 257
Engine oil temperature 72
Engine oil types, alterna‐ tive 258
Engine oil types, ap‐ proved 258
Engine start during malfunc‐ tion 31 Seite 294ReferenceEverything from A to Z294
Online Edition for Part no. 01 40 2 607 971 - 09 11 490
Page 295 of 303
Engine start, refer to Startingthe engine 58
Engine start, Starting aid 269
Engine stop 58
Engine temperature 72
Entering/exiting vehicle, assis‐ tance, steering wheel 53
Entering a car wash 273
Equalizer 176
Equipment, interior 136
ESP Electronic Stability Pro‐ gram, refer to DSC 98
Exchanging wheels/tires 251
Exhaust system 147
Exterior mirror, automatic dim‐ ming feature 52
Exterior mirrors 51
External devices 199
External start 269
External temperature dis‐ play 73
External temperature warn‐ ing 73
Eyes for securing cargo 150
F
Fader 176
Failure message, refer to Check Control 70
False alarm, refer to Uninten‐ tional alarm 41
Fan, refer to Air volume 132
Fault displays, refer to Check Control 70
Filler neck for engine oil 257
Fine wood, care 275
First aid kit 268
Fitting for towing, refer to Tow fitting 271
Flat tire, changing wheels 265
Flat Tire Monitor FTM 92
Flat tire, Tire Pressure Monitor TPM 89
Flat tire, warning lamp 90, 93
Flooding 147 Floor carpet, care 275
Floor mats, care 275
FM/AM station 179
Fold-out position, windshield wipers 65
Foot brake 147
Front airbags 86
Front fog lamps 84
Front lamps 263
Front passenger airbags, au‐ tomatic deactivation 88
Front passenger airbags, indi‐ cator lamp 88
Front seats 45
FTM Flat Tire Monitor 92
Fuel cap 242
Fuel consumption, current 74
Fuel consumption, refer to Average fuel consump‐
tion 76
Fuel filler flap 242
Fuel gauge 72
Fuel quality 244
Fuel, tank capacity 282
Fuse 266
G
Garage door opener, refer to Integrated universal remote
control 136
Gas station recommenda‐ tion 168
Gear change, automatic trans‐ mission 67
Gear shift indicator 75
General driving notes 146
Glass sunroof, powered with tilt function 43
Glove compartment 141
Gong, volume equaliza‐ tion 177
GPS navigation, refer to Navi‐ gation system 158
Gray display of the map 171 Gross vehicle weight, ap‐
proved 281
Gross weight, permissible for trailer towing 281
H
Hand brake, refer to Parking brake 61
Hand-held transmitter, alter‐ nating code 137
Hazard warning flashers 267
HDC Hill Descent Control 100
HD Radio 180
Head airbags 86
Headlamp control, auto‐ matic 82
Headlamp courtesy delay fea‐ ture 82
Headlamp courtesy delay fea‐ ture via remote control 35
Headlamp flasher 64
Headlamp glass 263
Headlamps 263
Headlamps, care 274
Headlamp washer system 64
Headliner 15
Head restraints 45
Head restraints, front 49
Head-up Display 129
Head-up Display, care 276
Heavy cargo, stowing 150
Height, seats 45
Height, vehicle 280
High-beam Assistant 83
High beams 64
High beams/low beams, refer to High-beam Assistant 83
Hill Descent Control HDC 100
Hills 148
Hill start assistant, refer to Drive-off assistant 98
Hints 6
Holder for beverages 142
Homepage 6
Hood 255 Seite 295Everything from A to ZReference295
Online Edition for Part no. 01 40 2 607 971 - 09 11 490