2012 BMW 640I COUPE check engine
[x] Cancel search: check enginePage 261 of 303
Socket for OBD Onboard
Diagnosis
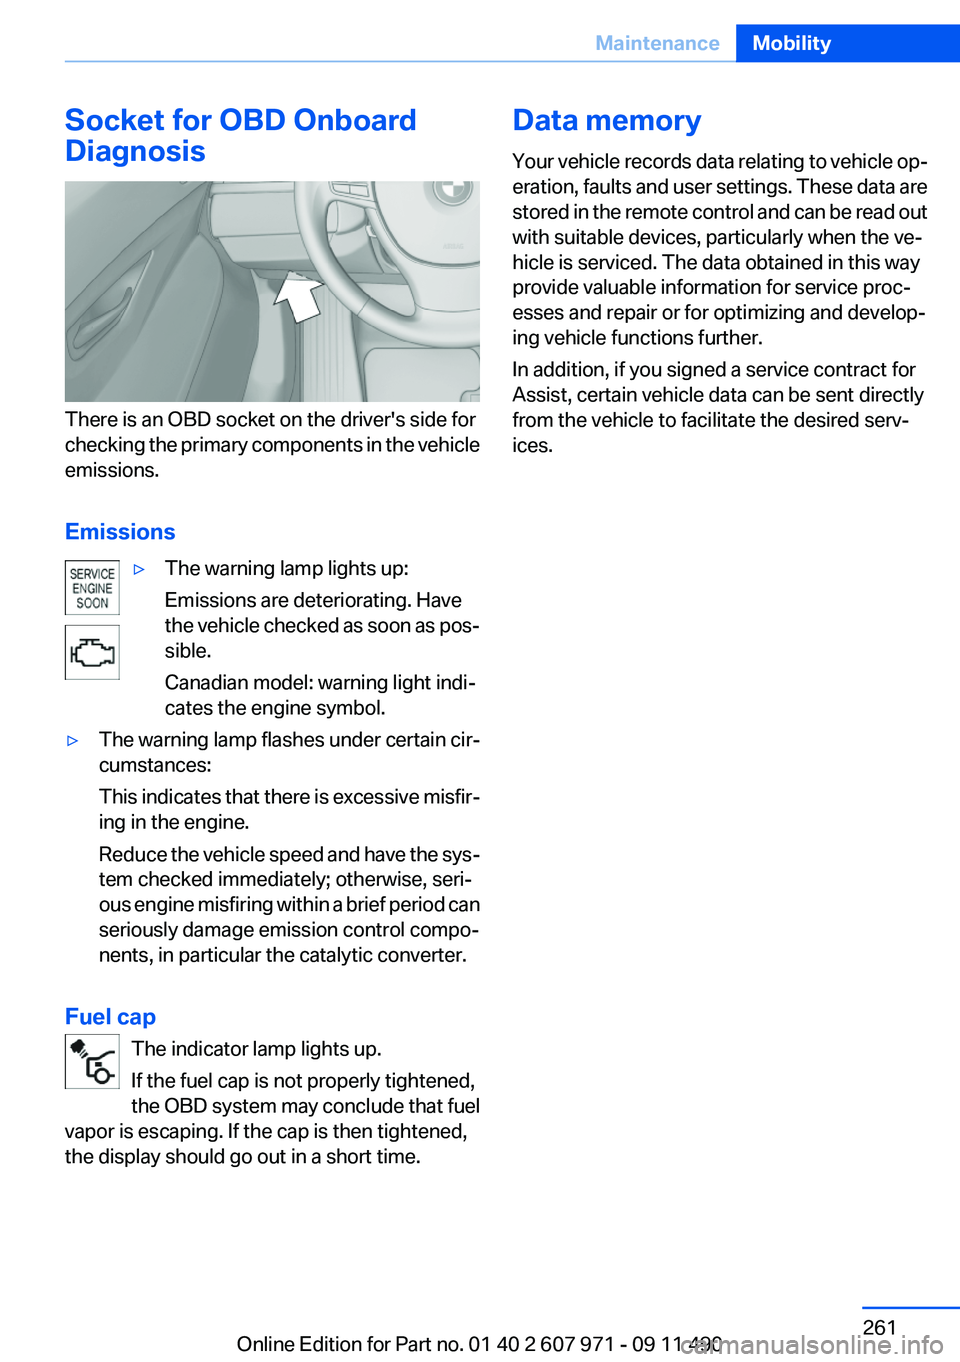
There is an OBD socket on the driver's side for
checking the primary components in the vehicle
emissions.
Emissions
▷The warning lamp lights up:
Emissions are deteriorating. Have
the vehicle checked as soon as pos‐
sible.
Canadian model: warning light indi‐
cates the engine symbol.▷The warning lamp flashes under certain cir‐
cumstances:
This indicates that there is excessive misfir‐
ing in the engine.
Reduce the vehicle speed and have the sys‐
tem checked immediately; otherwise, seri‐
ous engine misfiring within a brief period can
seriously damage emission control compo‐
nents, in particular the catalytic converter.
Fuel cap
The indicator lamp lights up.
If the fuel cap is not properly tightened,
the OBD system may conclude that fuel
vapor is escaping. If the cap is then tightened,
the display should go out in a short time.
Data memory
Your vehicle records data relating to vehicle op‐
eration, faults and user settings. These data are
stored in the remote control and can be read out
with suitable devices, particularly when the ve‐
hicle is serviced. The data obtained in this way
provide valuable information for service proc‐
esses and repair or for optimizing and develop‐
ing vehicle functions further.
In addition, if you signed a service contract for
Assist, certain vehicle data can be sent directly
from the vehicle to facilitate the desired serv‐
ices.Seite 261MaintenanceMobility261
Online Edition for Part no. 01 40 2 607 971 - 09 11 490
Page 266 of 303
to ensure that all comfort functions are fully
available and that any Check Control messages
are no longer displayed.
Charging the battery
In the vehicle, only charge the battery via the
terminals, refer to page 269, in the engine com‐
partment with the engine off.
Power failure
After a temporary power loss, some equipment
needs to be reinitialized.
Individual settings need to be reprogrammed:▷Seat, mirror, and steering wheel memory:
store the positions again.▷Time: update.▷Date: update.▷Radio station: save again.▷Navigation system: wait for the operability of
the navigation.
Disposing of old batteries
Have old batteries disposed of by your
service center or bring them to a recy‐
cling center.
Maintain the battery in an upright position for
transport and storage. Secure the battery so
that it does not tip over during transport.
Fuses
Notes Replacing fuses
Never attempt to repair a blown fuse and
do not replace a defective fuse with a substitute
of another color or amperage rating; this could
lead to a circuit overload, ultimately resulting in
a fire in the vehicle.◀
Plastic tweezers and information on the fuse
types and locations are stored in the fuse box in
the cargo area.
In the glove compartment
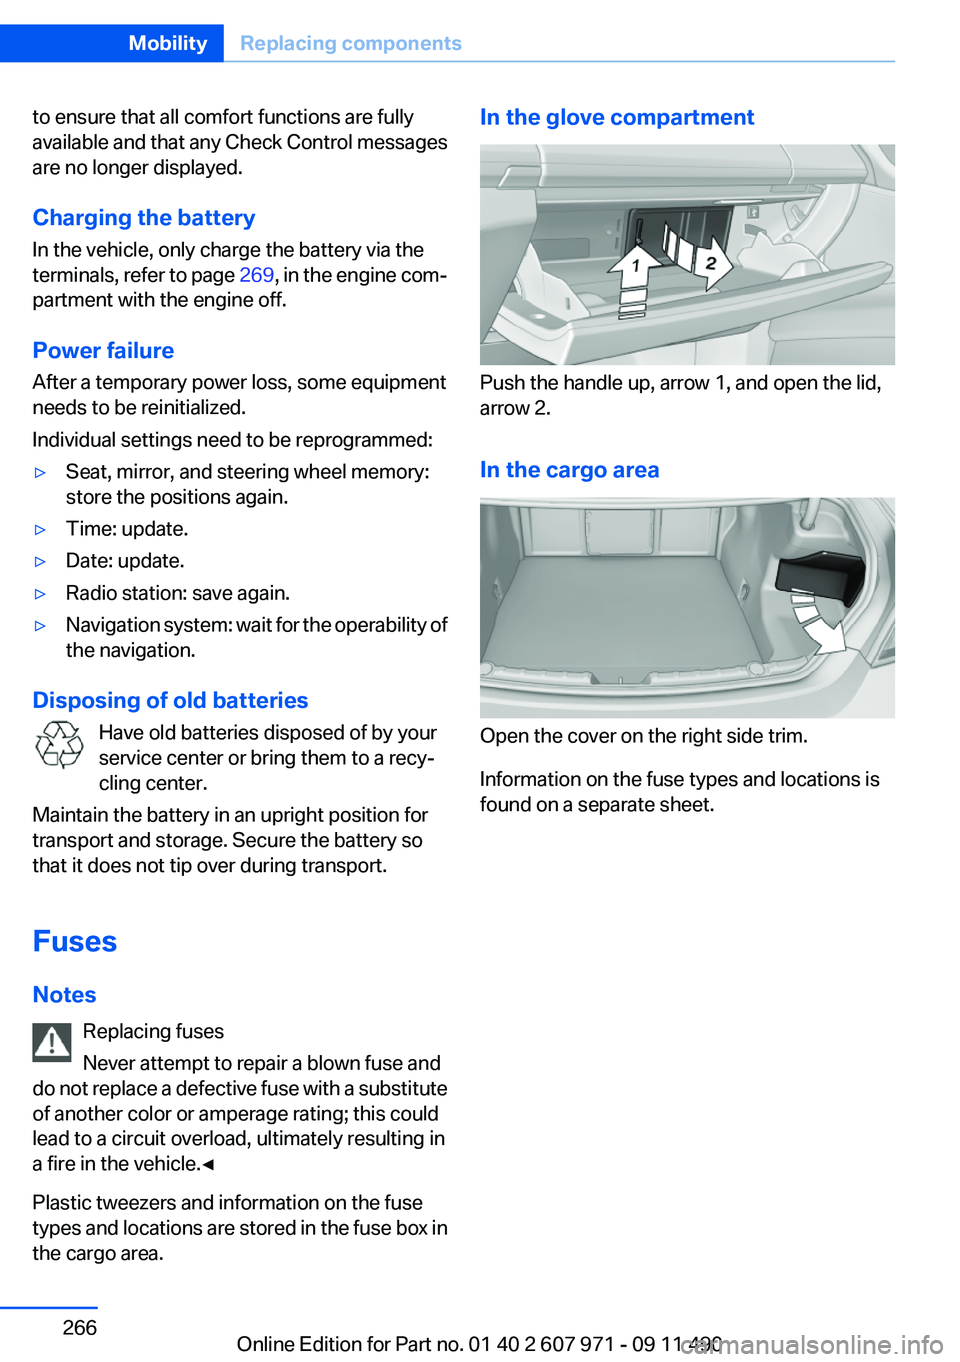
Push the handle up, arrow 1, and open the lid,
arrow 2.
In the cargo area
Open the cover on the right side trim.
Information on the fuse types and locations is
found on a separate sheet.
Seite 266MobilityReplacing components266
Online Edition for Part no. 01 40 2 607 971 - 09 11 490
Page 269 of 303

Roadside Assistance
The Roadside Assistance, refer to page 234
phone number can be viewed on the iDrive or a
connection to Roadside Assistance can be es‐
tablished directly.
Jump starting
Notes
If the battery is discharged, an engine can be
started using the battery of another vehicle and
two jumper cables. Only use jumper cables with
fully insulated clamp handles.
To prevent personal injury or damage to both
vehicles, adhere strictly to the following proce‐
dure.
Do not touch live parts
To avoid the risk of potentially fatal injury,
always avoid all contact with electrical compo‐
nents while the engine is running.◀
Preparation1.Check whether the battery of the other ve‐
hicle has a voltage of 12 volts. This informa‐
tion can be found on the battery.2.Switch off the engine of the assisting vehi‐
cle.3.Switch off any electronic systems/power
consumers in both vehicles.
Bodywork contact between vehicles
Make sure that there is no contact be‐
tween the bodywork of the two vehicles; other‐
wise, there is the danger of short circuits.◀
Starting aid terminals Connecting order
Connect the jumper cables in the correct
order; otherwise, there is the danger of injury
from sparking.◀
The so-called starting aid terminal in the engine
compartment acts as the battery's positive ter‐
minal.
The body ground or a special nut acts as the
negative terminal.
Connecting the cables
1.Pull off the cap of the BMW starting aid ter‐
minal.2.Attach one terminal clamp of the positive
jumper cable to the positive terminal of the
battery, or to the corresponding starting aid
terminal of the vehicle providing assistance.3.Attach the other end of the cable to the pos‐
itive terminal of the battery, or to the corre‐
sponding starting aid terminal of the vehicle
to be started.4.Attach one terminal clamp of the negative
jumper cable to the negative terminal of the
battery, or to the corresponding engine or
body ground of the vehicle providing assis‐
tance.5.Attach the other end of the cable to the neg‐
ative terminal of the battery, or to the corre‐
sponding engine or body ground of the ve‐
hicle to be started.Seite 269Breakdown assistanceMobility269
Online Edition for Part no. 01 40 2 607 971 - 09 11 490
Page 270 of 303
Starting the engine
Never use spray fluids to start the engine.1.Start the engine of the assisting vehicle and
let it run for several minutes at an increased
idle speed.2.Start the engine of the vehicle being started
in the usual way.
If the first starting attempt is not successful,
wait a few minutes before making another
attempt in order to allow the discharged bat‐
tery to recharge.3.Let both engines run for several minutes.4.Disconnect the jumper cables in the reverse
order.
Check the battery and recharge if necessary.
Tow-starting and towing
Manual transmission
Observe before towing your vehicle The parking brake is blocked
The parking brake cannot be released
manually.
When the parking brake is blocked, do not tow
with the front axle lifted or the vehicle can be
damaged.
Contact your service center.◀
Gearshift lever in neutral position.
Towing Follow the towing instructions
Follow all towing instructions; otherwise,
vehicle damage or accidents may occur.◀
▷Make sure that the ignition is switched on;
otherwise, the low beams, tail lamps, turn
signals, and windshield wipers may be un‐
available.▷Do not tow the vehicle with the rear axle
tilted, as the front wheels could turn.▷When the engine is stopped, there is no
power assist. Consequently, more force
needs to be applied when braking and steer‐
ing.▷Larger steering wheel movements are re‐
quired.
Tow truck
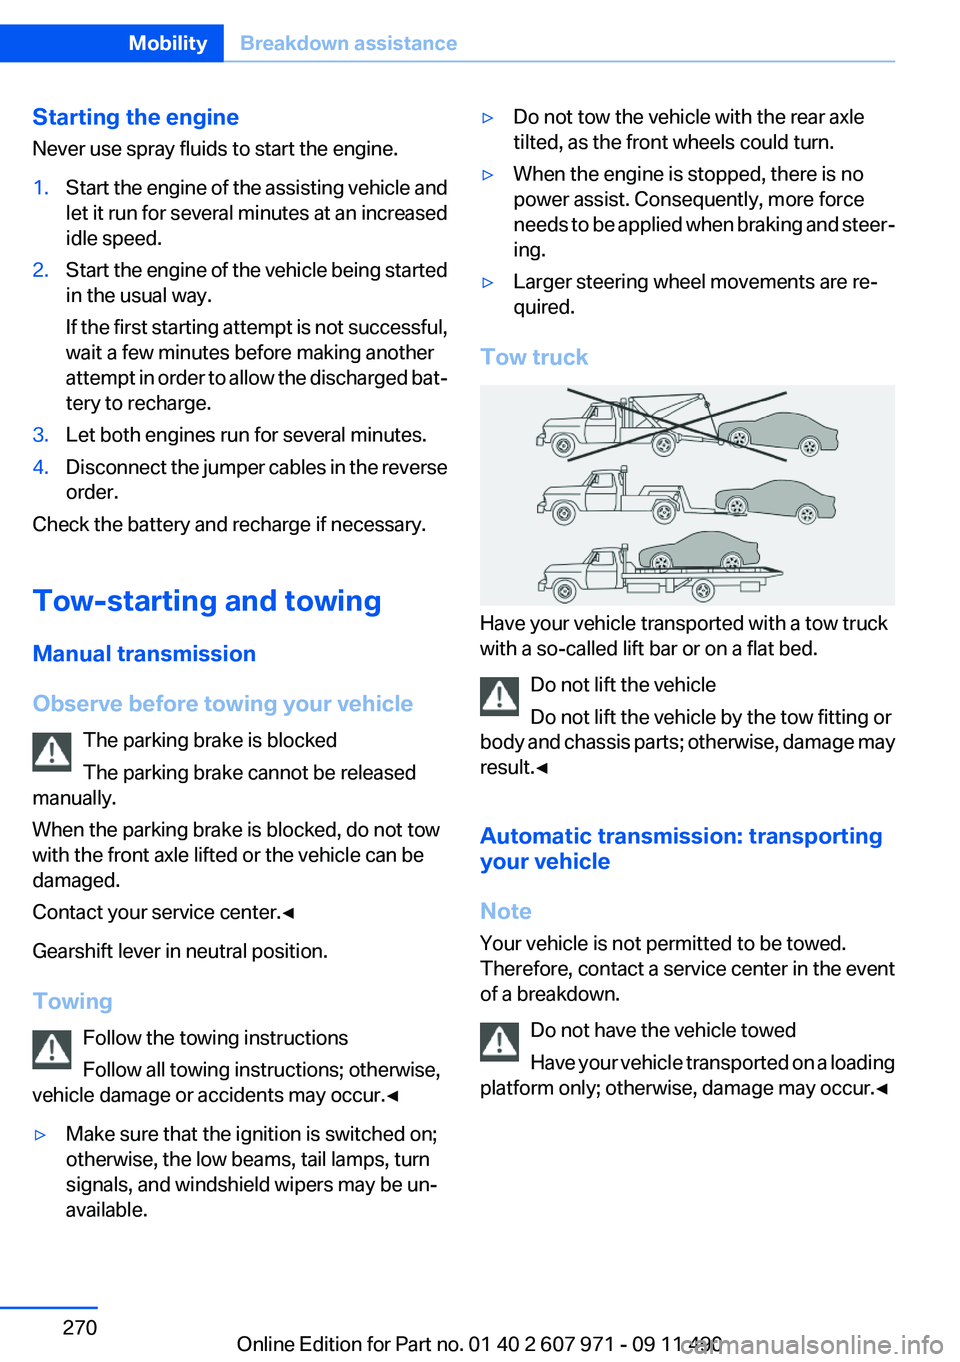
Have your vehicle transported with a tow truck
with a so-called lift bar or on a flat bed.
Do not lift the vehicle
Do not lift the vehicle by the tow fitting or
body and chassis parts; otherwise, damage may
result.◀
Automatic transmission: transporting
your vehicle
Note
Your vehicle is not permitted to be towed.
Therefore, contact a service center in the event
of a breakdown.
Do not have the vehicle towed
Have your vehicle transported on a loading
platform only; otherwise, damage may occur.◀
Seite 270MobilityBreakdown assistance270
Online Edition for Part no. 01 40 2 607 971 - 09 11 490
Page 272 of 303
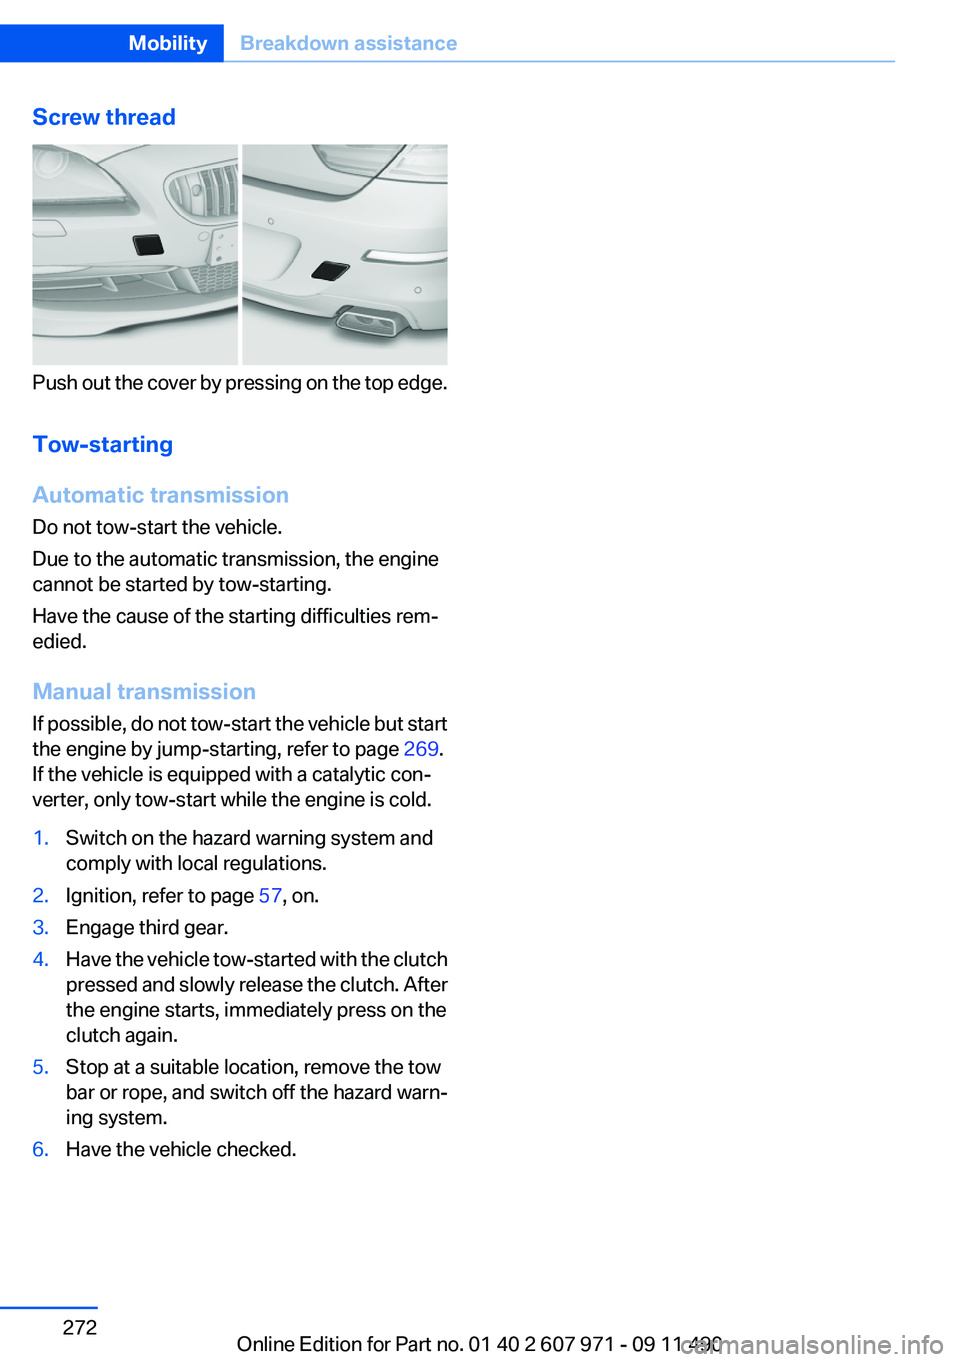
Screw thread
Push out the cover by pressing on the top edge.
Tow-starting
Automatic transmission
Do not tow-start the vehicle.
Due to the automatic transmission, the engine
cannot be started by tow-starting.
Have the cause of the starting difficulties rem‐
edied.
Manual transmission
If possible, do not tow-start the vehicle but start
the engine by jump-starting, refer to page 269.
If the vehicle is equipped with a catalytic con‐
verter, only tow-start while the engine is cold.
1.Switch on the hazard warning system and
comply with local regulations.2.Ignition, refer to page 57, on.3.Engage third gear.4.Have the vehicle tow-started with the clutch
pressed and slowly release the clutch. After
the engine starts, immediately press on the
clutch again.5.Stop at a suitable location, remove the tow
bar or rope, and switch off the hazard warn‐
ing system.6.Have the vehicle checked.Seite 272MobilityBreakdown assistance272
Online Edition for Part no. 01 40 2 607 971 - 09 11 490
Page 274 of 303
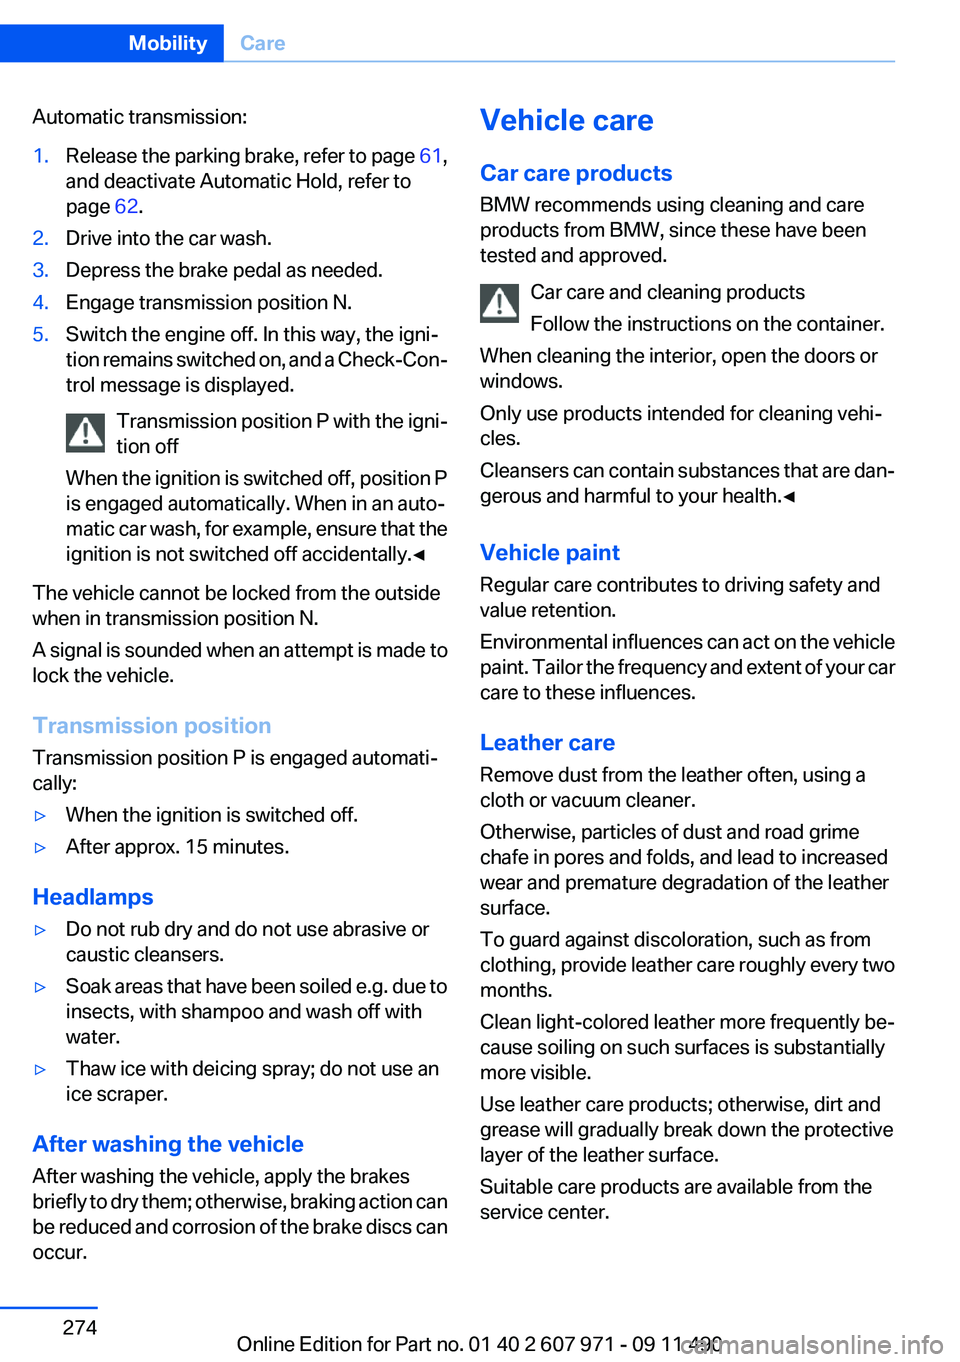
Automatic transmission:1.Release the parking brake, refer to page 61,
and deactivate Automatic Hold, refer to
page 62.2.Drive into the car wash.3.Depress the brake pedal as needed.4.Engage transmission position N.5.Switch the engine off. In this way, the igni‐
tion remains switched on, and a Check-Con‐
trol message is displayed.
Transmission position P with the igni‐
tion off
When the ignition is switched off, position P
is engaged automatically. When in an auto‐
matic car wash, for example, ensure that the
ignition is not switched off accidentally.◀
The vehicle cannot be locked from the outside
when in transmission position N.
A signal is sounded when an attempt is made to
lock the vehicle.
Transmission position
Transmission position P is engaged automati‐
cally:
▷When the ignition is switched off.▷After approx. 15 minutes.
Headlamps
▷Do not rub dry and do not use abrasive or
caustic cleansers.▷Soak areas that have been soiled e.g. due to
insects, with shampoo and wash off with
water.▷Thaw ice with deicing spray; do not use an
ice scraper.
After washing the vehicle
After washing the vehicle, apply the brakes
briefly to dry them; otherwise, braking action can
be reduced and corrosion of the brake discs can
occur.
Vehicle care
Car care products
BMW recommends using cleaning and care
products from BMW, since these have been
tested and approved.
Car care and cleaning products
Follow the instructions on the container.
When cleaning the interior, open the doors or
windows.
Only use products intended for cleaning vehi‐
cles.
Cleansers can contain substances that are dan‐
gerous and harmful to your health.◀
Vehicle paint
Regular care contributes to driving safety and
value retention.
Environmental influences can act on the vehicle
paint. Tailor the frequency and extent of your car
care to these influences.
Leather care
Remove dust from the leather often, using a
cloth or vacuum cleaner.
Otherwise, particles of dust and road grime
chafe in pores and folds, and lead to increased
wear and premature degradation of the leather
surface.
To guard against discoloration, such as from
clothing, provide leather care roughly every two
months.
Clean light-colored leather more frequently be‐
cause soiling on such surfaces is substantially
more visible.
Use leather care products; otherwise, dirt and
grease will gradually break down the protective
layer of the leather surface.
Suitable care products are available from the
service center.Seite 274MobilityCare274
Online Edition for Part no. 01 40 2 607 971 - 09 11 490
Page 295 of 303
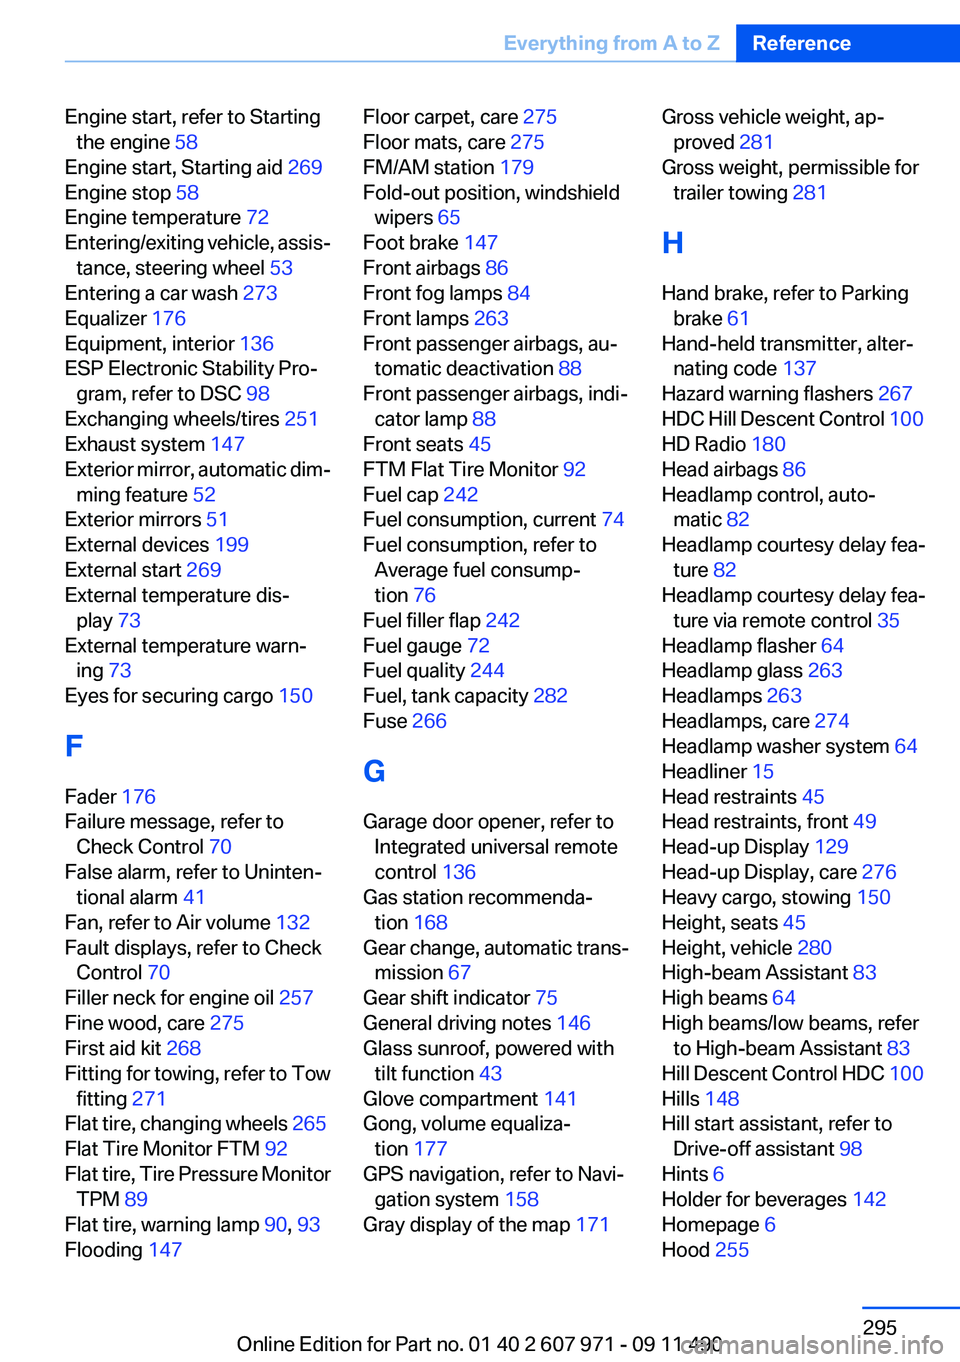
Engine start, refer to Startingthe engine 58
Engine start, Starting aid 269
Engine stop 58
Engine temperature 72
Entering/exiting vehicle, assis‐ tance, steering wheel 53
Entering a car wash 273
Equalizer 176
Equipment, interior 136
ESP Electronic Stability Pro‐ gram, refer to DSC 98
Exchanging wheels/tires 251
Exhaust system 147
Exterior mirror, automatic dim‐ ming feature 52
Exterior mirrors 51
External devices 199
External start 269
External temperature dis‐ play 73
External temperature warn‐ ing 73
Eyes for securing cargo 150
F
Fader 176
Failure message, refer to Check Control 70
False alarm, refer to Uninten‐ tional alarm 41
Fan, refer to Air volume 132
Fault displays, refer to Check Control 70
Filler neck for engine oil 257
Fine wood, care 275
First aid kit 268
Fitting for towing, refer to Tow fitting 271
Flat tire, changing wheels 265
Flat Tire Monitor FTM 92
Flat tire, Tire Pressure Monitor TPM 89
Flat tire, warning lamp 90, 93
Flooding 147 Floor carpet, care 275
Floor mats, care 275
FM/AM station 179
Fold-out position, windshield wipers 65
Foot brake 147
Front airbags 86
Front fog lamps 84
Front lamps 263
Front passenger airbags, au‐ tomatic deactivation 88
Front passenger airbags, indi‐ cator lamp 88
Front seats 45
FTM Flat Tire Monitor 92
Fuel cap 242
Fuel consumption, current 74
Fuel consumption, refer to Average fuel consump‐
tion 76
Fuel filler flap 242
Fuel gauge 72
Fuel quality 244
Fuel, tank capacity 282
Fuse 266
G
Garage door opener, refer to Integrated universal remote
control 136
Gas station recommenda‐ tion 168
Gear change, automatic trans‐ mission 67
Gear shift indicator 75
General driving notes 146
Glass sunroof, powered with tilt function 43
Glove compartment 141
Gong, volume equaliza‐ tion 177
GPS navigation, refer to Navi‐ gation system 158
Gray display of the map 171 Gross vehicle weight, ap‐
proved 281
Gross weight, permissible for trailer towing 281
H
Hand brake, refer to Parking brake 61
Hand-held transmitter, alter‐ nating code 137
Hazard warning flashers 267
HDC Hill Descent Control 100
HD Radio 180
Head airbags 86
Headlamp control, auto‐ matic 82
Headlamp courtesy delay fea‐ ture 82
Headlamp courtesy delay fea‐ ture via remote control 35
Headlamp flasher 64
Headlamp glass 263
Headlamps 263
Headlamps, care 274
Headlamp washer system 64
Headliner 15
Head restraints 45
Head restraints, front 49
Head-up Display 129
Head-up Display, care 276
Heavy cargo, stowing 150
Height, seats 45
Height, vehicle 280
High-beam Assistant 83
High beams 64
High beams/low beams, refer to High-beam Assistant 83
Hill Descent Control HDC 100
Hills 148
Hill start assistant, refer to Drive-off assistant 98
Hints 6
Holder for beverages 142
Homepage 6
Hood 255 Seite 295Everything from A to ZReference295
Online Edition for Part no. 01 40 2 607 971 - 09 11 490
Page 297 of 303
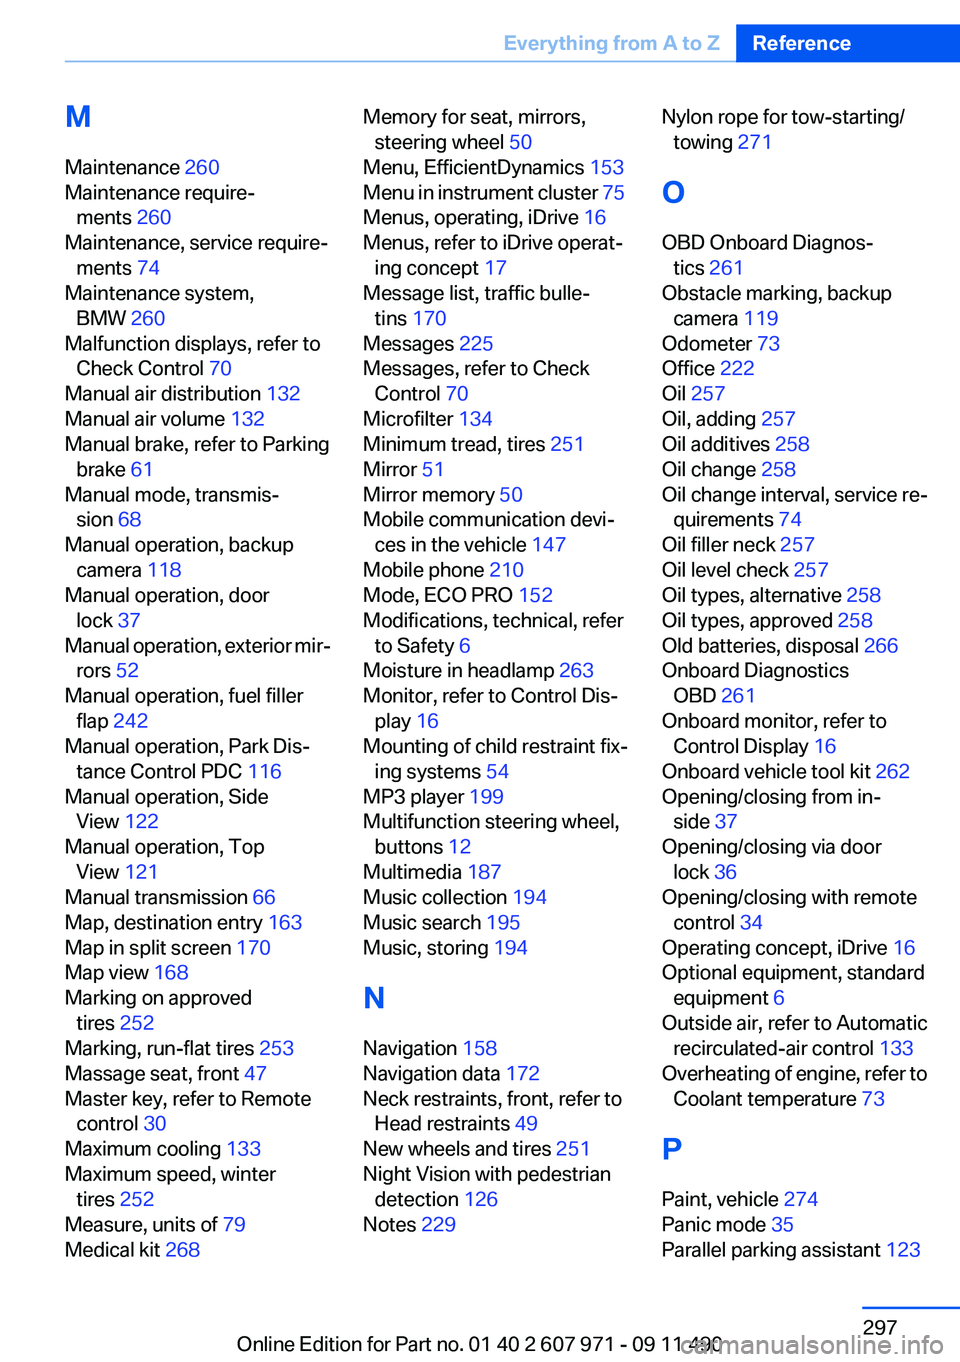
M
Maintenance 260
Maintenance require‐ ments 260
Maintenance, service require‐ ments 74
Maintenance system, BMW 260
Malfunction displays, refer to Check Control 70
Manual air distribution 132
Manual air volume 132
Manual brake, refer to Parking brake 61
Manual mode, transmis‐ sion 68
Manual operation, backup camera 118
Manual operation, door lock 37
Manual operation, exterior mir‐ rors 52
Manual operation, fuel filler flap 242
Manual operation, Park Dis‐ tance Control PDC 116
Manual operation, Side View 122
Manual operation, Top View 121
Manual transmission 66
Map, destination entry 163
Map in split screen 170
Map view 168
Marking on approved tires 252
Marking, run-flat tires 253
Massage seat, front 47
Master key, refer to Remote control 30
Maximum cooling 133
Maximum speed, winter tires 252
Measure, units of 79
Medical kit 268 Memory for seat, mirrors,
steering wheel 50
Menu, EfficientDynamics 153
Menu in instrument cluster 75
Menus, operating, iDrive 16
Menus, refer to iDrive operat‐ ing concept 17
Message list, traffic bulle‐ tins 170
Messages 225
Messages, refer to Check Control 70
Microfilter 134
Minimum tread, tires 251
Mirror 51
Mirror memory 50
Mobile communication devi‐ ces in the vehicle 147
Mobile phone 210
Mode, ECO PRO 152
Modifications, technical, refer to Safety 6
Moisture in headlamp 263
Monitor, refer to Control Dis‐ play 16
Mounting of child restraint fix‐ ing systems 54
MP3 player 199
Multifunction steering wheel, buttons 12
Multimedia 187
Music collection 194
Music search 195
Music, storing 194
N
Navigation 158
Navigation data 172
Neck restraints, front, refer to Head restraints 49
New wheels and tires 251
Night Vision with pedestrian detection 126
Notes 229 Nylon rope for tow-starting/
towing 271
O
OBD Onboard Diagnos‐ tics 261
Obstacle marking, backup camera 119
Odometer 73
Office 222
Oil 257
Oil, adding 257
Oil additives 258
Oil change 258
Oil change interval, service re‐ quirements 74
Oil filler neck 257
Oil level check 257
Oil types, alternative 258
Oil types, approved 258
Old batteries, disposal 266
Onboard Diagnostics OBD 261
Onboard monitor, refer to Control Display 16
Onboard vehicle tool kit 262
Opening/closing from in‐ side 37
Opening/closing via door lock 36
Opening/closing with remote control 34
Operating concept, iDrive 16
Optional equipment, standard equipment 6
Outside air, refer to Automatic recirculated-air control 133
Overheating of engine, refer to Coolant temperature 73
P
Paint, vehicle 274
Panic mode 35
Parallel parking assistant 123 Seite 297Everything from A to ZReference297
Online Edition for Part no. 01 40 2 607 971 - 09 11 490