2012 BMW 640I COUPE low beam
[x] Cancel search: low beamPage 127 of 303
Heat image
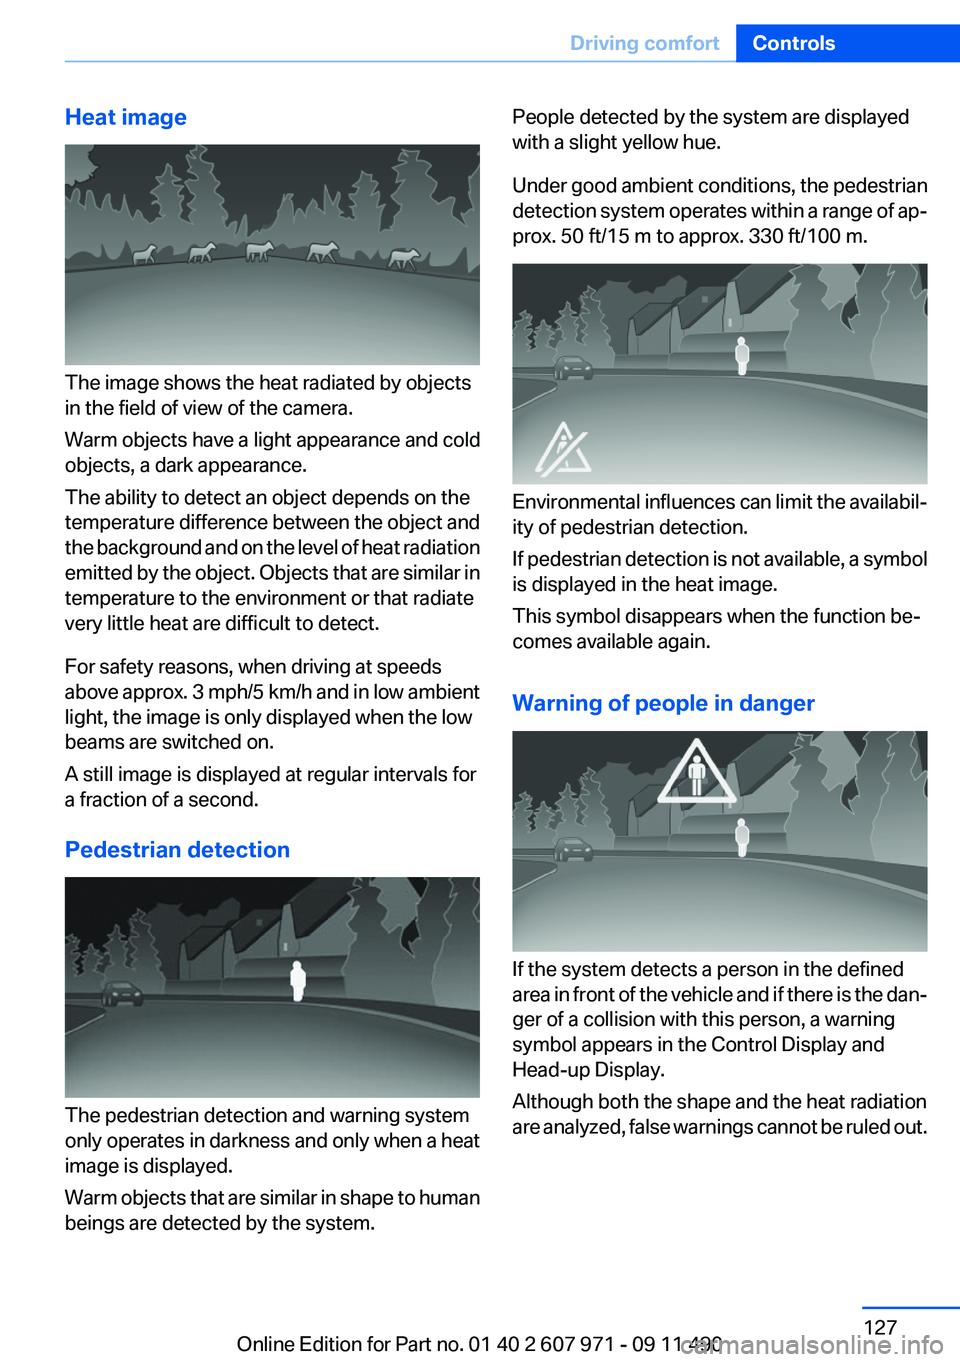
The image shows the heat radiated by objects
in the field of view of the camera.
Warm objects have a light appearance and cold
objects, a dark appearance.
The ability to detect an object depends on the
temperature difference between the object and
the background and on the level of heat radiation
emitted by the object. Objects that are similar in
temperature to the environment or that radiate
very little heat are difficult to detect.
For safety reasons, when driving at speeds
above approx. 3 mph/5 km/h and in low ambient
light, the image is only displayed when the low
beams are switched on.
A still image is displayed at regular intervals for
a fraction of a second.
Pedestrian detection
The pedestrian detection and warning system
only operates in darkness and only when a heat
image is displayed.
Warm objects that are similar in shape to human
beings are detected by the system.
People detected by the system are displayed
with a slight yellow hue.
Under good ambient conditions, the pedestrian
detection system operates within a range of ap‐
prox. 50 ft/15 m to approx. 330 ft/100 m.
Environmental influences can limit the availabil‐
ity of pedestrian detection.
If pedestrian detection is not available, a symbol
is displayed in the heat image.
This symbol disappears when the function be‐
comes available again.
Warning of people in danger
If the system detects a person in the defined
area in front of the vehicle and if there is the dan‐
ger of a collision with this person, a warning
symbol appears in the Control Display and
Head-up Display.
Although both the shape and the heat radiation
are analyzed, false warnings cannot be ruled out.
Seite 127Driving comfortControls127
Online Edition for Part no. 01 40 2 607 971 - 09 11 490
Page 130 of 303
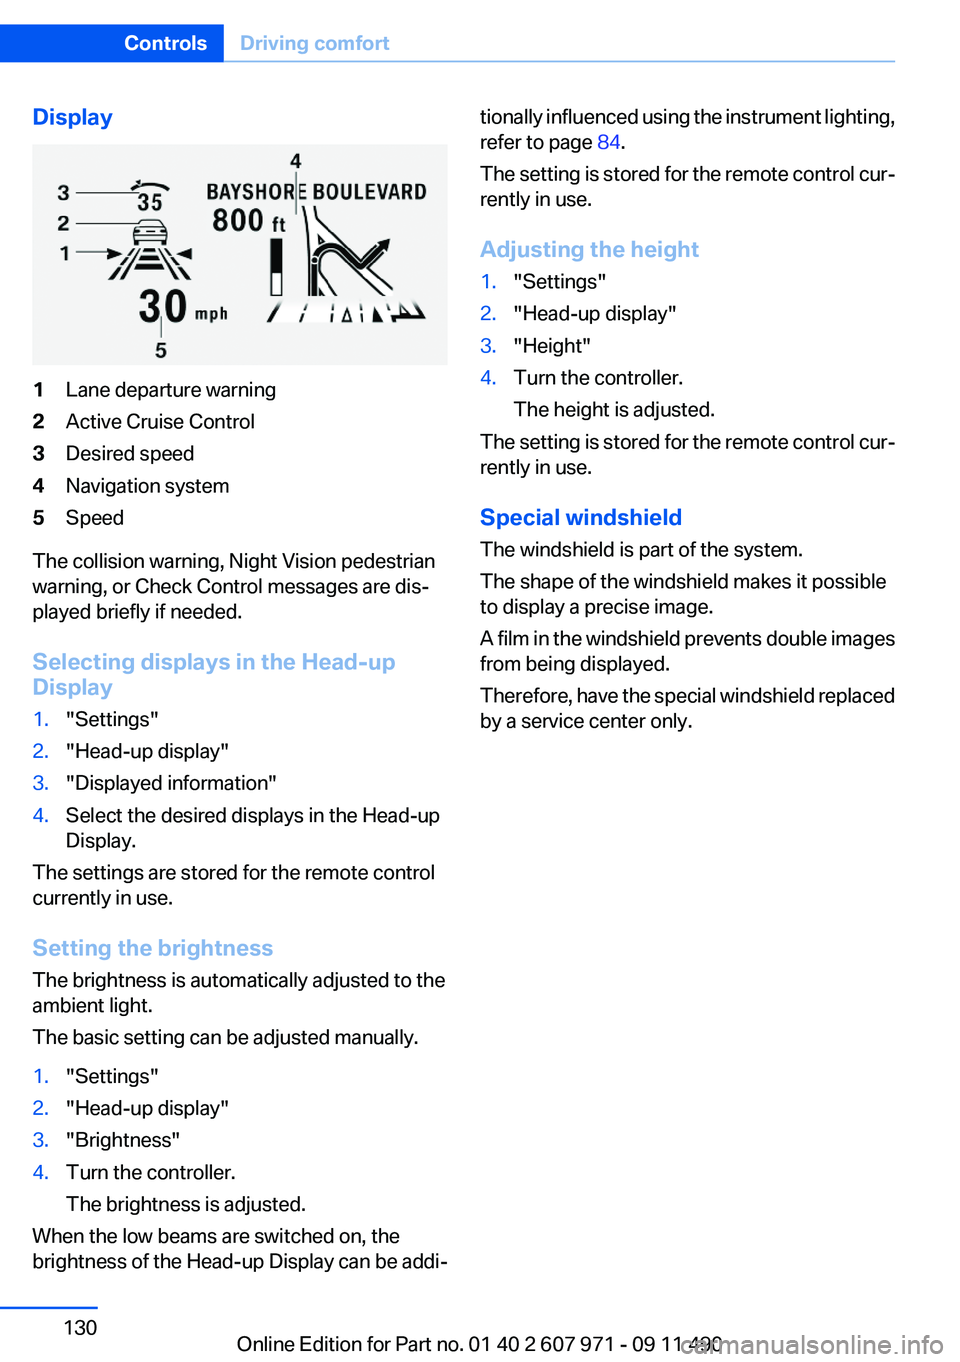
Display1Lane departure warning2Active Cruise Control3Desired speed4Navigation system5Speed
The collision warning, Night Vision pedestrian
warning, or Check Control messages are dis‐
played briefly if needed.
Selecting displays in the Head-up
Display
1."Settings"2."Head-up display"3."Displayed information"4.Select the desired displays in the Head-up
Display.
The settings are stored for the remote control
currently in use.
Setting the brightness
The brightness is automatically adjusted to the
ambient light.
The basic setting can be adjusted manually.
1."Settings"2."Head-up display"3."Brightness"4.Turn the controller.
The brightness is adjusted.
When the low beams are switched on, the
brightness of the Head-up Display can be addi‐
tionally influenced using the instrument lighting,
refer to page 84.
The setting is stored for the remote control cur‐
rently in use.
Adjusting the height1."Settings"2."Head-up display"3."Height"4.Turn the controller.
The height is adjusted.
The setting is stored for the remote control cur‐
rently in use.
Special windshield
The windshield is part of the system.
The shape of the windshield makes it possible
to display a precise image.
A film in the windshield prevents double images
from being displayed.
Therefore, have the special windshield replaced
by a service center only.
Seite 130ControlsDriving comfort130
Online Edition for Part no. 01 40 2 607 971 - 09 11 490
Page 263 of 303
Danger of burns
Only change bulbs when they are cool;
otherwise, there is the danger of getting
burned.◀
Working on the lighting system
When working on the lighting system, you
should always switch off the lights affected to
prevent short circuits.
To avoid possible injury or equipment damage
when replacing bulbs, observe any instructions
provided by the bulb manufacturer.◀
Do not perform work/bulb replacement on
xenon headlamps
Have any work on the xenon lighting system, in‐
cluding bulb replacement, performed only by a
service center. Due to the high voltage present
in the system, there is the danger of fatal injuries
if work is carried out improperly.◀
Do not touch the bulbs
Do not touch the glass of new bulbs with
your bare hands, as even minute amounts of
contamination will burn into the bulb's surface
and reduce its service life.
Use a clean tissue, cloth or something similar, or
hold the bulb by its base.◀
Light-emitting diodes (LEDs)
Light-emitting diodes installed behind a cover
serve as the light source for controls, display el‐
ements and other equipment.
These light-emitting diodes, which are related
to conventional lasers, are officially designated
as Class 1 light-emitting diodes.
Do not remove the covers
Do not remove the covers, and never stare
into the unfiltered light for several hours; other‐
wise, irritation of the retina could result.◀Headlamp glass
Condensation can form on the inside of the ex‐
ternal lamps in cool or humid weather. When
driving with the light switched on, the conden‐
sation evaporates after a short time. The head‐
lamp glasses do not need to be changed.
If the headlamps do not dim despite driving with
the light switched on, increasing humidity forms,
e. g. water droplets in the light, have the service
center check this.
Front lamps, bulb replacement
Xenon headlamps
Because of the long life of these bulbs, the like‐
lihood of failure is very low. Switching the lamps
on and off frequently shortens their life.
If a bulb fails, switch on the front fog lamps and
continue the trip with great care. Comply with
local regulations.
Do not perform work/bulb replacement on
xenon headlamps
Have any work on the xenon lighting system, in‐
cluding bulb replacement, performed only by a
service center. Due to the high voltage present
in the system, there is the danger of fatal injuries
if work is carried out improperly.◀
Low beams and high beams are designed with
xenon technology.
For checking and adjusting headlamp aim,
please contact your BMW center.
LED headlamps, Light-emitting diodes
(LEDs) or light modules
With Xenon-headlamps, the following lamps are
designed with LED technology or as a light mod‐
ule:▷Parking lamps and roadside parking lamps▷Turn signal lamps▷Front fog lamps▷Daytime running lightsSeite 263Replacing componentsMobility263
Online Edition for Part no. 01 40 2 607 971 - 09 11 490
Page 270 of 303
Starting the engine
Never use spray fluids to start the engine.1.Start the engine of the assisting vehicle and
let it run for several minutes at an increased
idle speed.2.Start the engine of the vehicle being started
in the usual way.
If the first starting attempt is not successful,
wait a few minutes before making another
attempt in order to allow the discharged bat‐
tery to recharge.3.Let both engines run for several minutes.4.Disconnect the jumper cables in the reverse
order.
Check the battery and recharge if necessary.
Tow-starting and towing
Manual transmission
Observe before towing your vehicle The parking brake is blocked
The parking brake cannot be released
manually.
When the parking brake is blocked, do not tow
with the front axle lifted or the vehicle can be
damaged.
Contact your service center.◀
Gearshift lever in neutral position.
Towing Follow the towing instructions
Follow all towing instructions; otherwise,
vehicle damage or accidents may occur.◀
▷Make sure that the ignition is switched on;
otherwise, the low beams, tail lamps, turn
signals, and windshield wipers may be un‐
available.▷Do not tow the vehicle with the rear axle
tilted, as the front wheels could turn.▷When the engine is stopped, there is no
power assist. Consequently, more force
needs to be applied when braking and steer‐
ing.▷Larger steering wheel movements are re‐
quired.
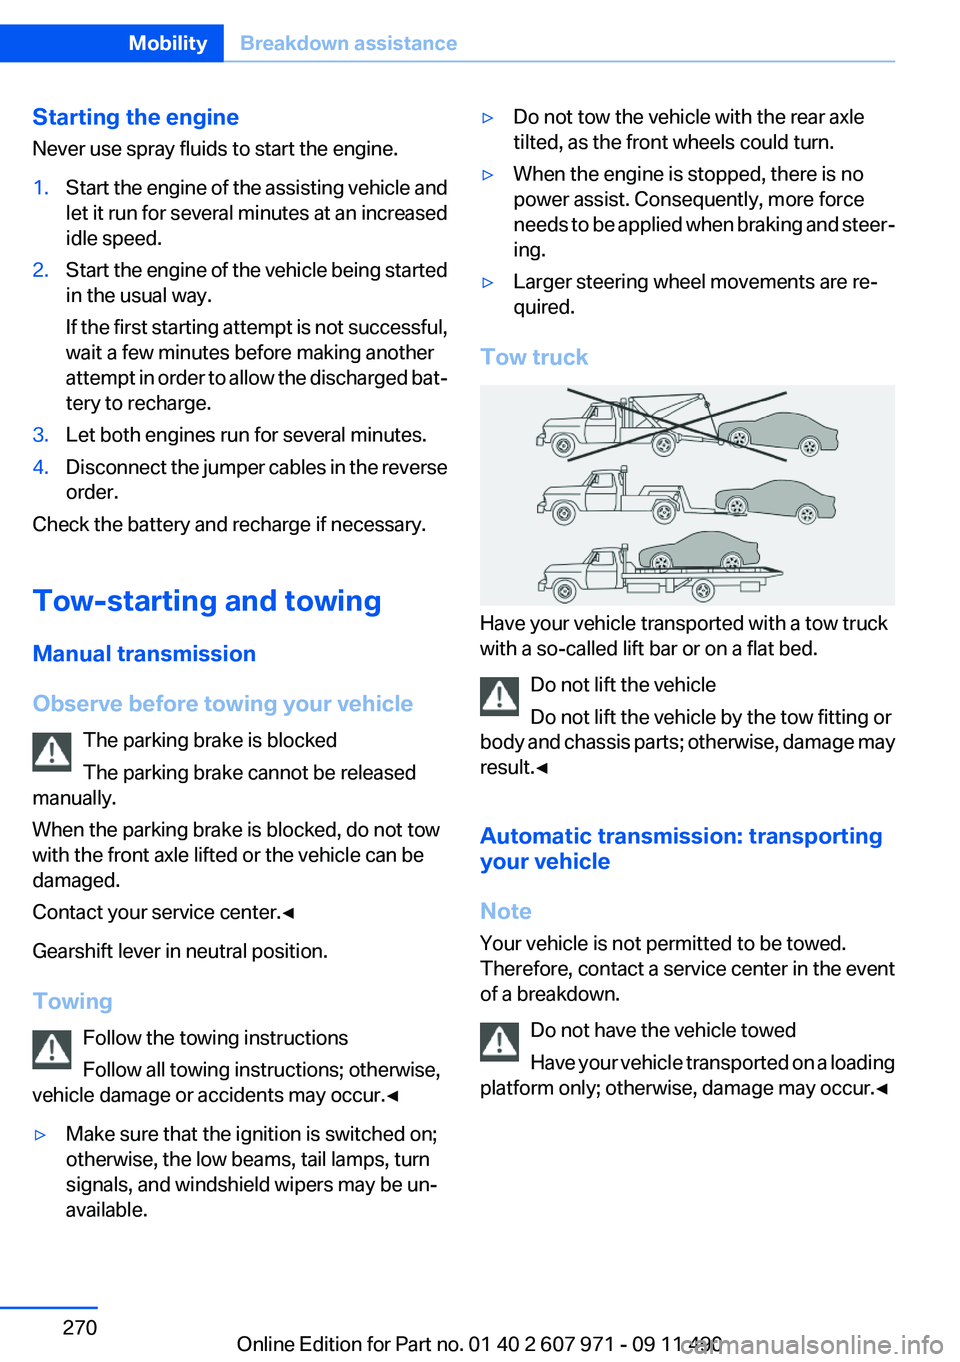
Tow truck
Have your vehicle transported with a tow truck
with a so-called lift bar or on a flat bed.
Do not lift the vehicle
Do not lift the vehicle by the tow fitting or
body and chassis parts; otherwise, damage may
result.◀
Automatic transmission: transporting
your vehicle
Note
Your vehicle is not permitted to be towed.
Therefore, contact a service center in the event
of a breakdown.
Do not have the vehicle towed
Have your vehicle transported on a loading
platform only; otherwise, damage may occur.◀
Seite 270MobilityBreakdown assistance270
Online Edition for Part no. 01 40 2 607 971 - 09 11 490
Page 295 of 303
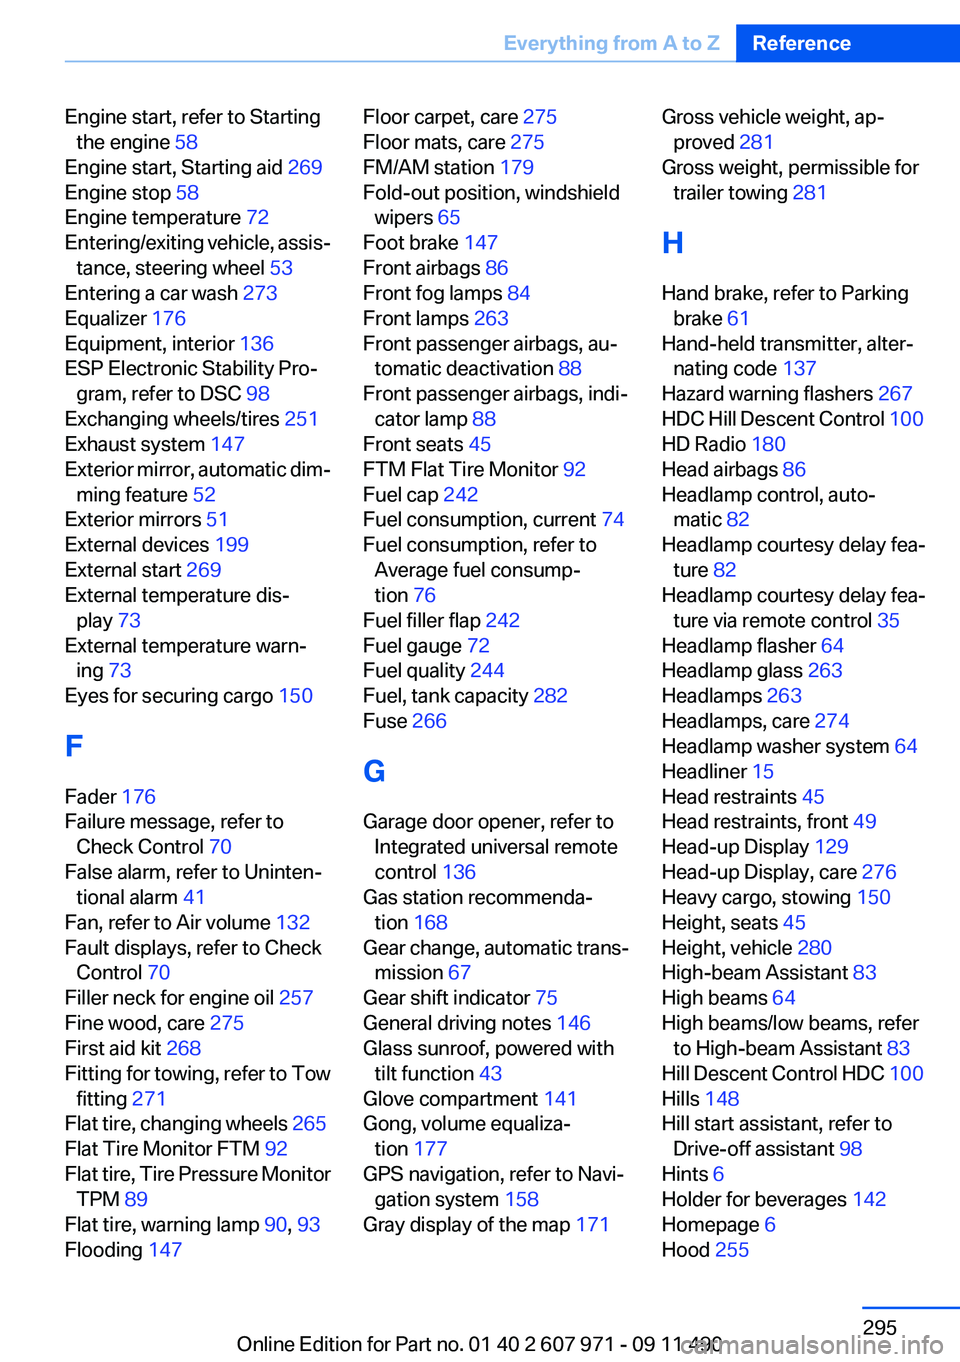
Engine start, refer to Startingthe engine 58
Engine start, Starting aid 269
Engine stop 58
Engine temperature 72
Entering/exiting vehicle, assis‐ tance, steering wheel 53
Entering a car wash 273
Equalizer 176
Equipment, interior 136
ESP Electronic Stability Pro‐ gram, refer to DSC 98
Exchanging wheels/tires 251
Exhaust system 147
Exterior mirror, automatic dim‐ ming feature 52
Exterior mirrors 51
External devices 199
External start 269
External temperature dis‐ play 73
External temperature warn‐ ing 73
Eyes for securing cargo 150
F
Fader 176
Failure message, refer to Check Control 70
False alarm, refer to Uninten‐ tional alarm 41
Fan, refer to Air volume 132
Fault displays, refer to Check Control 70
Filler neck for engine oil 257
Fine wood, care 275
First aid kit 268
Fitting for towing, refer to Tow fitting 271
Flat tire, changing wheels 265
Flat Tire Monitor FTM 92
Flat tire, Tire Pressure Monitor TPM 89
Flat tire, warning lamp 90, 93
Flooding 147 Floor carpet, care 275
Floor mats, care 275
FM/AM station 179
Fold-out position, windshield wipers 65
Foot brake 147
Front airbags 86
Front fog lamps 84
Front lamps 263
Front passenger airbags, au‐ tomatic deactivation 88
Front passenger airbags, indi‐ cator lamp 88
Front seats 45
FTM Flat Tire Monitor 92
Fuel cap 242
Fuel consumption, current 74
Fuel consumption, refer to Average fuel consump‐
tion 76
Fuel filler flap 242
Fuel gauge 72
Fuel quality 244
Fuel, tank capacity 282
Fuse 266
G
Garage door opener, refer to Integrated universal remote
control 136
Gas station recommenda‐ tion 168
Gear change, automatic trans‐ mission 67
Gear shift indicator 75
General driving notes 146
Glass sunroof, powered with tilt function 43
Glove compartment 141
Gong, volume equaliza‐ tion 177
GPS navigation, refer to Navi‐ gation system 158
Gray display of the map 171 Gross vehicle weight, ap‐
proved 281
Gross weight, permissible for trailer towing 281
H
Hand brake, refer to Parking brake 61
Hand-held transmitter, alter‐ nating code 137
Hazard warning flashers 267
HDC Hill Descent Control 100
HD Radio 180
Head airbags 86
Headlamp control, auto‐ matic 82
Headlamp courtesy delay fea‐ ture 82
Headlamp courtesy delay fea‐ ture via remote control 35
Headlamp flasher 64
Headlamp glass 263
Headlamps 263
Headlamps, care 274
Headlamp washer system 64
Headliner 15
Head restraints 45
Head restraints, front 49
Head-up Display 129
Head-up Display, care 276
Heavy cargo, stowing 150
Height, seats 45
Height, vehicle 280
High-beam Assistant 83
High beams 64
High beams/low beams, refer to High-beam Assistant 83
Hill Descent Control HDC 100
Hills 148
Hill start assistant, refer to Drive-off assistant 98
Hints 6
Holder for beverages 142
Homepage 6
Hood 255 Seite 295Everything from A to ZReference295
Online Edition for Part no. 01 40 2 607 971 - 09 11 490
Page 296 of 303
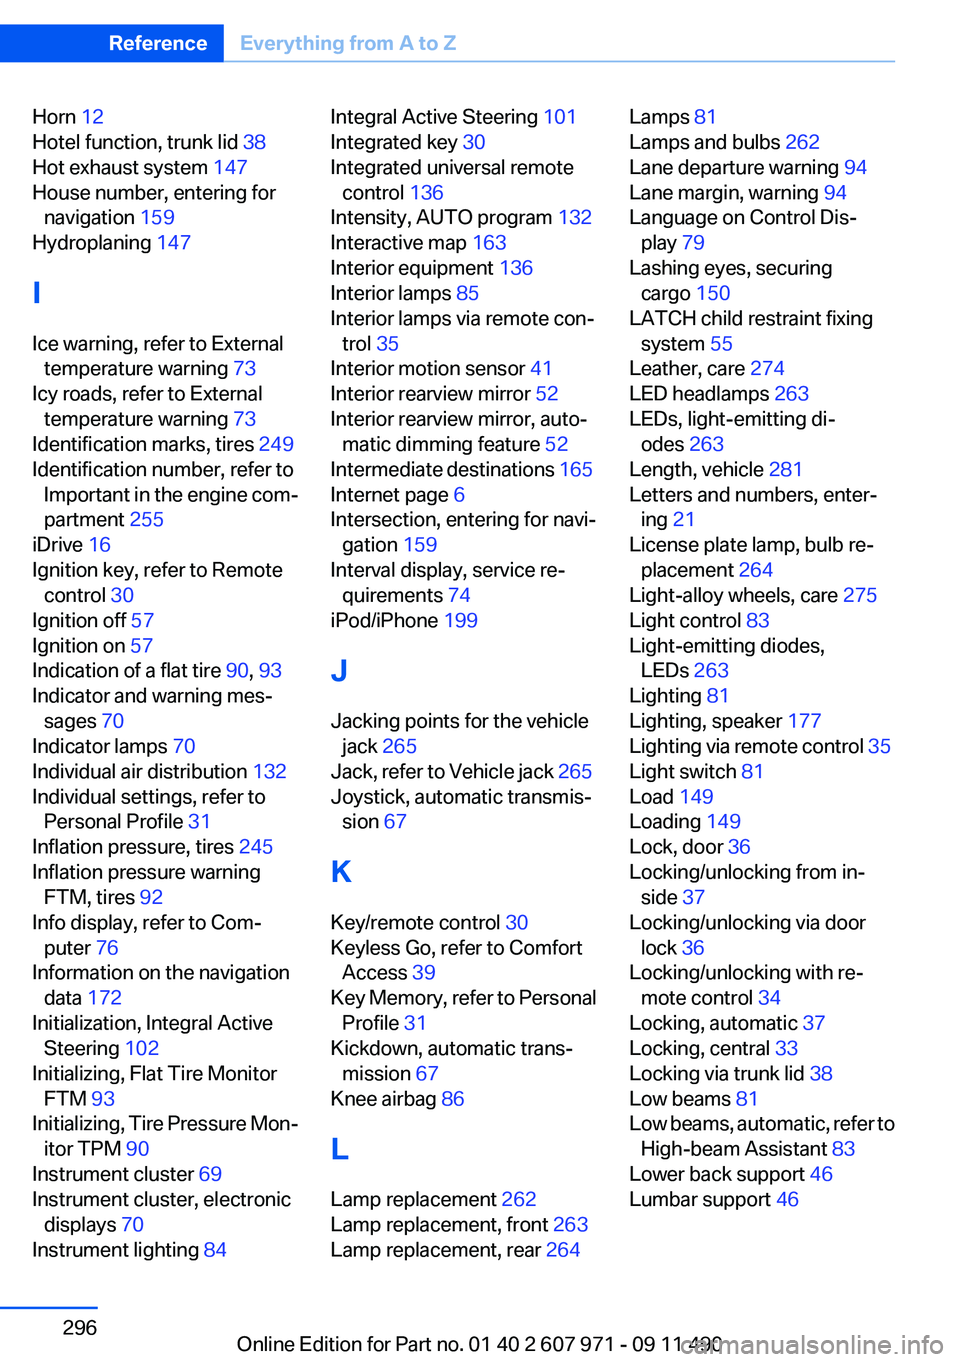
Horn 12
Hotel function, trunk lid 38
Hot exhaust system 147
House number, entering for navigation 159
Hydroplaning 147
I
Ice warning, refer to External temperature warning 73
Icy roads, refer to External temperature warning 73
Identification marks, tires 249
Identification number, refer to Important in the engine com‐
partment 255
iDrive 16
Ignition key, refer to Remote control 30
Ignition off 57
Ignition on 57
Indication of a flat tire 90, 93
Indicator and warning mes‐ sages 70
Indicator lamps 70
Individual air distribution 132
Individual settings, refer to Personal Profile 31
Inflation pressure, tires 245
Inflation pressure warning FTM, tires 92
Info display, refer to Com‐ puter 76
Information on the navigation data 172
Initialization, Integral Active Steering 102
Initializing, Flat Tire Monitor FTM 93
Initializing, Tire Pressure Mon‐ itor TPM 90
Instrument cluster 69
Instrument cluster, electronic displays 70
Instrument lighting 84 Integral Active Steering 101
Integrated key 30
Integrated universal remote control 136
Intensity, AUTO program 132
Interactive map 163
Interior equipment 136
Interior lamps 85
Interior lamps via remote con‐ trol 35
Interior motion sensor 41
Interior rearview mirror 52
Interior rearview mirror, auto‐ matic dimming feature 52
Intermediate destinations 165
Internet page 6
Intersection, entering for navi‐ gation 159
Interval display, service re‐ quirements 74
iPod/iPhone 199
J
Jacking points for the vehicle jack 265
Jack, refer to Vehicle jack 265
Joystick, automatic transmis‐ sion 67
K
Key/remote control 30
Keyless Go, refer to Comfort Access 39
Key Memory, refer to Personal Profile 31
Kickdown, automatic trans‐ mission 67
Knee airbag 86
L
Lamp replacement 262
Lamp replacement, front 263
Lamp replacement, rear 264 Lamps 81
Lamps and bulbs 262
Lane departure warning 94
Lane margin, warning 94
Language on Control Dis‐ play 79
Lashing eyes, securing cargo 150
LATCH child restraint fixing system 55
Leather, care 274
LED headlamps 263
LEDs, light-emitting di‐ odes 263
Length, vehicle 281
Letters and numbers, enter‐ ing 21
License plate lamp, bulb re‐ placement 264
Light-alloy wheels, care 275
Light control 83
Light-emitting diodes, LEDs 263
Lighting 81
Lighting, speaker 177
Lighting via remote control 35
Light switch 81
Load 149
Loading 149
Lock, door 36
Locking/unlocking from in‐ side 37
Locking/unlocking via door lock 36
Locking/unlocking with re‐ mote control 34
Locking, automatic 37
Locking, central 33
Locking via trunk lid 38
Low beams 81
Low beams, automatic, refer to High-beam Assistant 83
Lower back support 46
Lumbar support 46 Seite 296ReferenceEverything from A to Z296
Online Edition for Part no. 01 40 2 607 971 - 09 11 490