2012 BMW 640I CONVERTIBLE remote control
[x] Cancel search: remote controlPage 121 of 282
Clean the lens, refer to page
257.
Head-up Display *
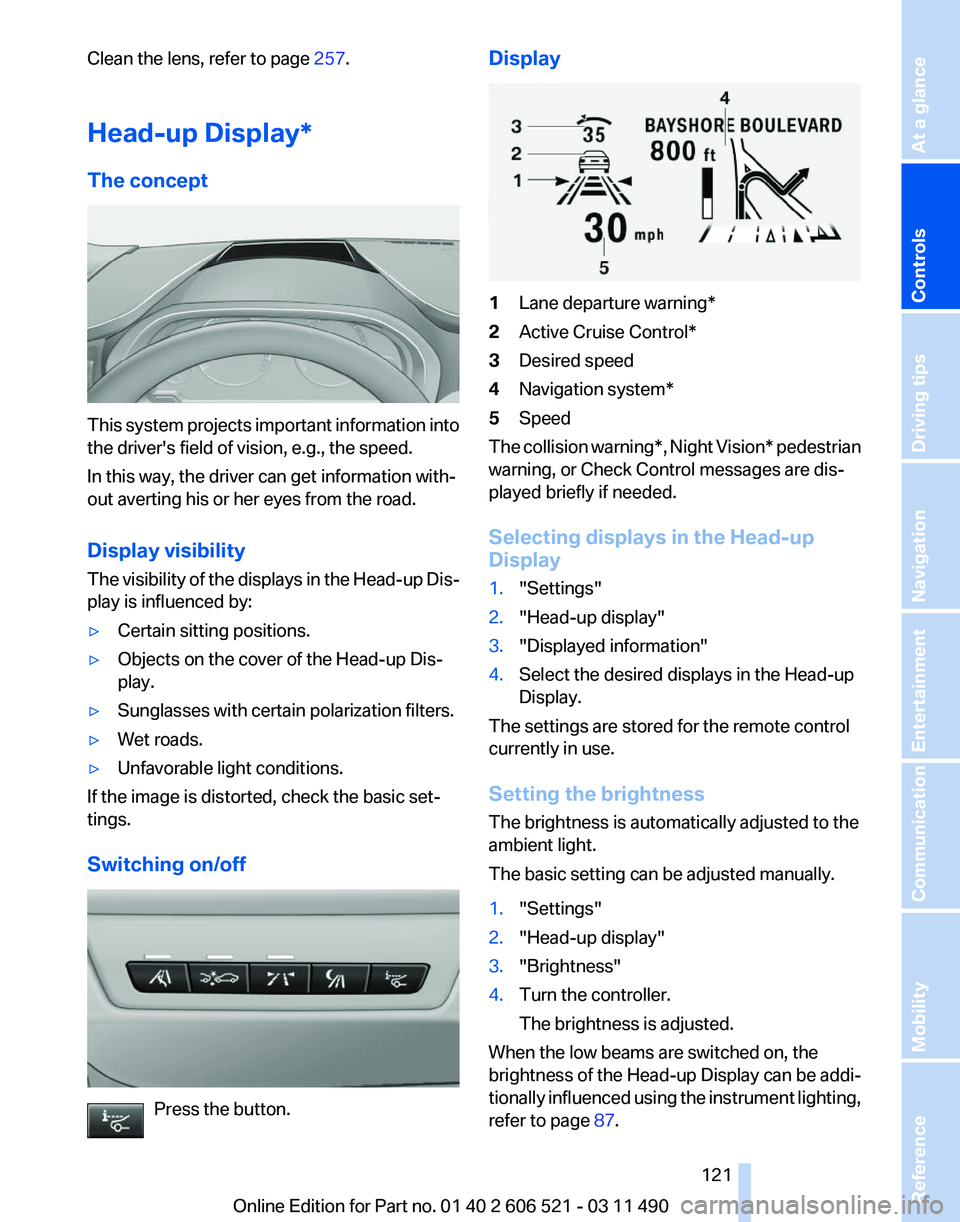
The concept This system projects important information into
the driver's field of vision, e.g., the speed.
In this way, the driver can get information with‐
out averting his or her eyes from the road.
Display visibility
The
visibility of the displays in the Head-up Dis‐
play is influenced by:
▷ Certain sitting positions.
▷ Objects on the cover of the Head-up Dis‐
play.
▷ Sunglasses with certain polarization filters.
▷ Wet roads.
▷ Unfavorable light conditions.
If the image is distorted, check the basic set‐
tings.
Switching on/off Press the button. Display
1
Lane departure warning*
2 Active Cruise Control*
3 Desired speed
4 Navigation system*
5 Speed
The collision warning*, Night Vision* pedestrian
warning, or Check Control messages are dis‐
played briefly if needed.
Selecting displays in the Head-up
Display
1. "Settings"
2. "Head-up display"
3. "Displayed information"
4. Select the desired displays in the Head-up
Display.
The settings are stored for the remote control
currently in use.
Setting the brightness
The brightness is automatically adjusted to the
ambient light.
The basic setting can be adjusted manually.
1. "Settings"
2. "Head-up display"
3. "Brightness"
4. Turn the controller.
The brightness is adjusted.
When the low beams are switched on, the
brightness
of the Head-up Display can be addi‐
tionally influenced using the instrument lighting,
refer to page 87.
Seite 121
121Online Edition for Part no. 01 40 2 606 521 - 03 11 490
Reference Mobility Communication Entertainment Navigation Driving tips
Controls At a glance
Page 122 of 282
The setting is stored for the remote control cur‐
rently in use.
Adjusting the height
1.
"Settings"
2. "Head-up display"
3. "Height"
4. Turn the controller.
The height is adjusted.
The setting is stored for the remote control cur‐
rently in use.
Special windshield
The windshield is part of the system.
The shape of the windshield makes it possible
to display a precise image.
A
film in the windshield prevents double images
from being displayed.
Therefore, have the special windshield replaced
by a service center only.
Seite 122
122 Online Edition for Part no. 01 40 2 606 521 - 03 11 490
Driving comfort
Page 128 of 282

Interior equipment
Integrated universal remote
control*
The concept
This system can replace up to three different
hand-held transmitters for various types of re‐
mote-controlled equipment, such as garage
doors or lighting systems.
The hand-held transmitter signal can be pro‐
grammed on one of the three memory buttons.
The
corresponding device can then be operated
using the programmed memory button.
The LED indicates that a signal is being trans‐
mitted.
When selling the vehicle, delete the stored pro‐
grams for security reasons.
During programming
During programming and before activat‐
ing a device using the universal remote control,
ensure that there are no people, animals, or ob‐
jects in the range of movement of the remote-
controlled device; otherwise, there is a risk of
injury or damage.
Also follow the safety instructions of the hand-
held transmitter.◀
Compatibility
If this symbol is printed on the packaging
or in the instructions of the hand-held
transmitter, the remote-controlled de‐
vice is generally compatible with the universal
remote control.
If you have any questions, please contact:
▷ Your service center.
▷ www.homelink.com on the Internet. Programming
▷
LED, arrow 1.
▷ Memory buttons, arrow 2.
Fixed-code hand-held transmitters
1. Switch on the ignition.
2. Initial setup:
Press
both outer buttons 1 and 3 for approx.
20 seconds until the LED flashes.
All programs of the three memory buttons,
arrow 2, are cleared.
3. Hold the hand-held transmitter a distance of
approx.
2 to 8 in/5 to 20 cm from the memory
buttons.
4. Simultaneously press the transmit button of
the hand-held transmitter and the memory
button of the universal remote control.
The LED flashes slowly.
5. Release both buttons when the LED flashes
rapidly.
If
the LED does not flash rapidly after approx.
15 seconds, change the distance and repeat
the step.
The device can be operated using the memory
button with the engine running or the ignition
switched on.
Malfunction
If the device cannot be used after repeated at‐
tempts at programming, please check whether
the hand-held transmitter is equipped with an
alternating code system.
Seite 128
128 Online Edition for Part no. 01 40 2 606 521 - 03 11 490
Interior equipment
Page 129 of 282
To do so:
▷
Read the instructions of the hand-held
transmitter.
▷ Press the memory button of the universal
remote control for an extended period.
If the LED flashes rapidly for a brief period and
then lights up continuously for approx. 2 sec‐
onds, the hand-held transmitter is equipped
with an alternating code system.
In this case, program the memory buttons as
described under Alternating-code hand-held
transmitters.
Alternating-code hand-held
transmitters
Please obtain information on synchronizing the
device
in the operating manual of the device be‐
ing set up.
Programming will be easier with the aid of a sec‐
ond person.
1. Park the vehicle within range of the remote-
controlled device.
2. Program the universal remote control as de‐
scribed above under Fixed-code hand-held
transmitters.
3. Press and hold the programmed button on
the
interior rearview mirror for approx. 5 sec‐
onds until the device to be adjusted is acti‐
vated.
If the device does not become activated,
press and hold the button and watch the
LED:
▷ If the LED lights up continuously, the
programming is completed. The device
should
become activated when the but‐
ton is pressed briefly.
▷ If the LED flashes for approx. 2 seconds
and then lights up continuously, con‐
tinue the programming procedure be‐
ginning with step 4.
4. Locate the button on the receiver of the de‐
vice to be set, e.g., on the drive. 5.
Press the button on the receiver of the de‐
vice
to be set. You have approx. 30 seconds
for the next step.
6. Press the programmed memory button of
the universal remote control three times.
The device can be operated when the engine is
running or the ignition is switched on.
Reassigning individual programs
1. Switch on the ignition.
2. Hold the hand-held transmitter a distance of
approx.
2 to 8 in/5 to 20 cm from the memory
buttons.
3. Press the memory button of the universal
remote control.
4. If the LED flashes slowly after approx.
20 seconds, press the transmit button on
the hand-held transmitter.
5. Release both buttons when the LED flashes
rapidly.
If
the LED does not flash rapidly after approx.
15 seconds, change the distance and repeat
the step.
Deleting all stored programs
Press the left and right memory buttons for ap‐
prox. 20 seconds until the LED flashes rapidly.
All stored programs are deleted.
The programs cannot be deleted individually.
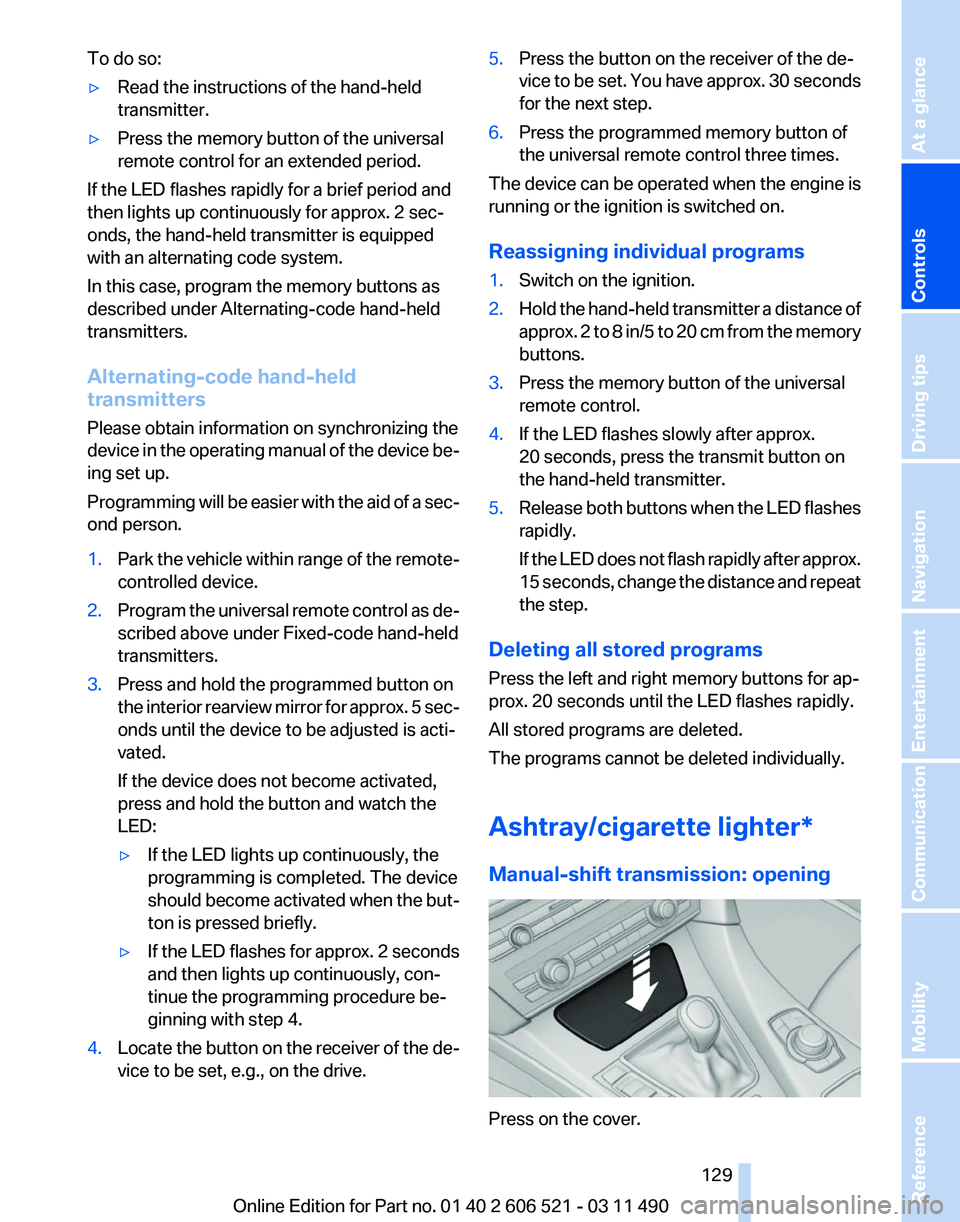
Ashtray/cigarette lighter
*
Manual-shift transmission: opening Press on the cover.
Seite 129
129Online Edition for Part no. 01 40 2 606 521 - 03 11 490
Reference Mobility Communication Entertainment Navigation Driving tips
Controls At a glance
Page 154 of 282
▷
Road types are part of the navigation data
and
are taken into consideration when plan‐
ning a route, e.g., avoid highways.
▷ The recommended route may differ from the
route
you would take based on personal ex‐
perience.
▷ The settings are stored for the remote con‐
trol currently in use.
▷ Destination guidance with traffic bulletins,
refer to page 159.
Changing the route criteria
1. "Navigation"
2. "Map"
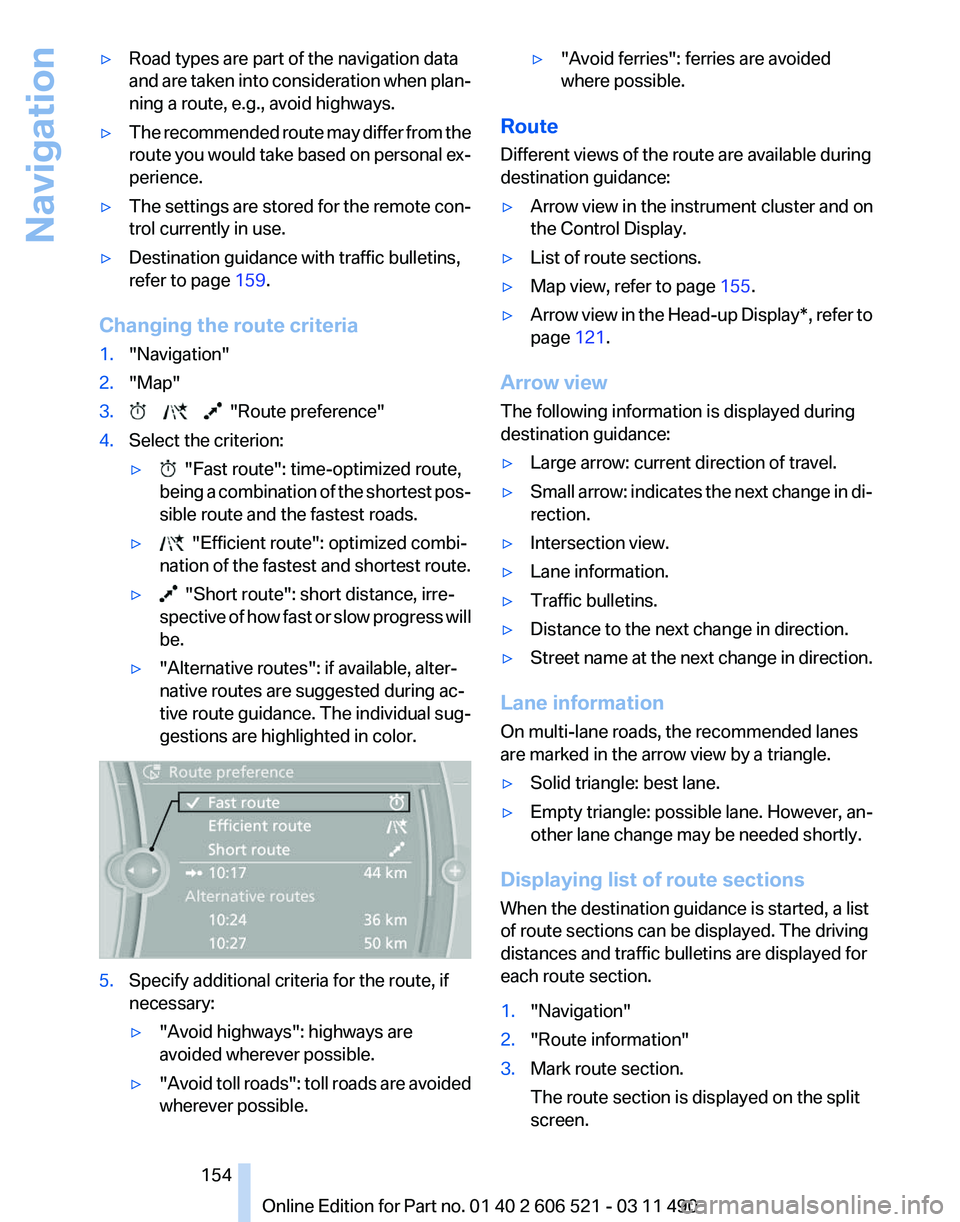
3. "Route preference"
4. Select the criterion:
▷ "Fast route": time-optimized route,
being
a combination of the shortest pos‐
sible route and the fastest roads.
▷ "Efficient route": optimized combi‐
nation of the fastest and shortest route.
▷ "Short route": short distance, irre‐
spective
of how fast or slow progress will
be.
▷ "Alternative routes": if available, alter‐
native routes are suggested during ac‐
tive route guidance. The individual sug‐
gestions are highlighted in color. 5.
Specify additional criteria for the route, if
necessary:
▷"Avoid highways": highways are
avoided wherever possible.
▷ "Avoid
toll roads": toll roads are avoided
wherever possible. ▷
"Avoid ferries": ferries are avoided
where possible.
Route
Different views of the route are available during
destination guidance:
▷ Arrow view in the instrument cluster and on
the Control Display.
▷ List of route sections.
▷ Map view, refer to page 155.
▷ Arrow view in the Head-up Display*, refer to
page 121.
Arrow view
The following information is displayed during
destination guidance:
▷ Large arrow: current direction of travel.
▷ Small arrow: indicates the next change in di‐
rection.
▷ Intersection view.
▷ Lane information.
▷ Traffic bulletins.
▷ Distance to the next change in direction.
▷ Street name at the next change in direction.
Lane information
On multi-lane roads, the recommended lanes
are marked in the arrow view by a triangle.
▷ Solid triangle: best lane.
▷ Empty triangle: possible lane. However, an‐
other lane change may be needed shortly.
Displaying list of route sections
When the destination guidance is started, a list
of route sections can be displayed. The driving
distances and traffic bulletins are displayed for
each route section.
1. "Navigation"
2. "Route information"
3. Mark route section.
The route section is displayed on the split
screen.
Seite 154
154 Online Edition for Part no. 01 40 2 606 521 - 03 11 490
Navigation
Page 155 of 282
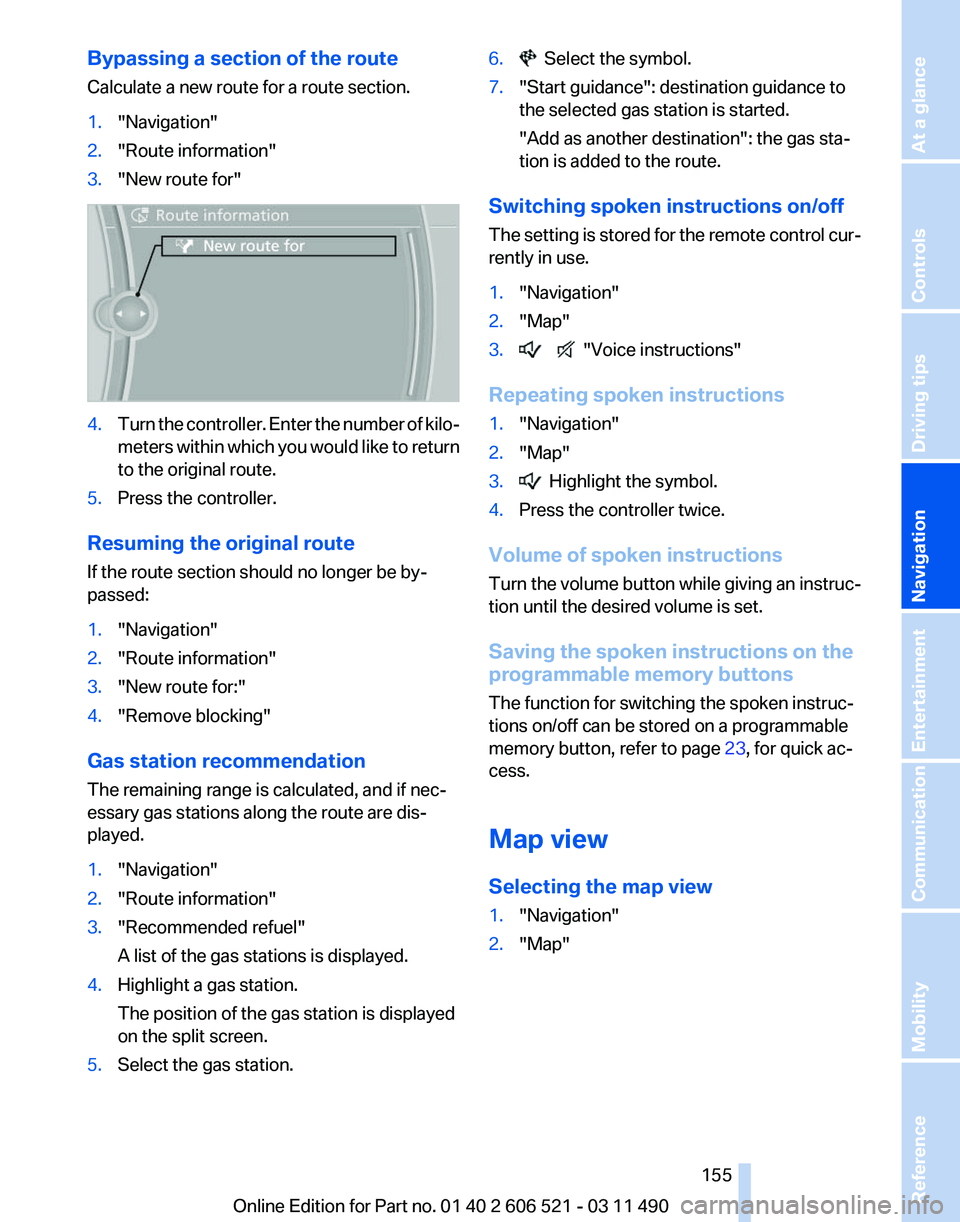
Bypassing a section of the route
Calculate a new route for a route section.
1.
"Navigation"
2. "Route information"
3. "New route for" 4.
Turn the controller. Enter the number of kilo‐
meters
within which you would like to return
to the original route.
5. Press the controller.
Resuming the original route
If the route section should no longer be by‐
passed:
1. "Navigation"
2. "Route information"
3. "New route for:"
4. "Remove blocking"
Gas station recommendation
The remaining range is calculated, and if nec‐
essary gas stations along the route are dis‐
played.
1. "Navigation"
2. "Route information"
3. "Recommended refuel"
A list of the gas stations is displayed.
4. Highlight a gas station.
The position of the gas station is displayed
on the split screen.
5. Select the gas station. 6. Select the symbol.
7. "Start guidance": destination guidance to
the selected gas station is started.
"Add as another destination"
: the gas sta‐
tion is added to the route.
Switching spoken instructions on/off
The
setting is stored for the remote control cur‐
rently in use.
1. "Navigation"
2. "Map"
3. "Voice instructions"
Repeating spoken instructions
1. "Navigation"
2. "Map"
3. Highlight the symbol.
4. Press the controller twice.
Volume of spoken instructions
Turn
the volume button while giving an instruc‐
tion until the desired volume is set.
Saving the spoken instructions on the
programmable memory buttons
The function for switching the spoken instruc‐
tions on/off can be stored on a programmable
memory button, refer to page 23, for quick ac‐
cess.
Map view
Selecting the map view
1. "Navigation"
2. "Map"
Seite 155
155Online Edition for Part no. 01 40 2 606 521 - 03 11 490
Reference Mobility Communication Entertainment
Navigation Driving tips Controls At a glance
Page 157 of 282
Settings for the map view
The settings are stored for the remote control
currently in use.
1.
"Navigation"
2. "Map"
3. Open "Options".
4. "Settings"
Set the map view.
▷ "Day/night mode"
Select and create the necessary settings
depending on the light conditions.
"Traffic conditions/gray map" active: the
setting is disregarded.
▷ "Satellite images"
Depending on availability and resolution,
satellite images* are displayed in a scale of
approx. 1 mile to 600 miles/2 km to
1,000 km.
▷ "Perspective view in 3D"
Prominent areas that are contained in the
navigation data are displayed on the map in
3D.
▷ "Traffic conditions/gray map"
The map is optimized for displaying traffic
bulletins,
refer to page 157. Symbols for the
special destinations are no longer displayed.
Map view for split screen
The map view can be selected for the split
screen independently from the main screen.
1. Open "Options".
2. "Split screen"
3. Move the controller to the right repeatedly
until the split screen is selected.
4. Select "Split screen content" or the scale.
5. Select the map view.
▷"Arrow display"
▷ "Map facing north"
▷ "Map direction of travel"
▷ "Map view with perspective"
▷ "Position" ▷
"Exit ramp view": selected blind drive‐
ways
are displayed three dimensionally.
Setting in some cases will affect the dis‐
play in the Head-Up Display*.
▷ "Traffic conditions/gray map"
6. To change the scale: select the split screen
and turn the controller.
Traffic bulletins*
At a glance
▷ Display the traffic bulletins from radio sta‐
tions that broadcast the TI Traffic Informa‐
tion
of a traffic information service. Informa‐
tion on traffic obstructions and hazards is
updated continuously.
Certain BMW models equipped with navi‐
gation have the capability to display real-
time traffic information. If your system has
this capability the following additional terms
and conditions apply:
An End-User shall no longer have the right
to use the Traffic Data in the event that the
End-User is in material breach of the terms
and conditions contained herein.
A. Total Traffic Network, a division of Clear
Channel Broadcasting, Inc. (“Total Traffic
Network”) holds the rights to the traffic in‐
cident data and RDS-TMC network through
which it is delivered. You may not modify,
copy, scan or use any other method to re‐
produce, duplicate, republish, transmit or
distribute in any way any portion of traffic in‐
cident data. You agree to indemnify, defend
and hold harmless BMW of North America,
LLC. (“BMW NA”) and Total Traffic Net‐
work, Inrix, Inc (and their affiliates) against
any and all claims, damages, costs or other
expenses that arise directly or indirectly out
of (a) your unauthorized use of the traffic in‐
cident data or the RDS-TMC network, (b)
your violation of this directive and/or (c) any
unauthorized or unlawful activities by you in
connection herewith.
Seite 157
157Online Edition for Part no. 01 40 2 606 521 - 03 11 490
Reference Mobility Communication Entertainment
Navigation Driving tips Controls At a glance
Page 164 of 282
Tone
General information
The sound settings are stored for the remote
control currently in use.
Treble, bass, balance, and
fader
▷
"Treble": treble adjustment.
▷ "Bass": depth adjustment.
▷ "Balance": left/right volume distribution.
▷ "Fader": front/rear volume distribution.
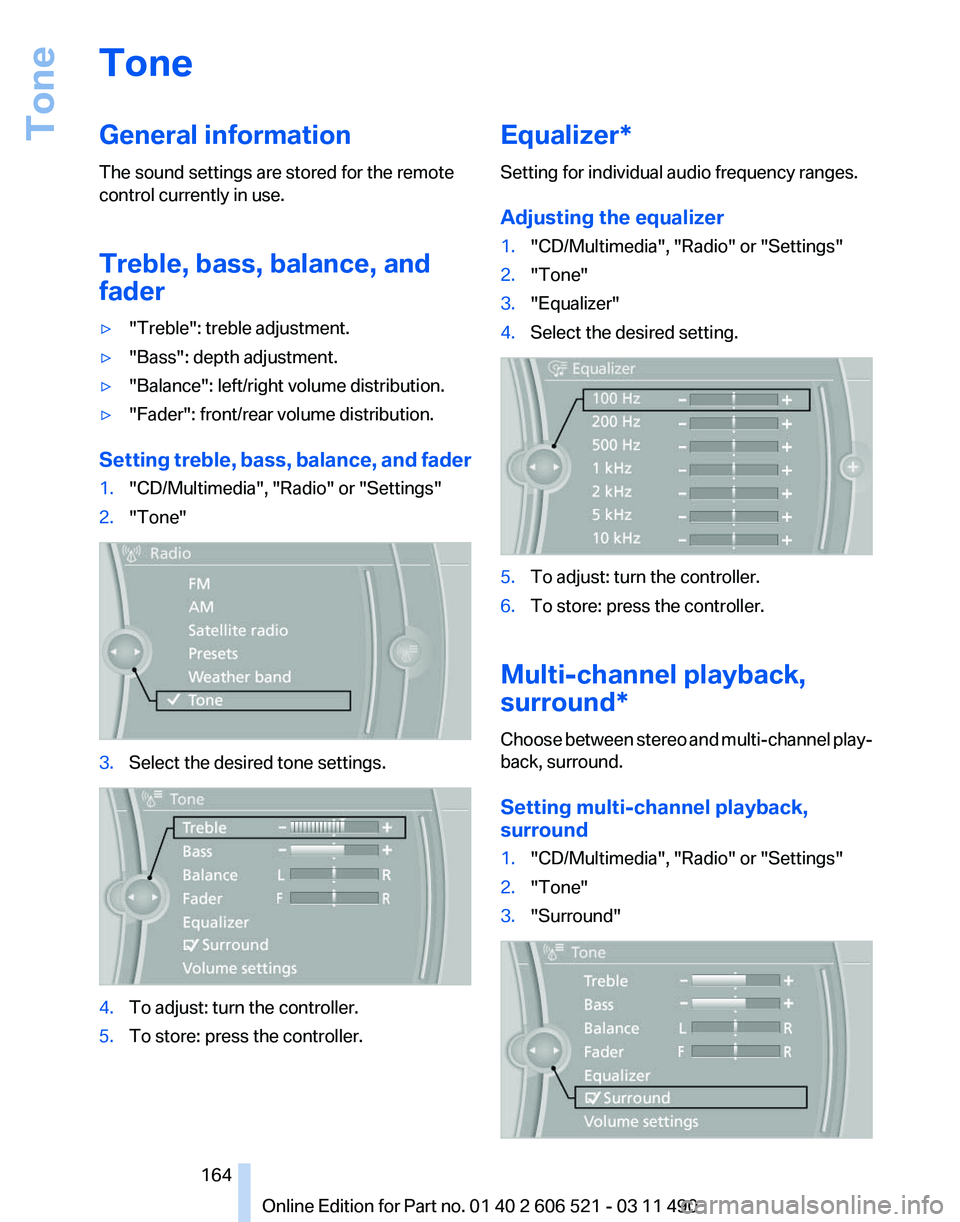
Setting treble, bass, balance, and fader
1. "CD/Multimedia", "Radio" or "Settings"
2. "Tone" 3.
Select the desired tone settings. 4.
To adjust: turn the controller.
5. To store: press the controller. Equalizer*
Setting for individual audio frequency ranges.
Adjusting the equalizer
1.
"CD/Multimedia", "Radio" or "Settings"
2. "Tone"
3. "Equalizer"
4. Select the desired setting. 5.
To adjust: turn the controller.
6. To store: press the controller.
Multi-channel playback,
surround*
Choose between stereo and multi-channel play‐
back, surround.
Setting multi-channel playback,
surround
1. "CD/Multimedia", "Radio" or "Settings"
2. "Tone"
3. "Surround" Seite 164
164 Online Edition for Part no. 01 40 2 606 521 - 03 11 490
Tone