2012 BMW 640I CONVERTIBLE change time
[x] Cancel search: change timePage 157 of 282
Settings for the map view
The settings are stored for the remote control
currently in use.
1.
"Navigation"
2. "Map"
3. Open "Options".
4. "Settings"
Set the map view.
▷ "Day/night mode"
Select and create the necessary settings
depending on the light conditions.
"Traffic conditions/gray map" active: the
setting is disregarded.
▷ "Satellite images"
Depending on availability and resolution,
satellite images* are displayed in a scale of
approx. 1 mile to 600 miles/2 km to
1,000 km.
▷ "Perspective view in 3D"
Prominent areas that are contained in the
navigation data are displayed on the map in
3D.
▷ "Traffic conditions/gray map"
The map is optimized for displaying traffic
bulletins,
refer to page 157. Symbols for the
special destinations are no longer displayed.
Map view for split screen
The map view can be selected for the split
screen independently from the main screen.
1. Open "Options".
2. "Split screen"
3. Move the controller to the right repeatedly
until the split screen is selected.
4. Select "Split screen content" or the scale.
5. Select the map view.
▷"Arrow display"
▷ "Map facing north"
▷ "Map direction of travel"
▷ "Map view with perspective"
▷ "Position" ▷
"Exit ramp view": selected blind drive‐
ways
are displayed three dimensionally.
Setting in some cases will affect the dis‐
play in the Head-Up Display*.
▷ "Traffic conditions/gray map"
6. To change the scale: select the split screen
and turn the controller.
Traffic bulletins*
At a glance
▷ Display the traffic bulletins from radio sta‐
tions that broadcast the TI Traffic Informa‐
tion
of a traffic information service. Informa‐
tion on traffic obstructions and hazards is
updated continuously.
Certain BMW models equipped with navi‐
gation have the capability to display real-
time traffic information. If your system has
this capability the following additional terms
and conditions apply:
An End-User shall no longer have the right
to use the Traffic Data in the event that the
End-User is in material breach of the terms
and conditions contained herein.
A. Total Traffic Network, a division of Clear
Channel Broadcasting, Inc. (“Total Traffic
Network”) holds the rights to the traffic in‐
cident data and RDS-TMC network through
which it is delivered. You may not modify,
copy, scan or use any other method to re‐
produce, duplicate, republish, transmit or
distribute in any way any portion of traffic in‐
cident data. You agree to indemnify, defend
and hold harmless BMW of North America,
LLC. (“BMW NA”) and Total Traffic Net‐
work, Inrix, Inc (and their affiliates) against
any and all claims, damages, costs or other
expenses that arise directly or indirectly out
of (a) your unauthorized use of the traffic in‐
cident data or the RDS-TMC network, (b)
your violation of this directive and/or (c) any
unauthorized or unlawful activities by you in
connection herewith.
Seite 157
157Online Edition for Part no. 01 40 2 606 521 - 03 11 490
Reference Mobility Communication Entertainment
Navigation Driving tips Controls At a glance
Page 159 of 282
in the map using triangles or gray bars along the
calculated route.
▷
Red: congestion.
▷ Orange: stop-and-go traffic.
▷ Yellow: heavy traffic.
▷ Green: clear roads.
▷ Gray: general traffic bulletins, e.g., construc‐
tion site.
The displayed information depends on the par‐
ticular traffic information service.
Filtering traffic bulletins
You
can set which traffic bulletins appear on the
map.
1. "Navigation"
2. "Map"
3. Open "Options".
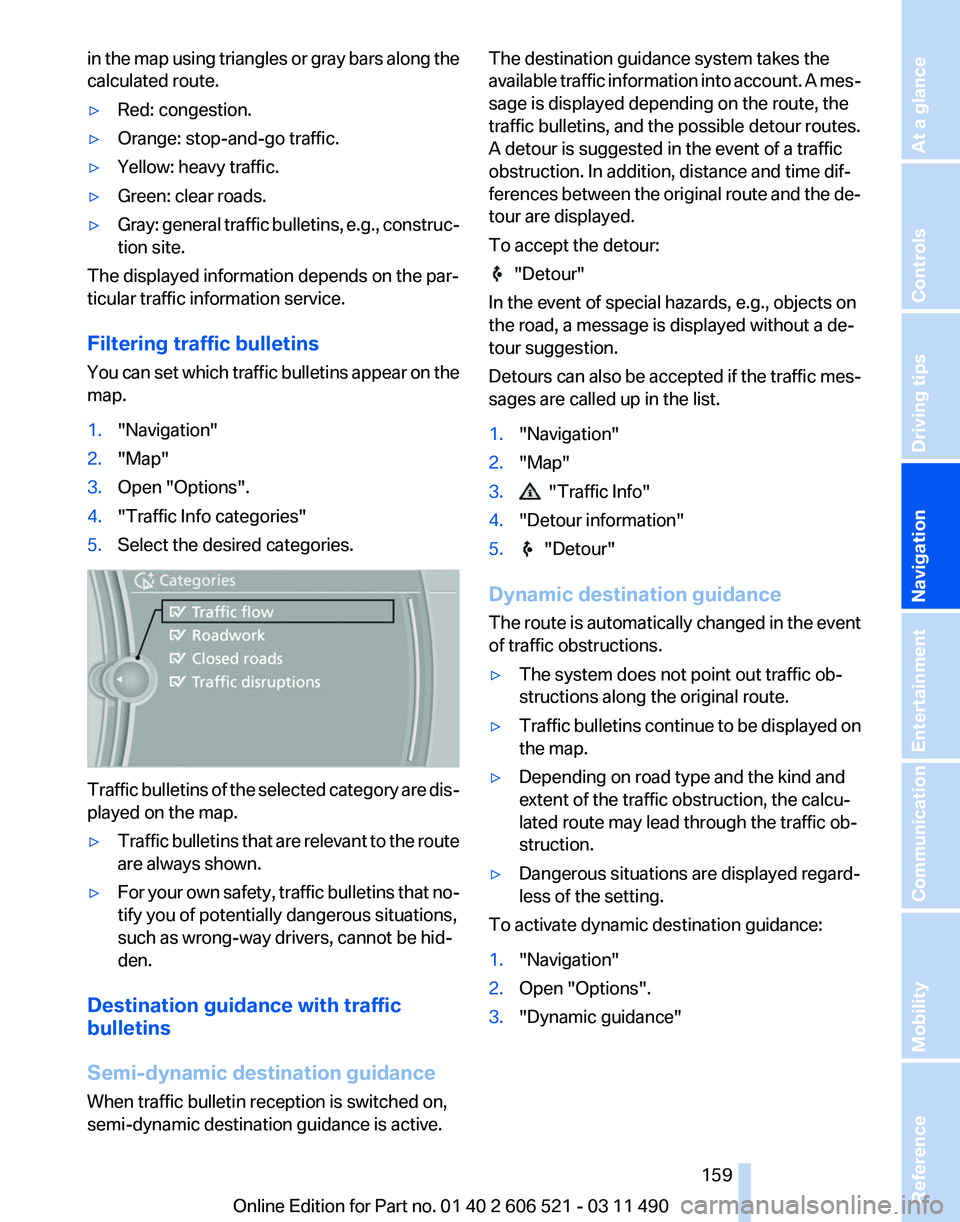
4. "Traffic Info categories"
5. Select the desired categories. Traffic bulletins of the selected category are dis‐
played on the map.
▷
Traffic bulletins that are relevant to the route
are always shown.
▷ For your own safety, traffic bulletins that no‐
tify you of potentially dangerous situations,
such as wrong-way drivers, cannot be hid‐
den.
Destination guidance with traffic
bulletins
Semi-dynamic destination guidance
When traffic bulletin reception is switched on,
semi-dynamic destination guidance is active. The destination guidance system takes the
available
traffic information into account. A mes‐
sage is displayed depending on the route, the
traffic bulletins, and the possible detour routes.
A detour is suggested in the event of a traffic
obstruction. In addition, distance and time dif‐
ferences between the original route and the de‐
tour are displayed.
To accept the detour: "Detour"
In the event of special hazards, e.g., objects on
the road, a message is displayed without a de‐
tour suggestion.
Detours
can also be accepted if the traffic mes‐
sages are called up in the list.
1. "Navigation"
2. "Map"
3. "Traffic Info"
4. "Detour information"
5. "Detour"
Dynamic destination guidance
The
route is automatically changed in the event
of traffic obstructions.
▷ The system does not point out traffic ob‐
structions along the original route.
▷ Traffic bulletins continue to be displayed on
the map.
▷ Depending on road type and the kind and
extent of the traffic obstruction, the calcu‐
lated route may lead through the traffic ob‐
struction.
▷ Dangerous situations are displayed regard‐
less of the setting.
To activate dynamic destination guidance:
1. "Navigation"
2. Open "Options".
3. "Dynamic guidance"
Seite 159
159Online Edition for Part no. 01 40 2 606 521 - 03 11 490
Reference Mobility Communication Entertainment
Navigation Driving tips Controls At a glance
Page 168 of 282
Weather Band*
General information
The availability of the Weather Band and the
number of available channels can vary depend‐
ing on the region.
Switching on the Weather Band
1.
"Radio"
2. "Weather band"
3. Select the desired channel.
Additional information
Weather Band is a service of the National Oce‐
anic and Atmospheric Administration (NOAA).
Additional information on the Internet:
www.nws.noaa.gov.
Satellite radio
*
General information
The channels are offered in predefined pack‐
ages. The packages must be enabled by tele‐
phone.
Navigation bar overview Symbol Function
Change the list view.
Select the category.
Direct channel entry
Timeshift
Open the My Favorites category/
open a favorite. Manage the favorites.
Traffic Jump
The functions of the navigation bar symbols can
also be stored on the programmable memory
buttons, refer to page
23. Managing a subscription
To be able to enable or unsubscribe from the
channels, you must have reception. It is usually
at
its best when you have an unobstructed view
of the sky. The channel name is displayed in the
status line.
Enabling channels
The Unsubscribed Channels category contains
all disabled channels.
1. "Radio"
2. "Satellite radio"
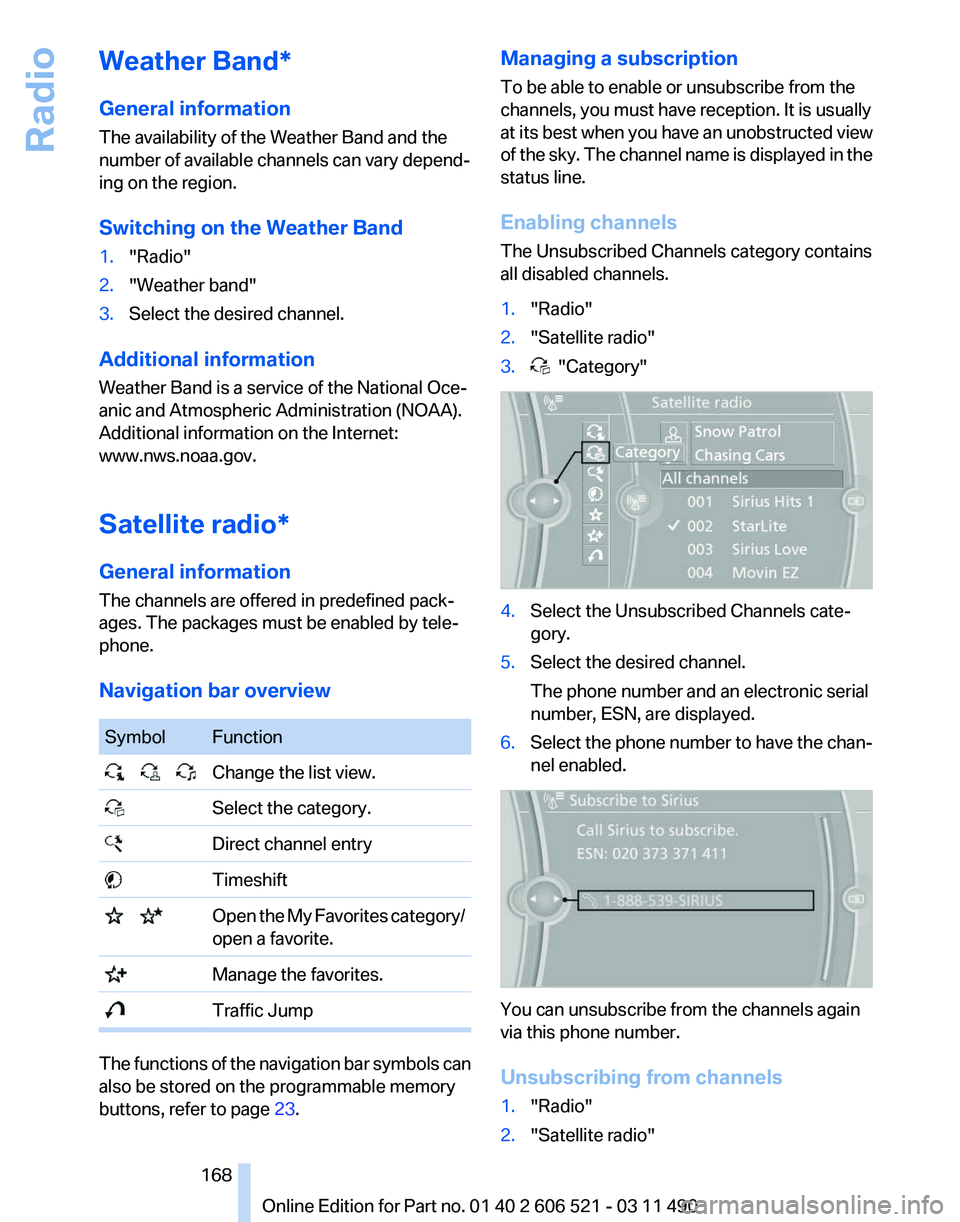
3. "Category"
4.
Select the Unsubscribed Channels cate‐
gory.
5. Select the desired channel.
The phone number and an electronic serial
number, ESN, are displayed.
6. Select the phone number to have the chan‐
nel enabled. You can unsubscribe from the channels again
via this phone number.
Unsubscribing from channels
1.
"Radio"
2. "Satellite radio"
Seite 168
168 Online Edition for Part no. 01 40 2 606 521 - 03 11 490
Radio
Page 169 of 282
3.
Open "Options".
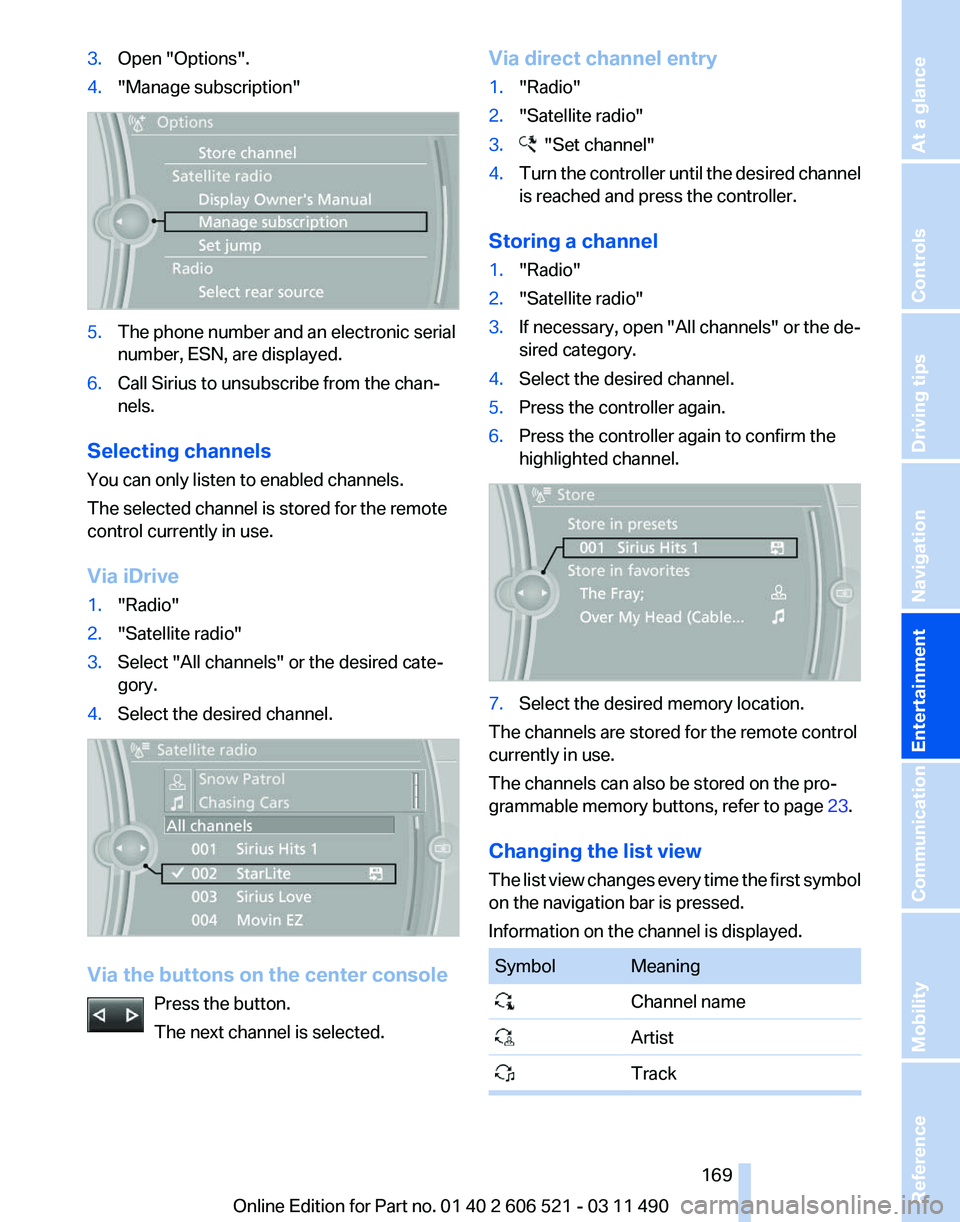
4. "Manage subscription" 5.
The phone number and an electronic serial
number, ESN, are displayed.
6. Call Sirius to unsubscribe from the chan‐
nels.
Selecting channels
You can only listen to enabled channels.
The selected channel is stored for the remote
control currently in use.
Via iDrive
1. "Radio"
2. "Satellite radio"
3. Select "All channels" or the desired cate‐
gory.
4. Select the desired channel. Via the buttons on the center console
Press the button.
The next channel is selected. Via direct channel entry
1.
"Radio"
2. "Satellite radio"
3. "Set channel"
4. Turn the controller until the desired channel
is reached and press the controller.
Storing a channel
1. "Radio"
2. "Satellite radio"
3. If necessary, open "All channels" or the de‐
sired category.
4. Select the desired channel.
5. Press the controller again.
6. Press the controller again to confirm the
highlighted channel. 7.
Select the desired memory location.
The channels are stored for the remote control
currently in use.
The channels can also be stored on the pro‐
grammable memory buttons, refer to page 23.
Changing the list view
The
list view changes every time the first symbol
on the navigation bar is pressed.
Information on the channel is displayed. Symbol Meaning
Channel name
Artist
Track Seite 169
169Online Edition for Part no. 01 40 2 606 521 - 03 11 490
Reference Mobility Communication
Entertainment Navigation Driving tips Controls At a glance
Page 173 of 282
CD/multimedia
Controls
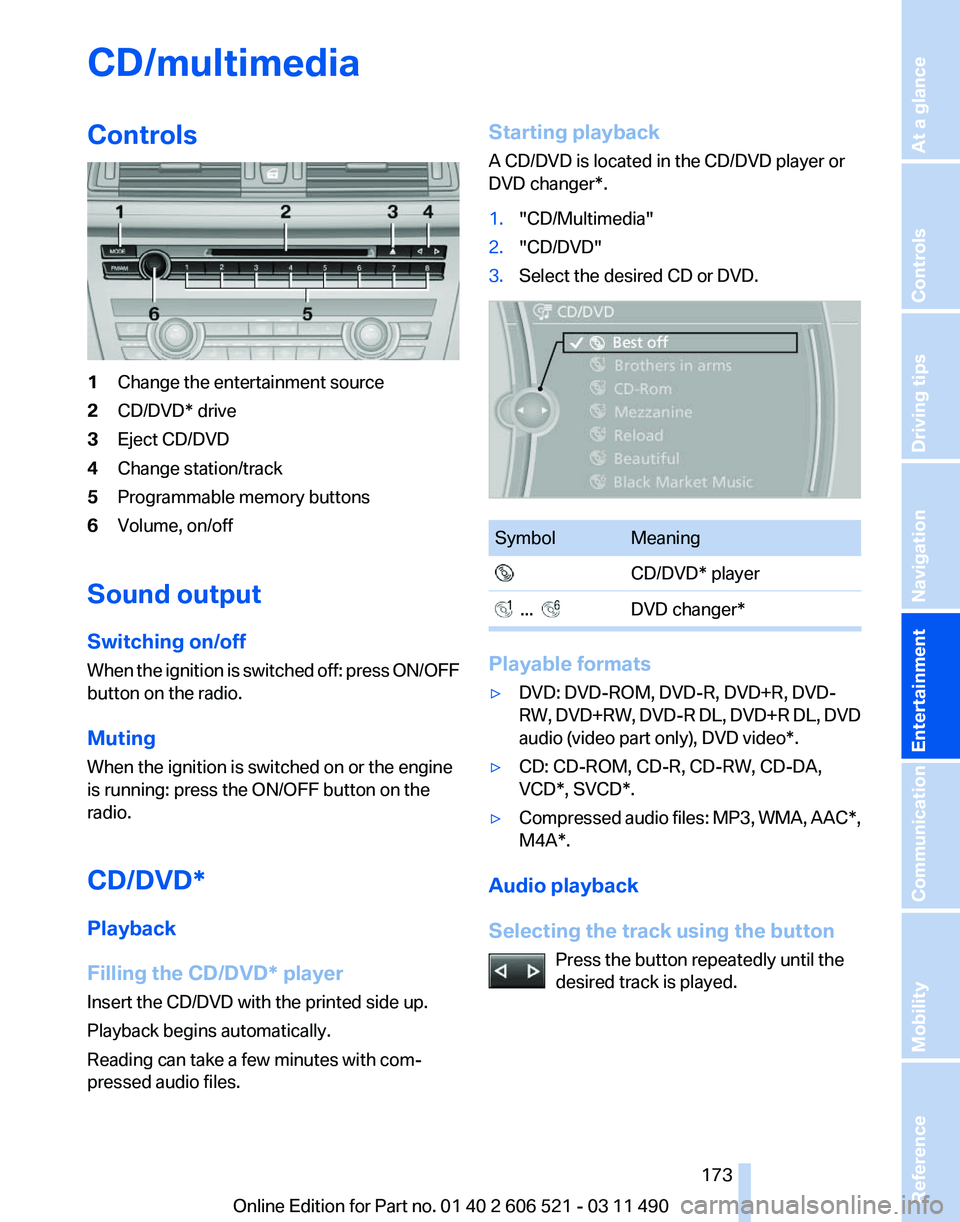
1
Change the entertainment source
2 CD/DVD* drive
3 Eject CD/DVD
4 Change station/track
5 Programmable memory buttons
6 Volume, on/off
Sound output
Switching on/off
When
the ignition is switched off: press ON/OFF
button on the radio.
Muting
When the ignition is switched on or the engine
is running: press the ON/OFF button on the
radio.
CD/DVD*
Playback
Filling the CD/DVD* player
Insert the CD/DVD with the printed side up.
Playback begins automatically.
Reading can take a few minutes with com‐
pressed audio files. Starting playback
A CD/DVD is located in the CD/DVD player or
DVD changer*.
1.
"CD/Multimedia"
2. "CD/DVD"
3. Select the desired CD or DVD. Symbol Meaning
CD/DVD* player ... DVD changer*
Playable formats
▷
DVD: DVD-ROM, DVD-R, DVD+R, DVD-
RW,
DVD+RW, DVD-R DL, DVD+R DL, DVD
audio (video part only), DVD video*.
▷ CD: CD-ROM, CD-R, CD-RW, CD-DA,
VCD*, SVCD*.
▷ Compressed audio files: MP3, WMA, AAC*,
M4A*.
Audio playback
Selecting the track using the button Press the button repeatedly until the
desired track is played. Seite 173
173Online Edition for Part no. 01 40 2 606 521 - 03 11 490
Reference Mobility Communication
Entertainment Navigation Driving tips Controls At a glance
Page 174 of 282
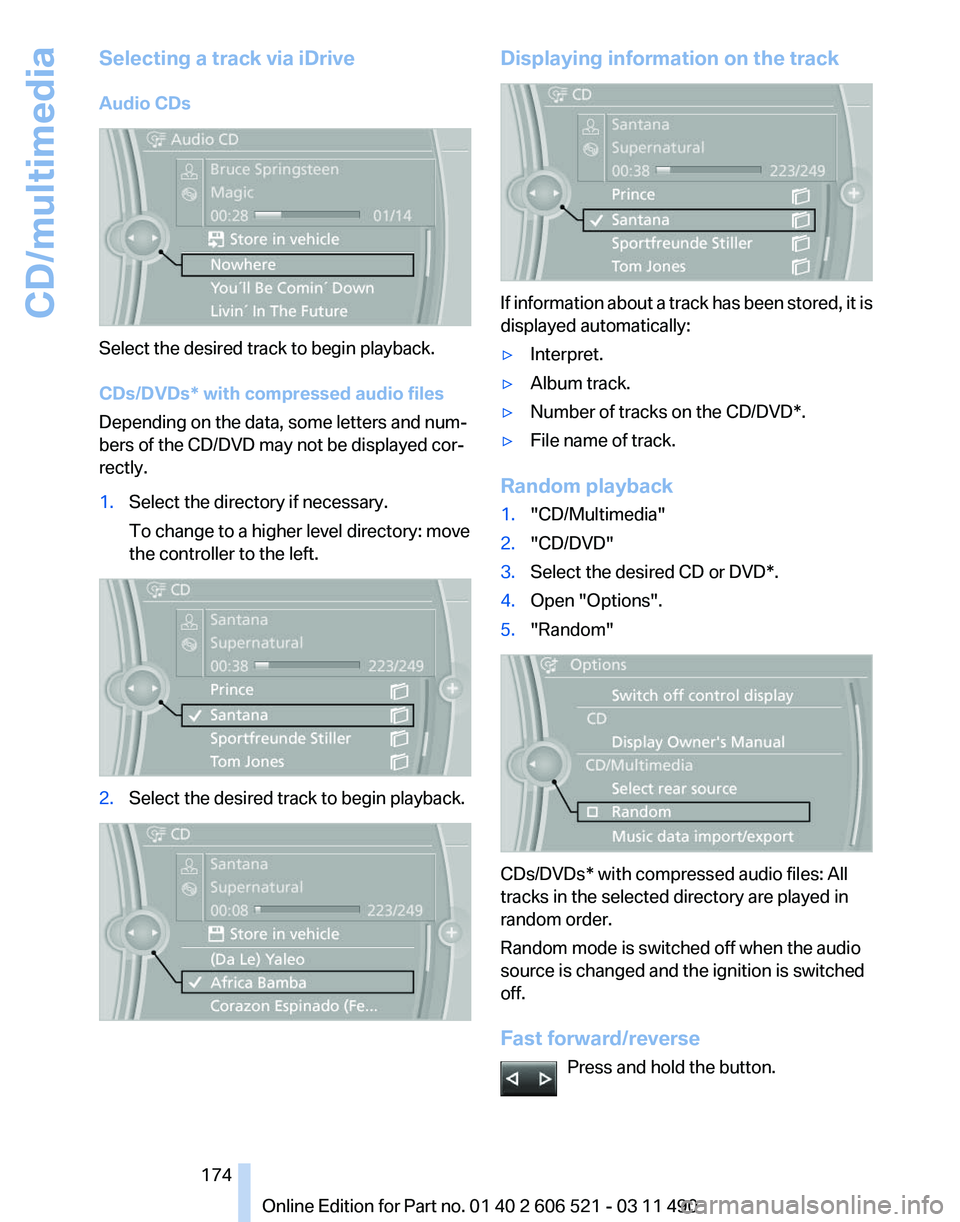
Selecting a track via iDrive
Audio CDs
Select the desired track to begin playback.
CDs/DVDs* with compressed audio files
Depending on the data, some letters and num‐
bers of the CD/DVD may not be displayed cor‐
rectly.
1.
Select the directory if necessary.
To change to a higher level directory: move
the controller to the left. 2.
Select the desired track to begin playback. Displaying information on the track
If information about a track has been stored, it is
displayed automatically:
▷
Interpret.
▷ Album track.
▷ Number of tracks on the CD/DVD*.
▷ File name of track.
Random playback
1. "CD/Multimedia"
2. "CD/DVD"
3. Select the desired CD or DVD*.
4. Open "Options".
5. "Random" CDs/DVDs* with compressed audio files: All
tracks in the selected directory are played in
random order.
Random mode is switched off when the audio
source is changed and the ignition is switched
off.
Fast forward/reverse
Press and hold the button. Seite 174
174 Online Edition for Part no. 01 40 2 606 521 - 03 11 490CD/multimedia
Page 176 of 282
2. "DVD menu"
The
DVD menu is displayed. The display de‐
pends on the contents of the DVD.
3. To select menu items: move the controller
and press it.
To change to the video menu: turn the controller
and press it.
DVD/VCD settings
For some DVDs, settings can only be made via
the DVD menu; refer also to the information on
the DVD.
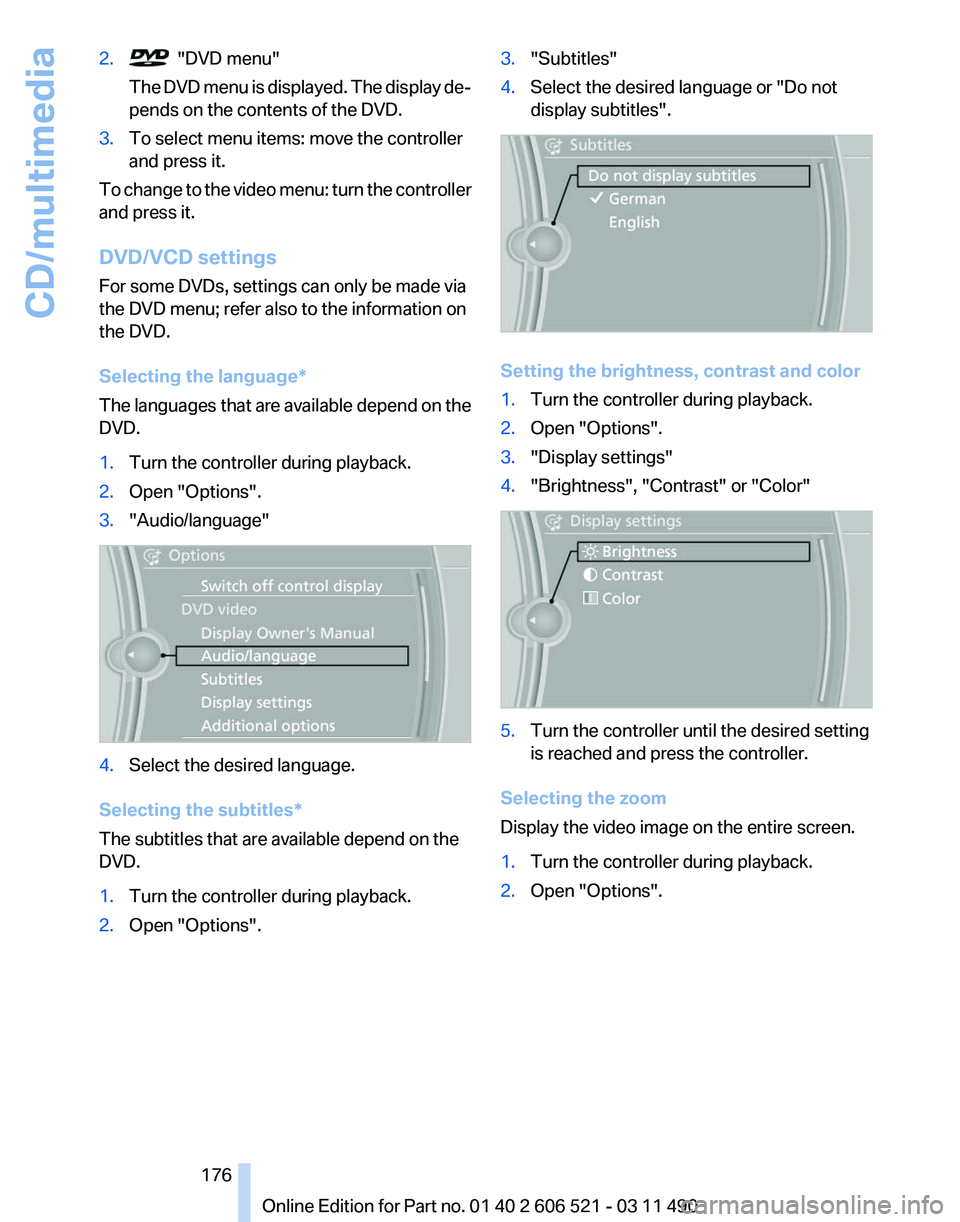
Selecting the language
*
The languages that are available depend on the
DVD.
1. Turn the controller during playback.
2. Open "Options".
3. "Audio/language" 4.
Select the desired language.
Selecting the subtitles*
The subtitles that are available depend on the
DVD.
1. Turn the controller during playback.
2. Open "Options". 3.
"Subtitles"
4. Select the desired language or "Do not
display subtitles". Setting the brightness, contrast and color
1.
Turn the controller during playback.
2. Open "Options".
3. "Display settings"
4. "Brightness", "Contrast" or "Color" 5.
Turn the controller until the desired setting
is reached and press the controller.
Selecting the zoom
Display the video image on the entire screen.
1. Turn the controller during playback.
2. Open "Options".
Seite 176
176 Online Edition for Part no. 01 40 2 606 521 - 03 11 490
CD/multimedia
Page 178 of 282
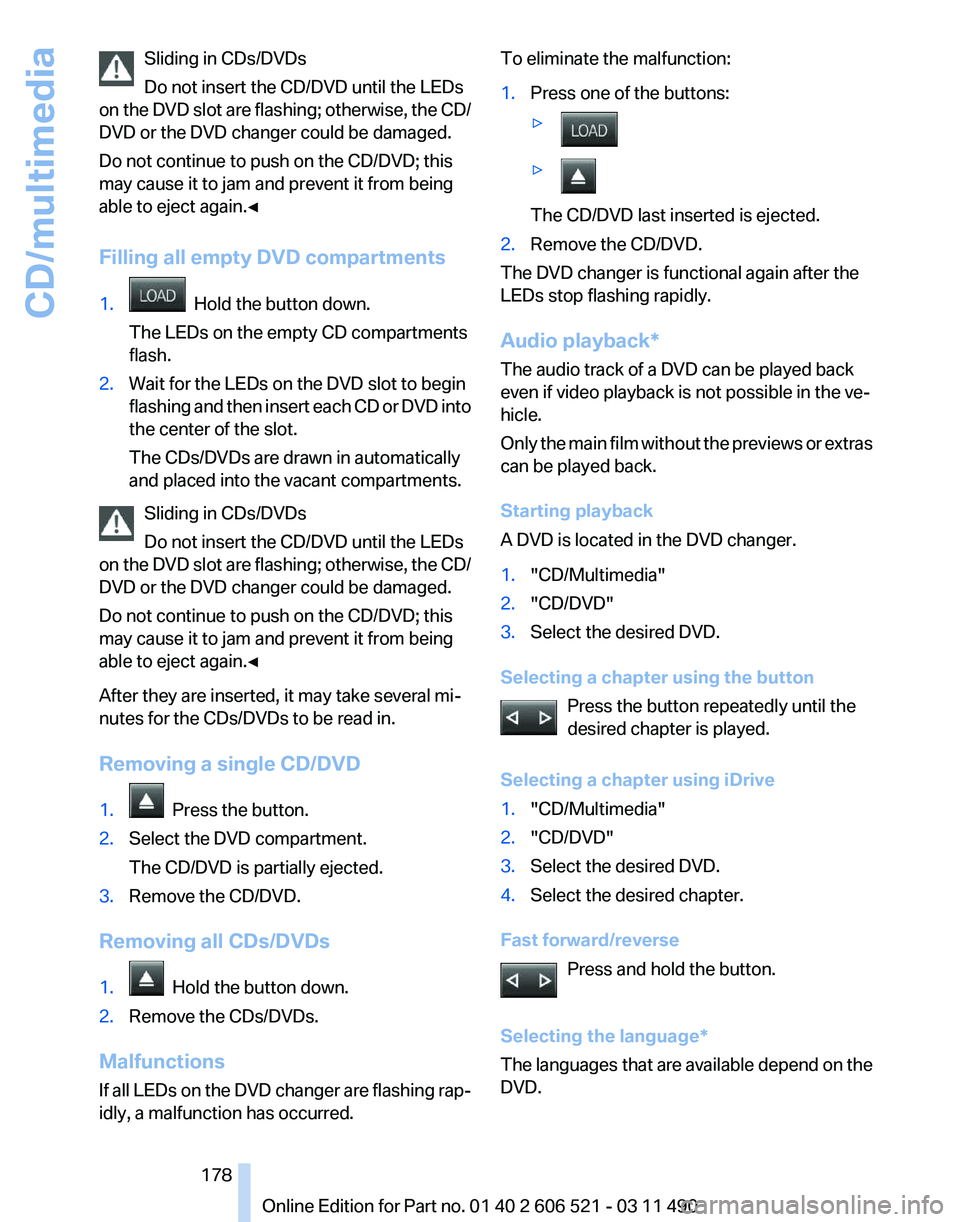
Sliding in CDs/DVDs
Do not insert the CD/DVD until the LEDs
on
the DVD slot are flashing; otherwise, the CD/
DVD or the DVD changer could be damaged.
Do not continue to push on the CD/DVD; this
may cause it to jam and prevent it from being
able to eject again.◀
Filling all empty DVD compartments
1. Hold the button down.
The LEDs on the empty CD compartments
flash.
2. Wait for the LEDs on the DVD slot to begin
flashing
and then insert each CD or DVD into
the center of the slot.
The CDs/DVDs are drawn in automatically
and placed into the vacant compartments.
Sliding in CDs/DVDs
Do not insert the CD/DVD until the LEDs
on
the DVD slot are flashing; otherwise, the CD/
DVD or the DVD changer could be damaged.
Do not continue to push on the CD/DVD; this
may cause it to jam and prevent it from being
able to eject again.◀
After they are inserted, it may take several mi‐
nutes for the CDs/DVDs to be read in.
Removing a single CD/DVD
1. Press the button.
2. Select the DVD compartment.
The CD/DVD is partially ejected.
3. Remove the CD/DVD.
Removing all CDs/DVDs
1. Hold the button down.
2. Remove the CDs/DVDs.
Malfunctions
If
all LEDs on the DVD changer are flashing rap‐
idly, a malfunction has occurred. To eliminate the malfunction:
1.
Press one of the buttons:
▷ ▷
The CD/DVD last inserted is ejected.
2. Remove the CD/DVD.
The DVD changer is functional again after the
LEDs stop flashing rapidly.
Audio playback*
The audio track of a DVD can be played back
even if video playback is not possible in the ve‐
hicle.
Only
the main film without the previews or extras
can be played back.
Starting playback
A DVD is located in the DVD changer.
1. "CD/Multimedia"
2. "CD/DVD"
3. Select the desired DVD.
Selecting a chapter using the button Press the button repeatedly until the
desired chapter is played.
Selecting a chapter using iDrive
1. "CD/Multimedia"
2. "CD/DVD"
3. Select the desired DVD.
4. Select the desired chapter.
Fast forward/reverse Press and hold the button.
Selecting the language
*
The languages that are available depend on the
DVD. Seite 178
178 Online Edition for Part no. 01 40 2 606 521 - 03 11 490
CD/multimedia