2012 BMW 550I XDRIVE GRAN TURISMO ESP
[x] Cancel search: ESPPage 121 of 321
▷Off: the LED goes out.
The state is stored for the remote control cur‐
rently in use.
Configuring the prewarning
After the warning function is switched on, the
following can be set via the iDrive:
▷The prewarning can be switched on/off.▷The time of the prewarning can be set.
These settings have no effect on the time of the
warning from the Active Cruise Control that
prompts the driver to intervene or brake.
Display in the instrument cluster
The collision warning can be issued in the in‐
strument cluster, in the Head-up Display, and
acoustically.
Warning stages
SymbolMeasureThe vehicle lights up in red: prewarn‐
ing.
Increase distance.The vehicle flashes red and an
acoustic signal sounds: acute warn‐
ing.
You are requested to intervene by
braking or making an evasive maneu‐
ver.
Adapting your speed and driving style
The display does not relieve the driver of
the responsibility to adapt his or her driving
speed and style to the traffic conditions.◀
System limits Be alert
Due to system limitations, warnings may
be not be issued at all, or may be issued late or
improperly. Therefore, always be alert and ready
to intervene; otherwise, there is the danger of an
accident occurring.◀
Detection range
This may result in the warning not being issued
or being issued late.
For example, the following situations may not be
detected:▷Slow moving vehicles when you approach
them at high speed.▷Vehicles that suddenly swerve in front of you
or sharply decelerating vehicles.▷Vehicles with an unusual rear appearance.▷Two-wheeled vehicles ahead of you.
Functional limitations
The system may not be fully functional in the
following situations:
▷In heavy fog, rain, sprayed water or snowfall.▷In tight curves.
Prewarning sensitivity
Each time after the prewarning time is set, this
may result in increased false warnings.
Cruise control
The concept
The system is functional at speeds beginning at
approx. 20 mph/30 km/h.
It maintains the speed that was set using the
control elements on the steering wheel.
The system brakes on downhill gradients if en‐
gine braking action is insufficient.
Unfavorable conditions
Do not use the system if unfavorable con‐
ditions make it impossible to drive at a constant
speed, for instance:
▷On curvy roads.▷In heavy traffic.Seite 121Driving comfortControls121
Online Edition for Part no. 01 40 2 607 855 - 09 11 490
Page 129 of 321
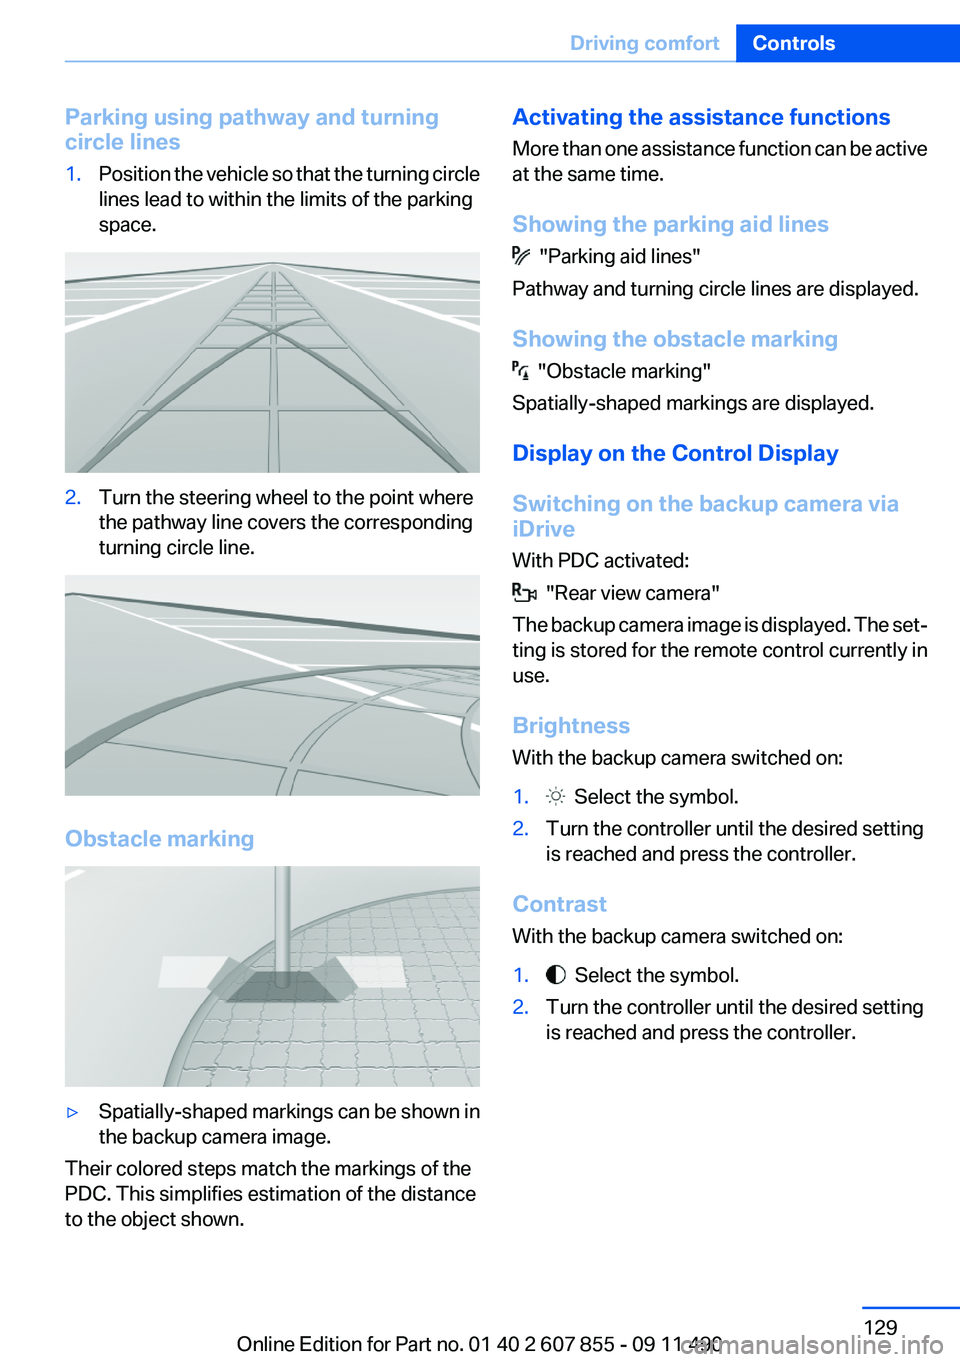
Parking using pathway and turning
circle lines1.Position the vehicle so that the turning circle
lines lead to within the limits of the parking
space.2.Turn the steering wheel to the point where
the pathway line covers the corresponding
turning circle line.
Obstacle marking
▷Spatially-shaped markings can be shown in
the backup camera image.
Their colored steps match the markings of the
PDC. This simplifies estimation of the distance
to the object shown.
Activating the assistance functions
More than one assistance function can be active
at the same time.
Showing the parking aid lines
"Parking aid lines"
Pathway and turning circle lines are displayed.
Showing the obstacle marking
"Obstacle marking"
Spatially-shaped markings are displayed.
Display on the Control Display
Switching on the backup camera via
iDrive
With PDC activated:
"Rear view camera"
The backup camera image is displayed. The set‐
ting is stored for the remote control currently in
use.
Brightness
With the backup camera switched on:
1. Select the symbol.2.Turn the controller until the desired setting
is reached and press the controller.
Contrast
With the backup camera switched on:
1. Select the symbol.2.Turn the controller until the desired setting
is reached and press the controller.Seite 129Driving comfortControls129
Online Edition for Part no. 01 40 2 607 855 - 09 11 490
Page 131 of 321
Contrast
With the Side View switched on:1. "Contrast"2.Turn the controller until the desired setting
is reached and press the controller.
Cameras
The two camera lenses are located on the sides
of the bumper.
The image quality may be impaired by dirt.
Clean the lens, refer to page 292.
Night Vision with pedestrian
detection
The concept
Night Vision with pedestrian detection is a night
vision system.
An infrared camera records the area in front of
the vehicle and displays the image on the Con‐
trol Display.
The picture is a heat image. The system has an
integrated pedestrian detection function that
detects pedestrians and cyclists. Warm objects
that are similar in shape to human beings are
detected by the system.
Personal responsibility
Night Vision cannot replace the driver's
personal judgment of the visibility conditions
and the traffic situation. The view ahead and the
actual visibility conditions must always be the
basis on which the vehicle speed is adjusted;
otherwise, there is a risk to road safety.◀
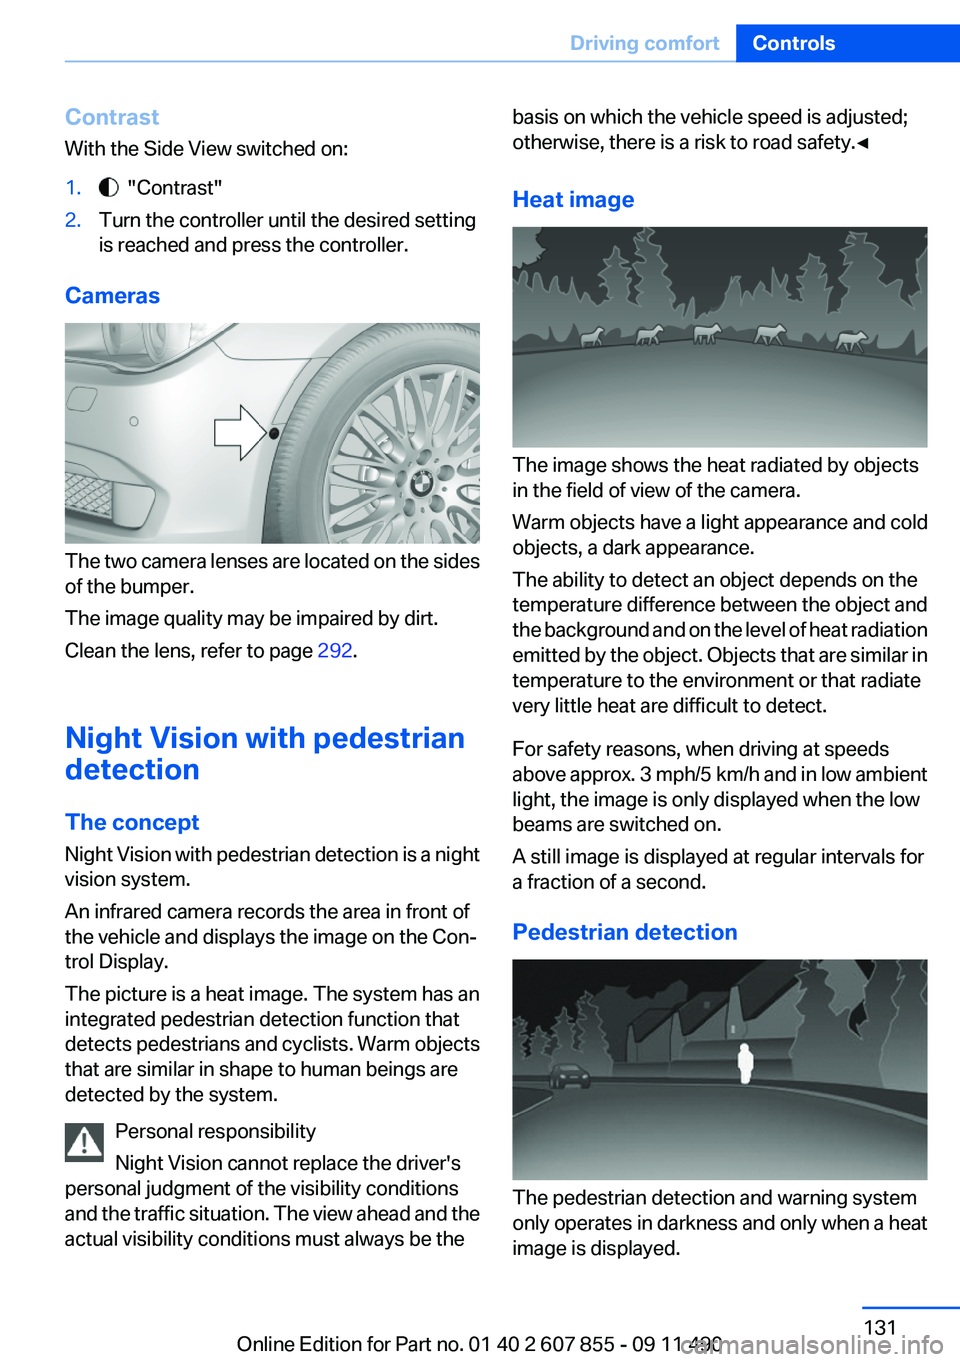
Heat image
The image shows the heat radiated by objects
in the field of view of the camera.
Warm objects have a light appearance and cold
objects, a dark appearance.
The ability to detect an object depends on the
temperature difference between the object and
the background and on the level of heat radiation
emitted by the object. Objects that are similar in
temperature to the environment or that radiate
very little heat are difficult to detect.
For safety reasons, when driving at speeds
above approx. 3 mph/5 km/h and in low ambient
light, the image is only displayed when the low
beams are switched on.
A still image is displayed at regular intervals for
a fraction of a second.
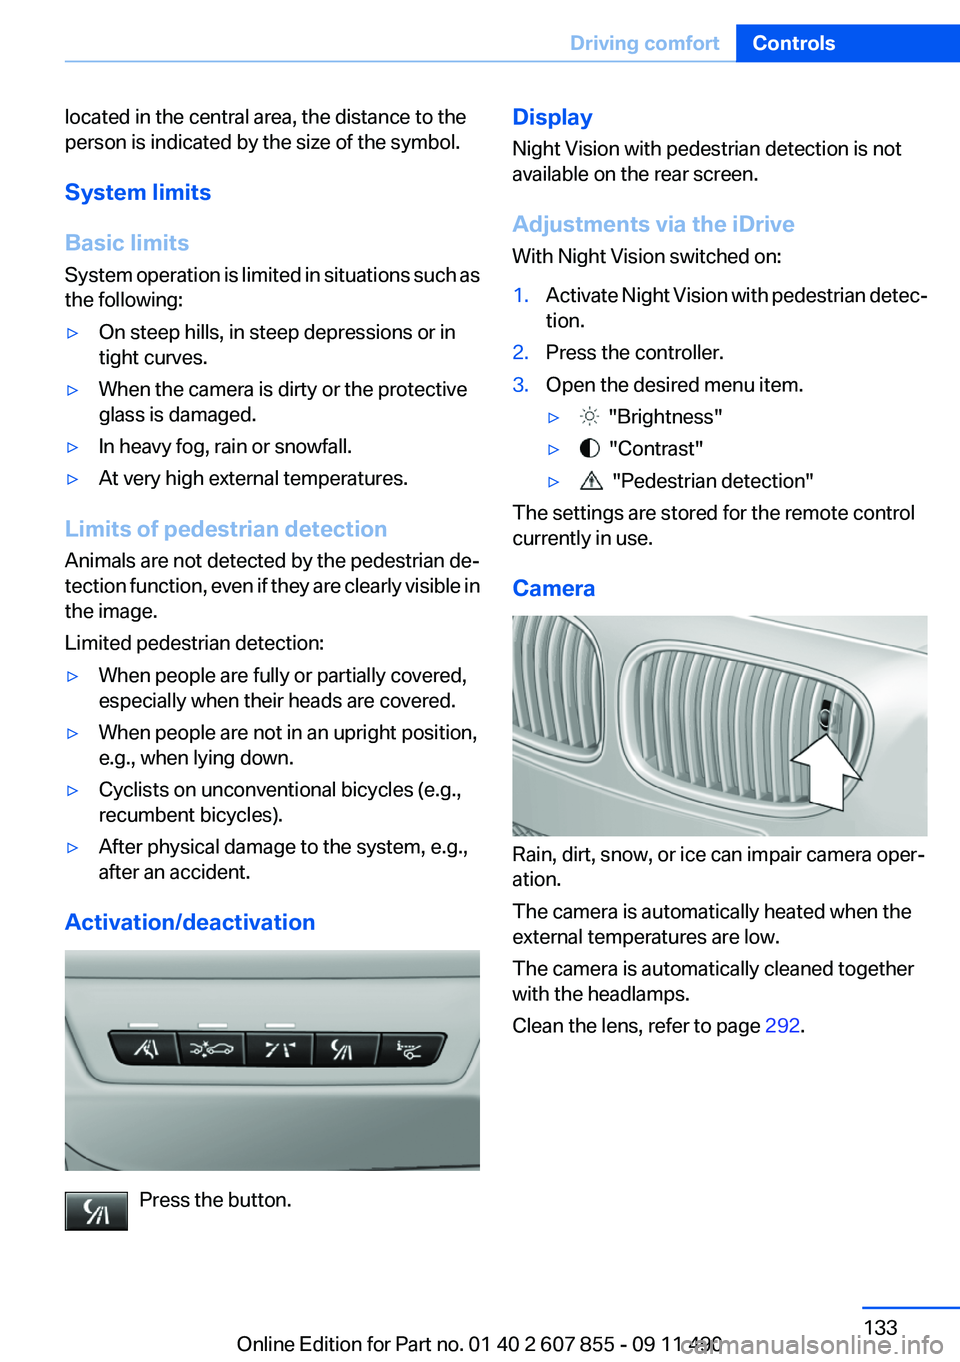
Pedestrian detection
The pedestrian detection and warning system
only operates in darkness and only when a heat
image is displayed.
Seite 131Driving comfortControls131
Online Edition for Part no. 01 40 2 607 855 - 09 11 490
Page 133 of 321
located in the central area, the distance to the
person is indicated by the size of the symbol.
System limits
Basic limits
System operation is limited in situations such as
the following:▷On steep hills, in steep depressions or in
tight curves.▷When the camera is dirty or the protective
glass is damaged.▷In heavy fog, rain or snowfall.▷At very high external temperatures.
Limits of pedestrian detection
Animals are not detected by the pedestrian de‐
tection function, even if they are clearly visible in
the image.
Limited pedestrian detection:
▷When people are fully or partially covered,
especially when their heads are covered.▷When people are not in an upright position,
e.g., when lying down.▷Cyclists on unconventional bicycles (e.g.,
recumbent bicycles).▷After physical damage to the system, e.g.,
after an accident.
Activation/deactivation
Press the button.
Display
Night Vision with pedestrian detection is not
available on the rear screen.
Adjustments via the iDrive
With Night Vision switched on:1.Activate Night Vision with pedestrian detec‐
tion.2.Press the controller.3.Open the desired menu item.▷ "Brightness"▷ "Contrast"▷ "Pedestrian detection"
The settings are stored for the remote control
currently in use.
Camera
Rain, dirt, snow, or ice can impair camera oper‐
ation.
The camera is automatically heated when the
external temperatures are low.
The camera is automatically cleaned together
with the headlamps.
Clean the lens, refer to page 292.
Seite 133Driving comfortControls133
Online Edition for Part no. 01 40 2 607 855 - 09 11 490
Page 138 of 321
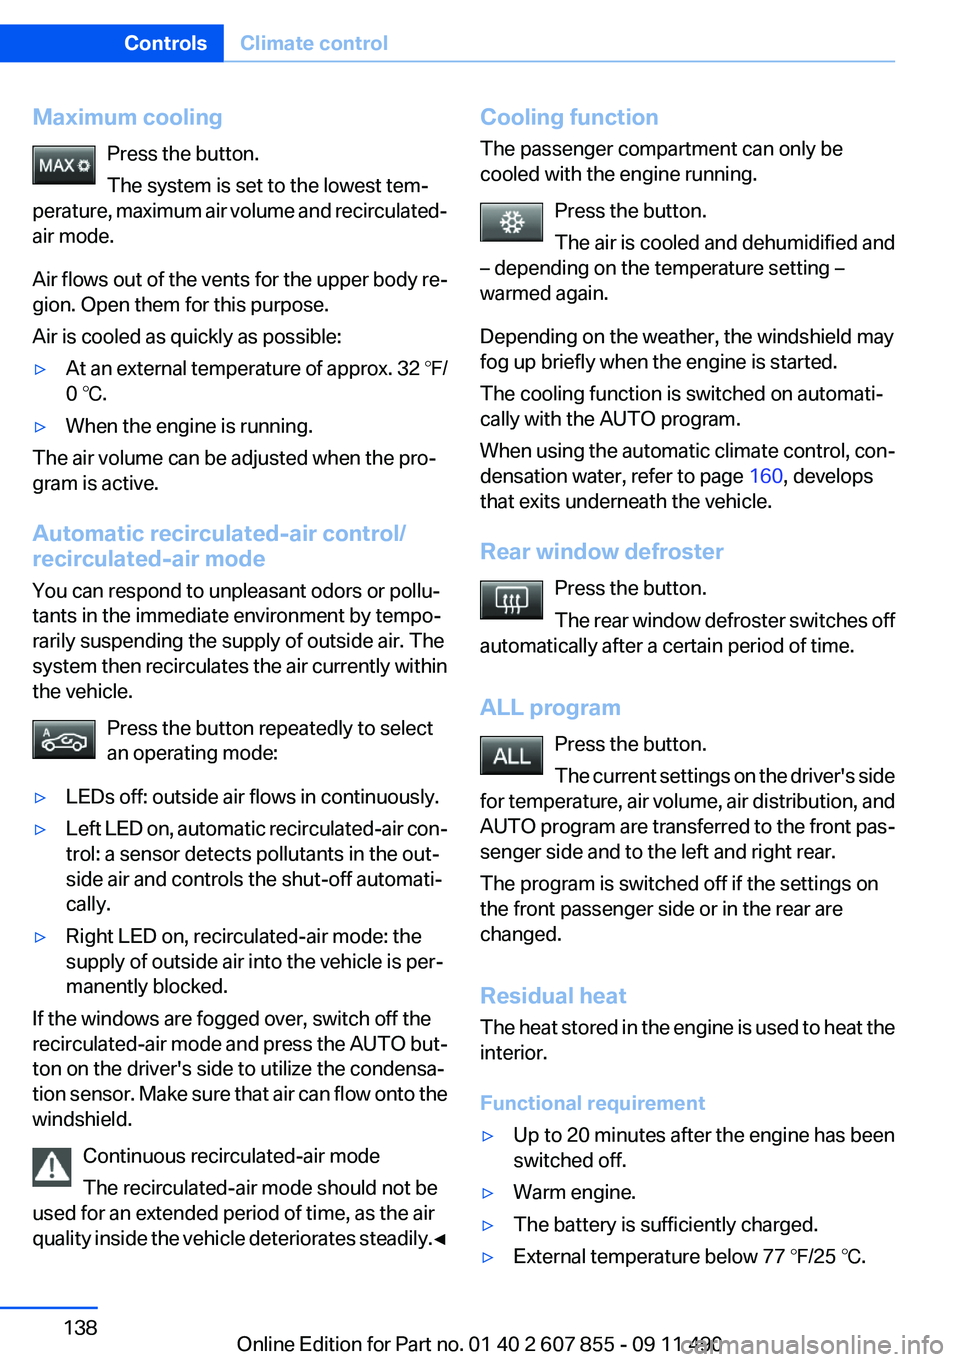
Maximum coolingPress the button.
The system is set to the lowest tem‐
perature, maximum air volume and recirculated-
air mode.
Air flows out of the vents for the upper body re‐
gion. Open them for this purpose.
Air is cooled as quickly as possible:▷At an external temperature of approx. 32 ℉/
0 ℃.▷When the engine is running.
The air volume can be adjusted when the pro‐
gram is active.
Automatic recirculated-air control/
recirculated-air mode
You can respond to unpleasant odors or pollu‐
tants in the immediate environment by tempo‐
rarily suspending the supply of outside air. The
system then recirculates the air currently within
the vehicle.
Press the button repeatedly to select
an operating mode:
▷LEDs off: outside air flows in continuously.▷Left LED on, automatic recirculated-air con‐
trol: a sensor detects pollutants in the out‐
side air and controls the shut-off automati‐
cally.▷Right LED on, recirculated-air mode: the
supply of outside air into the vehicle is per‐
manently blocked.
If the windows are fogged over, switch off the
recirculated-air mode and press the AUTO but‐
ton on the driver's side to utilize the condensa‐
tion sensor. Make sure that air can flow onto the
windshield.
Continuous recirculated-air mode
The recirculated-air mode should not be
used for an extended period of time, as the air
quality inside the vehicle deteriorates steadily. ◀
Cooling function
The passenger compartment can only be
cooled with the engine running.
Press the button.
The air is cooled and dehumidified and
– depending on the temperature setting –
warmed again.
Depending on the weather, the windshield may
fog up briefly when the engine is started.
The cooling function is switched on automati‐
cally with the AUTO program.
When using the automatic climate control, con‐
densation water, refer to page 160, develops
that exits underneath the vehicle.
Rear window defroster Press the button.
The rear window defroster switches off
automatically after a certain period of time.
ALL program Press the button.
The current settings on the driver's side
for temperature, air volume, air distribution, and
AUTO program are transferred to the front pas‐
senger side and to the left and right rear.
The program is switched off if the settings on
the front passenger side or in the rear are
changed.
Residual heat
The heat stored in the engine is used to heat the
interior.
Functional requirement▷Up to 20 minutes after the engine has been
switched off.▷Warm engine.▷The battery is sufficiently charged.▷External temperature below 77 ℉/25 ℃.Seite 138ControlsClimate control138
Online Edition for Part no. 01 40 2 607 855 - 09 11 490
Page 143 of 321
Interior equipmentVehicle equipment
All standard, country-specific and optional
equipment that is offered in the model series is
described in this chapter. Therefore, equipment
is also described that is not available in a vehicle,
e. g., because of the selected optional equip‐
ment or country variant. This also applies for
safety-related functions and systems.
Integrated universal remote
control
The concept
This system can replace up to three different
hand-held transmitters for various types of re‐
mote-controlled equipment, such as garage
doors or lighting systems.
The hand-held transmitter signal can be pro‐
grammed on one of the three memory buttons.
The corresponding device can then be operated
using the programmed memory button.
The LED indicates that a signal is being trans‐
mitted.
When selling the vehicle, delete the stored pro‐
grams for security reasons.
During programming
During programming and before activat‐
ing a device using the integrated universal re‐
mote control, ensure that there are no people,
animals, or objects in the range of movement of
the remote-controlled device; otherwise, there
is a risk of injury or damage.
Also follow the safety instructions of the hand-
held transmitter.◀
Compatibility If this symbol is printed on the packaging
or in the instructions of the hand-heldtransmitter, the remote-controlled device is
generally compatible with the integrated univer‐
sal remote control.
If you have any questions, please contact:▷Your service center.▷www.homelink.com on the Internet.
HomeLink is a registered trademark of Johnson
Controls, Inc.
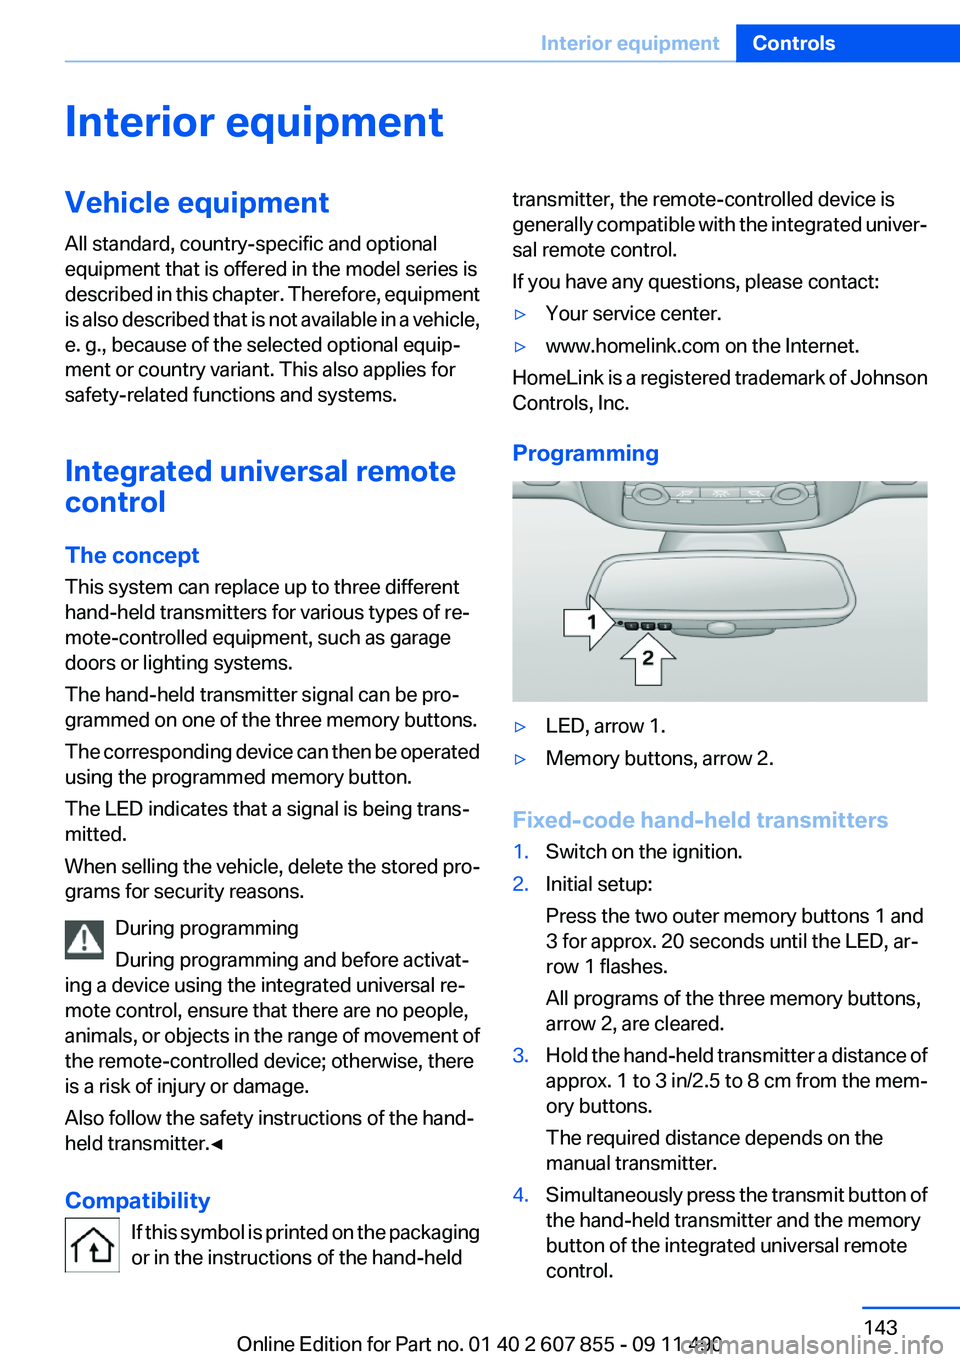
Programming
▷LED, arrow 1.▷Memory buttons, arrow 2.
Fixed-code hand-held transmitters
1.Switch on the ignition.2.Initial setup:
Press the two outer memory buttons 1 and
3 for approx. 20 seconds until the LED, ar‐
row 1 flashes.
All programs of the three memory buttons,
arrow 2, are cleared.3.Hold the hand-held transmitter a distance of
approx. 1 to 3 in/2.5 to 8 cm from the mem‐
ory buttons.
The required distance depends on the
manual transmitter.4.Simultaneously press the transmit button of
the hand-held transmitter and the memory
button of the integrated universal remote
control.Seite 143Interior equipmentControls143
Online Edition for Part no. 01 40 2 607 855 - 09 11 490
Page 148 of 321
Adjust the standard position of the rear
seat backrest
Before transporting passengers in the rear and
adjusting the rear seat backrest, set the rear seat
backrest to its basic position. Otherwise, the
rear seats may not effectively restrain passen‐
gers in an accident if the backrests are not ade‐
quately inclined.◀
Loading position Press the button. The seat moves for‐
ward and the backrest moves to the ba‐
sic position. Comfortable seating is still possible
although knee clearance is reduced.
Basic position Press and hold the button until the seat
stops automatically in its basic position.
Operation of the rear backrest was
deactivated
After a brief period, operation of the rear back‐
rest is deactivated to save battery power.
To reactivate operation:▷Open or close a door or the tailgate.▷Press a button on the remote control.▷Press the Start/Stop button.
Folding down the cargo partition
Danger of pinching
Before folding down the trunk partition,
ensure that the area of movement of the parti‐
tion is clear. In particular, ensure that no one is
located in the area of movement and that no one
reaches into the area of movement of the trunk
partition when the middle section is folded
down. Otherwise, injury or damage may result. ◀
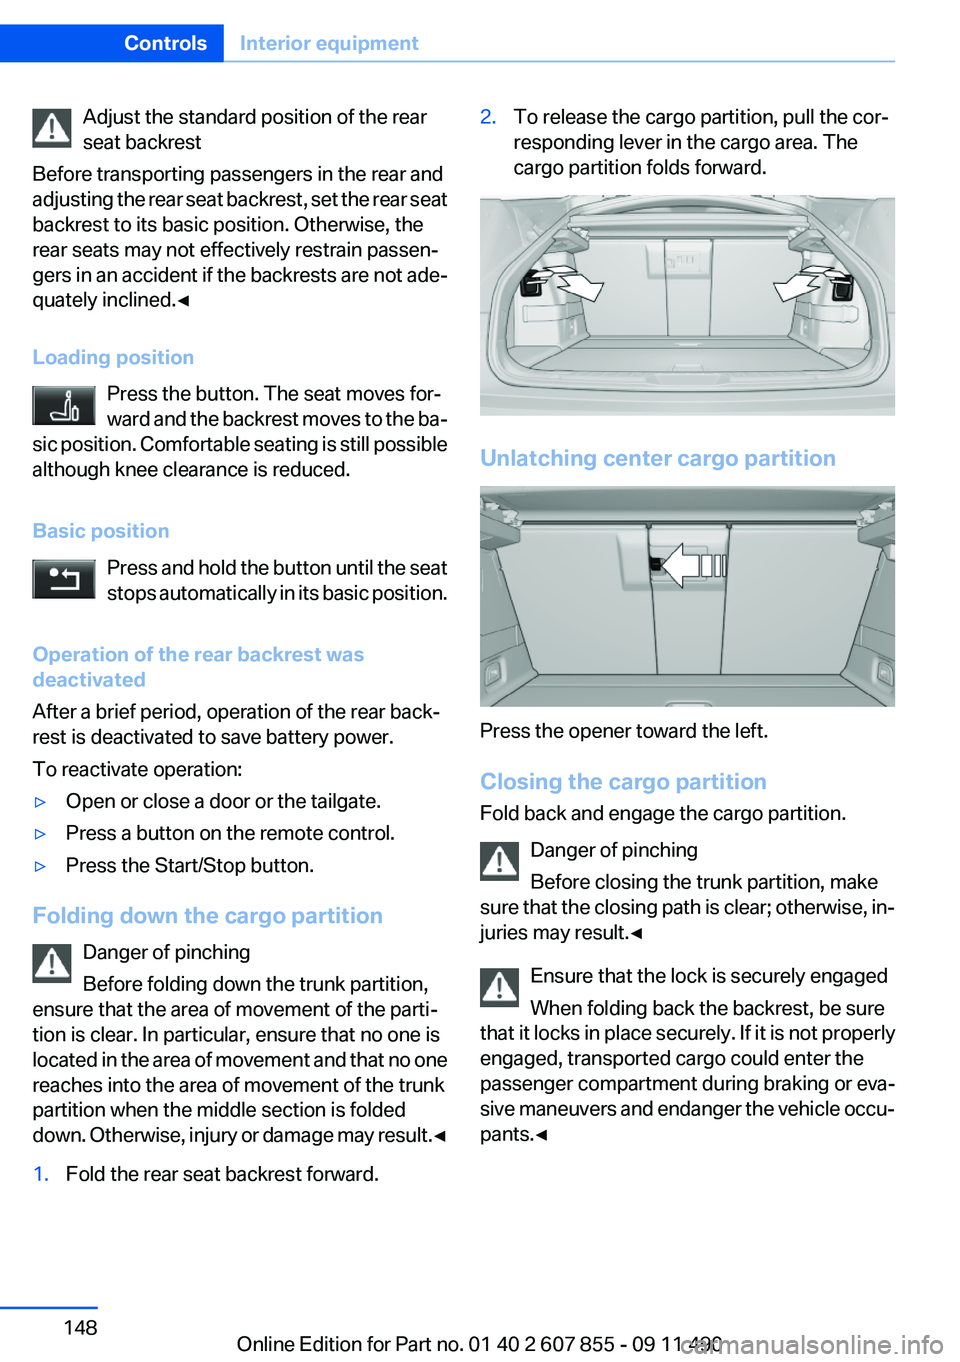
1.Fold the rear seat backrest forward.2.To release the cargo partition, pull the cor‐
responding lever in the cargo area. The
cargo partition folds forward.
Unlatching center cargo partition
Press the opener toward the left.
Closing the cargo partition
Fold back and engage the cargo partition.
Danger of pinching
Before closing the trunk partition, make
sure that the closing path is clear; otherwise, in‐
juries may result.◀
Ensure that the lock is securely engaged
When folding back the backrest, be sure
that it locks in place securely. If it is not properly
engaged, transported cargo could enter the
passenger compartment during braking or eva‐
sive maneuvers and endanger the vehicle occu‐
pants.◀
Seite 148ControlsInterior equipment148
Online Edition for Part no. 01 40 2 607 855 - 09 11 490
Page 159 of 321
Do not remove the heat shields installed and
never apply undercoating to them. When driv‐
ing, standing at idle and while parking, take care
to avoid possible contact between the hot ex‐
haust system and any highly flammable materi‐
als such as hay, leaves, grass, etc. Such contact
could lead to a fire, and with it the risk of serious
personal injury as well as property damage.
Do not touch hot exhaust pipes; otherwise, there
is the danger of getting burned.◀
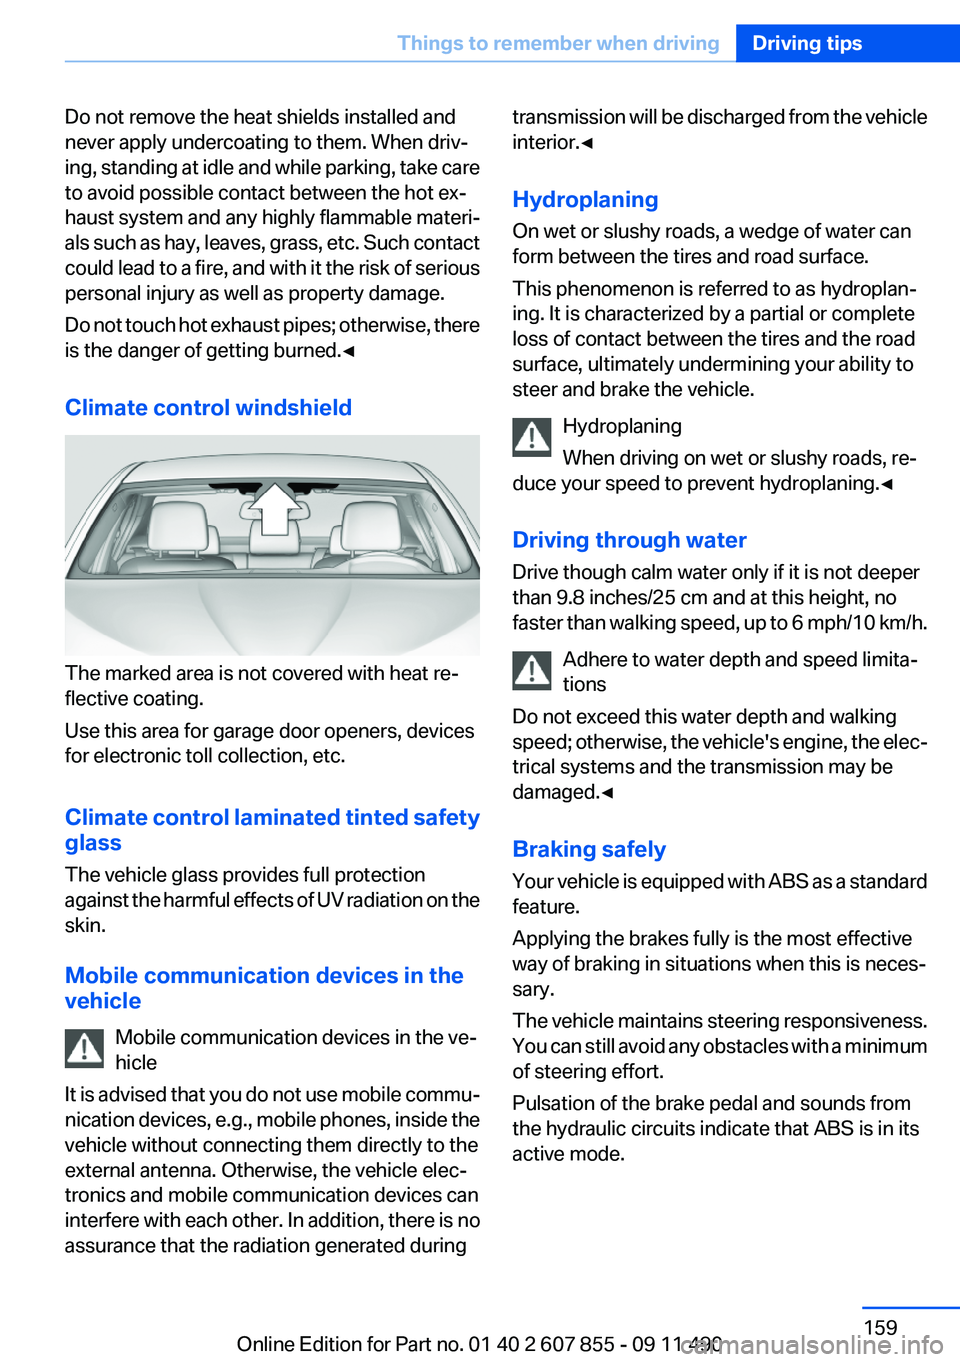
Climate control windshield
The marked area is not covered with heat re‐
flective coating.
Use this area for garage door openers, devices
for electronic toll collection, etc.
Climate control laminated tinted safety
glass
The vehicle glass provides full protection
against the harmful effects of UV radiation on the
skin.
Mobile communication devices in the
vehicle
Mobile communication devices in the ve‐
hicle
It is advised that you do not use mobile commu‐
nication devices, e.g., mobile phones, inside the
vehicle without connecting them directly to the
external antenna. Otherwise, the vehicle elec‐
tronics and mobile communication devices can
interfere with each other. In addition, there is no
assurance that the radiation generated during
transmission will be discharged from the vehicle
interior.◀
Hydroplaning
On wet or slushy roads, a wedge of water can
form between the tires and road surface.
This phenomenon is referred to as hydroplan‐
ing. It is characterized by a partial or complete
loss of contact between the tires and the road
surface, ultimately undermining your ability to
steer and brake the vehicle.
Hydroplaning
When driving on wet or slushy roads, re‐
duce your speed to prevent hydroplaning.◀
Driving through water
Drive though calm water only if it is not deeper
than 9.8 inches/25 cm and at this height, no
faster than walking speed, up to 6 mph/10 km/h.
Adhere to water depth and speed limita‐
tions
Do not exceed this water depth and walking
speed; otherwise, the vehicle's engine, the elec‐
trical systems and the transmission may be
damaged.◀
Braking safely
Your vehicle is equipped with ABS as a standard
feature.
Applying the brakes fully is the most effective
way of braking in situations when this is neces‐
sary.
The vehicle maintains steering responsiveness.
You can still avoid any obstacles with a minimum
of steering effort.
Pulsation of the brake pedal and sounds from
the hydraulic circuits indicate that ABS is in its
active mode.Seite 159Things to remember when drivingDriving tips159
Online Edition for Part no. 01 40 2 607 855 - 09 11 490