2012 BMW 535I GRAN TURISMO light
[x] Cancel search: lightPage 194 of 321
The setting is stored for the remote control cur‐
rently in use.
Deleting favorites1."Satellite radio"2. "Manage favorites"3.Highlight the desired favorite.4.Open "Options".5."Delete entry"
Traffic Jump
Traffic and weather information for a selected
region is broadcast every few minutes.
Selecting a region
1."Radio"2."Satellite radio"3.Open "Options".4."Set jump"5.Select the desired region.
The region is stored for the remote control cur‐
rently in use.
Activating/deactivating the jump
1."Radio"2."Satellite radio"3. "Jump to:"
Information for the selected region is broadcast
as soon as it is available.
A new panel opens.
Canceling the Traffic Jump: "Cancel".
SymbolMeaning Information will be broadcast shortly. Information is currently being broad‐
cast.
Select one of the symbols to deactivate Traffic
Jump.
Automatic update
About twice a year, Sirius performs an update of
the channel names and positions. The update
takes place automatically and may take several
minutes.
Notes▷Reception may not be available in some sit‐
uations, such as under certain environmen‐
tal or topographic conditions. The satellite
radio has no influence on this.▷The signal may not be available in tunnels or
underground garages next to tall buildings
or near trees, mountains or other powerful
sources of radio interference.
Stored stations
General information
It is possible to store up to 40 stations.
Calling up a station
1."Radio"2."Presets"3.Select the desired station.
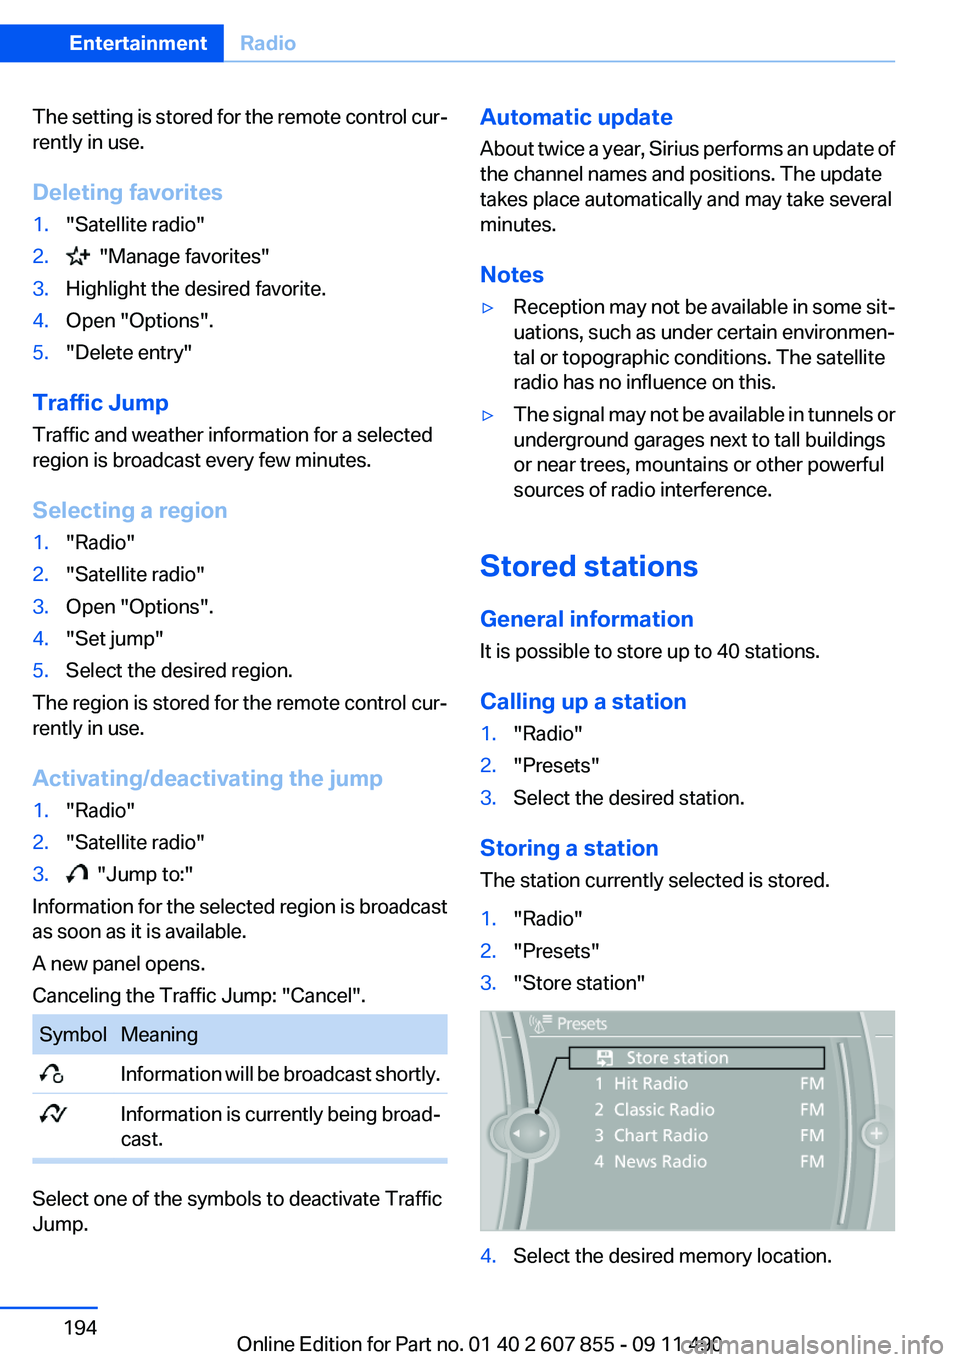
Storing a station
The station currently selected is stored.
1."Radio"2."Presets"3."Store station"4.Select the desired memory location.Seite 194EntertainmentRadio194
Online Edition for Part no. 01 40 2 607 855 - 09 11 490
Page 203 of 321
Malfunctions involving individual CDs/
DVDs
If malfunctions occur only with particular CDs/
DVDs, this can be due to one of the following
causes:
Home-recorded CDs/DVDs▷Possible reasons for malfunctions with
home-recorded CDs/DVDs are inconsistent
data creation or recording processes, or
poor quality or old age of the blank CD/DVD.▷Only label CDs/DVDs on the upper side with
a pen intended for this purpose.
Damage
▷Avoid fingerprints, dust, scratches and
moisture.▷Store CDs/DVDs in a sleeve.▷Do not subject CDs/DVDs to temperatures
over 122 ℉/50 ℃, high humidity or direct
sunlight.
CDs/DVDs with copy protection
CDs/DVDs are often provided with a copy pro‐
tection feature by the manufacturer. This can
mean that some CDs/DVDs cannot be played or
can only be played to a limited extent.
MACROVISION
This product contains copyrighted technology
that is based on multiple registered US patents
and the intellectual property of the Macrovision
Corporation and other manufacturers. The use
of this copy protection must be approved by
Macrovision. Media protected by this product -
unless otherwise agreed with Macrovision - may
only be used for private purposes. Copying of
this technology is prohibited.
DTS Digital Surround™ Manufactured under license under U.S.
Patent Numbers: 5,451,942;
5,956,674; 5,974,380; 5,978,762; 6,487,535 &
and other patents granted and registered in the
USA and worldwide. DTS and the logo are reg‐
istered trademarks & DTS Digital Surround and
the DTS logos are trademarks of DTS Inc. ©
DTS, Inc. All rights reserved.
Music collection
Storing music
General information
Music tracks from CDs/DVDs and USB devices
can be stored in the music collection on a hard
disc in the vehicle and played from there.▷Audio CD: tracks are converted into a com‐
pressed audio format. If available, informa‐
tion on the album, such as the artist, is
stored as well.▷CD/DVD or USB device with compressed
audio files: the entire content of the CD/DVD
or the USB device is stored in the vehicle as
an album. The WMA, MP3, M4A, and AAC
formats are stored. Individual tracks and di‐
rectories can be deleted later, Deleting a
track and directory, refer to page 207.
Tracks with DRM copy protection can be
stored but cannot be played back.
Backing up music data
Regularly back up the music data; other‐
wise, it could be lost if there is a fault on the hard
disk.◀
Music recognition technology and re‐
lated data are provided by Gracenote®.
Gracenote is the industry standard in music rec‐
ognition technology and related content deliv‐
ery. For more information, please visit
www.gracenote.com.
CD and music-related data from Gracenote, Inc.,
copyright © 2000-2009 Gracenote. Gracenote
Software, copyright © 2000-2009 Gracenote.
This product and service may practice one or
more of the following U.S. Patents: #5,987,525;
#6,061,680; #6,154,773, #6,161,132,
#6,230,192, #6,230,207, #6,240,459,
Seite 203CD/multimediaEntertainment203
Online Edition for Part no. 01 40 2 607 855 - 09 11 490
Page 207 of 321
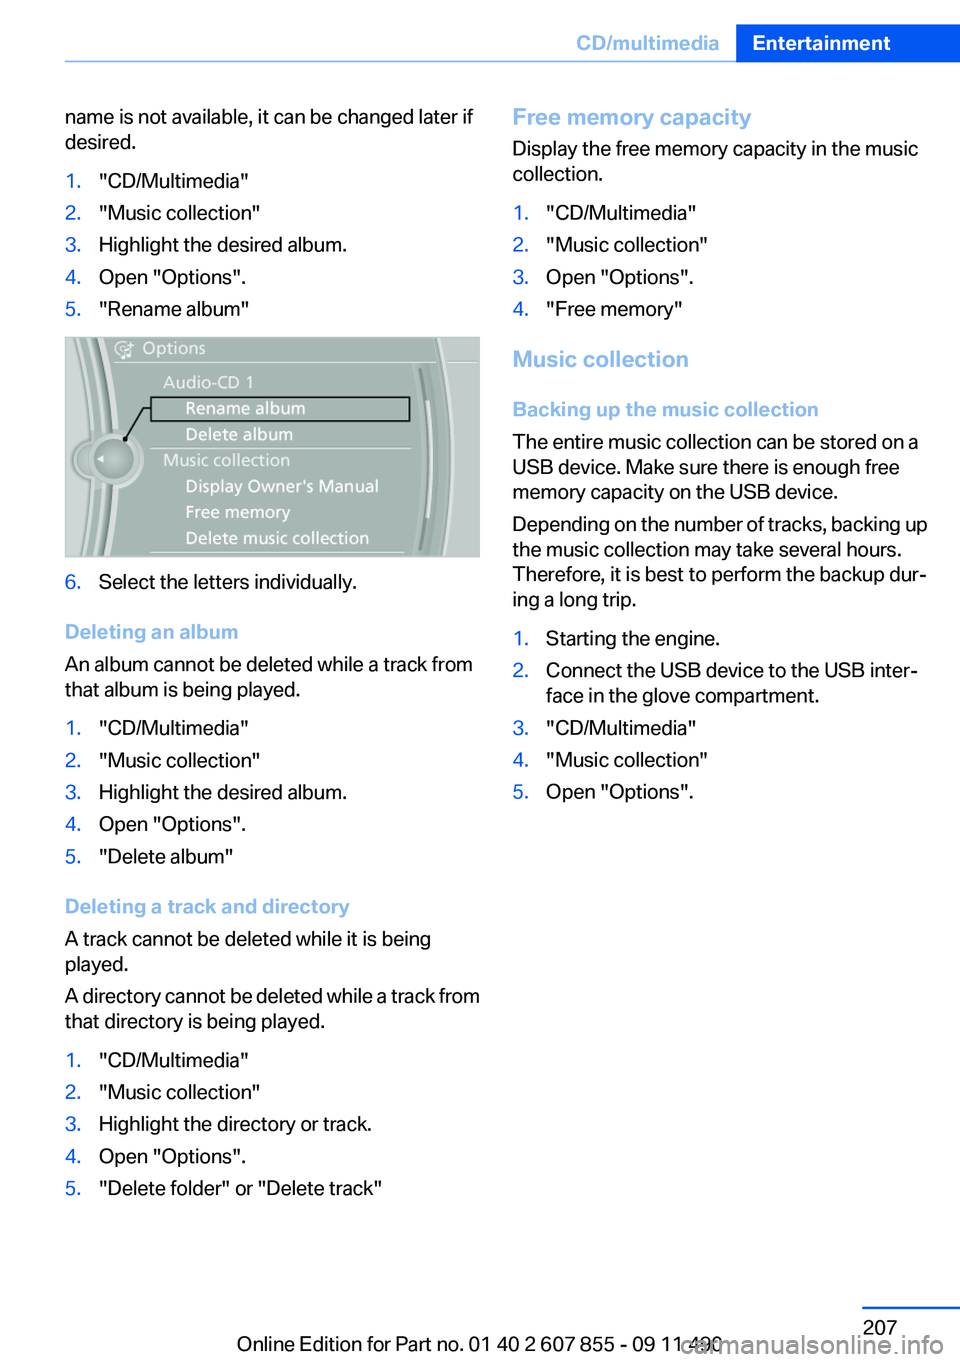
name is not available, it can be changed later if
desired.1."CD/Multimedia"2."Music collection"3.Highlight the desired album.4.Open "Options".5."Rename album"6.Select the letters individually.
Deleting an album
An album cannot be deleted while a track from
that album is being played.
1."CD/Multimedia"2."Music collection"3.Highlight the desired album.4.Open "Options".5."Delete album"
Deleting a track and directory
A track cannot be deleted while it is being
played.
A directory cannot be deleted while a track from
that directory is being played.
1."CD/Multimedia"2."Music collection"3.Highlight the directory or track.4.Open "Options".5."Delete folder" or "Delete track"Free memory capacity
Display the free memory capacity in the music
collection.1."CD/Multimedia"2."Music collection"3.Open "Options".4."Free memory"
Music collection
Backing up the music collection
The entire music collection can be stored on a
USB device. Make sure there is enough free
memory capacity on the USB device.
Depending on the number of tracks, backing up
the music collection may take several hours.
Therefore, it is best to perform the backup dur‐
ing a long trip.
1.Starting the engine.2.Connect the USB device to the USB inter‐
face in the glove compartment.3."CD/Multimedia"4."Music collection"5.Open "Options".Seite 207CD/multimediaEntertainment207
Online Edition for Part no. 01 40 2 607 855 - 09 11 490
Page 214 of 321
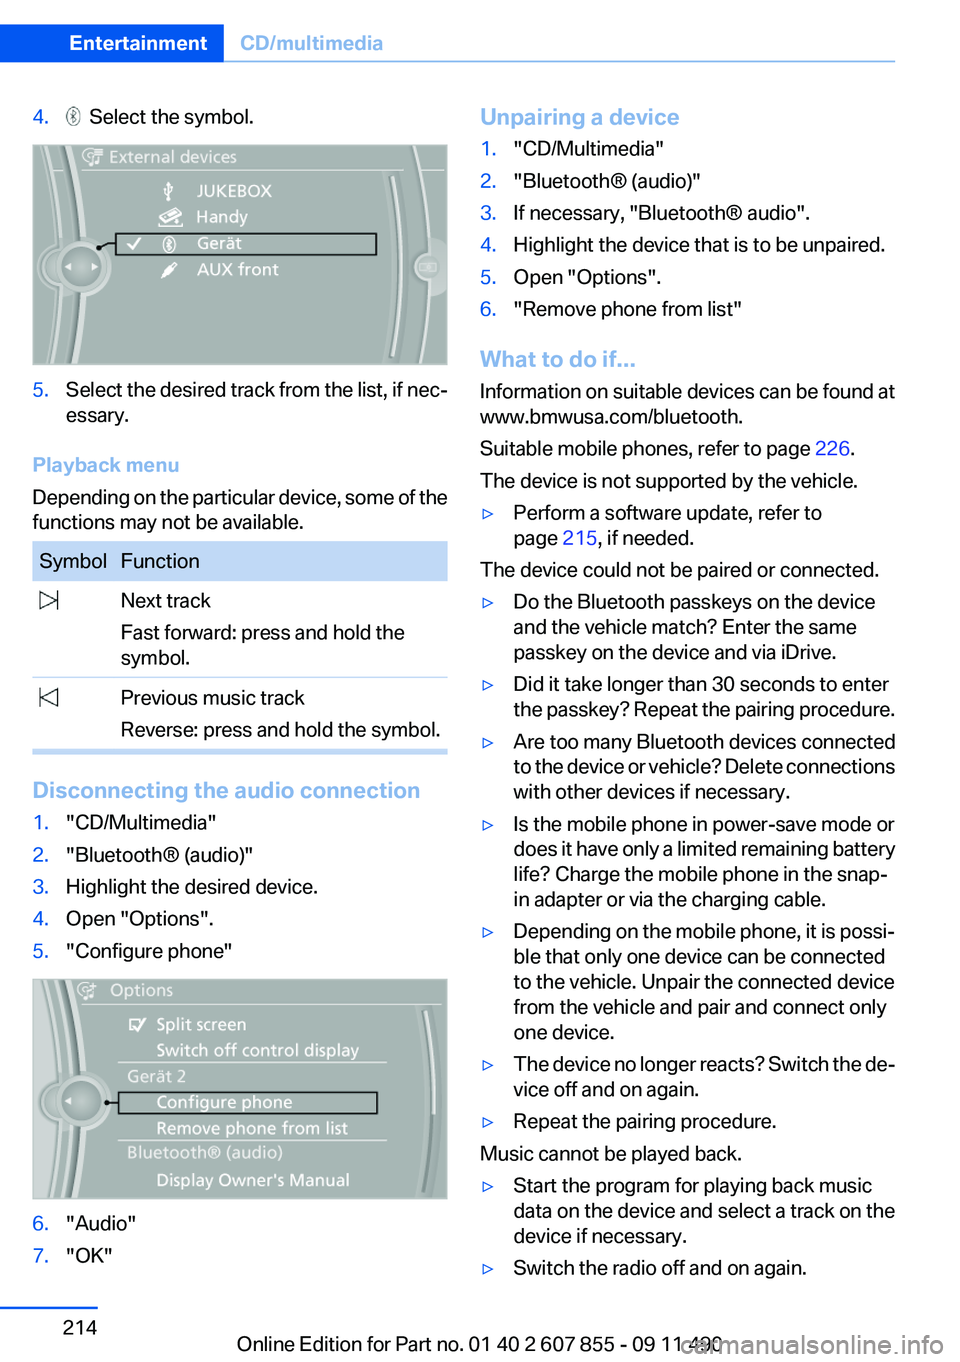
4. Select the symbol.5.Select the desired track from the list, if nec‐
essary.
Playback menu
Depending on the particular device, some of the
functions may not be available.
SymbolFunction Next track
Fast forward: press and hold the
symbol. Previous music track
Reverse: press and hold the symbol.
Disconnecting the audio connection
1."CD/Multimedia"2."Bluetooth® (audio)"3.Highlight the desired device.4.Open "Options".5."Configure phone"6."Audio"7."OK"Unpairing a device1."CD/Multimedia"2."Bluetooth® (audio)"3.If necessary, "Bluetooth® audio".4.Highlight the device that is to be unpaired.5.Open "Options".6."Remove phone from list"
What to do if...
Information on suitable devices can be found at
www.bmwusa.com/bluetooth.
Suitable mobile phones, refer to page 226.
The device is not supported by the vehicle.
▷Perform a software update, refer to
page 215, if needed.
The device could not be paired or connected.
▷Do the Bluetooth passkeys on the device
and the vehicle match? Enter the same
passkey on the device and via iDrive.▷Did it take longer than 30 seconds to enter
the passkey? Repeat the pairing procedure.▷Are too many Bluetooth devices connected
to the device or vehicle? Delete connections
with other devices if necessary.▷Is the mobile phone in power-save mode or
does it have only a limited remaining battery
life? Charge the mobile phone in the snap-
in adapter or via the charging cable.▷Depending on the mobile phone, it is possi‐
ble that only one device can be connected
to the vehicle. Unpair the connected device
from the vehicle and pair and connect only
one device.▷The device no longer reacts? Switch the de‐
vice off and on again.▷Repeat the pairing procedure.
Music cannot be played back.
▷Start the program for playing back music
data on the device and select a track on the
device if necessary.▷Switch the radio off and on again.Seite 214EntertainmentCD/multimedia214
Online Edition for Part no. 01 40 2 607 855 - 09 11 490
Page 218 of 321
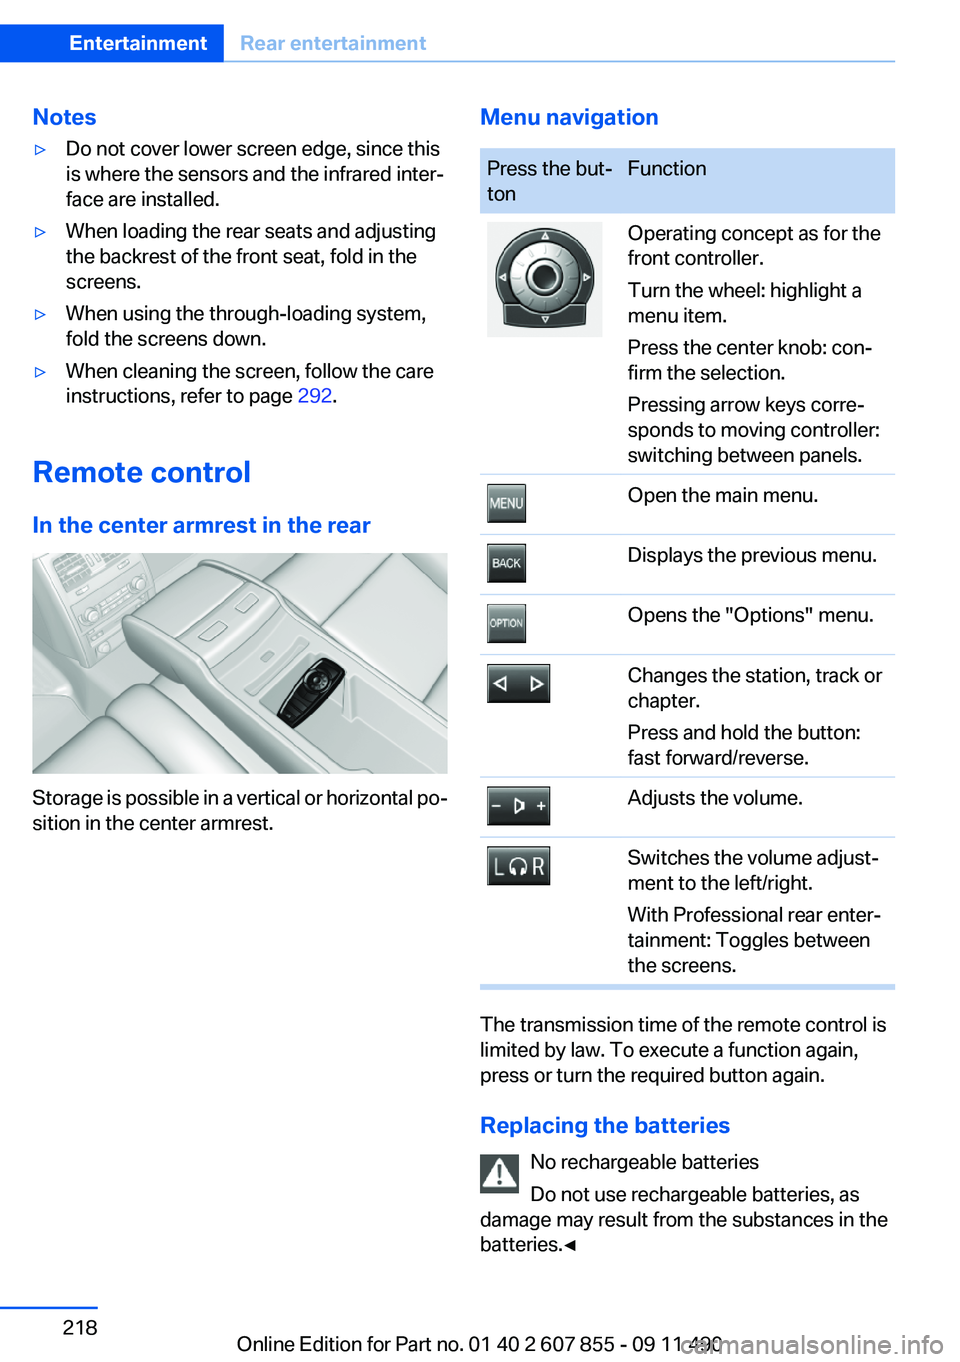
Notes▷Do not cover lower screen edge, since this
is where the sensors and the infrared inter‐
face are installed.▷When loading the rear seats and adjusting
the backrest of the front seat, fold in the
screens.▷When using the through-loading system,
fold the screens down.▷When cleaning the screen, follow the care
instructions, refer to page 292.
Remote control
In the center armrest in the rear
Storage is possible in a vertical or horizontal po‐
sition in the center armrest.
Menu navigationPress the but‐
tonFunctionOperating concept as for the
front controller.
Turn the wheel: highlight a
menu item.
Press the center knob: con‐
firm the selection.
Pressing arrow keys corre‐
sponds to moving controller:
switching between panels.Open the main menu.Displays the previous menu.Opens the "Options" menu.Changes the station, track or
chapter.
Press and hold the button:
fast forward/reverse.Adjusts the volume.Switches the volume adjust‐
ment to the left/right.
With Professional rear enter‐
tainment: Toggles between
the screens.
The transmission time of the remote control is
limited by law. To execute a function again,
press or turn the required button again.
Replacing the batteries No rechargeable batteries
Do not use rechargeable batteries, as
damage may result from the substances in the
batteries.◀
Seite 218EntertainmentRear entertainment218
Online Edition for Part no. 01 40 2 607 855 - 09 11 490
Page 221 of 321
The rear has priority▷When the source selected in the rear is
played on headphones, it can be selected
but not operated via iDrive in the front. Other
audio or video sources can be operated.▷Sound is output in the rear via headphones:
the source selected via the iDrive in the front
is output on the vehicle loudspeakers.▷Sound is output via loudspeakers: the
source selected in the rear is output on the
vehicle loudspeakers. Audio or video sour‐
ces cannot be selected via the iDrive in the
front.
Switching off the rear DVD
▷Rear entertainment is switched off.▷To switch rear entertainment back on: select
a different priority via the iDrive in the front
and switch on the system, refer to
page 217.
Headphones, vehicle
loudspeakers
Connecting the headphones
Normal headphones
Connect via the jack 1/8"/3.5 mm, refer to
page 217, on the rear CD/DVD player.
Infrared headphones
Connection via the infrared interface on the
lower edge of the screen.
Fitting infrared headphones and information on
which headphones are supported can be ob‐
tained from your service center.
When using infrared headphones, ensure that
the connection between the headphones and
the infrared interface is not disrupted:
▷Do not place an obstacle between the inter‐
face and headphones.▷Do not cover the interface.▷Do not scratch the interface.
Fold up display screens for interference-free re‐
ception.
Unfavorable light conditions such as bright am‐
bient light can impair reception.
Sound output on the headphones or
vehicle loudspeakers
Operation is only possible in the rear.
1."Options" Open.2."Headphones" or"Loudspeakers"
With the following setting, sound output in the
rear is not possible via the vehicle speakers:
"Driver control".
External devices
General information
External audio and video devices and digital
cameras can be connected to cinch sockets, re‐
fer to page 217, on the CD/DVD player. Opera‐
tion takes place on the external device.
Due to the large number of different audio and
video devices available on the market, it cannot
be ensured that every audio and video device
will be displayed correctly on the screen.
Connecting an external device
1.Fold down the cover in front of the cinch
sockets on the CD/DVD player.2.Connect the external device to the RCA
sockets.▷Video: yellow socket.▷Audio: white and red socket.
Starting playback
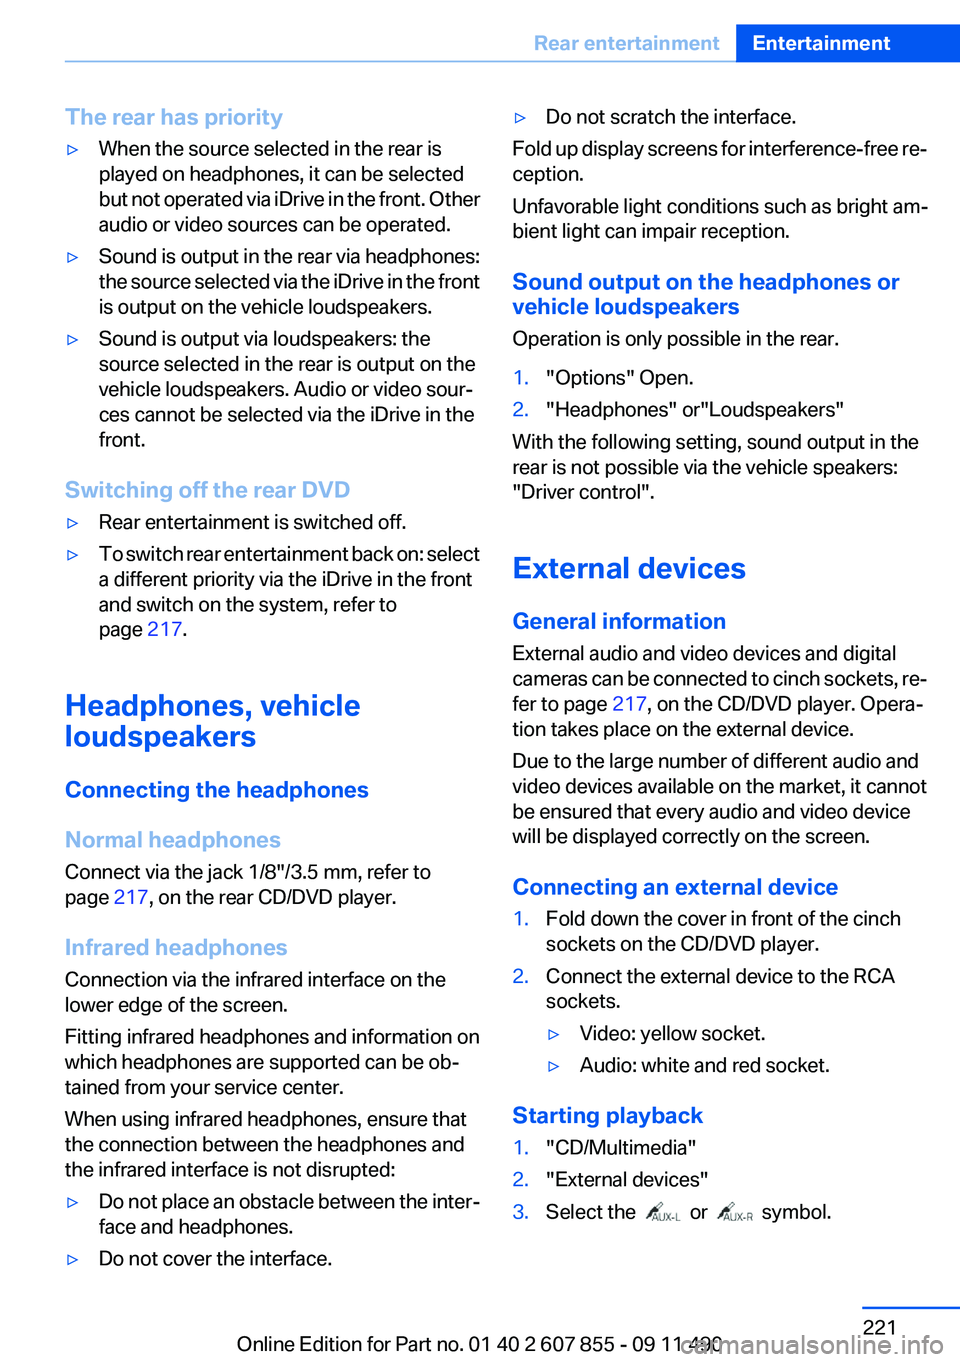
1."CD/Multimedia"2."External devices"3.Select the or symbol.Seite 221Rear entertainmentEntertainment221
Online Edition for Part no. 01 40 2 607 855 - 09 11 490
Page 229 of 321
Configuring cell phone
Additional functions can be activated or deacti‐
vated for paired and connected mobile phones.1."Telephone"2."Bluetooth® (phone)"3.Highlight the mobile phone to be config‐
ured.4."Options" Open.5."Configure phone"6.At least one function must be selected.▷"Telephone"▷"Additional telephone"▷"Audio"7."OK"
If a function is assigned to a mobile phone, the
function will be deactivated where appropriate
for a mobile phone that is already connected and
the mobile phone will be unpaired.
Swapping the telephone and additional
telephone
The function of the telephone and additional tel‐
ephone can be swapped automatically.
1."Telephone"2."Bluetooth® (phone)"3."Swap phone/addit. phone"
Unpairing the mobile phone
1."Telephone"2."Bluetooth® (phone)"3.Highlight the mobile phone that is to be un‐
paired.4."Options" Open.5."Remove phone from list"
What to do if...
Information on suitable mobile phones, refer to
page 226.
The mobile phone could not be paired or con‐
nected.
▷Is Bluetooth activated in the vehicle and on
the mobile phone? Activate Bluetooth in the
vehicle and on the mobile phone.▷Do the Bluetooth passkeys on the mobile
phone and the vehicle match? Enter the
same passkey on the mobile phone and via
iDrive.▷Did it take longer than 30 seconds to enter
the passkey? Repeat the pairing procedure.▷Are too many Bluetooth devices connected
to the mobile phone or vehicle? Delete con‐
nections with other devices if necessary.▷Is the audio connection activated? Deacti‐
vate the audio connection.▷Is the mobile phone in power-save mode or
does it have only a limited remaining battery
life? Charge the mobile phone in the snap-
in adapter or via the charging cable.▷Depending on the mobile phone, it is possi‐
ble that only one cell phone can be con‐
nected to the vehicle. Unpair the connected
cell phone from the vehicle and pair and con‐
nect only one cell phone.
The mobile phone no longer reacts.
▷Switch the mobile phone off and on again.▷Ambient temperatures too high or too low?
Do not subject the mobile phone to extreme
ambient temperatures.
The telephone functions are not available.
▷Is the mobile phone paired as an additional
telephone and is the additional telephone
function deactivated? Activate the function.▷Is an outgoing call not possible? Connect
the mobile phone as a telephone.
No or not all phone book entries are displayed,
or they are incomplete.
▷Transmission of the phone book entries is
not yet complete.▷It is possible that only the phone book en‐
tries of the mobile phone or the SIM card are
transmitted.Seite 229TelephoneCommunication229
Online Edition for Part no. 01 40 2 607 855 - 09 11 490
Page 233 of 321
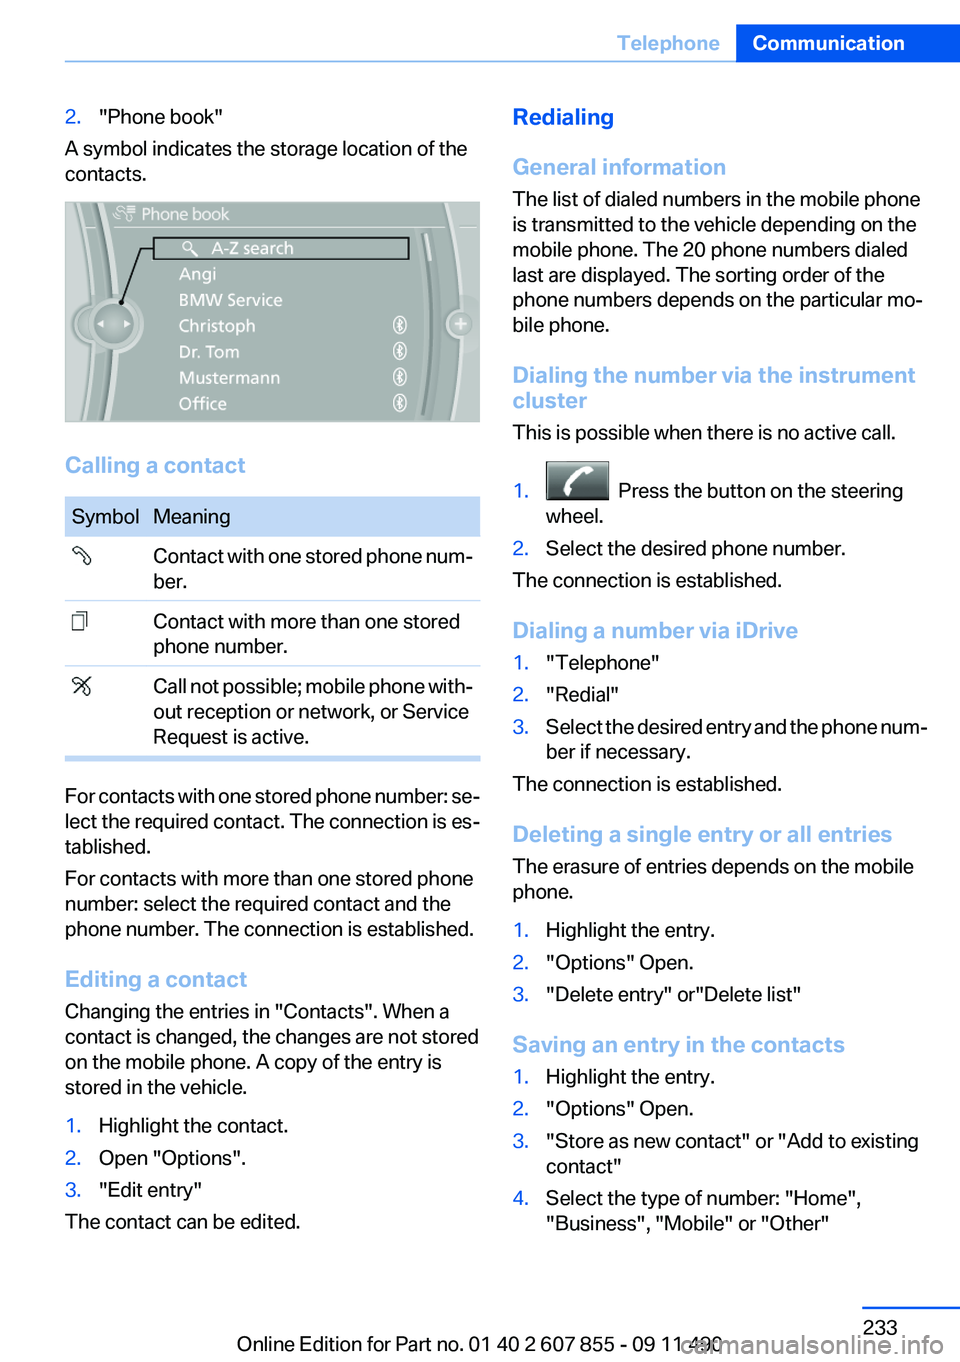
2."Phone book"
A symbol indicates the storage location of the
contacts.
Calling a contact
SymbolMeaning Contact with one stored phone num‐
ber. Contact with more than one stored
phone number. Call not possible; mobile phone with‐
out reception or network, or Service
Request is active.
For contacts with one stored phone number: se‐
lect the required contact. The connection is es‐
tablished.
For contacts with more than one stored phone
number: select the required contact and the
phone number. The connection is established.
Editing a contact
Changing the entries in "Contacts". When a
contact is changed, the changes are not stored
on the mobile phone. A copy of the entry is
stored in the vehicle.
1.Highlight the contact.2.Open "Options".3."Edit entry"
The contact can be edited.
Redialing
General information
The list of dialed numbers in the mobile phone
is transmitted to the vehicle depending on the
mobile phone. The 20 phone numbers dialed
last are displayed. The sorting order of the
phone numbers depends on the particular mo‐
bile phone.
Dialing the number via the instrument
cluster
This is possible when there is no active call.1. Press the button on the steering
wheel.2.Select the desired phone number.
The connection is established.
Dialing a number via iDrive
1."Telephone"2."Redial"3.Select the desired entry and the phone num‐
ber if necessary.
The connection is established.
Deleting a single entry or all entries
The erasure of entries depends on the mobile
phone.
1.Highlight the entry.2."Options" Open.3."Delete entry" or"Delete list"
Saving an entry in the contacts
1.Highlight the entry.2."Options" Open.3."Store as new contact" or "Add to existing
contact"4.Select the type of number: "Home",
"Business", "Mobile" or "Other"Seite 233TelephoneCommunication233
Online Edition for Part no. 01 40 2 607 855 - 09 11 490