2012 BMW 528I window
[x] Cancel search: windowPage 150 of 335
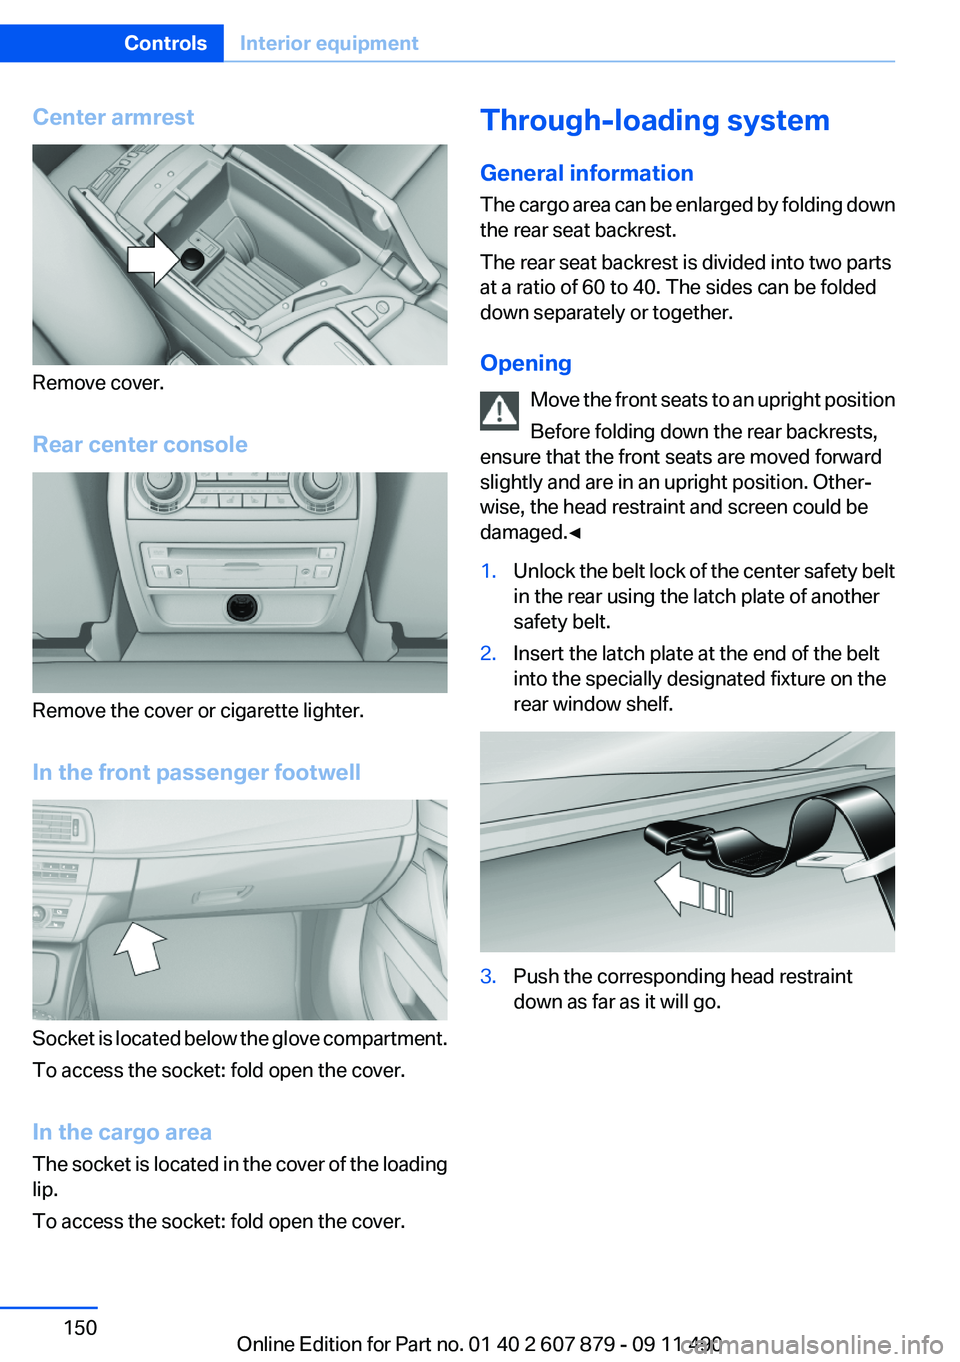
Center armrest
Remove cover.
Rear center console
Remove the cover or cigarette lighter.
In the front passenger footwell
Socket is located below the glove compartment.
To access the socket: fold open the cover.
In the cargo area
The socket is located in the cover of the loading
lip.
To access the socket: fold open the cover.
Through-loading system
General information
The cargo area can be enlarged by folding down
the rear seat backrest.
The rear seat backrest is divided into two parts
at a ratio of 60 to 40. The sides can be folded
down separately or together.
Opening Move the front seats to an upright position
Before folding down the rear backrests,
ensure that the front seats are moved forward
slightly and are in an upright position. Other‐
wise, the head restraint and screen could be
damaged.◀1.Unlock the belt lock of the center safety belt
in the rear using the latch plate of another
safety belt.2.Insert the latch plate at the end of the belt
into the specially designated fixture on the
rear window shelf.3.Push the corresponding head restraint
down as far as it will go.Seite 150ControlsInterior equipment150
Online Edition for Part no. 01 40 2 607 879 - 09 11 490
Page 151 of 335
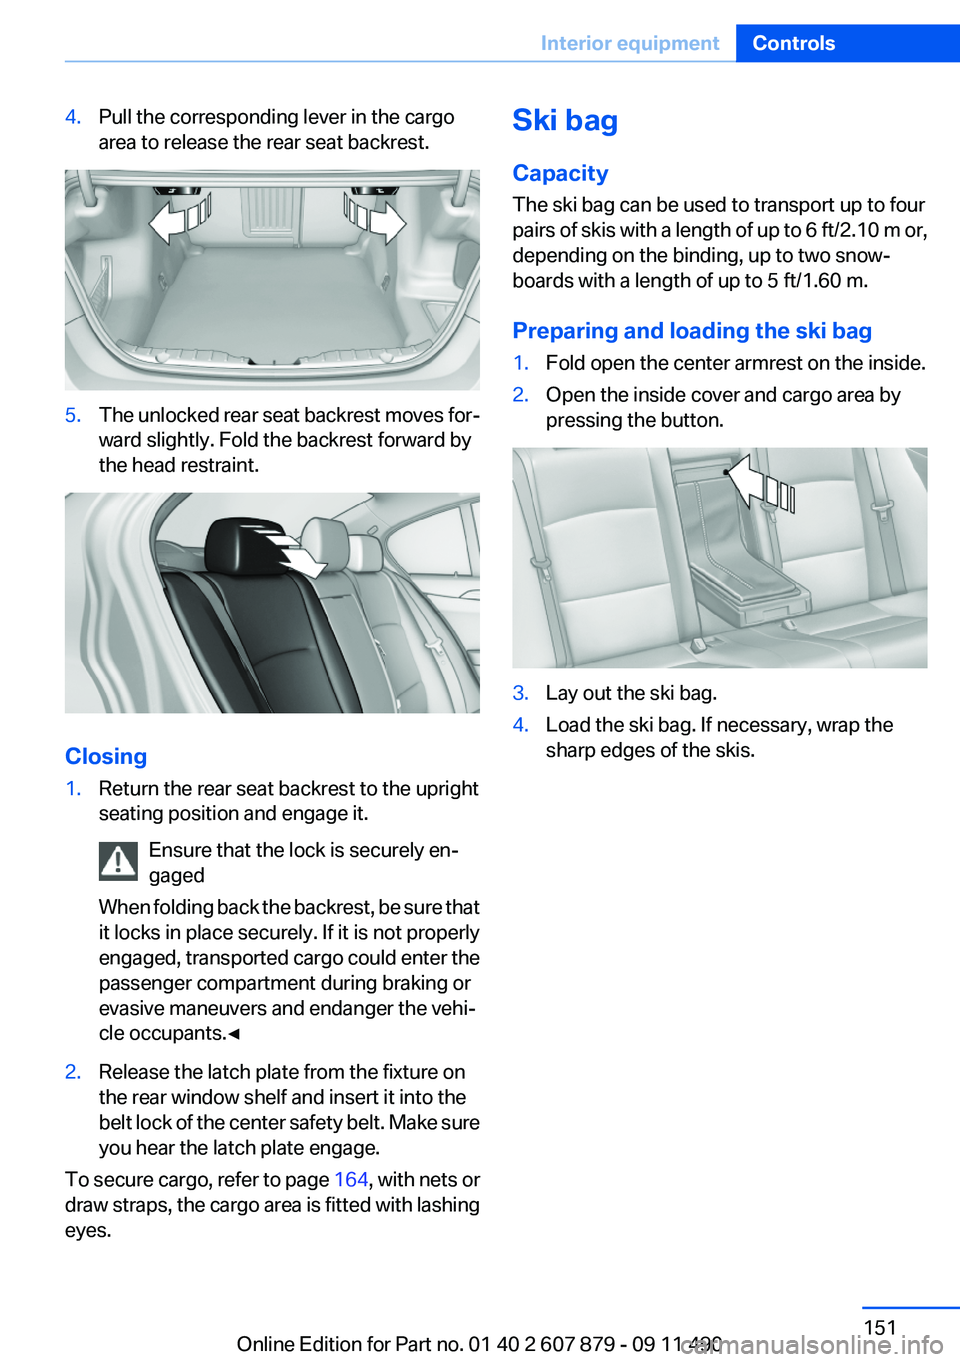
4.Pull the corresponding lever in the cargo
area to release the rear seat backrest.5.The unlocked rear seat backrest moves for‐
ward slightly. Fold the backrest forward by
the head restraint.
Closing
1.Return the rear seat backrest to the upright
seating position and engage it.
Ensure that the lock is securely en‐
gaged
When folding back the backrest, be sure that
it locks in place securely. If it is not properly
engaged, transported cargo could enter the
passenger compartment during braking or
evasive maneuvers and endanger the vehi‐
cle occupants.◀2.Release the latch plate from the fixture on
the rear window shelf and insert it into the
belt lock of the center safety belt. Make sure
you hear the latch plate engage.
To secure cargo, refer to page 164, with nets or
draw straps, the cargo area is fitted with lashing
eyes.
Ski bag
Capacity
The ski bag can be used to transport up to four
pairs of skis with a length of up to 6 ft/2.10 m or,
depending on the binding, up to two snow‐
boards with a length of up to 5 ft/1.60 m.
Preparing and loading the ski bag1.Fold open the center armrest on the inside.2.Open the inside cover and cargo area by
pressing the button.3.Lay out the ski bag.4.Load the ski bag. If necessary, wrap the
sharp edges of the skis.Seite 151Interior equipmentControls151
Online Edition for Part no. 01 40 2 607 879 - 09 11 490
Page 160 of 335
Things to remember when drivingVehicle equipment
All standard, country-specific and optional
equipment that is offered in the model series is
described in this chapter. Therefore, equipment
is also described that is not available in a vehicle,
e. g., because of the selected optional equip‐
ment or country variant. This also applies for
safety-related functions and systems.
Breaking-in period
General information
Moving parts need to be broken in to adjust to
each other.
The following instructions will help achieve a
long vehicle life and good economy.
Engine and differential
Always obey the official speed limit.
Up to 1,200 miles/2,000 km
Do not exceed the maximum engine and road
speed:▷For gasoline engine, 4,500 rpm and
100 mph/160 km/h.
Avoid full-throttle operation and use of the
transmission's kickdown mode for the initial
miles.
From 1,200 miles/2,000 km
The engine and vehicle speed can gradually be
increased.
Tires
Due to technical factors associated with their
manufacture, tires do not achieve their full trac‐
tion potential until after an initial breaking-in pe‐
riod.
Drive conservatively for the first 200 miles/
300 km.
Brake system
Brakes require an initial break-in period of ap‐
prox. 300 miles/500 km to achieve optimized
contact and wear patterns between brake pads
and discs. Drive moderately during this break-in
period.
Clutch
The function of the clutch reaches its optimal
level only after a distance driven of approx.
300 miles/500 km. During this break-in period,
engage the clutch gently.
Following part replacement
The same breaking in procedures should be ob‐
served if any of the components mentioned
above have to be renewed in the course of the
vehicle's operating life.
General driving notes
Closing the trunk lid Drive with the trunk lid closed
Only drive with the tailgate closed; other‐
wise, in the event of an accident or braking or
evasive maneuvers, passengers or other road
users may be injured or the vehicle may be dam‐
aged. In addition, exhaust fumes may enter the
passenger compartment.◀
If driving with the tailgate open cannot be
avoided:▷Close all windows and the glass sunroof.▷Greatly increase the blower speed.▷Drive moderately.Seite 160Driving tipsThings to remember when driving160
Online Edition for Part no. 01 40 2 607 879 - 09 11 490
Page 164 of 335
Stowing cargo▷Heavy cargo: stow as far forward and as low
as possible, ideally directly behind the cargo
area separating wall.▷Very heavy cargo: when the rear seat is not
occupied, secure each of the outer safety
belts in the opposite buckle.▷Cover sharp edges and corners.▷If necessary, fold down the rear backrests to
stow cargo.▷Do not stack cargo above the top edge of the
backrests.▷Place protective material around any sharp-
edged or pointed objects that could bump
against the rear window while the vehicle is
in motion.
Securing cargo
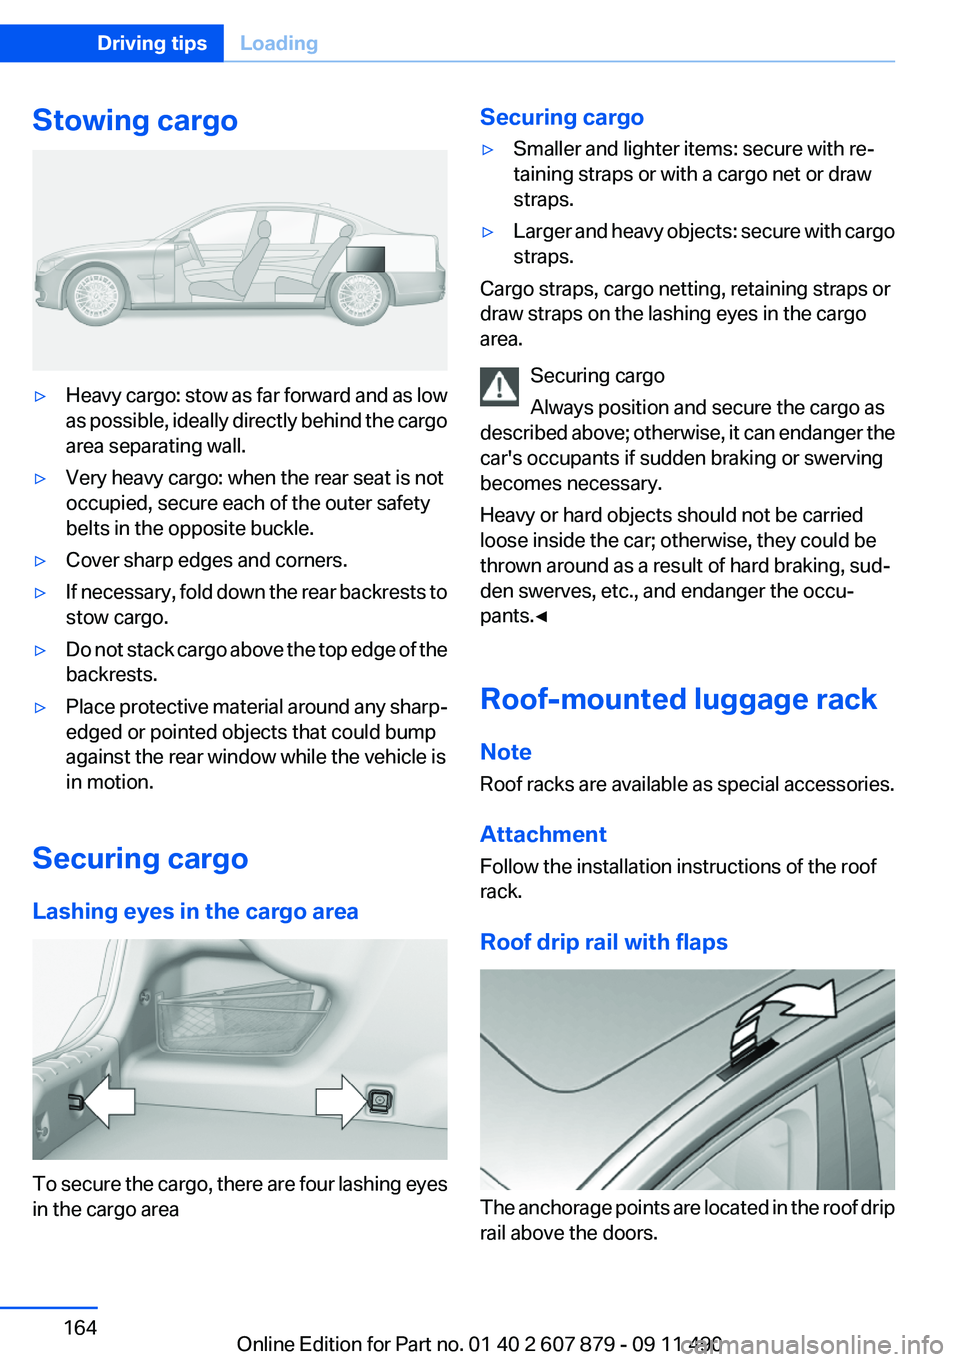
Lashing eyes in the cargo area
To secure the cargo, there are four lashing eyes
in the cargo area
Securing cargo▷Smaller and lighter items: secure with re‐
taining straps or with a cargo net or draw
straps.▷Larger and heavy objects: secure with cargo
straps.
Cargo straps, cargo netting, retaining straps or
draw straps on the lashing eyes in the cargo
area.
Securing cargo
Always position and secure the cargo as
described above; otherwise, it can endanger the
car's occupants if sudden braking or swerving
becomes necessary.
Heavy or hard objects should not be carried
loose inside the car; otherwise, they could be
thrown around as a result of hard braking, sud‐
den swerves, etc., and endanger the occu‐
pants.◀
Roof-mounted luggage rack
Note
Roof racks are available as special accessories.
Attachment
Follow the installation instructions of the roof
rack.
Roof drip rail with flaps
The anchorage points are located in the roof drip
rail above the doors.
Seite 164Driving tipsLoading164
Online Edition for Part no. 01 40 2 607 879 - 09 11 490
Page 166 of 335
Saving fuelVehicle equipment
All standard, country-specific and optional
equipment that is offered in the model series is
described in this chapter. Therefore, equipment
is also described that is not available in a vehicle,
e. g., because of the selected optional equip‐
ment or country variant. This also applies for
safety-related functions and systems.
General information
Your vehicle contains advanced technology for
the reduction of fuel consumption and emis‐
sions.
Fuel consumption depends on a number of dif‐
ferent factors.
The implementation of certain measures, driv‐
ing style and regular maintenance can have an
influence on fuel consumption and on the envi‐
ronmental impact.
Remove unnecessary cargo
Additional weight increases fuel consumption.
Remove attached parts
following use
Remove auxiliary mirrors, roof or rear luggage
racks which are no longer required following
use.
Attached parts on the vehicle impair the aero‐
dynamics and increase the fuel consumption.Close the windows and glass
sunroof
Driving with the glass sunroof and windows
open results in increased air resistance and
raises fuel consumption.
Check the tire inflation
pressure regularly
Check and, if necessary, correct the tire inflation
pressure at least twice a month and before start‐
ing on a long trip.
Low tire inflation pressure increases rolling re‐
sistance and thus raises fuel consumption and
tire wear.
Drive away without delay
Do not wait for the engine to warm up while the
vehicle remains stationary. Start driving right
away, but at moderate engine speeds.
This is the fastest way for the cold engine to
reach its operating temperature.
Look well ahead when driving
Avoid unnecessary acceleration and braking.
By maintaining a suitable distance to the vehicle
driving ahead of you.
Driving smoothly and looking ahead reduces
fuel consumption.
Avoid high engine speeds
Use 1st gear to get the vehicle in motion. Be‐
ginning with 2nd gear, accelerate rapidly. When
accelerating, shift up before reaching high en‐
gine speeds.Seite 166Driving tipsSaving fuel166
Online Edition for Part no. 01 40 2 607 879 - 09 11 490
Page 240 of 335
Deleting an entry1.›Delete name‹2.Say the name after being prompted to do so.3.Confirm the query with ›Yes‹.
Deleting all entries
1.›Delete phonebook‹
The dialog for deleting the phone book is
opened.2.Confirm the query with ›Yes‹.3.Confirm the query again with ›Yes‹.
Reading and selecting entries
1.›Read phonebook‹
The dialog for reading the phone book is
opened.2.Say ›Dial number‹ when the desired entry is
read.
Selecting an entry
1.›Dial name‹2.Say the name after being prompted to do so.3.Confirm the query with ›Yes‹.
Adjusting the volume
Turn the knob during an announcement.
▷The volume remains constant even if the
volume of other audio sources is changed.▷The volume is stored for the remote control
currently in use.
Notes
Do not use the voice operation to initiate an
Emergency Request. In stressful situations, the
voice and vocal pitch can change. This can un‐
necessarily delay the establishment of a tele‐
phone connection.
Instead, use the SOS button, refer to
page 298, in the vicinity of the interior mirror.
Environmental conditions▷Say the commands, numbers, and letters
smoothly and with normal volume, empha‐
sis, and speed.▷Always say commands in the language of
the system. The language for the mobile
phone voice operation is preset and cannot
be changed in the Control Display.▷Keep the doors, windows, and glass sun‐
roof closed to prevent noise interference.▷Avoid making other noise in the vehicle
while speaking.
Snap-in adapter
General information
Detailed information about snap-in adapter,
which supports the functions of the mobile
phone, available from the service center.
Notes
At high temperatures, the charge function of the
mobile phone can be limited where appropriate
and the functions are no longer executed.
When the mobile phone is used via the vehicle,
heed the operating manual of the mobile phone.
Installation position
In the center armrest.
Inserting the snap-in adapter
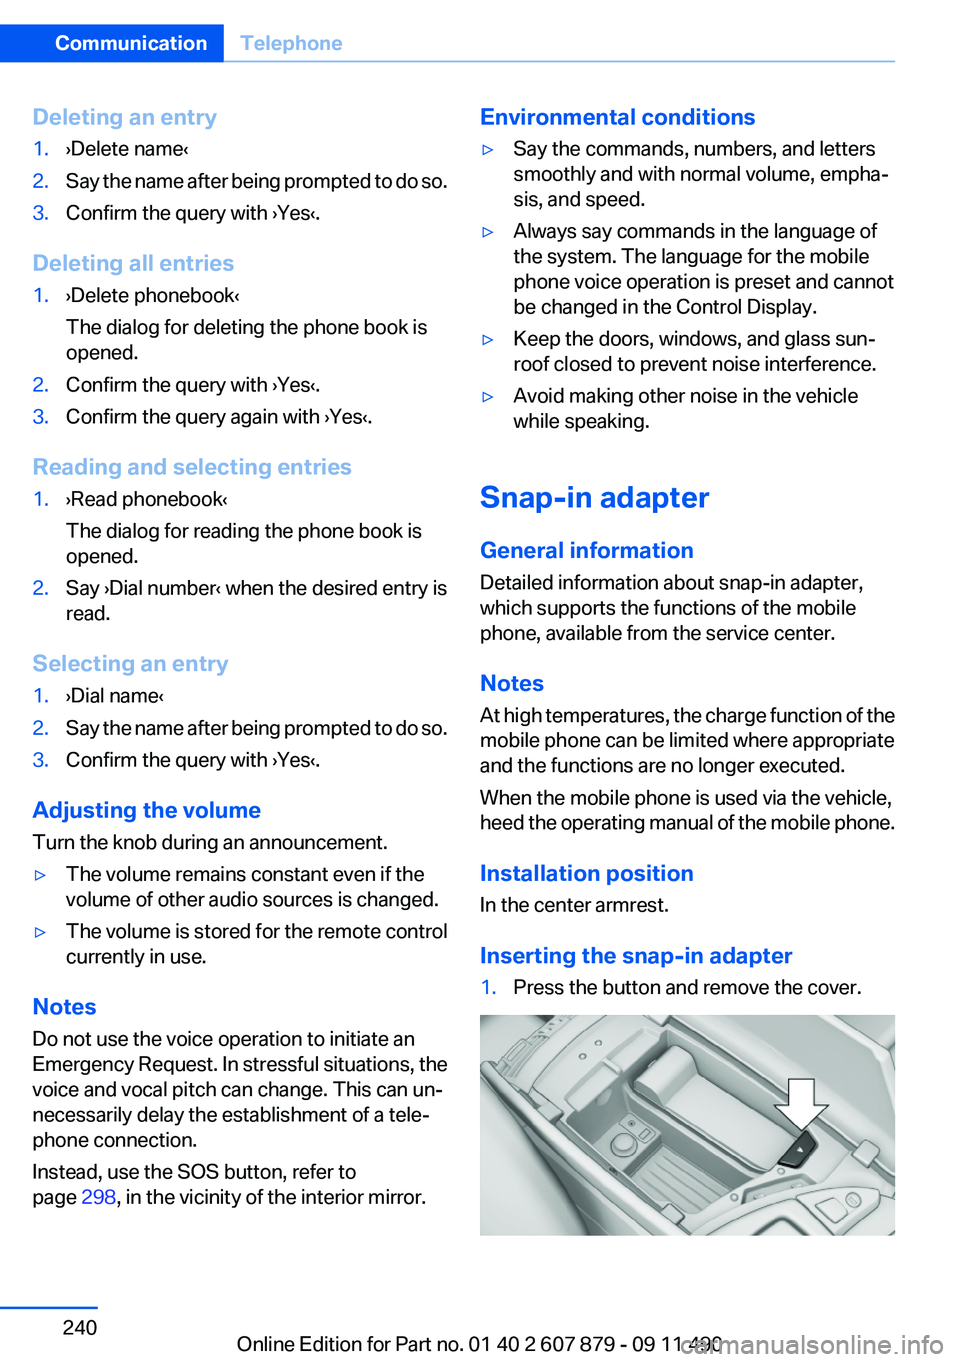
1.Press the button and remove the cover.Seite 240CommunicationTelephone240
Online Edition for Part no. 01 40 2 607 879 - 09 11 490
Page 305 of 335
Automatic transmission:1.Release the parking brake, refer to page 66,
and deactivate Automatic Hold, refer to
page 67.2.Drive into the car wash.3.Depress the brake pedal as needed.4.Engage transmission position N.5.Switch the engine off. In this way, the igni‐
tion remains switched on, and a Check-Con‐
trol message is displayed.
Transmission position P with the igni‐
tion off
When the ignition is switched off, position P
is engaged automatically. When in an auto‐
matic car wash, for example, ensure that the
ignition is not switched off accidentally.◀
The vehicle cannot be locked from the outside
when in transmission position N.
A signal is sounded when an attempt is made to
lock the vehicle.
Transmission position
Transmission position P is engaged automati‐
cally:
▷When the ignition is switched off.▷After approx. 15 minutes.
Headlamps
▷Do not rub dry and do not use abrasive or
caustic cleansers.▷Soak areas that have been soiled e.g. due to
insects, with shampoo and wash off with
water.▷Thaw ice with deicing spray; do not use an
ice scraper.
After washing the vehicle
After washing the vehicle, apply the brakes
briefly to dry them; otherwise, braking action can
be reduced and corrosion of the brake discs can
occur.
Vehicle care
Car care products
BMW recommends using cleaning and care
products from BMW, since these have been
tested and approved.
Car care and cleaning products
Follow the instructions on the container.
When cleaning the interior, open the doors or
windows.
Only use products intended for cleaning vehi‐
cles.
Cleansers can contain substances that are dan‐
gerous and harmful to your health.◀
Vehicle paint
Regular care contributes to driving safety and
value retention.
Environmental influences can act on the vehicle
paint. Tailor the frequency and extent of your car
care to these influences.
Leather care
Remove dust from the leather often, using a
cloth or vacuum cleaner.
Otherwise, particles of dust and road grime
chafe in pores and folds, and lead to increased
wear and premature degradation of the leather
surface.
To guard against discoloration, such as from
clothing, provide leather care roughly every two
months.
Clean light-colored leather more frequently be‐
cause soiling on such surfaces is substantially
more visible.
Use leather care products; otherwise, dirt and
grease will gradually break down the protective
layer of the leather surface.
Suitable care products are available from the
service center.Seite 305CareMobility305
Online Edition for Part no. 01 40 2 607 879 - 09 11 490
Page 326 of 335

Condition Based ServiceCBS 288
Confirmation signal 35
Contacts 243, 251
Control Display 16
Control Display, settings 86
Controller 16
Control systems, driving sta‐ bility 107
Convenient opening 34
Coolant 286
Coolant temperature 81
Cooling function 141
Cooling, maximum 141
Cooling system 286
Corrosion on brake discs 162
Cruise control 121
Cruise control, active with Stop & Go 114
Cruising range 81
Cupholder 155
Current fuel consumption 82
Current location, storing 174
Customer Relations 256
D
Damage, tires 278
Damping control, dy‐ namic 110
Data, technical 310
Date 81
Daytime running lights 90
Defrosting, refer to Windows, defrosting 140
Destination distance 84
Destination guidance 180
Destination guidance with in‐ termediate destinations 178
Destination input, naviga‐ tion 172
Digital clock 81
Digital radio 193
Dimensions 310
Dimmable exterior mirrors 56 Dimmable interior rearview
mirror 56
Direction indicator, refer to Turn signals 69
Display, ECO PRO 167
Display, electronic, instrument cluster 77
Display in front wind‐ shield 137
Display lighting, refer to Instru‐ ment lighting 93
Displays 75
Displays, cleaning 307
Disposal, coolant 287
Disposal, vehicle battery 296
Distance control, refer to PDC 123
Distance, selecting for ACC 116
Distance to destination 84
Divided screen view, split screen 20
Door lock, refer to Remote control 30
Doors, Automatic Soft Clos‐ ing 37
Downhill control 109
Drive-off assistant 107
Drive-off assistant, refer to DSC 107
Driving Experience Switch 111
Driving instructions, breaking in 160
Driving notes, general 160
Driving stability control sys‐ tems 107
Driving tips 160
DSC Dynamic Stability Con‐ trol 107
DTC driving dynamics 108
DTC Dynamic Traction Con‐ trol 108
DVD/CD 200
DVD/CD notes 206
DVD/CD player, rear 221 DVD changer 204
DVD settings 203
DVDs, storing 207
DVD, video 202
Dynamic Damping Con‐ trol 110
Dynamic destination guid‐ ance 186
Dynamic Drive 110
Dynamic Stability Control DSC 107
Dynamic Traction Control DTC 108
E
ECO PRO 167
EfficientDynamics 168
EfficientDynamics menu, refer to ECO PRO 167
Electronic displays, instru‐ ment combination 77
Electronic Stability Program ESP, refer to DSC 107
Emergency detection, remote control 31
Emergency release, door lock 37
Emergency release, fuel filler flap 262
Emergency Request 298
Emergency service, refer to Roadside Assistance 299
Emergency start function, en‐ gine start 31
Emergency unlocking, trunk lid 40
Energy Control 82
Energy recovery 82
Engine, automatic start/stop function 64
Engine, automatic switch- off 64
Engine compartment 282
Engine compartment, working in 282 Seite 326ReferenceEverything from A to Z326
Online Edition for Part no. 01 40 2 607 879 - 09 11 490