2012 BMW 135I COUPE Vin number location
[x] Cancel search: Vin number locationPage 108 of 272
Practical interior accessories
106
Digital compass*
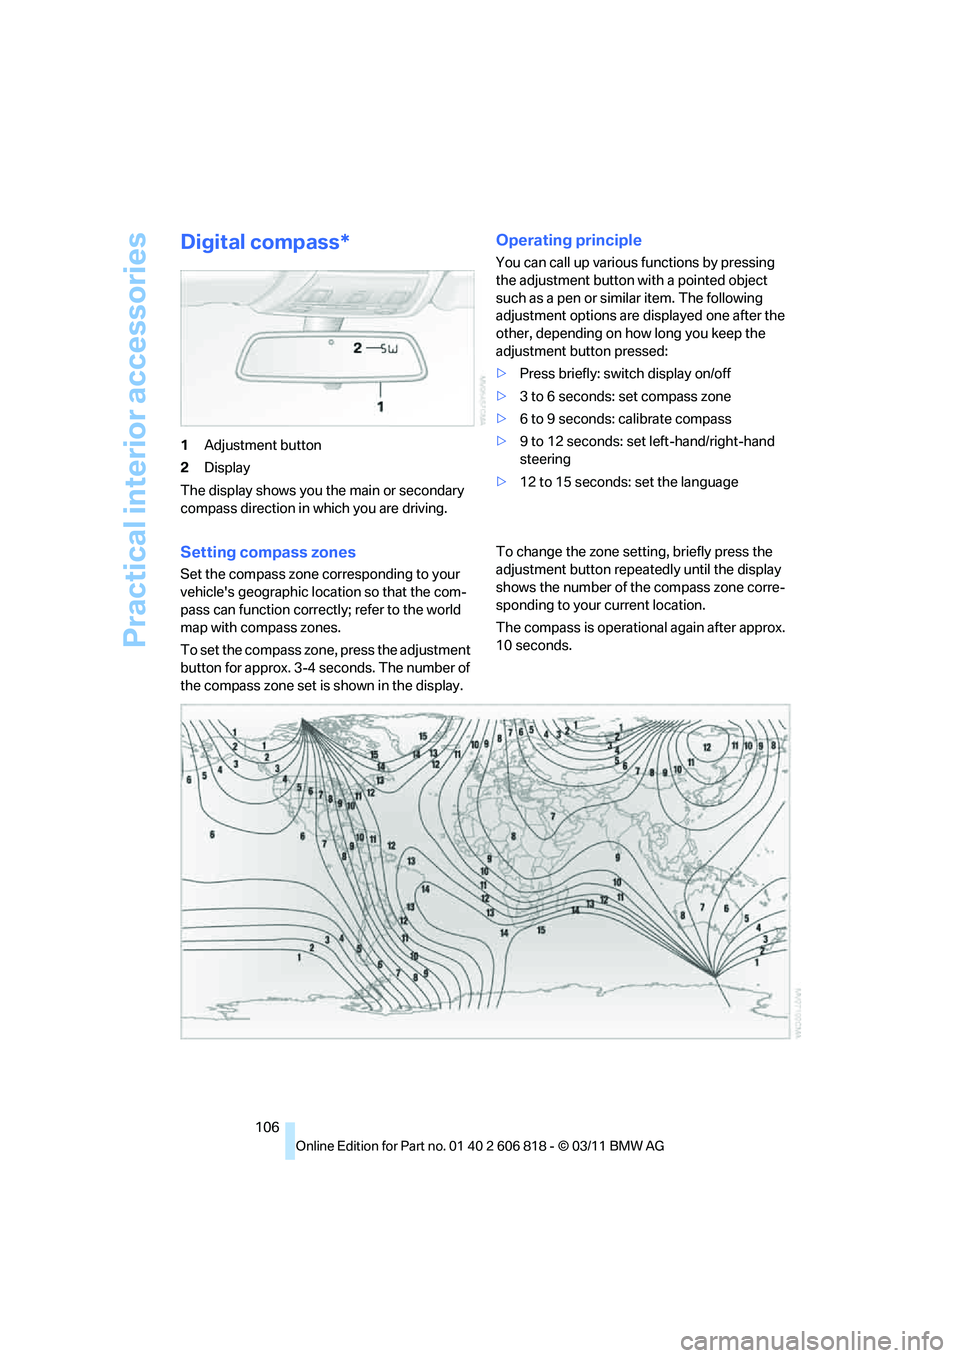
1Adjustment button
2Display
The display shows you the main or secondary
compass direction in which you are driving.
Operating principle
You can call up various functions by pressing
the adjustment button with a pointed object
such as a pen or similar item. The following
adjustment options are displayed one after the
other, depending on how long you keep the
adjustment button pressed:
>Press briefly: switch display on/off
>3 to 6 seconds: set compass zone
>6 to 9 seconds: calibrate compass
>9 to 12 seconds: set left-hand/right-hand
steering
>12 to 15 seconds: set the language
Setting compass zones
Set the compass zone corresponding to your
vehicle's geographic location so that the com-
pass can function correctly; refer to the world
map with compass zones.
To set the compass zone, press the adjustment
button for approx. 3-4 seconds. The number of
the compass zone set is shown in the display.To change the zone setting, briefly press the
adjustment button repeatedly until the display
shows the number of the compass zone corre-
sponding to your current location.
The compass is operational again after approx.
10 seconds.
Page 133 of 272
Navigation
Driving tips
131Reference
At a glance
Controls
Communications
Entertainment
Mobility
Destination entry via voice*
General information
For instructions on the voice activation system,
refer to page23.
>During the destination entry by voice, you
can switch between voice entry and entry
via iDrive at any time. To do so, reactivate
the voice activation system if necessary.
>Having the possible spoken commands
read aloud: {Voice commands}
Saying the entries
>With the Professional navigation system:
City/town, street, and house number can be
entered with a single command
*.
>Countries, towns and cities, streets and
intersections can be spoken as whole
words
* in the system language, refer to
page81, or can be spelled.
Example: to enter a destination in a US state
as a complete word, the system language
must be English.
>Spell the entry if the language spoken in the
area is different from the system language.
>Say the letters smoothly, and avoid exag-
gerating the pronunciation and inserting
lengthy pauses between the letters.
>The methods of entry depend on the navi-
gation data in use and on the country and
language settings.
Entering an address in a command*
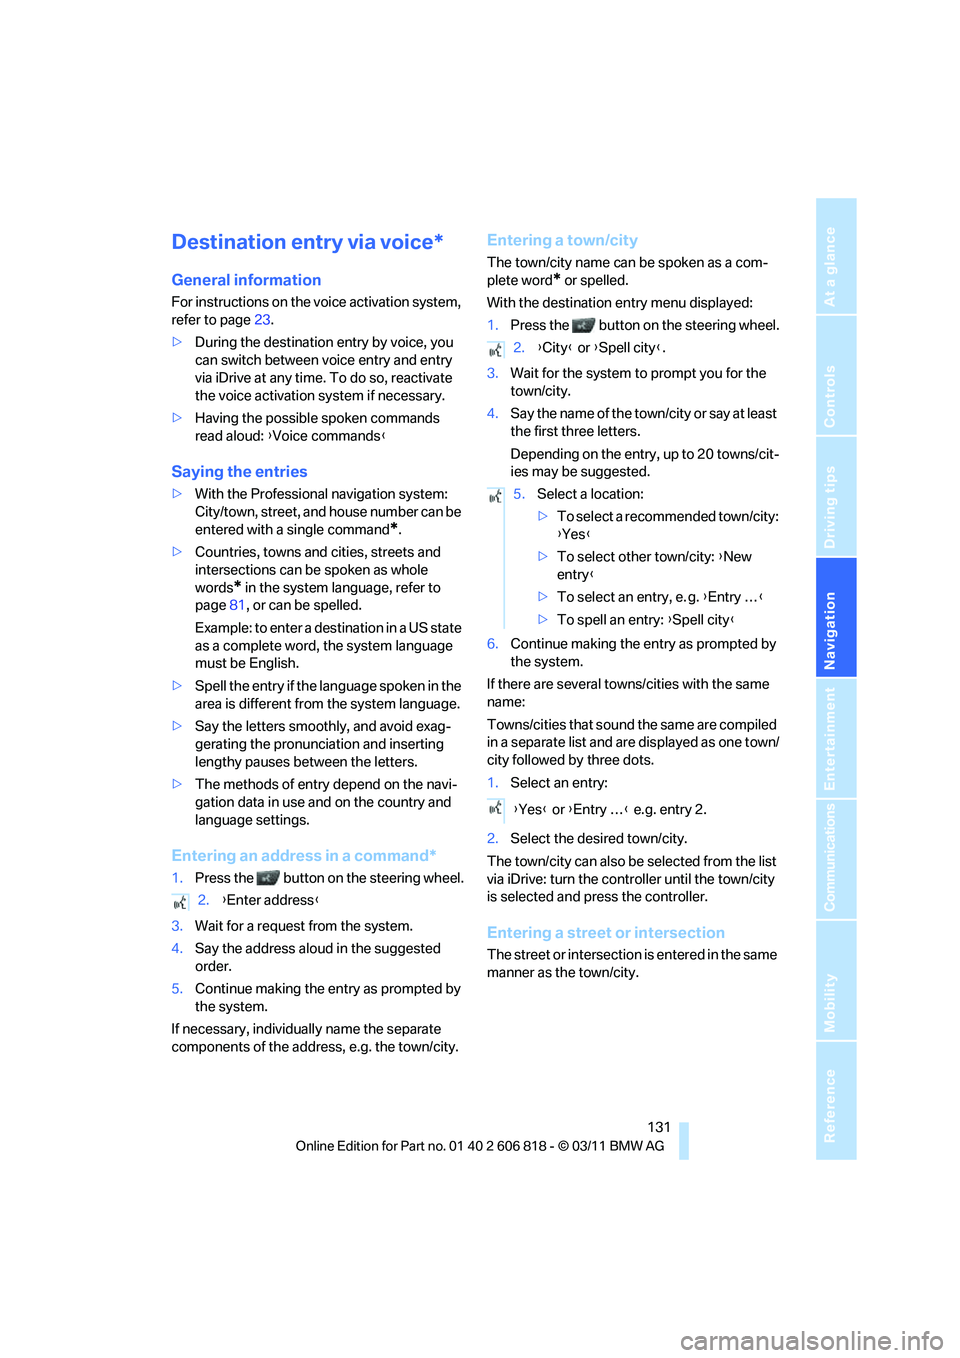
1.Press the button on the steering wheel.
3.Wait for a request from the system.
4.Say the address aloud in the suggested
order.
5.Continue making the entry as prompted by
the system.
If necessary, individually name the separate
components of the address, e.g. the town/city.
Entering a town/city
The town/city name can be spoken as a com-
plete word
* or spelled.
With the destination entry menu displayed:
1.Press the button on the steering wheel.
3.Wait for the system to prompt you for the
town/city.
4.Say the name of the town/city or say at least
the first three letters.
Depending on the entry, up to 20 towns/cit-
ies may be suggested.
6.Continue making the entry as prompted by
the system.
If there are several towns/cities with the same
name:
Towns/cities that sound the same are compiled
in a separate list and are displayed as one town/
city followed by three dots.
1.Select an entry:
2.Select the desired town/city.
The town/city can also be selected from the list
via iDrive: turn the controller until the town/city
is selected and press the controller.
Entering a street or intersection
The street or intersection is entered in the same
manner as the town/city. 2.{Enter address}
2.{City} or {Spell city}.
5.Select a location:
>To select a recommended town/city:
{Yes}
>To select other town/city: {New
entry}
>To select an entry, e. g. {Entry …}
>To spell an entry: {Spell city}
{Yes} or {Entry …} e.g. entry 2.
Page 153 of 272
Navigation
Entertainment
Driving tips
151Reference
At a glance
Controls
Communications
Mobility
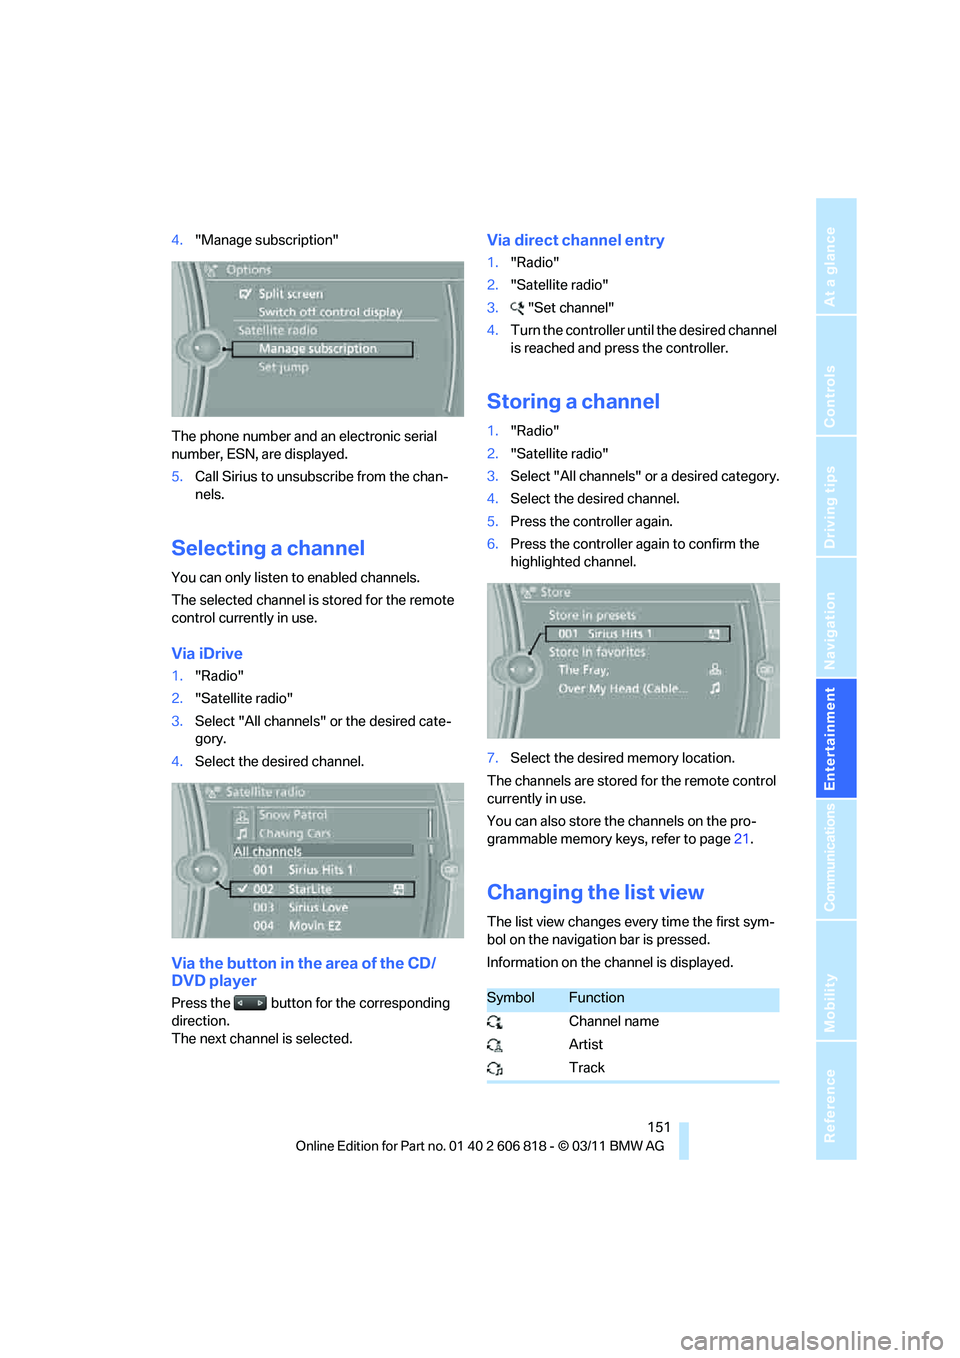
4."Manage subscription"
The phone number and an electronic serial
number, ESN, are displayed.
5.Call Sirius to unsubscribe from the chan-
nels.
Selecting a channel
You can only listen to enabled channels.
The selected channel is stored for the remote
control currently in use.
Via iDrive
1."Radio"
2."Satellite radio"
3.Select "All channels" or the desired cate-
gory.
4.Select the desired channel.
Via the button in the area of the CD/
DVD player
Press the button for the corresponding
direction.
The next channel is selected.
Via direct channel entry
1."Radio"
2."Satellite radio"
3."Set channel"
4.Turn the controller until the desired channel
is reached and press the controller.
Storing a channel
1."Radio"
2."Satellite radio"
3.Select "All channels" or a desired category.
4.Select the desired channel.
5.Press the controller again.
6.Press the controller again to confirm the
highlighted channel.
7.Select the desired memory location.
The channels are stored for the remote control
currently in use.
You can also store the channels on the pro-
grammable memory keys, refer to page21.
Changing the list view
The list view changes every time the first sym-
bol on the navigation bar is pressed.
Information on the channel is displayed.
SymbolFunction
Channel name
Artist
Track
Page 185 of 272
183
Entertainment
Reference
At a glance
Controls
Driving tips Communications
Navigation
Mobility
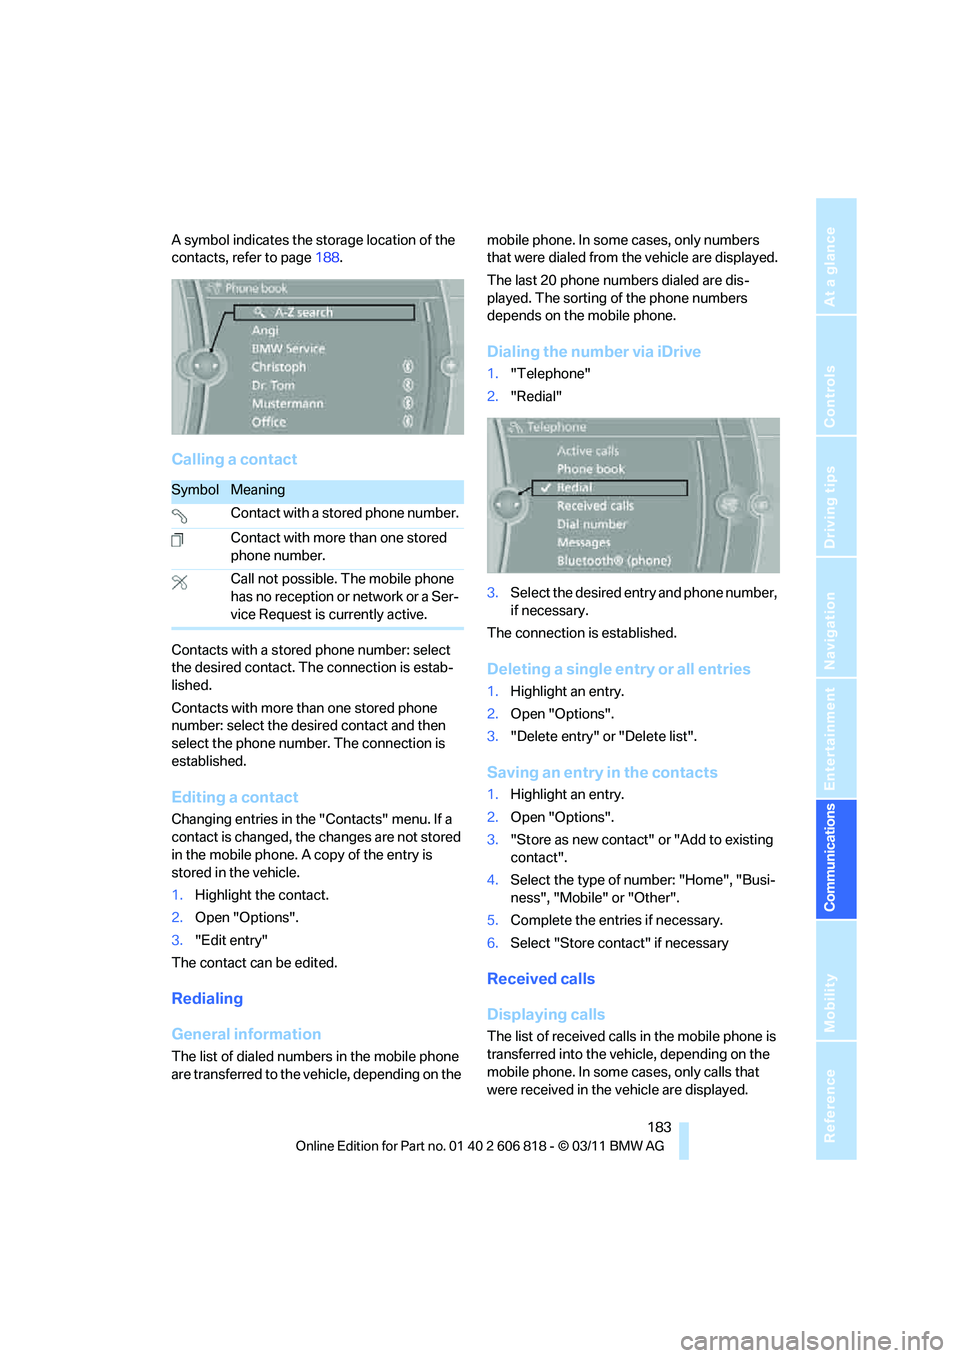
A symbol indicates the storage location of the
contacts, refer to page188.
Calling a contact
Contacts with a stored phone number: select
the desired contact. The connection is estab-
lished.
Contacts with more than one stored phone
number: select the desired contact and then
select the phone number. The connection is
established.
Editing a contact
Changing entries in the "Contacts" menu. If a
contact is changed, the changes are not stored
in the mobile phone. A copy of the entry is
stored in the vehicle.
1.Highlight the contact.
2.Open "Options".
3."Edit entry"
The contact can be edited.
Redialing
General information
The list of dialed numbers in the mobile phone
are transferred to the vehicle, depending on the mobile phone. In some cases, only numbers
that were dialed from the vehicle are displayed.
The last 20 phone numbers dialed are dis-
played. The sorting of the phone numbers
depends on the mobile phone.
Dialing the number via iDrive
1."Telephone"
2."Redial"
3.Select the desired entry and phone number,
if necessary.
The connection is established.
Deleting a single entry or all entries
1.Highlight an entry.
2.Open "Options".
3."Delete entry" or "Delete list".
Saving an entry in the contacts
1.Highlight an entry.
2.Open "Options".
3."Store as new contact" or "Add to existing
contact".
4.Select the type of number: "Home", "Busi-
ness", "Mobile" or "Other".
5.Complete the entries if necessary.
6.Select "Store contact" if necessary
Received calls
Displaying calls
The list of received calls in the mobile phone is
transferred into the vehicle, depending on the
mobile phone. In some cases, only calls that
were received in the vehicle are displayed.
SymbolMeaning
Contact with a stored phone number.
Contact with more than one stored
phone number.
Call not possible. The mobile phone
has no reception or network or a Ser-
vice Request is currently active.
Page 191 of 272
189
Entertainment
Reference
At a glance
Controls
Driving tips Communications
Navigation
Mobility
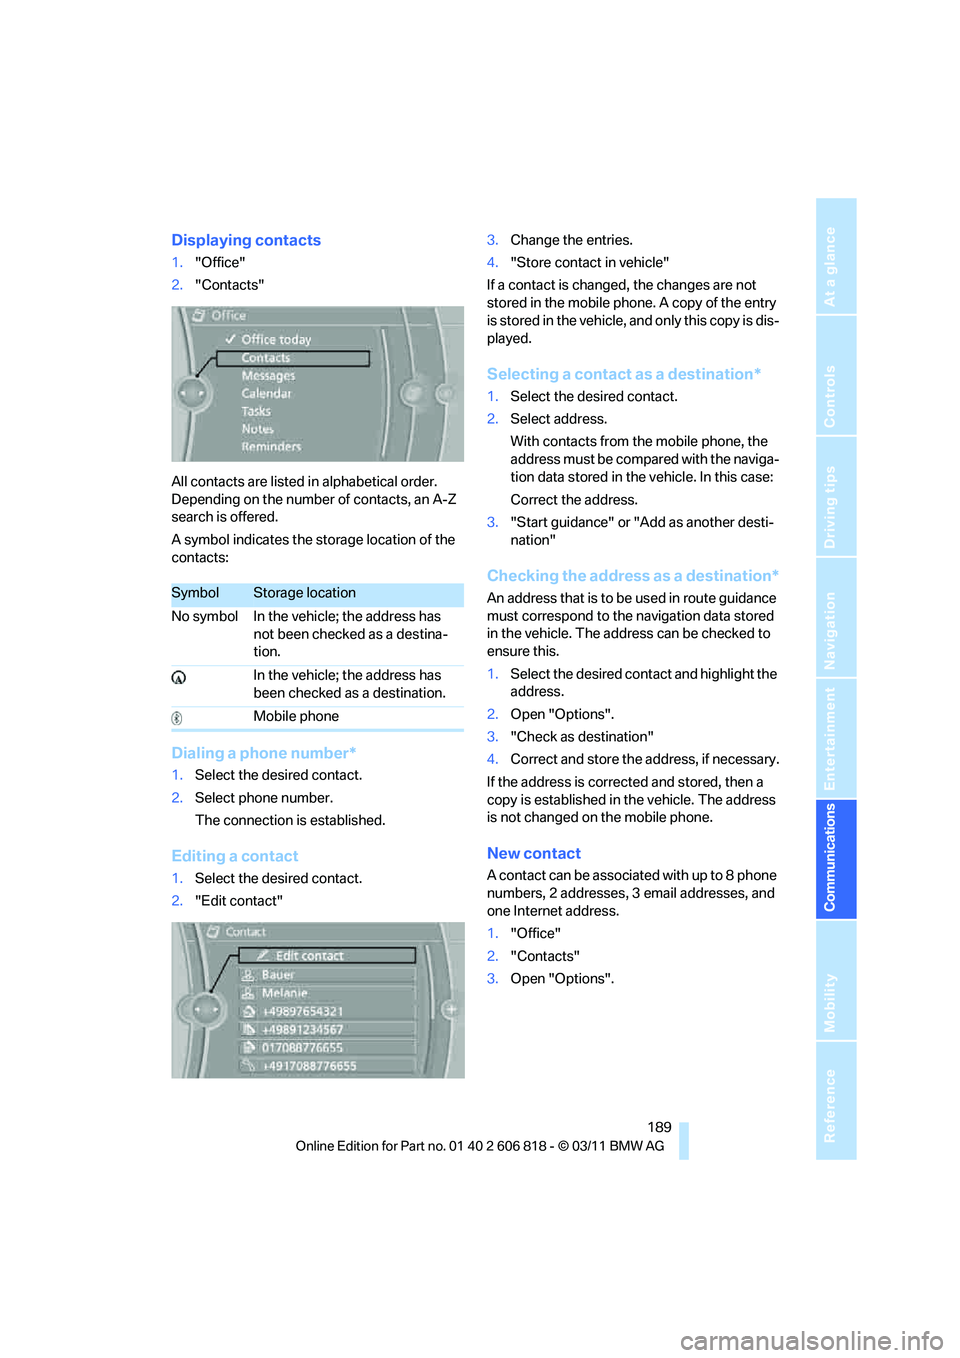
Displaying contacts
1."Office"
2."Contacts"
All contacts are listed in alphabetical order.
Depending on the number of contacts, an A-Z
search is offered.
A symbol indicates the storage location of the
contacts:
Dialing a phone number*
1.Select the desired contact.
2.Select phone number.
The connection is established.
Editing a contact
1.Select the desired contact.
2."Edit contact"3.Change the entries.
4."Store contact in vehicle"
If a contact is changed, the changes are not
stored in the mobile phone. A copy of the entry
is stored in the vehicle, and only this copy is dis-
played.
Selecting a contact as a destination*
1.Select the desired contact.
2.Select address.
With contacts from the mobile phone, the
address must be compared with the naviga-
tion data stored in the vehicle. In this case:
Correct the address.
3."Start guidance" or "Add as another desti-
nation"
Checking the address as a destination*
An address that is to be used in route guidance
must correspond to the navigation data stored
in the vehicle. The address can be checked to
ensure this.
1.Select the desired contact and highlight the
address.
2.Open "Options".
3."Check as destination"
4.Correct and store the address, if necessary.
If the address is corrected and stored, then a
copy is established in the vehicle. The address
is not changed on the mobile phone.
New contact
A contact can be associated with up to 8 phone
numbers, 2 addresses, 3 email addresses, and
one Internet address.
1."Office"
2."Contacts"
3.Open "Options".
SymbolStorage location
No symbol In the vehicle; the address has
not been checked as a destina-
tion.
In the vehicle; the address has
been checked as a destination.
Mobile phone
Page 267 of 272
Reference 265
At a glance
Controls
Driving tips
Communications
Navigation
Entertainment
Mobility
Sport program, automatic
transmission with
Steptronic61
Sport program with 7-gear
Sport automatic
transmission with double
clutch63
Stability control, refer to
Driving stability control
systems83
Start/Stop button57
– starting the engine58
– switching off the engine58
Starting, refer to Starting the
engine58
Starting assistance, refer to
Jump-starting235
Starting the engine
– Start/Stop button57
Start menu17
State/province, for
navigation125
Station, selecting
– radio147
Status information on the
Control Display19
Status of this Owner's Manual
at time of printing5
Steam jet223,224
Steering wheel52
– adjustment52
– buttons on steering
wheel11
– heating53
– shift paddles64
Steering wheel buttons, refer
to Shift paddles64
Steering with variable ratio,
refer to Active steering89
Steptronic, refer to Automatic
transmission with
Steptronic59
Storage226
Storage compartment
package108
Storage compartments108
Stored trip, calling up132Storing
– seat position, refer to Seat
and mirror memory50
– telephone numbers, refer to
separate Owner's Manual
Storing a destination in the
address book127
Storing music161
Storing tires215
Stowage, refer to Storage
compartments108
Street, entering,
navigation126
Suitable mobile phones176
Summer tires, refer to Wheels
and tires208
Surround
145
SVCD157
SW, waveband147
Switches, refer to Cockpit10
Switching off
– engine58
Switching off the engine
– Start/Stop button57
Switching on
– audio144
– CD changer144
– CD player144
– radio144
Switching the cooling function
on and off101
Switch-on times of parked car
ventilation, preselecting103
Symbols4
– status information19
T
Tachometer70
Tailgate, refer to Trunk lid33
Tail lamp, refer to Tail
lamps230
– replacing bulb231
Tail lamps230
– replacing bulb231
Tank contents, refer to
Capacities246
Tasks193Technical data242
– dimensions243
Technical modifications5
Telephone176
– hands-free system184
– phone book182
– received calls183
– redialing183
– voice commands184
Telephone, installation
location, refer to Center
armrest108
Telephone, refer to separate
Owner's Manual
Teleservice Diagnosis200
Teleservice Help200
Temperature display
– outside temperature70
– outside temperature
warning70
– setting the units74
Tempomat, refer to Cruise
control68
Text message191
Thigh support46
Third brake lamp, refer to
Center brake lamp231
Three-point safety belt50
Through-loading system109
Tilt alarm sensor35
Tilt function, passenger side
mirror52
Timer, refer to Preselecting
switch-on times103
Tire inflation pressure208
– loss85,87
Tire pressure monitoring,
refer to Flat Tire Monitor84
Tire Pressure Monitor
TPM86
– resetting the system87
– system limitations86
– warning lamp87
Tire puncture, refer to Flat Tire
Monitor85
Tire Quality Grading212