2012 BMW 135I COUPE stop start
[x] Cancel search: stop startPage 87 of 272
Controls
85Reference
At a glance
Driving tips
Communications
Navigation
Entertainment
Mobility
In the following situations, the system could be
delayed or malfunction:
>System has not been initialized
>Driving on snowy or slippery road surface
>Performance-oriented style of driving: slip
in the drive wheels, high lateral acceleration
>Driving with snow chains
*
Status display
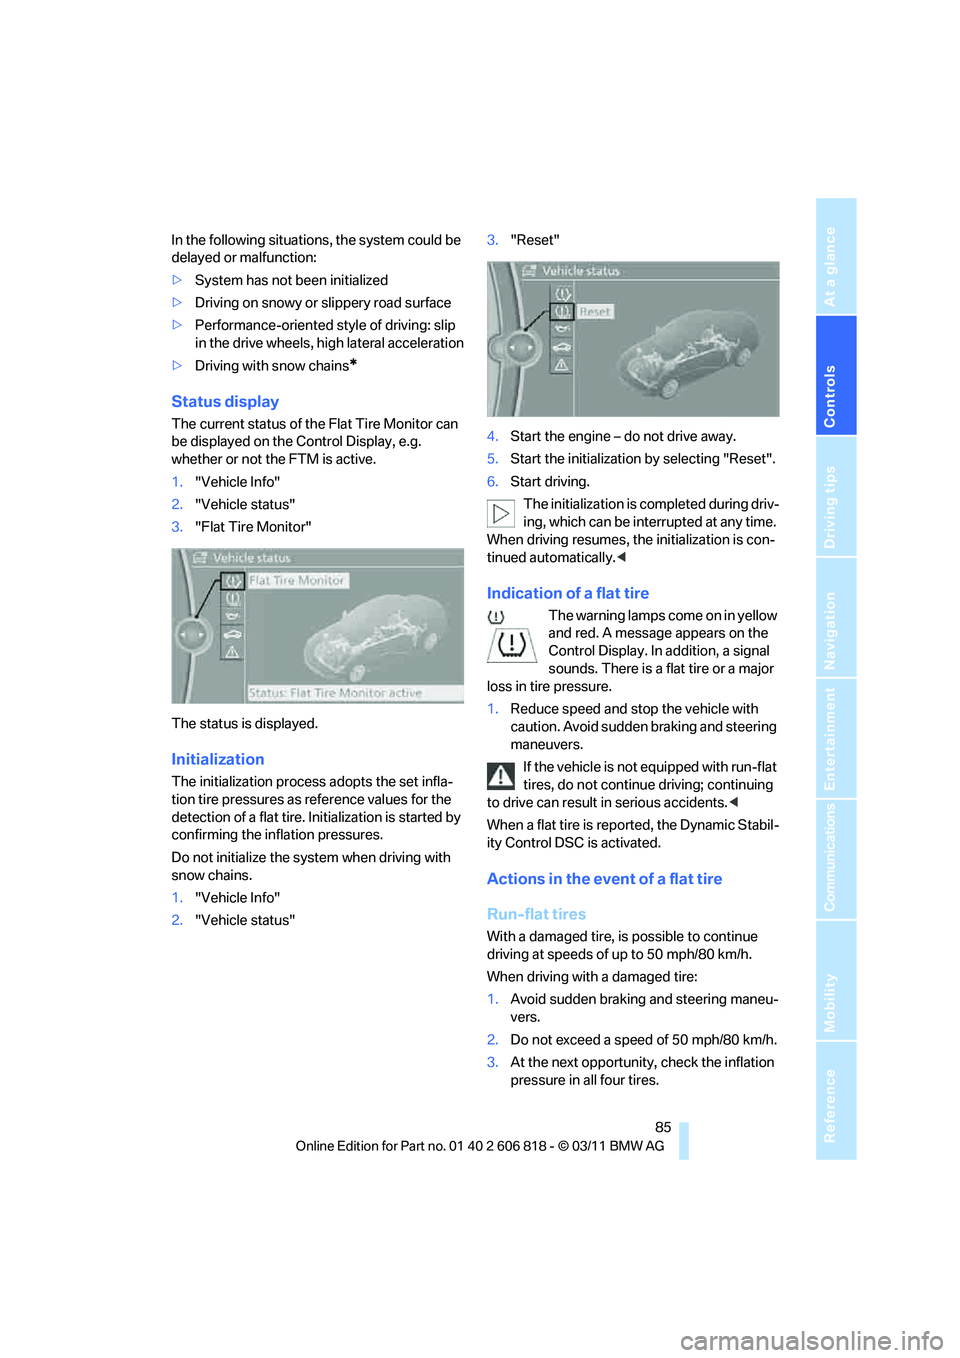
The current status of the Flat Tire Monitor can
be displayed on the Control Display, e.g.
whether or not the FTM is active.
1."Vehicle Info"
2."Vehicle status"
3."Flat Tire Monitor"
The status is displayed.
Initialization
The initialization process adopts the set infla-
tion tire pressures as reference values for the
detection of a flat tire. Initialization is started by
confirming the inflation pressures.
Do not initialize the system when driving with
snow chains.
1."Vehicle Info"
2."Vehicle status"3."Reset"
4.Start the engine – do not drive away.
5.Start the initialization by selecting "Reset".
6.Start driving.
The initialization is completed during driv-
ing, which can be interrupted at any time.
When driving resumes, the initialization is con-
tinued automatically.<
Indication of a flat tire
The warning lamps come on in yellow
and red. A message appears on the
Control Display. In addition, a signal
sounds. There is a flat tire or a major
loss in tire pressure.
1.Reduce speed and stop the vehicle with
caution. Avoid sudden braking and steering
maneuvers.
If the vehicle is not equipped with run-flat
tires, do not continue driving; continuing
to drive can result in serious accidents.<
When a flat tire is reported, the Dynamic Stabil-
ity Control DSC is activated.
Actions in the event of a flat tire
Run-flat tires
With a damaged tire, is possible to continue
driving at speeds of up to 50 mph/80 km/h.
When driving with a damaged tire:
1.Avoid sudden braking and steering maneu-
vers.
2.Do not exceed a speed of 50 mph/80 km/h.
3.At the next opportunity, check the inflation
pressure in all four tires.
Page 89 of 272
Controls
87Reference
At a glance
Driving tips
Communications
Navigation
Entertainment
Mobility
Status indicator on the Control Display
The color of the tires represents the status of
the tires and the system.
A change in the tire inflation pressure during
driving is taken into account.
A correction is only required when this is indi-
cated by the TPM.
Green wheels
The inflation pressure corresponds to the
desired state.
"TPM active" appears in the Control Display.
One wheel yellow
There is a flat tire or substantial loss of tire pres-
sure in the indicated tire.
All wheels yellow
>There is a flat tire or substantial loss of tire
pressure in several tires.
>The system was not reset after a wheel
change and thus issues a warning based on
the inflation pressures initialized last.
Gray wheels
The system cannot detect a puncture.
Reasons for this may be:
>TPM is being reset.
>Interference from systems or devices that
use the same radio frequency.
>Malfunction.
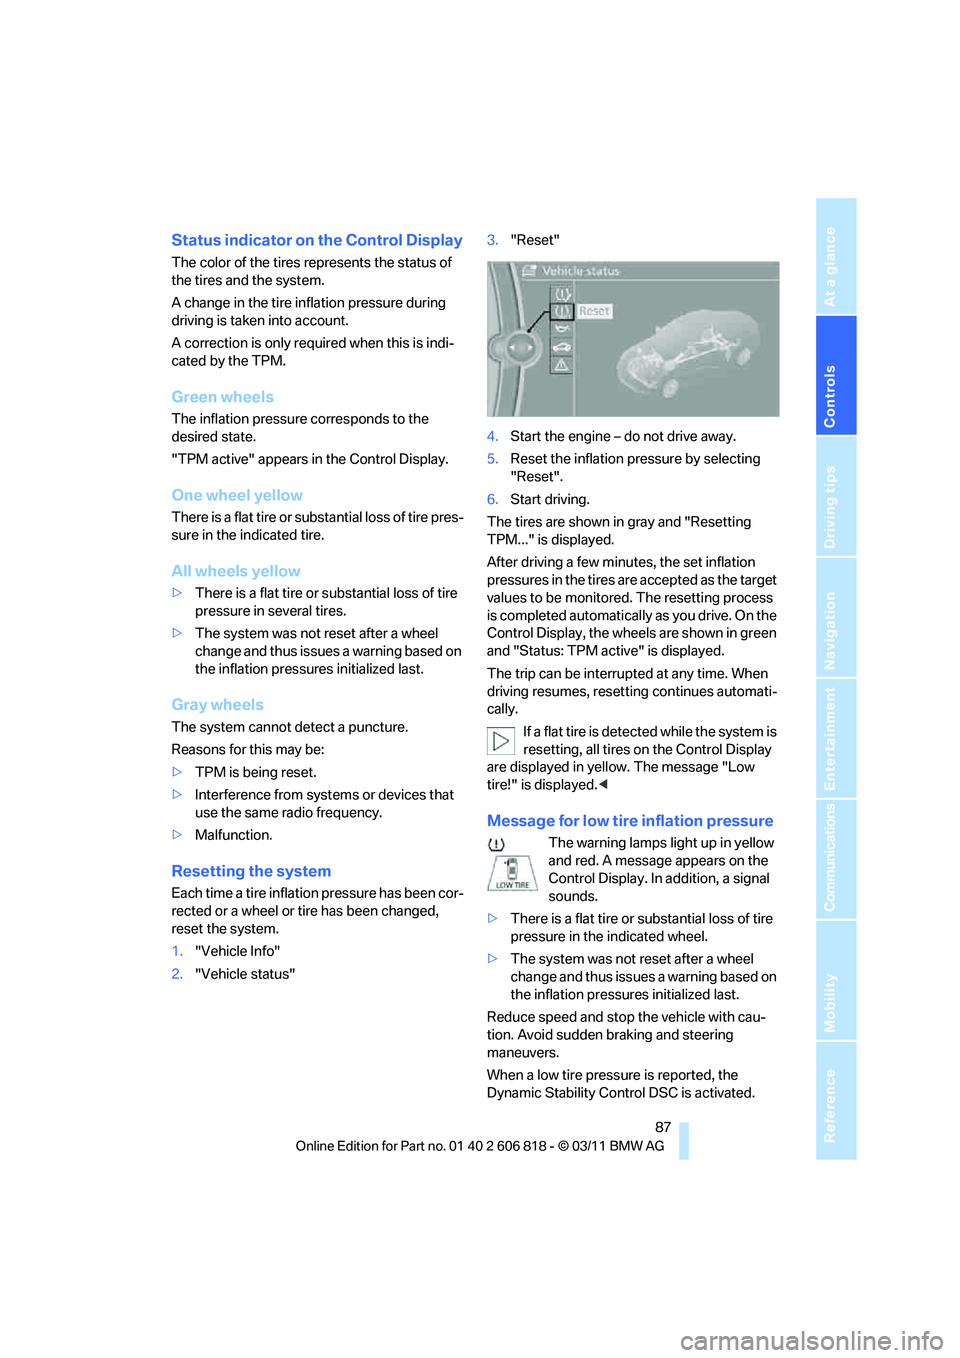
Resetting the system
Each time a tire inflation pressure has been cor-
rected or a wheel or tire has been changed,
reset the system.
1."Vehicle Info"
2."Vehicle status"3."Reset"
4.Start the engine – do not drive away.
5.Reset the inflation pressure by selecting
"Reset".
6.Start driving.
The tires are shown in gray and "Resetting
TPM..." is displayed.
After driving a few minutes, the set inflation
pressures in the tires are accepted as the target
values to be monitored. The resetting process
is completed automatically as you drive. On the
Control Display, the wheels are shown in green
and "Status: TPM active" is displayed.
The trip can be interrupted at any time. When
driving resumes, resetting continues automati-
cally.
If a flat tire is detected while the system is
resetting, all tires on the Control Display
are displayed in yellow. The message "Low
tire!" is displayed.<
Message for low tire inflation pressure
The warning lamps light up in yellow
and red. A message appears on the
Control Display. In addition, a signal
sounds.
>There is a flat tire or substantial loss of tire
pressure in the indicated wheel.
>The system was not reset after a wheel
change and thus issues a warning based on
the inflation pressures initialized last.
Reduce speed and stop the vehicle with cau-
tion. Avoid sudden braking and steering
maneuvers.
When a low tire pressure is reported, the
Dynamic Stability Control DSC is activated.
Page 91 of 272
Controls
89Reference
At a glance
Driving tips
Communications
Navigation
Entertainment
Mobility
Declaration according to NHTSA/
FMVSS 138
Tire Pressure Monitoring Systems
Each tire should be checked monthly when cold
and inflated to the inflation pressure recom-
mended by the vehicle manufacturer on the
vehicle placard or tire inflation pressure label. If
your vehicle has tires of a different size than the
size indicated on the vehicle placard or tire infla-
tion pressure label, you should determine the
proper tire inflation pressure for those tires. As
an added safety feature, your vehicle has been
equipped with a tire pressure monitoring sys-
tem, TPMS, that illuminates a low tire pressure
telltale when one or more of your tires are signif-
icantly underinflated. Accordingly, when the
low tire pressure telltale illuminates, you should
stop and check your tires as soon as possible,
and inflate them to the proper pressure. Driving
on a significantly underinflated tire causes the
tire to overheat and can lead to tire failure.
Underinflation also reduces fuel efficiency and
tire tread life, and may affect the vehicle’s han-
dling and stopping ability. Please note that the
TPMS is not a substitute for proper tire mainte-
nance, and it is the driver’s responsibility to
maintain correct tire pressure, even if underin-
flation has not reached the level at which the
TPMS low tire pressure telltale illuminates.
The TPMS malfunction indicator is combined
with the low tire pressure telltale. When the sys-
tem detects a malfunction, the telltale will flash
for approximately one minute and then remain
continuously lit. This sequence will continue
upon subsequent vehicle startups as long as
the malfunction exists. When the malfunction
indicator is illuminated, the system may not be
able to detect or signal low tire pressure as
intended. TPMS malfunctions may occur for a
variety of reasons, including the installation of
replacement or alternate tires or wheels on the
vehicle that prevent the TPMS from functioning
properly. Always check the TPMS malfunction
telltale after replacing one or more tires or
wheels on your vehicle to ensure that the
replacement or alternate tires and wheels allow
the TPMS to continue to function properly.
Active steering*
The concept
Active steering varies the turning angle of the
front wheels in relation to steering wheel move-
ments. It also varies the steering force required
to turn the wheels depending on the speed at
which you are driving.
When you are driving in the low speed range,
e.g. in a town or when parking, the steering
angle is increased, i.e. steering becomes very
direct and less effort is required to turn the
wheels. In the higher speed range, on the other
hand, the steering angle is reduced as the
speed increases. This improves the handling of
your BMW over the entire speed range.
In critical situations, the system can make tar-
geted corrections to the steering angle pro-
vided by the driver and thus stabilize the vehicle
before the driver intervenes. This stabilizing
intervention is simultaneously deactivated
when DSC is switched off, refer to page83.
Malfunction
The warning lamps come on. Active
steering is malfunctioning or is tem-
porarily deactivated. At low speeds,
greater steering wheel movements
are required, whereas at higher speeds the
vehicle reacts more sensitively to steering
wheel movements. The stability-enhancing
feature may also be deactivated. Drive cau-
tiously and think well ahead.
Deactivation
Active steering is deactivated to perform an ini-
tialization. A message indicates that the feature
is deactivated. Initialization may take several
minutes.
If the message does not disappear during the
current trip, have the system checked.
Defect
If there is a defect, a corresponding text mes-
sage appears. Have the system checked.
Page 100 of 272
Lamps
98
Instrument lighting
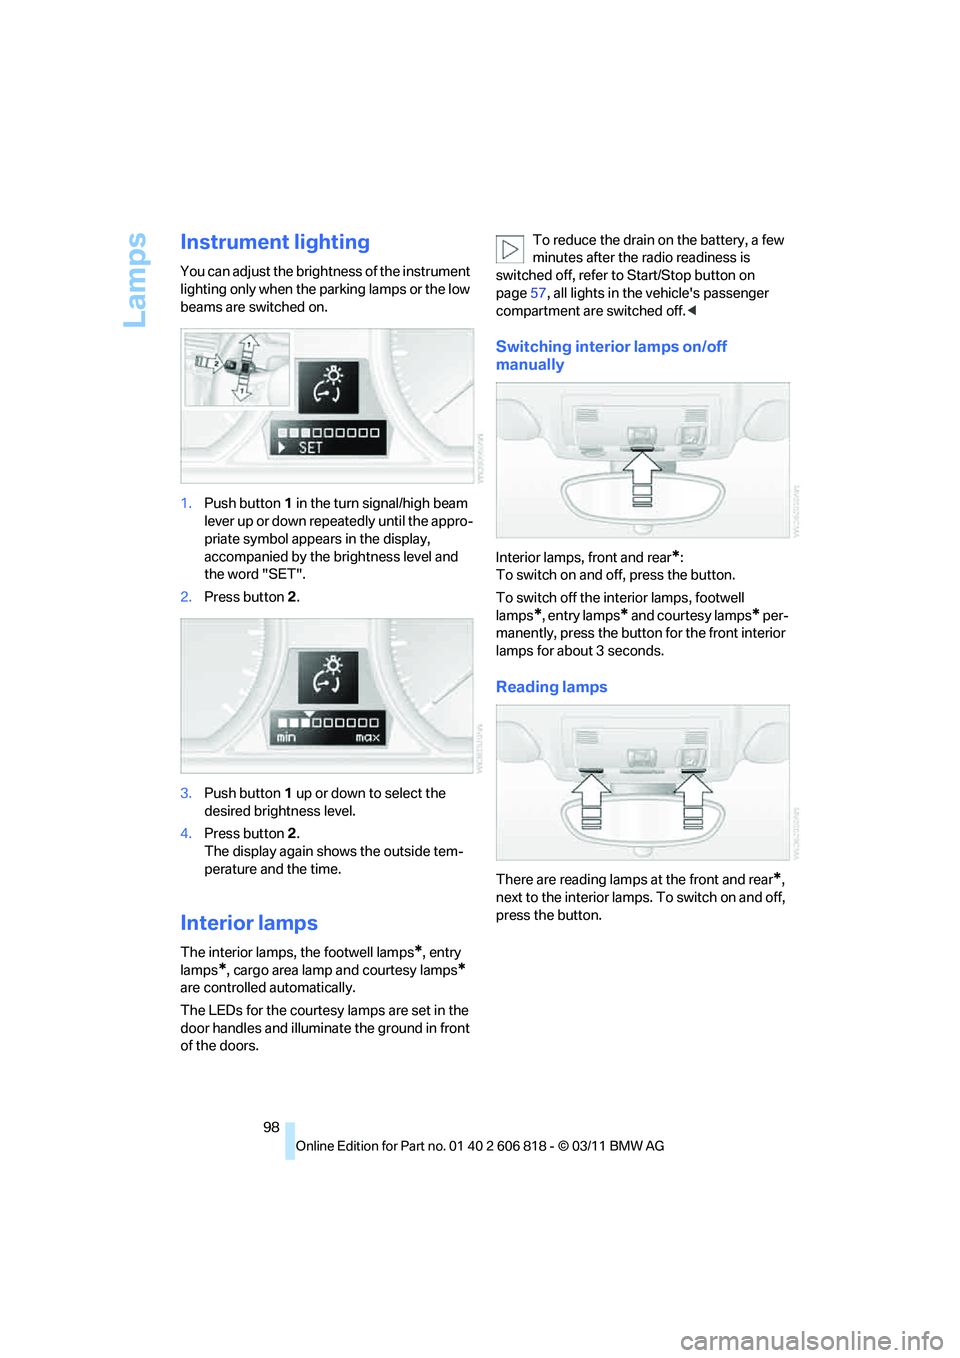
You can adjust the brightness of the instrument
lighting only when the parking lamps or the low
beams are switched on.
1.Push button1 in the turn signal/high beam
lever up or down repeatedly until the appro-
priate symbol appears in the display,
accompanied by the brightness level and
the word "SET".
2.Press button2.
3.Push button1 up or down to select the
desired brightness level.
4.Press button 2.
The display again shows the outside tem-
perature and the time.
Interior lamps
The interior lamps, the footwell lamps*, entry
lamps
*, cargo area lamp and courtesy lamps*
are controlled automatically.
The LEDs for the courtesy lamps
are set in the
door handles and illuminate the ground in front
of the doors.To reduce the drain on the battery, a few
minutes after the radio readiness is
switched off, refer to Start/Stop button on
page57, all lights in the vehicle's passenger
compartment are switched off.<
Switching interior lamps on/off
manually
Interior lamps, front and rear*:
To switch on and off, press the button.
To switch off the interior lamps, footwell
lamps
*, entry lamps* and courtesy lamps* per-
manently, press the button for the front interior
lamps for about 3 seconds.
Reading lamps
There are reading lamps at the front and rear*,
next to the interior lamps. To switch on and off,
press the button.
Page 136 of 272
Destination guidance
134
Destination guidance
Starting destination
guidance
1."Navigation"
2.Entering a destination, refer to page125.
3."Accept destination"
4."Start guidance"
The route is displayed on the Control Display
after it is calculated.
In the map view, the distance to the destination/
intermediate destination and the estimated
time of arrival are displayed.
The arrow display appears on the Control Dis-
play, if so desired.
Terminating destination
guidance
1."Navigation"
2."Map"
3."Guidance"
4."Stop guidance"
Continuing destination
guidance
If the destination was not reached during the
last trip, destination guidance can be resumed.
"Resume guidance"
Route criteria
General information
>You can influence the calculated route by
selecting certain trip criteria.
>Route criteria can be changed during desti-
nation entry and during route guidance.>Street types are part of the navigation data
and are taken into account in route plan-
ning, e.g. avoiding highways.
>The proposed route can differ from per-
sonal experience.
>The settings are stored for the remote con-
trol currently in use.
>Route guidance with traffic bulletins, refer
to page140.
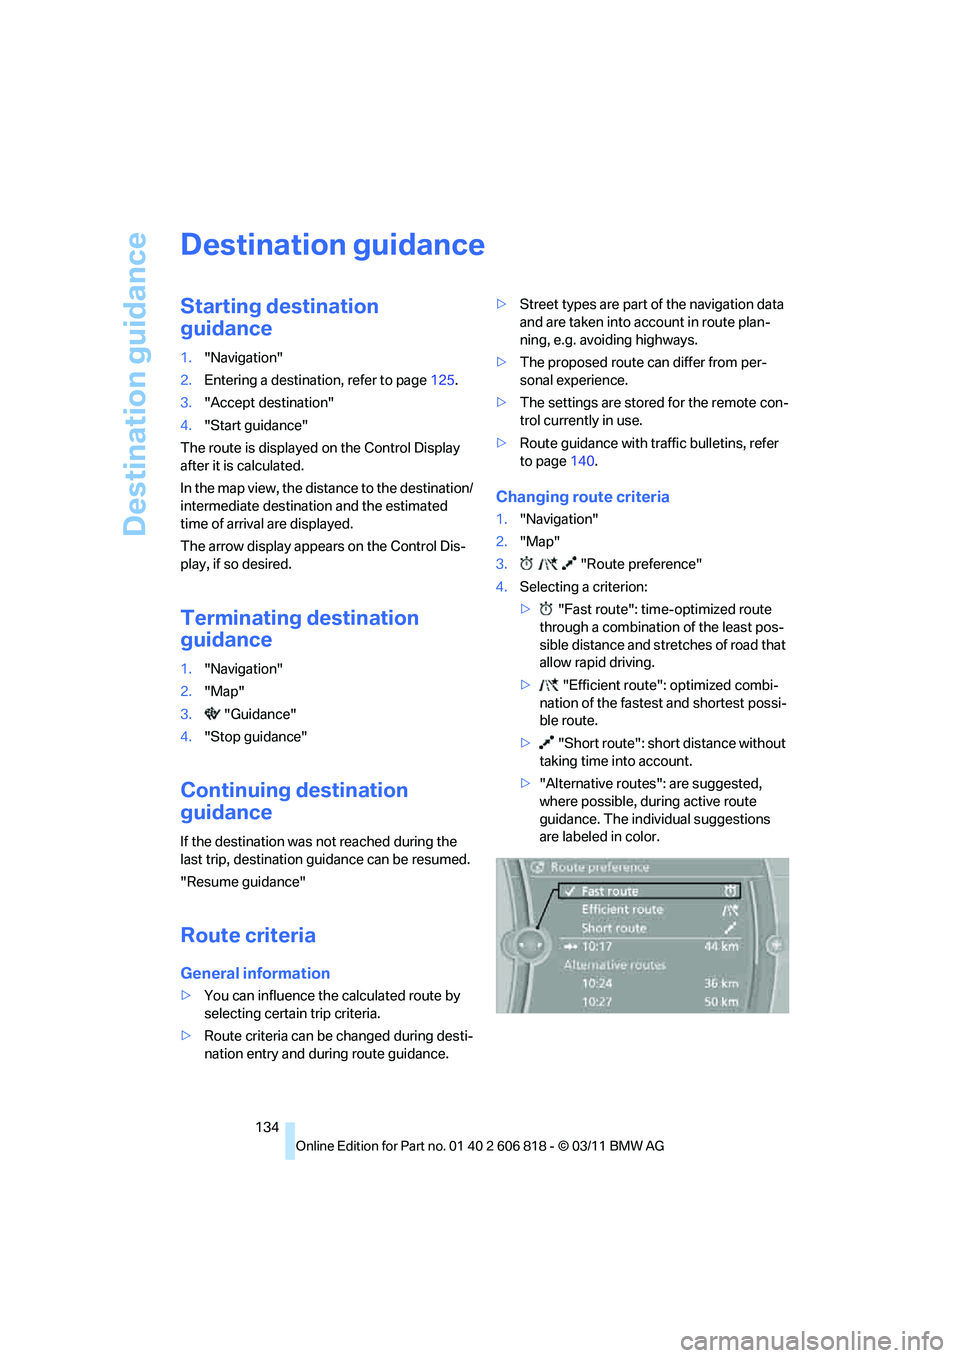
Changing route criteria
1."Navigation"
2."Map"
3."Route preference"
4.Selecting a criterion:
>"Fast route": time-optimized route
through a combination of the least pos-
sible distance and stretches of road that
allow rapid driving.
>"Efficient route": optimized combi-
nation of the fastest and shortest possi-
ble route.
>"Short route": short distance without
taking time into account.
>"Alternative routes": are suggested,
where possible, during active route
guidance. The individual suggestions
are labeled in color.
Page 139 of 272
Navigation
Driving tips
137Reference
At a glance
Controls
Communications
Entertainment
Mobility
Traffic obstructions
Small triangles along the planned route identify
route segments with traffic obstructions,
depending on map scale. The direction of the
triangles indicates the direction of the obstruc-
tion.
Road signs classify the obstructions.
>Red road sign: the obstruction relates to the
planned route or direction of travel.
>Gray road sign: the obstruction does not
relate to the planned route or direction of
travel.
Traffic bulletins, refer to page138.
Planned route
After route guidance is started, the planned
route is displayed on the map.
Status boxes
Show/hide: press the controller.
>Upper status box: time, phone details, and
entertainment details.
>Lower status box: symbol for active route
guidance, traffic bulletin status, arrival time,
and distance from destination.
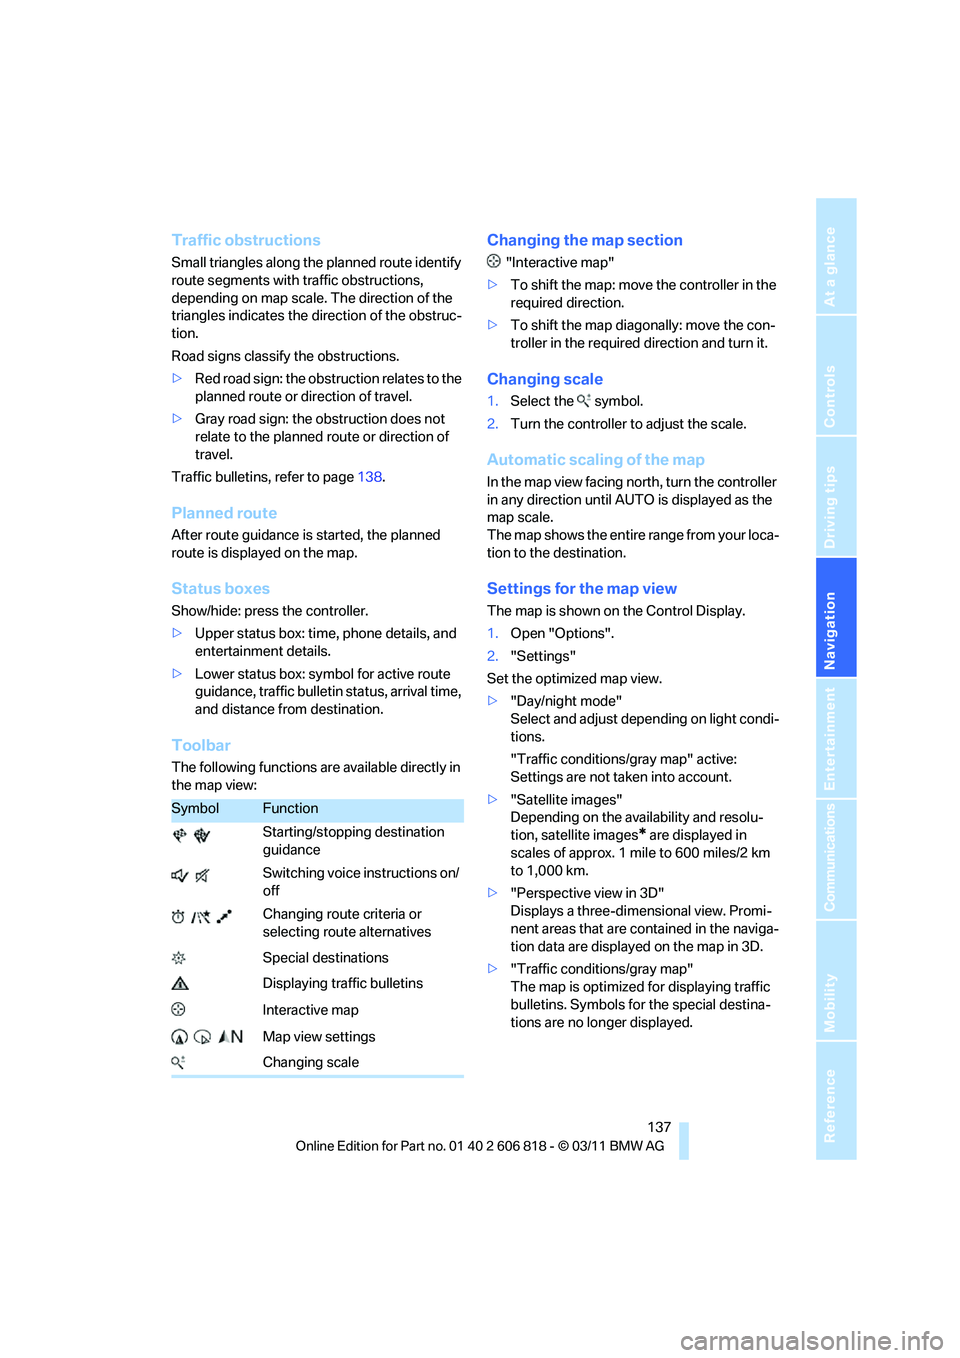
Toolbar
The following functions are available directly in
the map view:
Changing the map section
"Interactive map"
>To shift the map: move the controller in the
required direction.
>To shift the map diagonally: move the con-
troller in the required direction and turn it.
Changing scale
1.Select the symbol.
2.Turn the controller to adjust the scale.
Automatic scaling of the map
In the map view facing north, turn the controller
in any direction until AUTO is displayed as the
map scale.
The map shows the entire range from your loca-
tion to the destination.
Settings for the map view
The map is shown on the Control Display.
1.Open "Options".
2."Settings"
Set the optimized map view.
>"Day/night mode"
Select and adjust depending on light condi-
tions.
"Traffic conditions/gray map" active:
Settings are not taken into account.
>"Satellite images"
Depending on the availability and resolu-
tion, satellite images
* are displayed in
scales of approx. 1 mile to 600 miles/2 km
to 1,000 km.
>"Perspective view in 3D"
Displays a three-dimensional view. Promi-
nent areas that are contained in the naviga-
tion data are displayed on the map in 3D.
>"Traffic conditions/gray map"
The map is optimized for displaying traffic
bulletins. Symbols for the special destina-
tions are no longer displayed.
SymbolFunction
Starting/stopping destination
guidance
Switching voice instructions on/
off
Changing route criteria or
selecting route alternatives
Special destinations
Displaying traffic bulletins
Interactive map
Map view settings
Changing scale
Page 159 of 272
Navigation
Entertainment
Driving tips
157Reference
At a glance
Controls
Communications
Mobility
Fast forward/reverse
Press and hold the button for the corre-
sponding direction.
Automatic repeat*
Selected tracks, directories or CDs/DVDs are
repeated automatically.
Video playback*
Country codes
Only DVDs with the code of the home region
can be played back; also refer to the information
on your DVD.
Starting playback
For your own safety, the video image is only dis-
played up to approx. 2 mph/3 km/h and in some
market-specific versions, only with the parking
brake engaged or the selector lever of the auto-
matic transmission is in the park position.
DVD video
1."CD/Multimedia"
2."CD/DVD"
3.Select a DVD with video content.4."DVD menu"
5.Start the DVD via the DVD menu.
VCD/SVCD
1."CD/Multimedia"
2."CD/DVD"
3.Select a CD/DVD with video content.
4."Select track"
5.Select the desired track.
The CD/DVD is started.
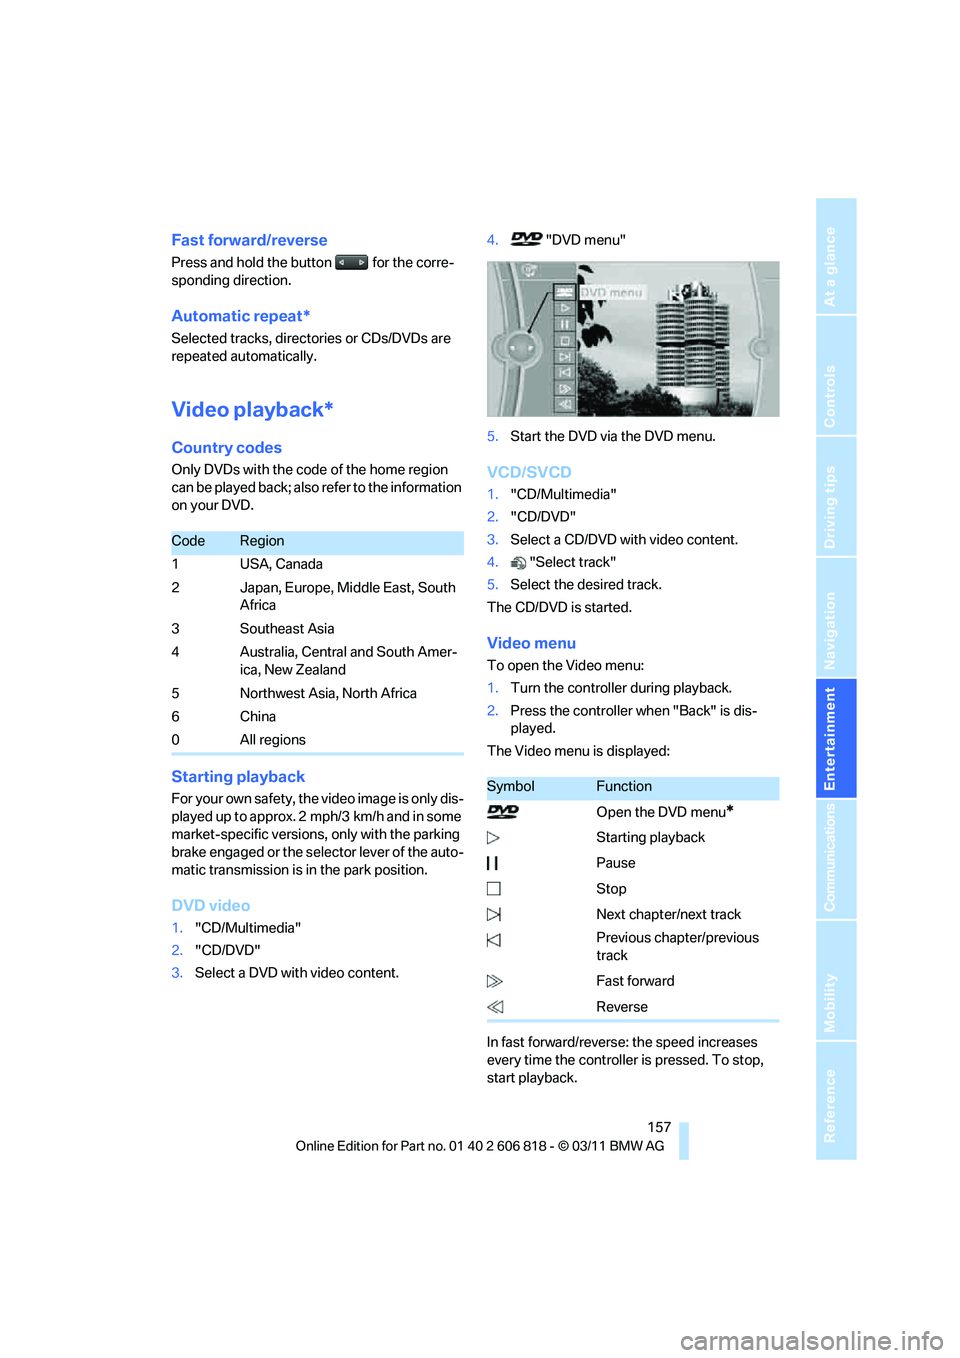
Video menu
To open the Video menu:
1.Turn the controller during playback.
2.Press the controller when "Back" is dis-
played.
The Video menu is displayed:
In fast forward/reverse: the speed increases
every time the controller is pressed. To stop,
start playback.
CodeRegion
1USA, Canada
2 Japan, Europe, Middle East, South
Africa
3 Southeast Asia
4 Australia, Central and South Amer-
ica, New Zealand
5 Northwest Asia, North Africa
6China
0 All regions
SymbolFunction
Open the DVD menu
*
Starting playback
Pause
Stop
Next chapter/next track
Previous chapter/previous
track
Fast forward
Reverse
Page 174 of 272
External devices
172 Is the device no longer responding? Switch
the device off and back on again.
Repeat the pairing procedure.
>No music can be played.
Start the program for playing music files on
the device and if necessary, select a track
via the device.
Activate and deactivate the radio mute on
the radio control panel.
>Music files only play quietly.
Adjust volume settings on the device.
>Playback is interrupted by the press of a
button or other messages on the device.
Switch off key tones and other acoustic sig-
nal on the device.
>Playback is interrupted by a phone call or
traffic report and does not automatically
continue.
Activate and deactivate the radio mute on
the radio control panel.
>Playback is not possible when the mobile
phone is connected via Bluetooth audio and
at the same time via the extended connec-
tivity of the music player in the mobile
phone
*.
Disconnect one of the two connections, e.g.
the audio connection, refer to page171,
and start playback again.
If you have gone through all items in the list and
still cannot activate the desired function please
contact Customer Relations or a BMW center.
Software update*
The vehicle supports various external devices,
depending on the software it is currently using.
A software update can enable the vehicle to
support new mobile phones or new external
devices, for example.
Software updates and associated, up-to-date
instructions are available on the web page
www.bmwusa.com/update.
Displaying current version
The currently installed software is displayed.
1."Settings"
2."Software update"
3."Show current version"
Select the desired version
* to display additional
information
*.
Updating software by USB*
The software update can only be performed
when stopped.
1.Save the file for the software update in the
main directory of a USB data storage
device.
2.Connect the USB data storage device to the
USB interface of the USB audio interface in
the center armrest. It is not possible to per-
form the update using the USB interface in
the glove compartment.
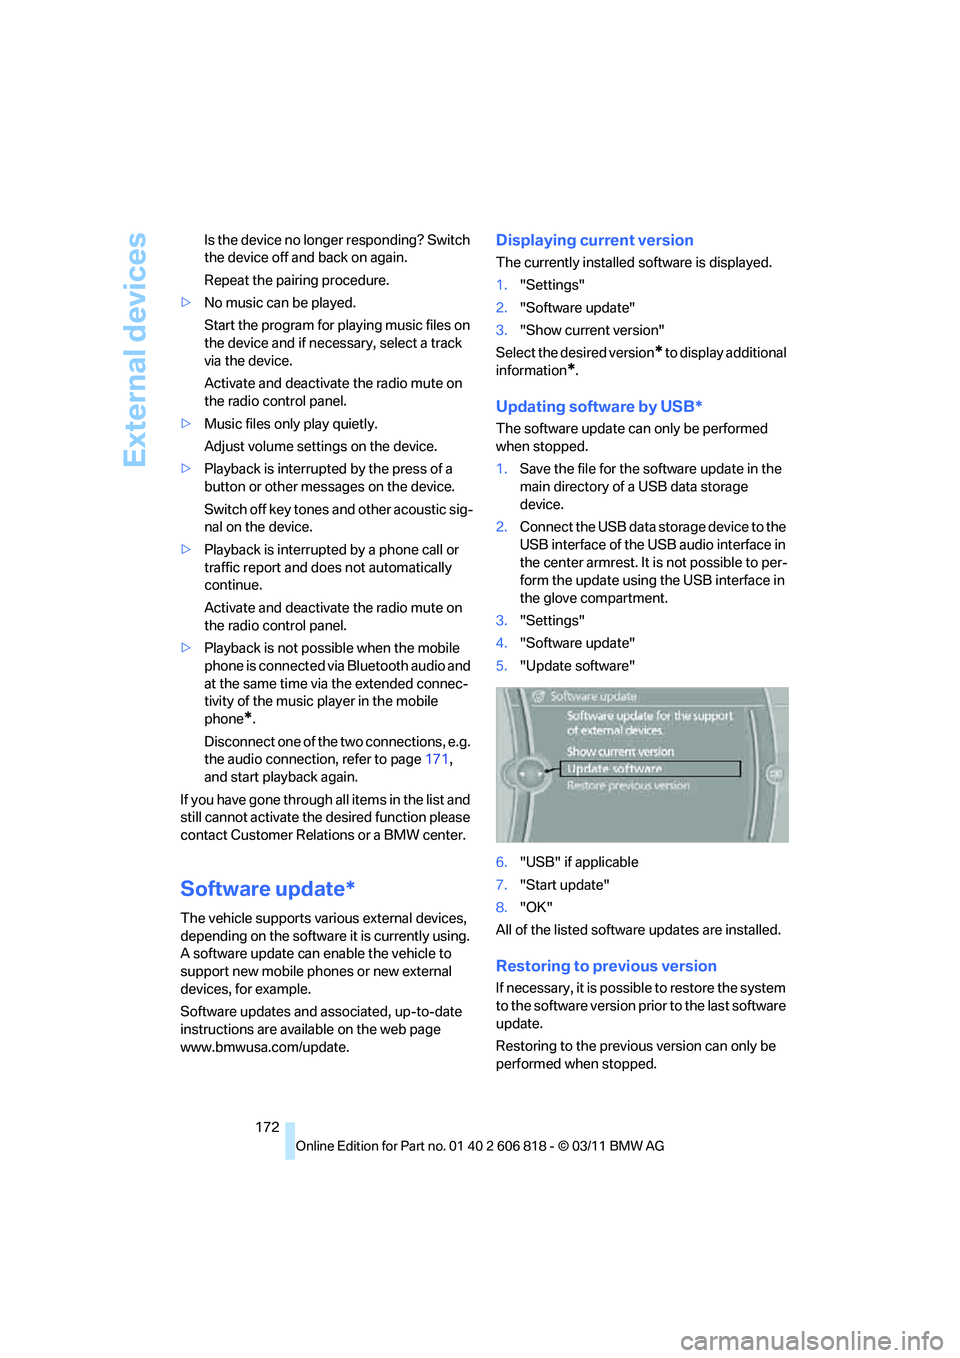
3."Settings"
4."Software update"
5."Update software"
6."USB" if applicable
7."Start update"
8."OK"
All of the listed software updates are installed.
Restoring to previous version
If necessary, it is possible to restore the system
to the software version prior to the last software
update.
Restoring to the previous version can only be
performed when stopped.