2012 BMW 135I CONVERTIBLE light
[x] Cancel search: lightPage 55 of 272
Controls
53Reference
At a glance
Driving tips
Communications
Navigation
Entertainment
Mobility
Do not use force to swing the lever
back up; otherwise, the mechanism
will be damaged.<
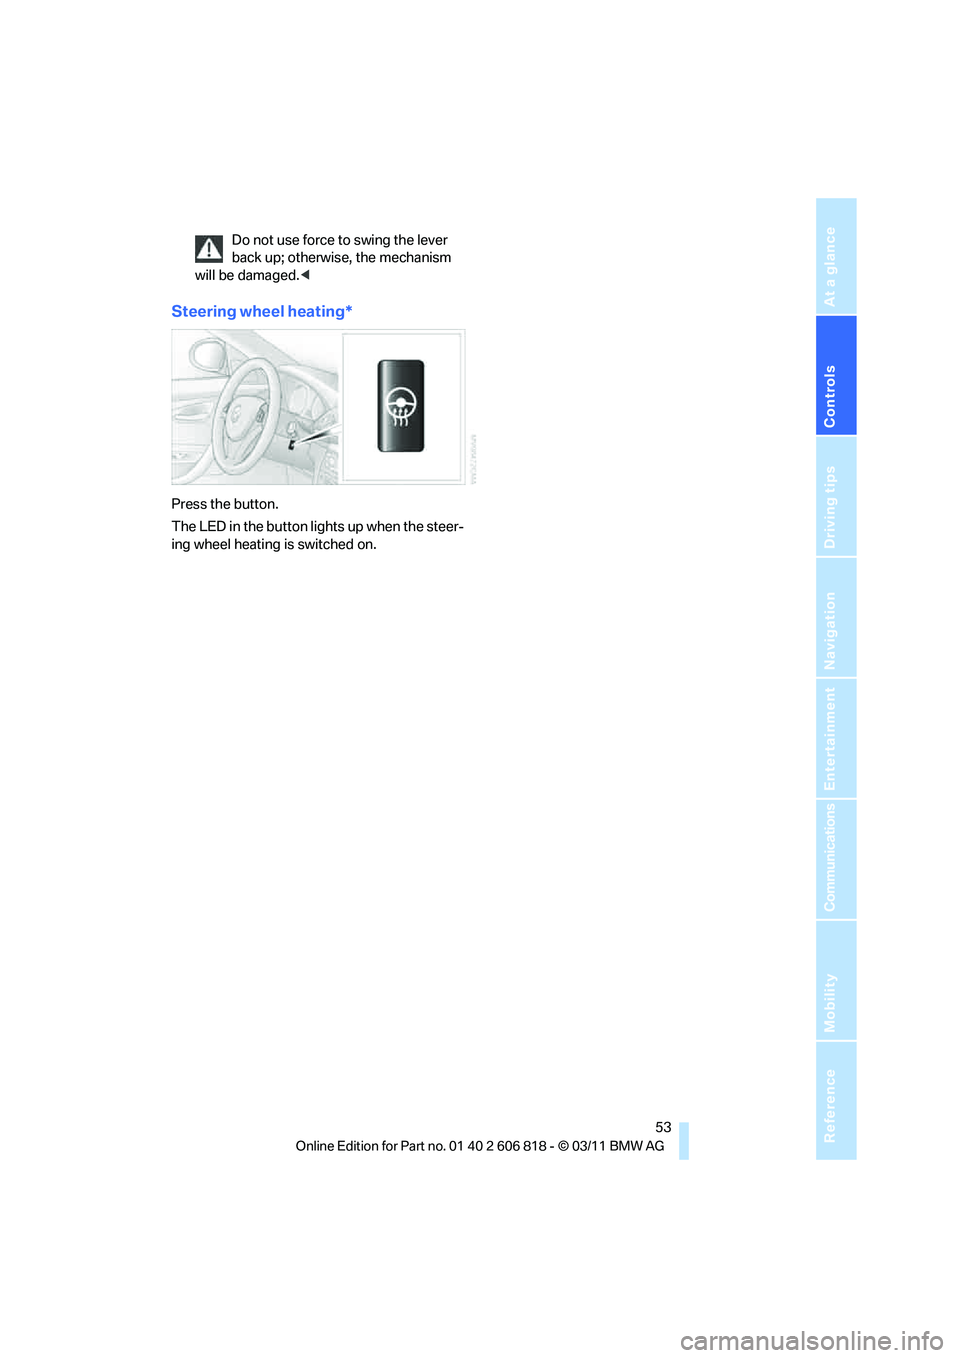
Steering wheel heating*
Press the button.
The LED in the button lights up when the steer-
ing wheel heating is switched on.
Page 61 of 272
Controls
59Reference
At a glance
Driving tips
Communications
Navigation
Entertainment
Mobility
3.Forcefully apply the parking brake.
4.Removing the remote control from the igni-
tion lock, refer to page57.
Sport automatic transmission with
double clutch
1.With the car at a standstill, press the Start/
Stop button.
If the transmission is shifted into N when the
engine is switched off, you will be notified
visually and acoustically of this fact.
2.Forcefully apply the parking brake.
3.Remove remote control from the ignition
lock, refer to page57. The transmission is
automatically shifted into transmission
position P.
Parking brake
The parking brake is primarily intended to pre-
vent the vehicle from rolling while parked; it
brakes the rear wheels.
Indicator lamp
The indicator lamp is lit, and when you
drive off a signal sounds in addition.
The parking brake is still applied.
Indicator lamp for Canadian models.
Applying
The lever locks in position automatically.
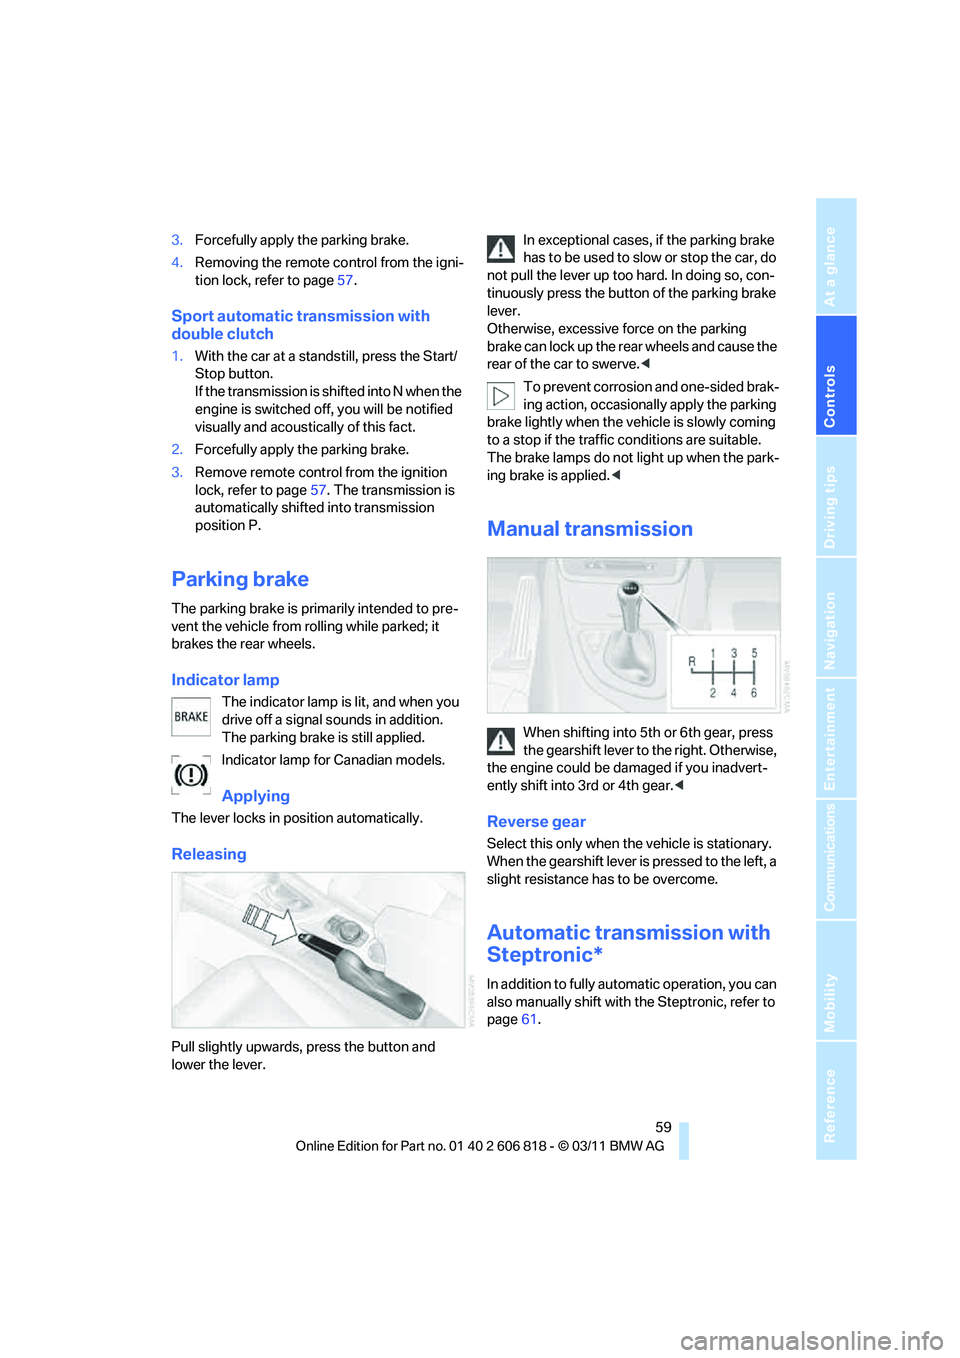
Releasing
Pull slightly upwards, press the button and
lower the lever.In exceptional cases, if the parking brake
has to be used to slow or stop the car, do
not pull the lever up too hard. In doing so, con-
tinuously press the button of the parking brake
lever.
Otherwise, excessive force on the parking
brake can lock up the rear wheels and cause the
rear of the car to swerve.<
To prevent corrosion and one-sided brak-
ing action, occasionally apply the parking
brake lightly when the vehicle is slowly coming
to a stop if the traffic conditions are suitable.
The brake lamps do not light up when the park-
ing brake is applied.<
Manual transmission
When shifting into 5th or 6th gear, press
the gearshift lever to the right. Otherwise,
the engine could be damaged if you inadvert-
ently shift into 3rd or 4th gear.<
Reverse gear
Select this only when the vehicle is stationary.
When the gearshift lever is pressed to the left, a
slight resistance has to be overcome.
Automatic transmission with
Steptronic*
In addition to fully automatic operation, you can
also manually shift with the Steptronic, refer to
page61.
Page 64 of 272

Driving
62 3.Using the screwdriver from the onboard
vehicle tool kit, refer to page227, press the
red lever, see arrow, while moving the
selector lever to the desired position.
7-gear Sport automatic
transmission with double
clutch*
The concept
The 7-gear Sport automatic transmission with
double clutch is an automated manual trans-
mission with two clutches and secondary gear
sets in which the clutching and shifting is han-
dled by an electrohydraulic system.
With the 7-gear Sport automatic transmission
with double clutch, the gears are shifted without
an interruption in driving power.
You operate the 7-gear Sport automatic trans-
mission with double clutch using the selector
lever and two shift paddles on the steering
wheel.
It offers you the following functions:
>Either manual or automatic mode: sequen-
tial mode or drive mode
>Automatic downshifting and protection
against incorrect gear selection, even in
sequential mode
>Acceleration assistant, Launch Control,
refer to page66
>Automatic intermediate throttle application
System limitations
The 7-gear Sport automatic transmission with
double clutch has an overheating protection
that protects the clutch from extreme loads.
The indicator lamp lights up in yellow if
the transmission becomes too warm.
Avoid high engine loads and frequent
accelerations from zero. If the transmission is
overheated, the indicator lamp lights up in red
and the power flow to the motor is interrupted. It
is only possible to continue driving once the
transmission has cooled down.
Avoid frequent powerful accelerations from
zero and do not hold the vehicle on inclines by
pressing lightly on the accelerator while letting
the clutch slip, as this may cause the transmis-
sion to overheat.
Selector lever positions
P R N D M/S + –
The selector lever position and the engaged
gear are displayed, e.g. M4.
Engaging selector lever positions
>The selector lever can be moved out of
position P only with the engine running:
interlock.
>Before moving the lever away from P or N
with the vehicle stationary, first depress the
brake; otherwise, the desired shift will not
be executed: shiftlock.
Page 66 of 272
Driving
64 The engaged gear, e.g. M1 is displayed in the
instrument cluster.
In the following situations, the 7-gear Sport
automatic transmission with double clutch
does the thinking for you:
>Upshifts and downshifts are executed only
when they will result in a plausible combina-
tion of engine and vehicle speed; thus, for
example, a downshift that could cause the
engine to overrev will not be executed by
the system.
>At a stop, the transmission is automatically
shifted down to the first gear.
>Shortly before the speed falls below a gear-
dependent minimum speed, the transmis-
sion automatically downshifts without your
intervention.
Quick downshifting: even in sequential mode,
you can skip over several gears in order to
achieve an optimum acceleration. To do so,
depress the accelerator past the resistance
point.
To return to automatic mode, push the selector
lever to the right.
Gear shifting
Upshift or downshift using the selector lever or
the shift paddles. You do not need to lift your
foot off the accelerator when doing so.
Using the selector lever
>To upshift, pull the selector lever toward the
rear.
>To downshift, push it toward the front.
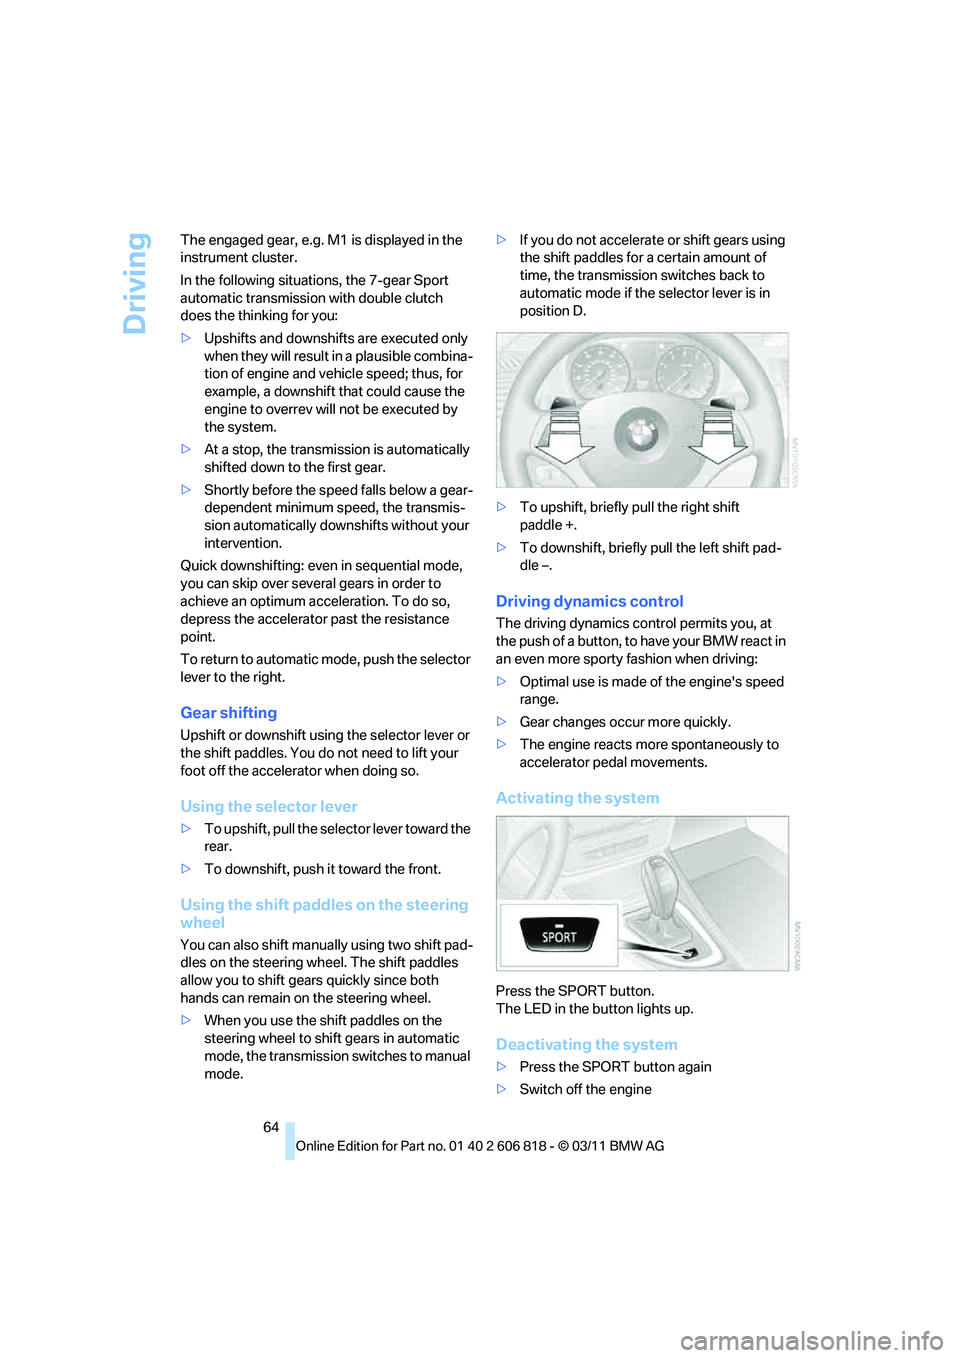
Using the shift paddles on the steering
wheel
You can also shift manually using two shift pad-
dles on the steering wheel. The shift paddles
allow you to shift gears quickly since both
hands can remain on the steering wheel.
>When you use the shift paddles on the
steering wheel to shift gears in automatic
mode, the transmission switches to manual
mode.>If you do not accelerate or shift gears using
the shift paddles for a certain amount of
time, the transmission switches back to
automatic mode if the selector lever is in
position D.
>To upshift, briefly pull the right shift
paddle +.
>To downshift, briefly pull the left shift pad-
dle –.
Driving dynamics control
The driving dynamics control permits you, at
the push of a button, to have your BMW react in
an even more sporty fashion when driving:
>Optimal use is made of the engine's speed
range.
>Gear changes occur more quickly.
>The engine reacts more spontaneously to
accelerator pedal movements.
Activating the system
Press the SPORT button.
The LED in the button lights up.
Deactivating the system
>Press the SPORT button again
>Switch off the engine
Page 68 of 272
Driving
66
Launch Control
Launch Control enables an optimum accelera-
tion when starting off on a road surface with
good traction.
Do not use Launch Control too often; oth-
erwise, the powerful stresses on the vehi-
cle will lead to premature component wear.<
Launch Control is ready for use when the
engine is at operating temperature, i.e. after
uninterrupted travel of at least 6.2 miles/10 km.
1.With the engine running, step on the brake
with your left foot.
2.Activate Dynamic Traction Control (DTC),
refer to page84.
3.Activate Driving dynamics control, refer to
page64.
4.With the vehicle stationary, activate the
manual mode and select 1
stgear.
5.With your right foot, push the accelerator
pedal past the resistance point. The engine
speed for pulling away is adjusted. A flag
symbol appears in the instrument cluster.
6.When you release the brake pedal, the vehi-
cle accelerates. Keep the accelerator pedal
floored.
7.The upshifting occurs automatically as long
as you keep the accelerator pedal pressed
past the resistance point.
Launch Control will be ready for use again after
you drive a certain distance.
Launch Control is not available for use during
the break-in phase, refer to page116.
To maintain driving stability, keep DSC
activated whenever possible.<
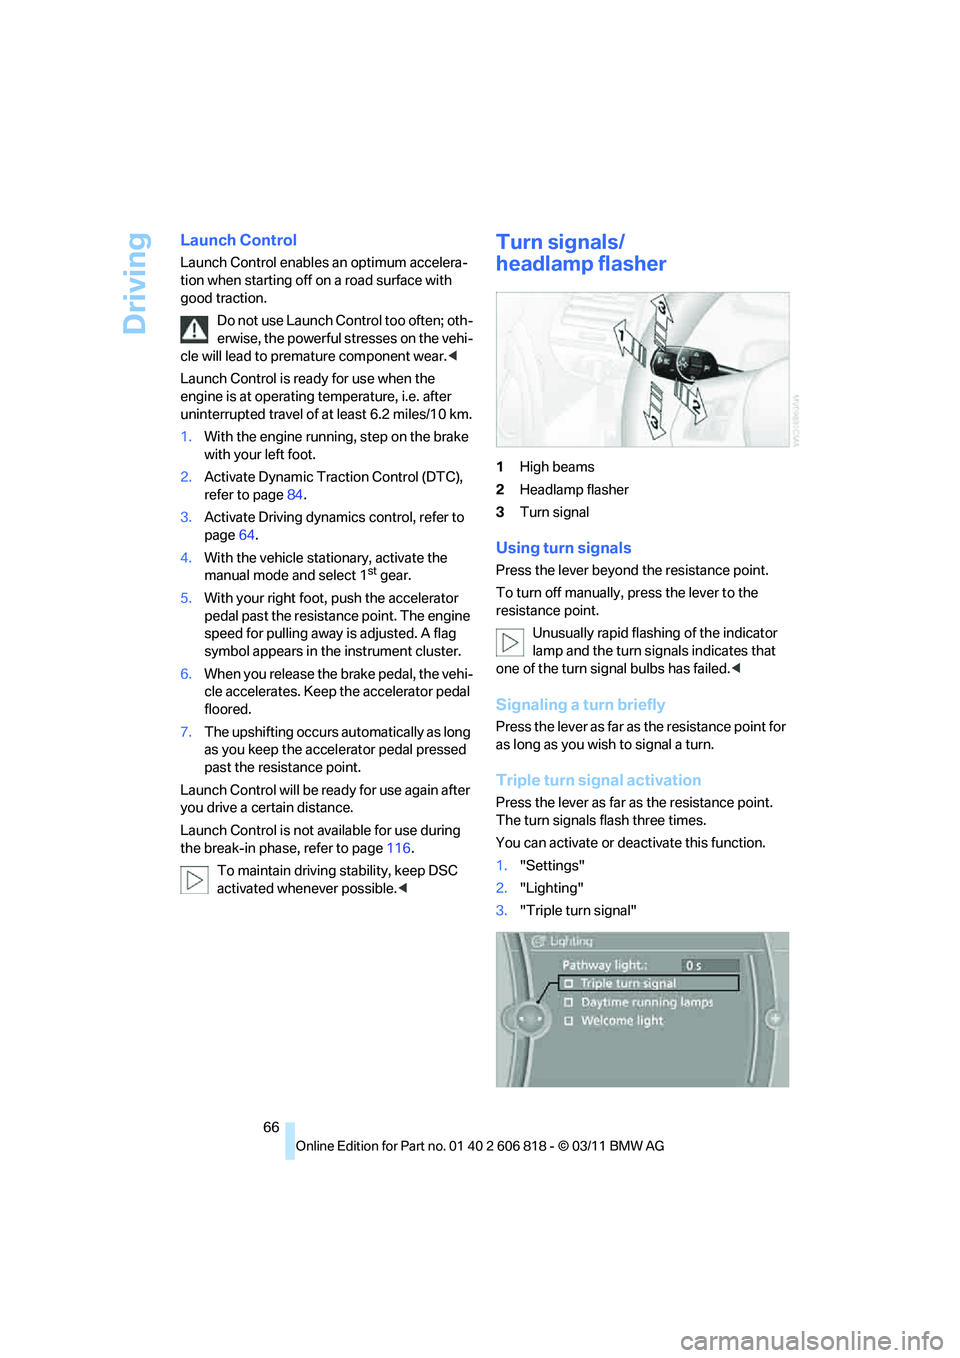
Turn signals/
headlamp flasher
1High beams
2Headlamp flasher
3Turn signal
Using turn signals
Press the lever beyond the resistance point.
To turn off manually, press the lever to the
resistance point.
Unusually rapid flashing of the indicator
lamp and the turn signals indicates that
one of the turn signal bulbs has failed.<
Signaling a turn briefly
Press the lever as far as the resistance point for
as long as you wish to signal a turn.
Triple turn signal activation
Press the lever as far as the resistance point.
The turn signals flash three times.
You can activate or deactivate this function.
1."Settings"
2."Lighting"
3."Triple turn signal"
Page 69 of 272

Controls
67Reference
At a glance
Driving tips
Communications
Navigation
Entertainment
Mobility
The setting is stored for the remote control cur-
rently in use.
Wiper system
1Switching on wipers
2Switching off wipers or brief wipe
3Activating/deactivating intermittent wipe or
rain sensor
*
4Cleaning windshield and headlamps*
5Setting speed for intermittent wipe, or sen-
sitivity of the rain sensor
Switching on wipers
Press the lever upward, arrow 1.
The lever automatically returns to its initial posi-
tion when released.
Normal wiper speed
Press once.
The system switches to operation in the inter-
mittent mode when the vehicle is stationary.
Fast wiper speed
Press twice or press beyond the resistance
point.
The system switches to normal speed when the
vehicle is stationary.
Intermittent wipe or rain sensor*
If the car is not equipped with a rain sensor, the
intermittent-wipe time is a preset.
If the car is equipped with a rain sensor, the time
between wipes is controlled automatically and
depends on the intensity of the rainfall. The rain sensor is mounted on the windshield, directly in
front of the interior rearview mirror.
Activating intermittent wipe or rain
sensor
Press the button, arrow3. The LED in the but-
ton lights up.
Setting speed for intermittent wipe or
sensitivity of the rain sensor
Turn the thumb wheel5.
Deactivating intermittent wipe or rain
sensor
Press the button again, arrow3.
The LED goes out.
Deactivate the rain sensor before enter-
ing an automatic car wash. Failure to do
so could result in damage caused by undesired
wiper activation.<
Cleaning windshield and headlamps*
Pull the lever, arrow 4.
Washer fluid is sprayed onto the windshield and
the wipers are operated for a short time.
When the vehicle lighting system is switched
on, the headlamps are cleaned at regular and
appropriate intervals.
Do not use the washers if there is any
danger that the fluid will freeze on the
windshield. If you do, your vision could be
obscured. Antifreeze should therefore be
added to the fluid, refer to Washer fluid.
Do not use the washers when the washer fluid
reservoir is empty; otherwise, you will damage
the washer pump.<
Page 72 of 272
Controls overview
70
Controls overview
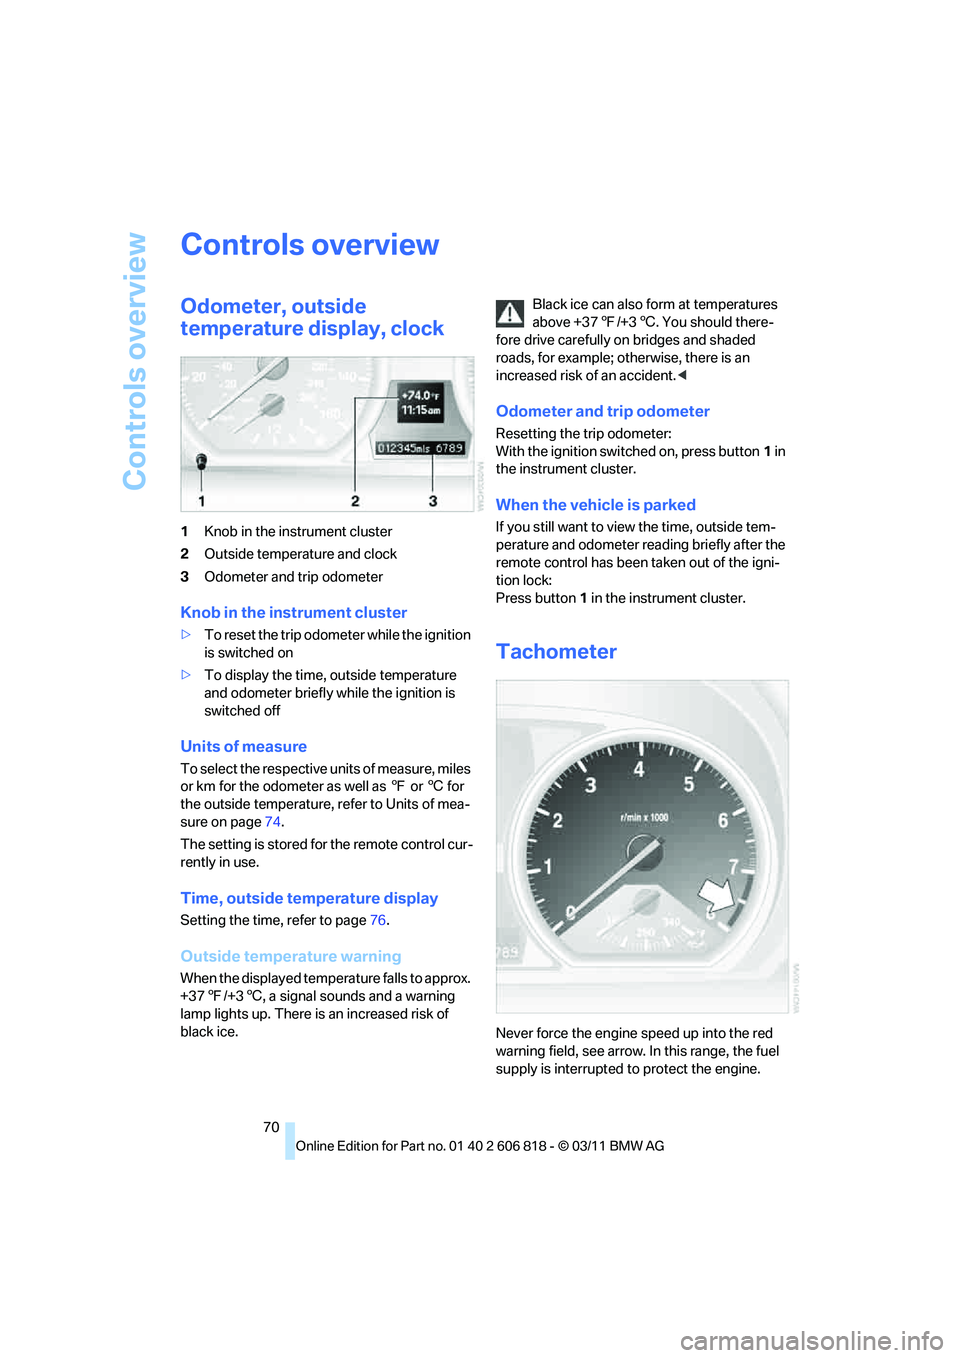
Odometer, outside
temperature display, clock
1Knob in the instrument cluster
2Outside temperature and clock
3Odometer and trip odometer
Knob in the instrument cluster
>To reset the trip odometer while the ignition
is switched on
>To display the time, outside temperature
and odometer briefly while the ignition is
switched off
Units of measure
To select the respective units of measure, miles
or km for the odometer as well as 7 or 6 for
the outside temperature, refer to Units of mea-
sure on page74.
The setting is stored for the remote control cur-
rently in use.
Time, outside temperature display
Setting the time, refer to page76.
Outside temperature warning
When the displayed temperature falls to approx.
+377/+36, a signal sounds and a warning
lamp lights up. There is an increased risk of
black ice.Black ice can also form at temperatures
above +377/+36. You should there-
fore drive carefully on bridges and shaded
roads, for example; otherwise, there is an
increased risk of an accident.<
Odometer and trip odometer
Resetting the trip odometer:
With the ignition switched on, press button1 in
the instrument cluster.
When the vehicle is parked
If you still want to view the time, outside tem-
perature and odometer reading briefly after the
remote control has been taken out of the igni-
tion lock:
Press button1 in the instrument cluster.
Tachometer
Never force the engine speed up into the red
warning field, see arrow. In this range, the fuel
supply is interrupted to protect the engine.
Page 73 of 272
Controls
71Reference
At a glance
Driving tips
Communications
Navigation
Entertainment
Mobility
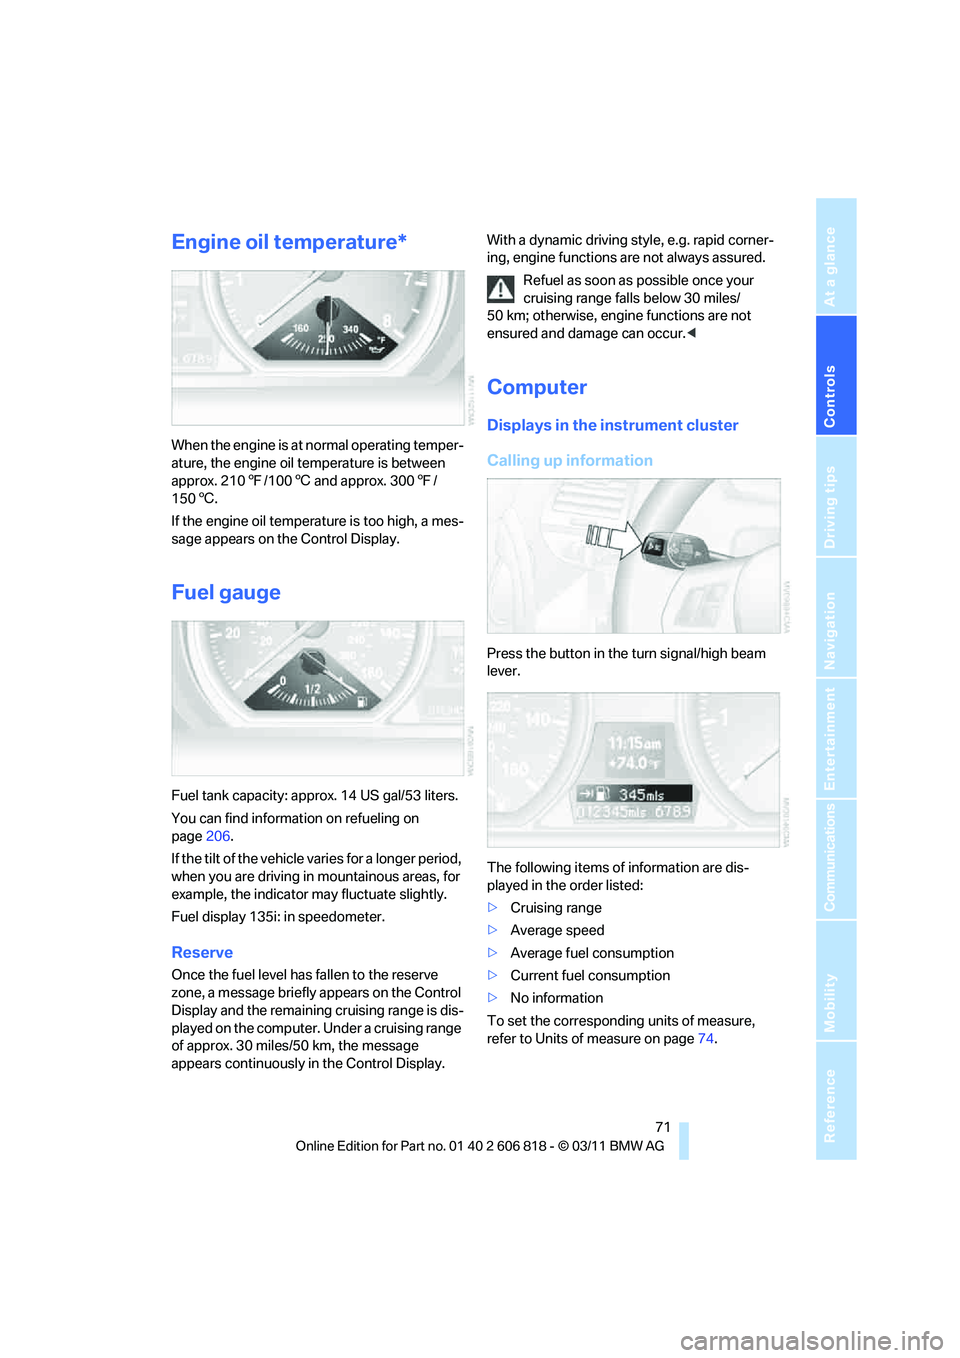
Engine oil temperature*
When the engine is at normal operating temper-
ature, the engine oil temperature is between
approx. 2107/1006 and approx. 3007/
1506.
If the engine oil temperature is too high, a mes-
sage appears on the Control Display.
Fuel gauge
Fuel tank capacity: approx. 14 US gal/53 liters.
You can find information on refueling on
page206.
If the tilt of the vehicle varies for a longer period,
when you are driving in mountainous areas, for
example, the indicator may fluctuate slightly.
Fuel display 135i: in speedometer.
Reserve
Once the fuel level has fallen to the reserve
zone, a message briefly appears on the Control
Display and the remaining cruising range is dis-
played on the computer. Under a cruising range
of approx. 30 miles/50 km, the message
appears continuously in the Control Display.With a dynamic driving style, e.g. rapid corner-
ing, engine functions are not always assured.
Refuel as soon as possible once your
cruising range falls below 30 miles/
50 km; otherwise, engine functions are not
ensured and damage can occur.<
Computer
Displays in the instrument cluster
Calling up information
Press the button in the turn signal/high beam
lever.
The following items of information are dis-
played in the order listed:
>Cruising range
>Average speed
>Average fuel consumption
>Current fuel consumption
>No information
To set the corresponding units of measure,
refer to Units of measure on page74.