2012 BMW 135I CONVERTIBLE automatic transmission
[x] Cancel search: automatic transmissionPage 65 of 272
Controls
63Reference
At a glance
Driving tips
Communications
Navigation
Entertainment
Mobility
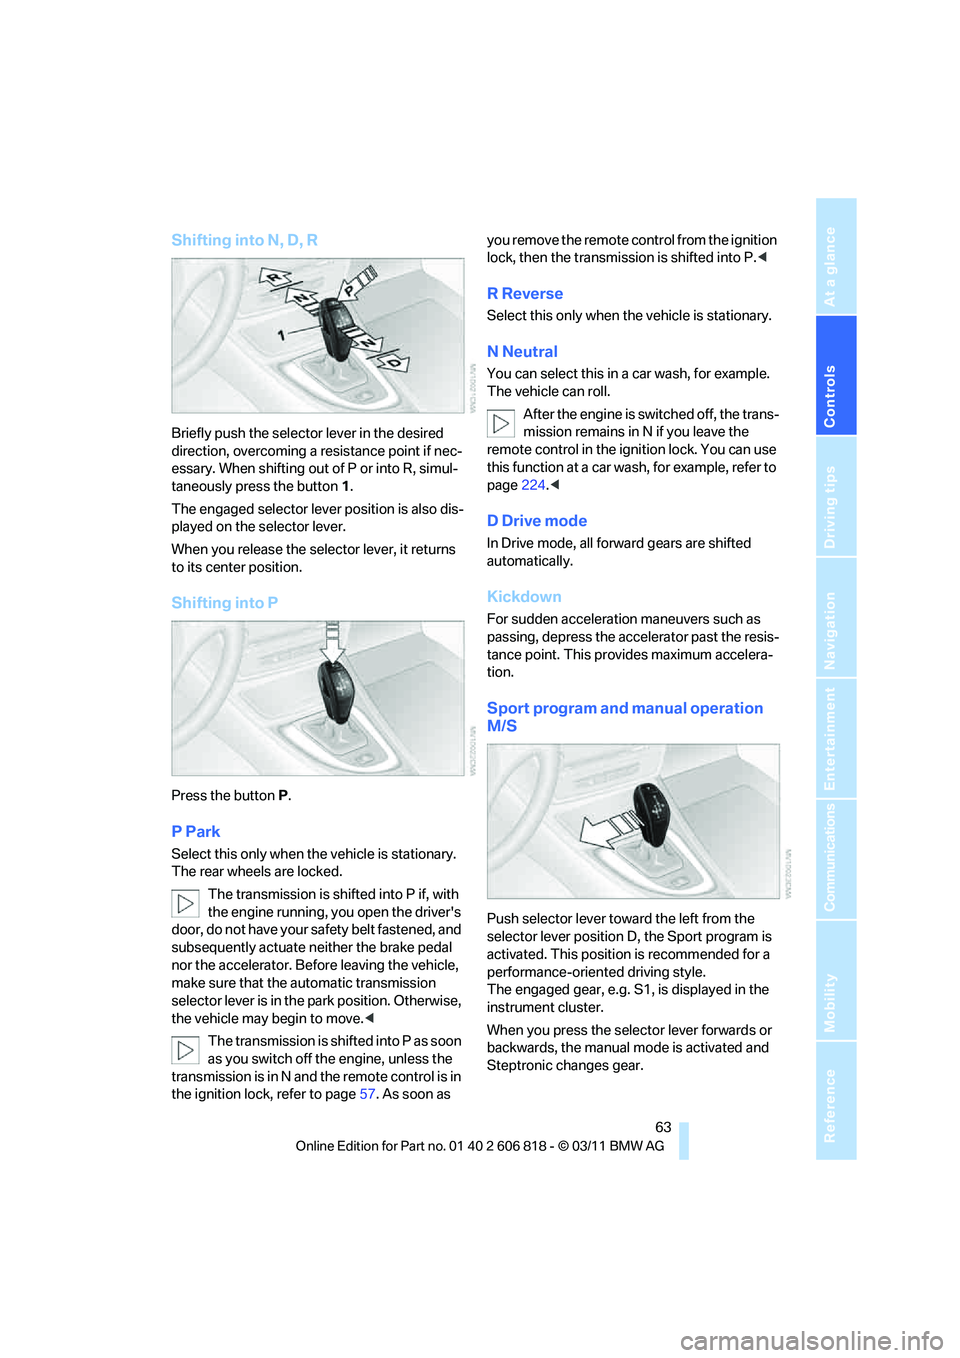
Shifting into N, D, R
Briefly push the selector lever in the desired
direction, overcoming a resistance point if nec-
essary. When shifting out of P or into R, simul-
taneously press the button 1.
The engaged selector lever position is also dis-
played on the selector lever.
When you release the selector lever, it returns
to its center position.
Shifting into P
Press the buttonP.
P Park
Select this only when the vehicle is stationary.
The rear wheels are locked.
The transmission is shifted into P if, with
the engine running, you open the driver's
door, do not have your safety belt fastened, and
subsequently actuate neither the brake pedal
nor the accelerator. Before leaving the vehicle,
make sure that the automatic transmission
selector lever is in the park position. Otherwise,
the vehicle may begin to move.<
The transmission is shifted into P as soon
as you switch off the engine, unless the
transmission is in N and the remote control is in
the ignition lock, refer to page57. As soon as you remove the remote control from the ignition
lock, then the transmission is shifted into P.<
R Reverse
Select this only when the vehicle is stationary.
N Neutral
You can select this in a car wash, for example.
The vehicle can roll.
After the engine is switched off, the trans-
mission remains in N if you leave the
remote control in the ignition lock. You can use
this function at a car wash, for example, refer to
page224.<
D Drive mode
In Drive mode, all forward gears are shifted
automatically.
Kickdown
For sudden acceleration maneuvers such as
passing, depress the accelerator past the resis-
tance point. This provides maximum accelera-
tion.
Sport program and manual operation
M/S
Push selector lever toward the left from the
selector lever position D, the Sport program is
activated. This position is recommended for a
performance-oriented driving style.
The engaged gear, e.g. S1, is displayed in the
instrument cluster.
When you press the selector lever forwards or
backwards, the manual mode is activated and
Steptronic changes gear.
Page 66 of 272
Driving
64 The engaged gear, e.g. M1 is displayed in the
instrument cluster.
In the following situations, the 7-gear Sport
automatic transmission with double clutch
does the thinking for you:
>Upshifts and downshifts are executed only
when they will result in a plausible combina-
tion of engine and vehicle speed; thus, for
example, a downshift that could cause the
engine to overrev will not be executed by
the system.
>At a stop, the transmission is automatically
shifted down to the first gear.
>Shortly before the speed falls below a gear-
dependent minimum speed, the transmis-
sion automatically downshifts without your
intervention.
Quick downshifting: even in sequential mode,
you can skip over several gears in order to
achieve an optimum acceleration. To do so,
depress the accelerator past the resistance
point.
To return to automatic mode, push the selector
lever to the right.
Gear shifting
Upshift or downshift using the selector lever or
the shift paddles. You do not need to lift your
foot off the accelerator when doing so.
Using the selector lever
>To upshift, pull the selector lever toward the
rear.
>To downshift, push it toward the front.
Using the shift paddles on the steering
wheel
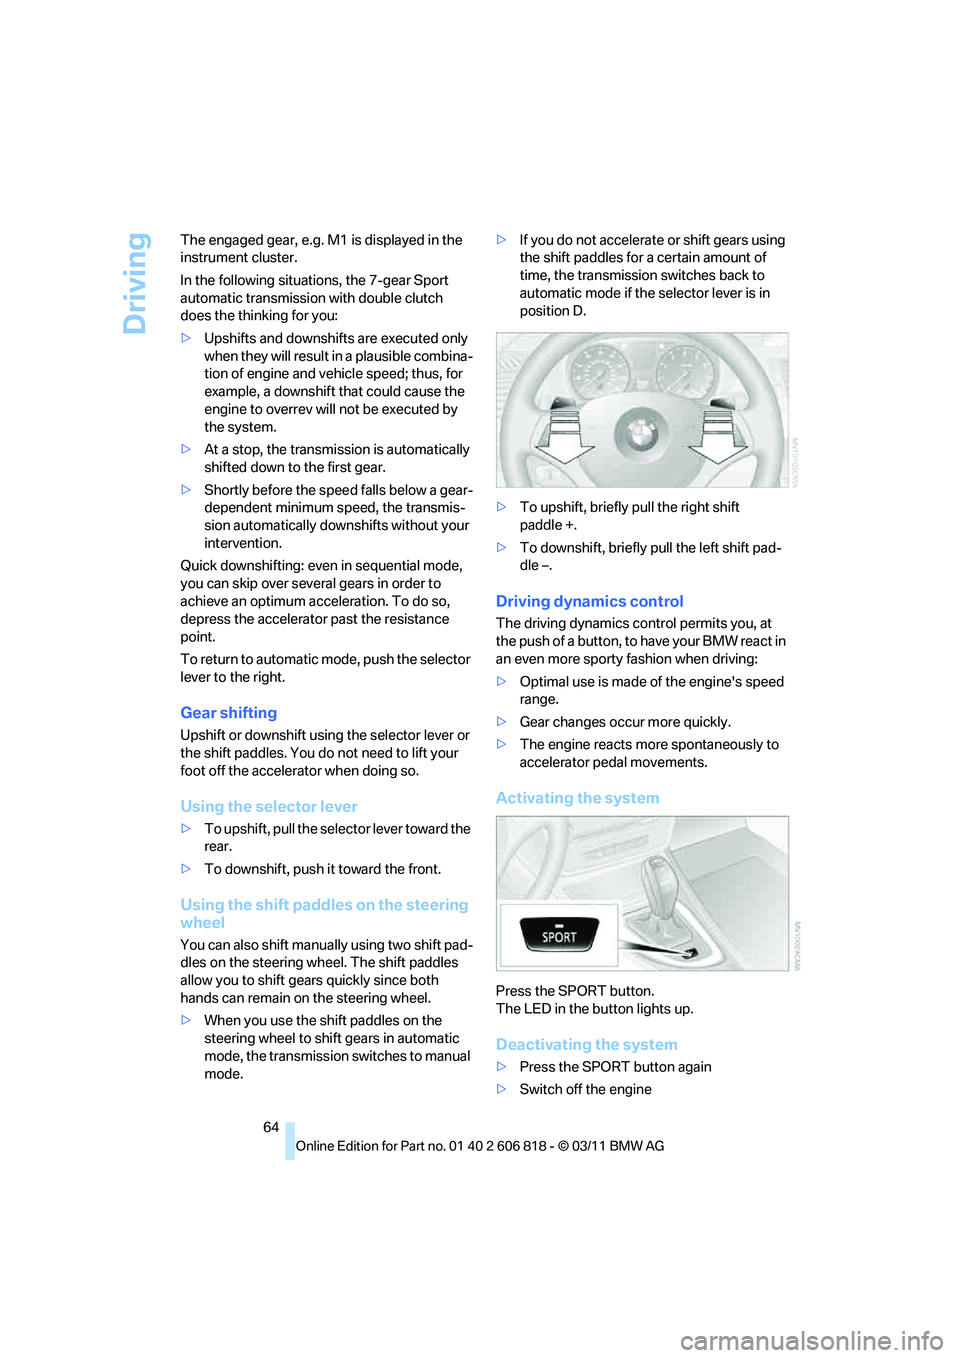
You can also shift manually using two shift pad-
dles on the steering wheel. The shift paddles
allow you to shift gears quickly since both
hands can remain on the steering wheel.
>When you use the shift paddles on the
steering wheel to shift gears in automatic
mode, the transmission switches to manual
mode.>If you do not accelerate or shift gears using
the shift paddles for a certain amount of
time, the transmission switches back to
automatic mode if the selector lever is in
position D.
>To upshift, briefly pull the right shift
paddle +.
>To downshift, briefly pull the left shift pad-
dle –.
Driving dynamics control
The driving dynamics control permits you, at
the push of a button, to have your BMW react in
an even more sporty fashion when driving:
>Optimal use is made of the engine's speed
range.
>Gear changes occur more quickly.
>The engine reacts more spontaneously to
accelerator pedal movements.
Activating the system
Press the SPORT button.
The LED in the button lights up.
Deactivating the system
>Press the SPORT button again
>Switch off the engine
Page 71 of 272
Controls
69Reference
At a glance
Driving tips
Communications
Navigation
Entertainment
Mobility
Increasing speed
Briefly press the lever, arrow 1, until the desired
speed is reached.
Each time the lever is pressed briefly, the speed
is increased by approx. 1 mph/1 km/h.
Accelerating using the lever
Press the lever, arrow 1, until the desired speed
is reached.
The vehicle accelerates without pressure on
the accelerator pedal. The system stores and
maintains the speed.
Decreasing speed
Repeatedly pull the lever, arrow2, until the
desired speed is reached.
The functions here are the same as for increas-
ing the speed or accelerating, except that the
speed will be decreased.
Deactivating cruise control
Push the lever briefly upwards or downwards,
arrow3.
In addition, the system is automatically deacti-
vated:
>When the brakes are applied.
>When the clutch of the manual transmission
is engaged or the transmission is shifted
into neutral.
>When the automatic transmission selector
lever is moved into the neutral position N.
>When the selector lever of the Sports auto-
matic transmission with double clutch is
moved into the neutral position N.
>When the vehicle travels faster or slower
than the set speed for an extended period,
e.g. when the accelerator is depressed.
>When DTC is activated or DSC is deacti-
vated.
>When DSC is intervening
Resuming a previously stored speed
Press the button, arrow4.
The last stored speed is resumed and main-
tained.
The stored speed is briefly displayed in the
instrument cluster.
The stored speed is cleared when the ignition is
switched off.
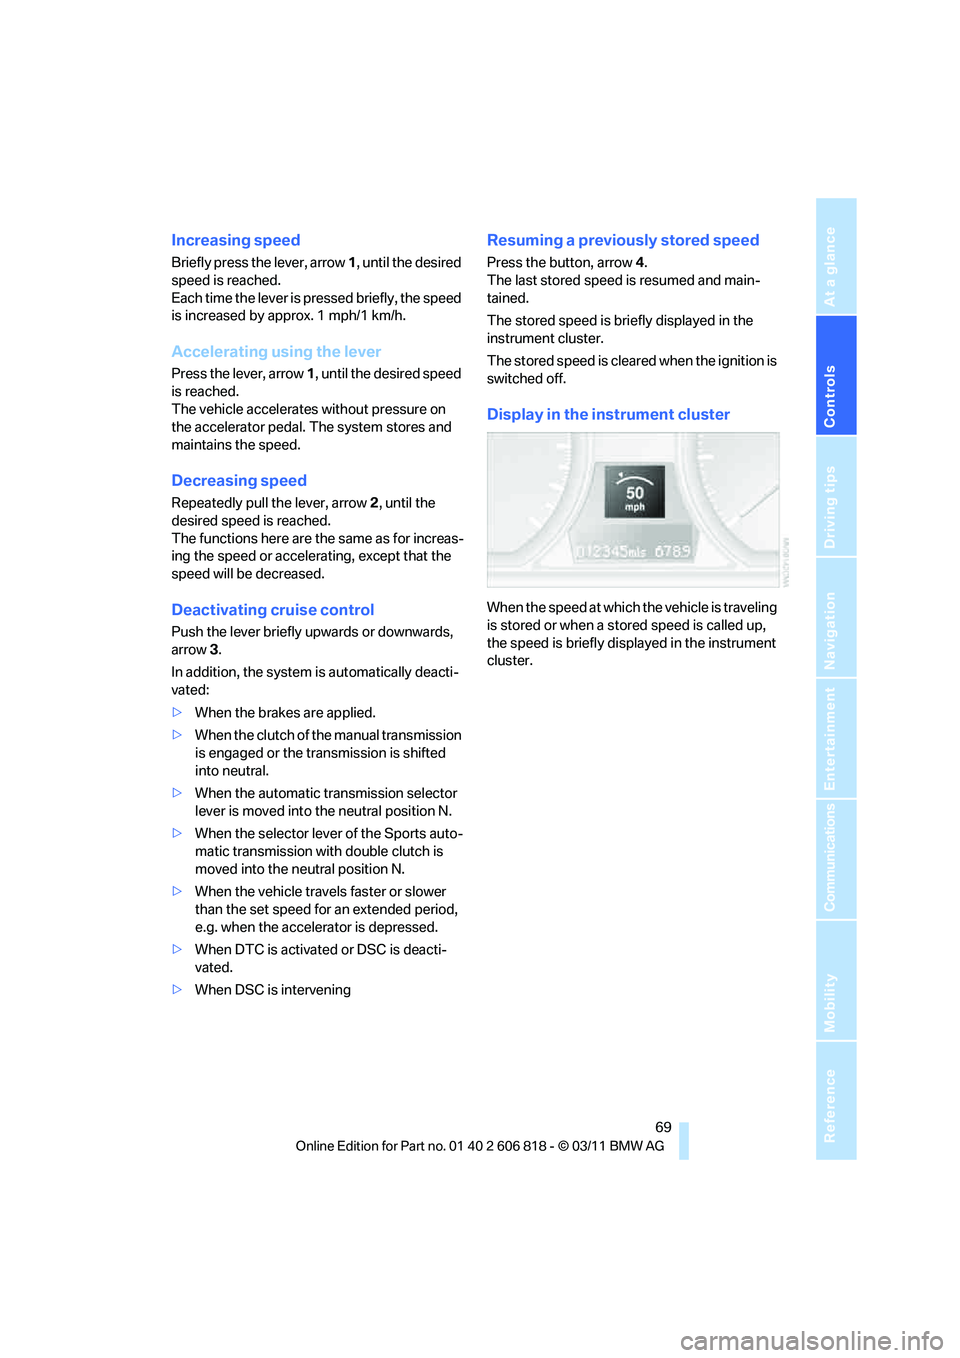
Display in the instrument cluster
When the speed at which the vehicle is traveling
is stored or when a stored speed is called up,
the speed is briefly displayed in the instrument
cluster.
Page 84 of 272
Technology for driving comfort and safety
82
Technology for driving comfort and safety
Park Distance Control PDC*
The concept
The PDC assists you with maneuvering in tight
parking spaces. Acoustic signals and a visual
indicator
warn you of the presence of an object
behind your vehicle. Four ultrasonic sensors in
the bumper measure the distance.
These sensors have a range of approx. 6.5 ft/
2 m. However, an acoustic warning does not
sound until an object is approx. 2 ft/60 cm from
the corner sensors, or approx. 5 ft/1.50 m from
the center sensors.
PDC is a parking aid that can indicate
objects when they are approached
slowly, as is usually the case when parking.
Avoid approaching an object at high speed; oth-
erwise, physical circumstances may lead to the
system warning being issued too late.<
Switching on automatically
With the engine running or the ignition switched
on, the system is activated after approx. second
when you engage reverse gear or move the
automatic transmission selector lever to
position R. Wait this short period before driving.
Switching off automatically
After approx. 150 ft/50 m of driving or approx.
20 mph/30 km/h of speed, the system switches
off and the LED goes out.
Signal tones
When nearing an object, its position is indicated
correspondingly by an interval tone. As the dis-
tance between vehicle and object decreases,
the intervals between the tones become
shorter. If the distance to the nearest object
falls to below roughly 1 ft/30 cm, then a contin-
uous tone sounds.An interval tone is interrupted after approx.
3seconds:
>If you stop in front of an object that has been
detected by only one of the corner sensors
>If you are driving parallel to a wall
Malfunction
The indicator lamp in the instrument
cluster lights up. PDC is malfunction-
ing. A message appears on the Con-
trol Display. Have the system checked.
To avoid this problem, keep the sensors clean
and free of ice or snow in order to ensure that
they will continue to operate effectively. When
using a high-pressure cleaner, do not spray the
sensors for extended periods of time and only
from a distance of at least 1 ft/30 cm.
PDC with visual warning
The approach of the vehicle to an object is
shown on the Control Display. Objects that are
farther away are displayed on the Control Dis-
play before a signal tone sounds. The display
appears on the Control Display as soon as PDC
is activated.
System limitations
Even with PDC, final responsibility for
estimating the distance between the
vehicle and any obstructions always remains
with the driver. Even when sensors are pro-
vided, there is a blind spot in which objects can
no longer be detected. The system is also sub-
ject to the physical limits that apply to all forms
of ultrasonic measurement, such as those
encountered with trailer towbars and hitches,
thin or wedge-shaped objects, etc. Low objects
that have already been displayed, e.g. curbs,
can disappear again from the detection area of
the sensors before or after a continuous tone
sounds. Higher, protruding objects, e.g. ledges,
cannot be detected. Loud sound sources out-
side or inside the car can drown out the PDC
Page 109 of 272
Controls
107Reference
At a glance
Driving tips
Communications
Navigation
Entertainment
Mobility
Calibrating the digital compass
The digital compass must be calibrated in the
following situations:
>An incorrect compass direction is shown.
>The compass direction shown does not
change although the direction of travel
does.
>Not all compass directions are shown.
Procedure
1.Make sure that no large metal objects or
overhead power lines are in the vicinity of
your vehicle and that you have enough
space to drive in a circle.
2.Set the currently valid compass zone.
3.Convertible: ensure that the convertible top
is fully closed.
4.Press the adjustment button for approx.
6-7 seconds to call up C. Then drive in at
least one full circle at a speed of no more
than 4 mph/7 km/h.
If calibration is successful, the display
changes from C to a compass direction.
5.Convertible: open the convertible top fully
and repeat step 4.
Setting right-hand/left-hand steering
Your digital compass is factory-set to right-
hand or left-hand steering, in accordance with
your vehicle.
Set the language
You can set the language of the display:
Press the adjustment button for approx.
12-13 seconds. Briefly press the adjustment
button again to switch between English, "E",
and German, "O".
The setting is automatically saved after approx.
10 seconds.
Glove compartment
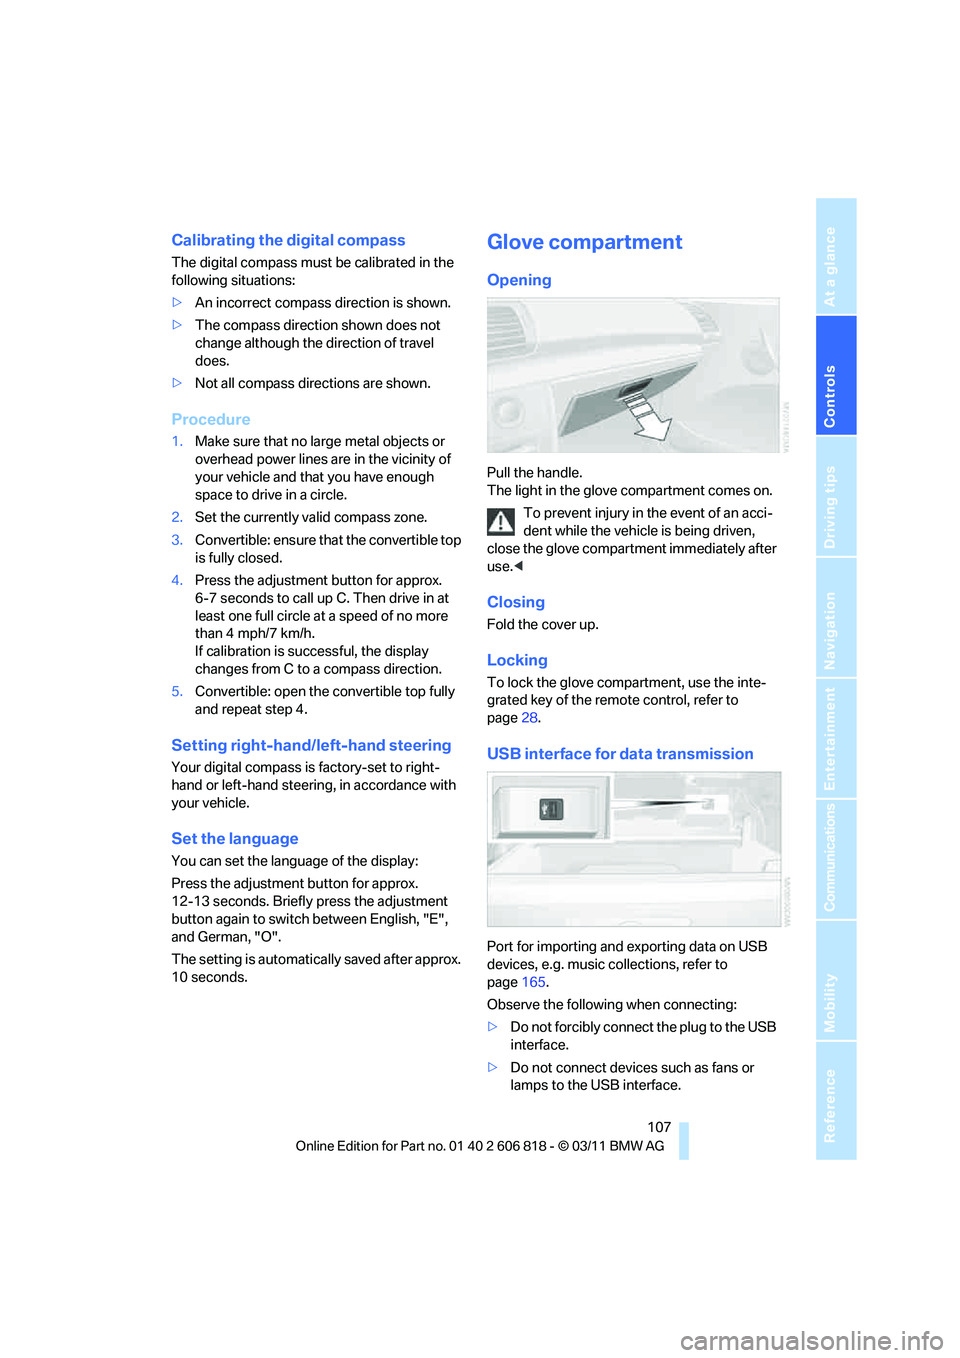
Opening
Pull the handle.
The light in the glove compartment comes on.
To prevent injury in the event of an acci-
dent while the vehicle is being driven,
close the glove compartment immediately after
use.<
Closing
Fold the cover up.
Locking
To lock the glove compartment, use the inte-
grated key of the remote control, refer to
page28.
USB interface for data transmission
Port for importing and exporting data on USB
devices, e.g. music collections, refer to
page165.
Observe the following when connecting:
>Do not forcibly connect the plug to the USB
interface.
>Do not connect devices such as fans or
lamps to the USB interface.
Page 120 of 272

Things to remember when driving
118 with the road surface, so that neither the car can
be steered nor the brake be properly applied.<
The risk of hydroplaning increases with declin-
ing tread depth on the tires, refer also to Mini-
mum tread depth on page213.
Driving through water
Drive through water on the road only if it is
not deeper than 1 ft/30 cm, and then only
at walking speed at the most. Otherwise, the
vehicle's engine, the electrical systems and the
transmission may be damaged.<
Use the parking brake on inclines
On inclines, do not hold the vehicle for a
lengthy period using the clutch; use the
parking brake instead. Otherwise, greater
clutch wear will result.<
For more information about the drive-off assis-
tant, refer to page84.
Braking safely
Your BMW is equipped with ABS as a standard
feature. Applying the brakes fully is the most
effective way of braking in situations in which
this is necessary. Since the vehicle maintains
steering responsiveness, you can still avoid
possible obstacles with a minimum of steering
effort.
Pulsation of the brake pedal, combined with
sounds from the hydraulic circuits, indicate that
ABS is in its active mode.
Objects in the movement range of the
pedals
Keep floor mats, carpet, and other objects
out of the movement range of the pedals;
otherwise, they may inhibit the function of the
pedals during driving.
Do not place additional floor mats onto an exist-
ing one or onto other objects.
Only use floor mats that have been approved for
the vehicle and can be appropriately fastened.
Make sure that the floor mats are securely fas-
tened again after they have been removed, e.g.
for cleaning.<
Driving in wet conditions
When roads are wet or there is heavy rain,
briefly exert gentle pressure on the brake pedal
every few miles. Monitor traffic conditions to
ensure that this maneuver does not endanger
other road users. The heat generated in this
process helps dry the pads and rotors to ensure
that full braking efficiency will then be available
when you need it.
Hills
To prevent overheating and the resulting
reduced efficiency of the brake system,
drive long or steep downhill gradients in the
gear in which the least braking is required. Even
light but consistent brake pressure can lead to
high temperatures, brake wear and possibly
even brake failure.<
You can increase the engine's braking effect by
shifting down, all the way to first gear if neces-
sary. This strategy helps you avoid placing
excessive loads on the brake system. Down-
shifting in manual mode of the automatic trans-
mission, refer to page61.
Sport automatic transmission with double
clutch never drive with the transmission in
neutral or with the engine switched off; other-
wise, there will be no engine braking action and
no power assistance to the brakes and steering.
Manual transmission: never drive with the
clutch held down, with the transmission in neu-
tral or with the engine switched off; otherwise,
there will be no engine braking action and no
power assistance to the brakes and steering.
Never allow floor mats, carpets or any other
objects to protrude into the area around the
pedals; otherwise, pedal function could be
impaired.<
Corrosion on brake rotors
When the vehicle is driven only occasionally,
during extended periods when the vehicle is not
used at all, and in operating conditions where
brake applications are less frequent, there is an
increased tendency for corrosion to form on
rotors, while contaminants accumulate on the
brake pads. This occurs because the minimum
Page 159 of 272
Navigation
Entertainment
Driving tips
157Reference
At a glance
Controls
Communications
Mobility
Fast forward/reverse
Press and hold the button for the corre-
sponding direction.
Automatic repeat*
Selected tracks, directories or CDs/DVDs are
repeated automatically.
Video playback*
Country codes
Only DVDs with the code of the home region
can be played back; also refer to the information
on your DVD.
Starting playback
For your own safety, the video image is only dis-
played up to approx. 2 mph/3 km/h and in some
market-specific versions, only with the parking
brake engaged or the selector lever of the auto-
matic transmission is in the park position.
DVD video
1."CD/Multimedia"
2."CD/DVD"
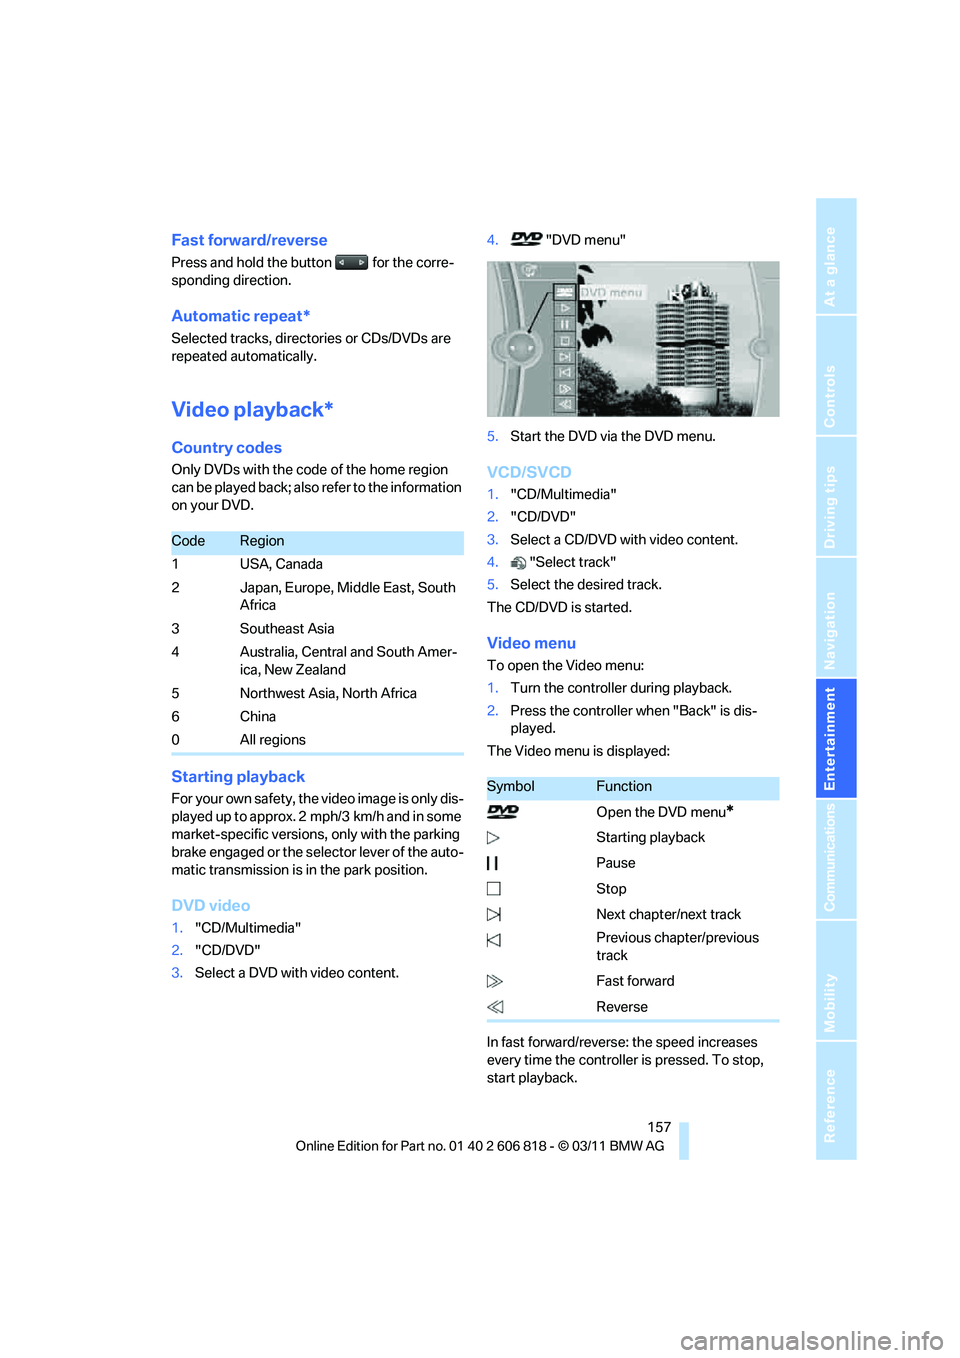
3.Select a DVD with video content.4."DVD menu"
5.Start the DVD via the DVD menu.
VCD/SVCD
1."CD/Multimedia"
2."CD/DVD"
3.Select a CD/DVD with video content.
4."Select track"
5.Select the desired track.
The CD/DVD is started.
Video menu
To open the Video menu:
1.Turn the controller during playback.
2.Press the controller when "Back" is dis-
played.
The Video menu is displayed:
In fast forward/reverse: the speed increases
every time the controller is pressed. To stop,
start playback.
CodeRegion
1USA, Canada
2 Japan, Europe, Middle East, South
Africa
3 Southeast Asia
4 Australia, Central and South Amer-
ica, New Zealand
5 Northwest Asia, North Africa
6China
0 All regions
SymbolFunction
Open the DVD menu
*
Starting playback
Pause
Stop
Next chapter/next track
Previous chapter/previous
track
Fast forward
Reverse
Page 225 of 272

Mobility
223Reference
At a glance
Controls
Driving tips
Communications
Navigation
Entertainment
Care
Care products
Regular cleaning and care contributes signifi-
cantly to the value retention of your BMW.
BMW recommends cleaning and caring for your
vehicle with products that are approved by
BMW for this purpose.
Your BMW center will be happy to advise you on
the products and services available for cleaning
and caring for your BMW.
Original BMW CareProducts have been
material-tested, laboratory-checked and
proven in the field, and offer optimal care and
protection for your vehicle.<
Do not use cleaners that contain alcohol
or solvents as these may result in dam-
age.<
Cleaning agents can contain substances
that are dangerous or hazardous to your
health. Therefore, follow the warning and safety
instructions on the packaging. When cleaning
inside the vehicle, always open the doors or
windows of the vehicle. In enclosed areas, pro-
vide for sufficient ventilation. Only use products
designed for cleaning vehicles.<
Exterior care
Washing the vehicle
Especially during the winter months,
ensure that the vehicle is washed more
frequently. Heavy soiling and road salt can lead
to vehicle damage.<
After washing the vehicle, apply the
brakes briefly to dry them; otherwise,
water can reduce braking efficiency over the
short term and brake discs can corrode.<
Automatic car washes
Preference should be given to cloth car washes.Do not use high-pressure car washes;
otherwise, water may drip into the vehicle
around the windows.<
Before driving into a car wash, ensure that it is
suitable for your BMW. Check the following:
>Dimensions of your vehicle, refer to
page243.
>If necessary, fold in the outside rearview
mirrors, refer to page51.
>Maximum permissible tire width.
Avoid car washes with guide rail heights
over 4 in/10 cm; otherwise, there is the
danger of damaging chassis parts.<
>In Convertibles, do not treat the convertible
top with wax. Ensure that a program is avail-
able that does not apply wax or is designed
specifically for Convertibles.
Preparations before driving into an automatic
car wash:
>Unscrew the rod antenna
*.
>Deactivate the rain sensor
* to prevent unin-
tentional wiping.
>Remove additional attachments, e.g. spoil-
ers or telephone antennas, if there is a pos-
sibility that they could be damaged.
>Leave the remote control in the ignition
lock.
Automatic transmission
Before driving into an automatic car wash, per-
form the following steps to ensure that the vehi-
cle can roll:
1.Insert the remote control into the ignition
lock, even with Comfort Access.
2.Move the selector lever to position N.
3.Release the parking brake.
4.Switch off the engine.
5.Leave the remote control in the ignition lock
so that the vehicle can roll.