2012 BMW 128I CONVERTIBLE lock
[x] Cancel search: lockPage 109 of 272
Controls
107Reference
At a glance
Driving tips
Communications
Navigation
Entertainment
Mobility
Calibrating the digital compass
The digital compass must be calibrated in the
following situations:
>An incorrect compass direction is shown.
>The compass direction shown does not
change although the direction of travel
does.
>Not all compass directions are shown.
Procedure
1.Make sure that no large metal objects or
overhead power lines are in the vicinity of
your vehicle and that you have enough
space to drive in a circle.
2.Set the currently valid compass zone.
3.Convertible: ensure that the convertible top
is fully closed.
4.Press the adjustment button for approx.
6-7 seconds to call up C. Then drive in at
least one full circle at a speed of no more
than 4 mph/7 km/h.
If calibration is successful, the display
changes from C to a compass direction.
5.Convertible: open the convertible top fully
and repeat step 4.
Setting right-hand/left-hand steering
Your digital compass is factory-set to right-
hand or left-hand steering, in accordance with
your vehicle.
Set the language
You can set the language of the display:
Press the adjustment button for approx.
12-13 seconds. Briefly press the adjustment
button again to switch between English, "E",
and German, "O".
The setting is automatically saved after approx.
10 seconds.
Glove compartment
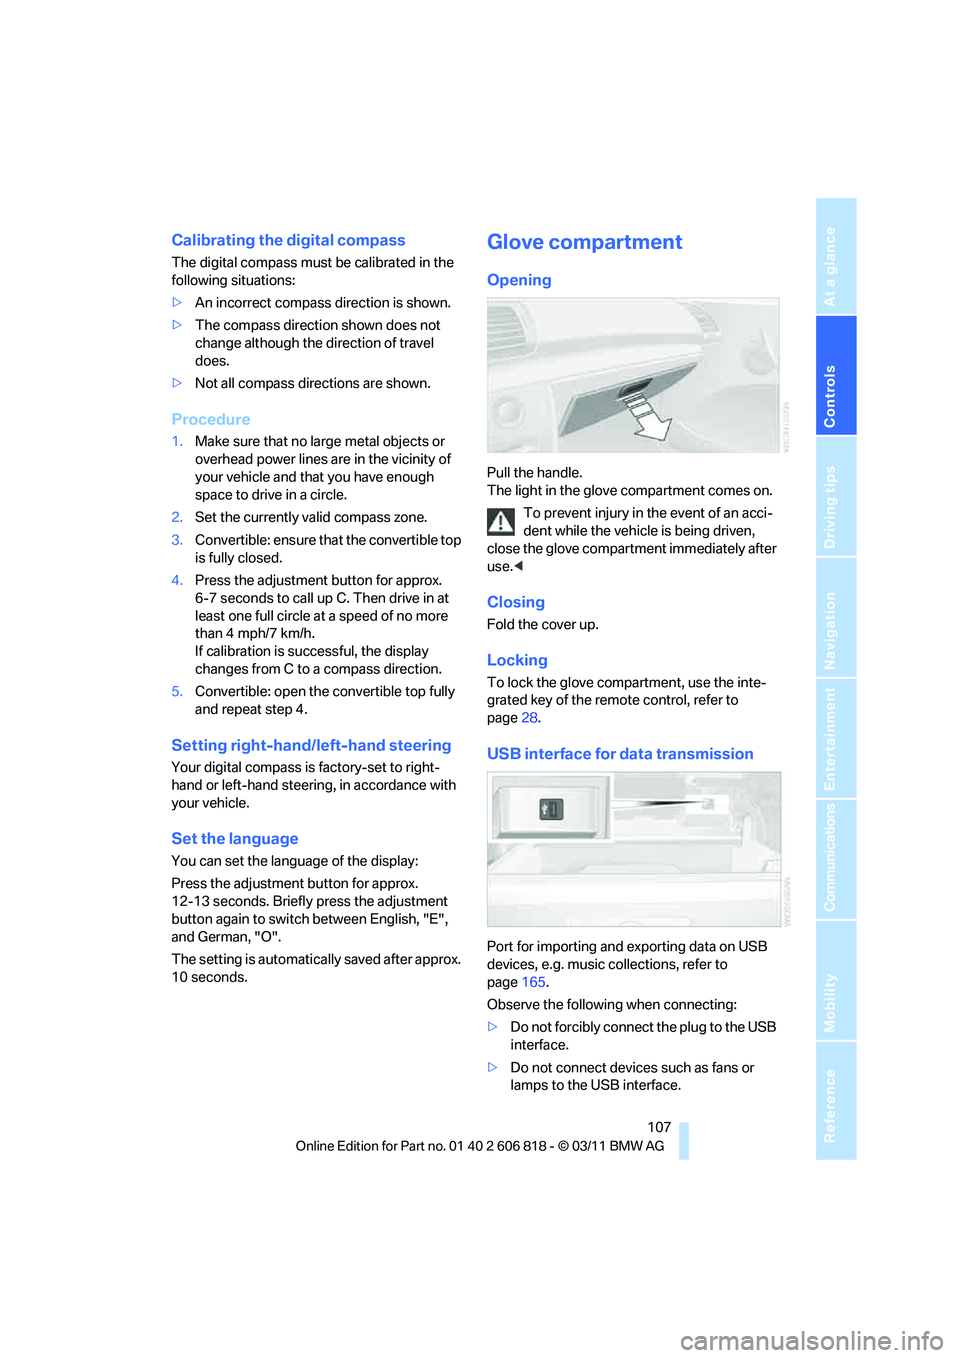
Opening
Pull the handle.
The light in the glove compartment comes on.
To prevent injury in the event of an acci-
dent while the vehicle is being driven,
close the glove compartment immediately after
use.<
Closing
Fold the cover up.
Locking
To lock the glove compartment, use the inte-
grated key of the remote control, refer to
page28.
USB interface for data transmission
Port for importing and exporting data on USB
devices, e.g. music collections, refer to
page165.
Observe the following when connecting:
>Do not forcibly connect the plug to the USB
interface.
>Do not connect devices such as fans or
lamps to the USB interface.
Page 111 of 272
Controls
109Reference
At a glance
Driving tips
Communications
Navigation
Entertainment
Mobility
Ashtray*
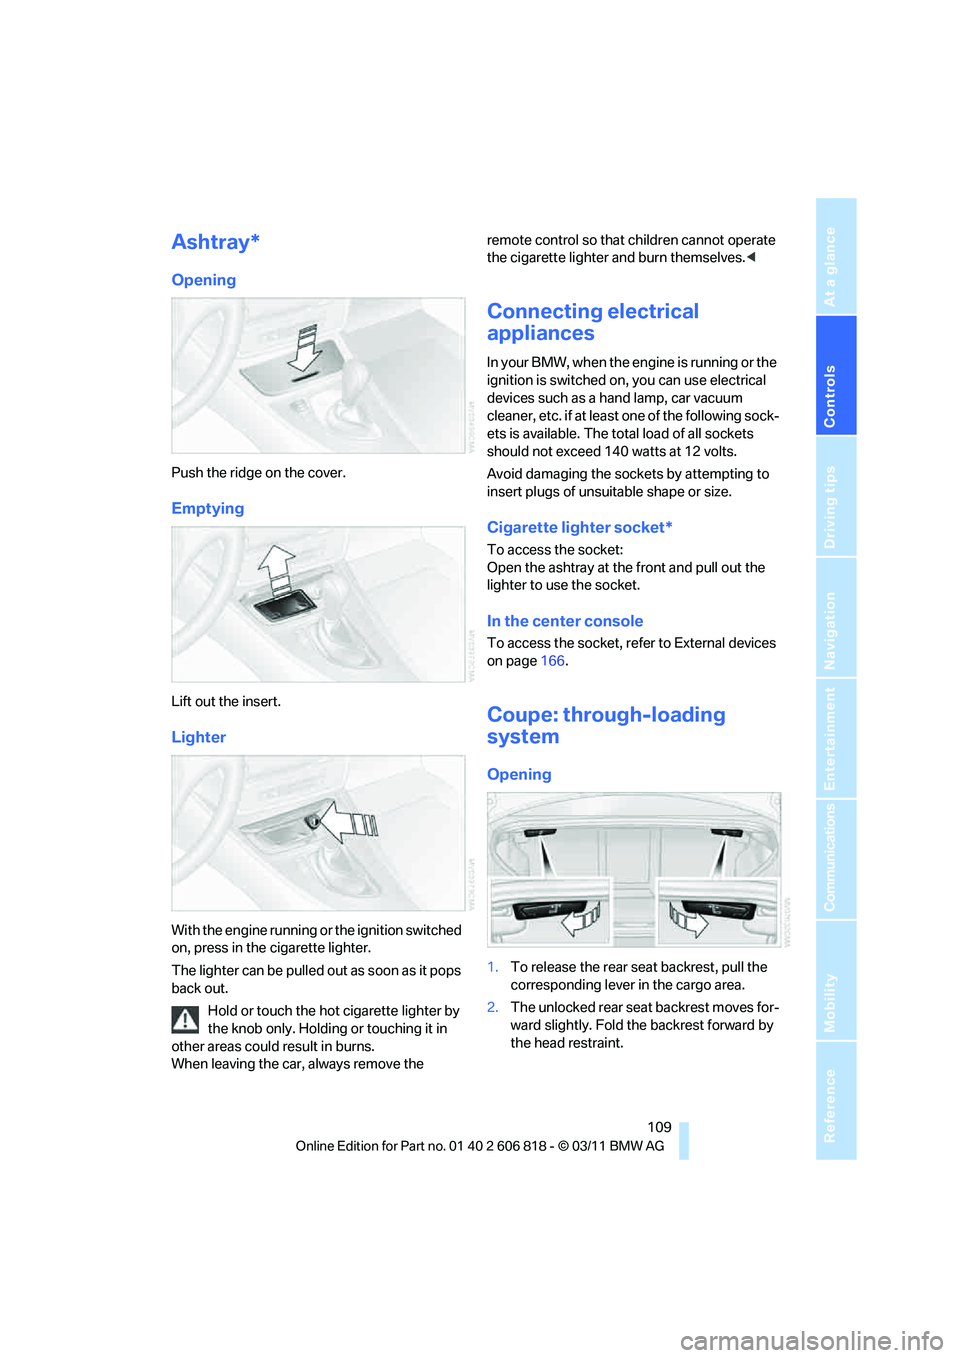
Opening
Push the ridge on the cover.
Emptying
Lift out the insert.
Lighter
With the engine running or the ignition switched
on, press in the cigarette lighter.
The lighter can be pulled out as soon as it pops
back out.
Hold or touch the hot cigarette lighter by
the knob only. Holding or touching it in
other areas could result in burns.
When leaving the car, always remove the remote control so that children cannot operate
the cigarette lighter and burn themselves.<
Connecting electrical
appliances
In your BMW, when the engine is running or the
ignition is switched on, you can use electrical
devices such as a hand lamp, car vacuum
cleaner, etc. if at least one of the following sock-
ets is available. The total load of all sockets
should not exceed 140 watts at 12 volts.
Avoid damaging the sockets by attempting to
insert plugs of unsuitable shape or size.
Cigarette lighter socket*
To access the socket:
Open the ashtray at the front and pull out the
lighter to use the socket.
In the center console
To access the socket, refer to External devices
on page166.
Coupe: through-loading
system
Opening
1.To release the rear seat backrest, pull the
corresponding lever in the cargo area.
2.The unlocked rear seat backrest moves for-
ward slightly. Fold the backrest forward by
the head restraint.
Page 112 of 272

Practical interior accessories
110
Closing
Return the rear seat backrest to the upright
seating position and engage it.
When returning the backrest into the
seating position, make sure that the
seat's locking mechanism is properly engaged.
Otherwise, cargo could be thrown around and
endanger the occupants in the event of sharp
braking or swerving.<
The lashing eyes in the cargo area provide you
with a way to attach cargo area nets
* or draw
straps for securing suitcases and luggage, refer
to page119.
Convertible: cargo loading
Enlarging the cargo area
When the convertible top is closed you can
enlarge the cargo area:
To do so, fold the cargo area partition upward.
Before opening the convertible top, pull the
cargo area partition down until it engages.
Ensure that pointed objects do not press
against the cargo area partition from below.The convertible top can only be opened
when the cargo area partition is folded
down.<
Storage compartments inside
the cargo area
Depending on your vehicle's equipment, the left
side trim panel of the luggage compartment will
contain a rubber strap
* for securing small
objects such as a folding umbrella.
The lashing eyes in the cargo area provide you
with a way to attach cargo area nets
* or draw
straps
* for securing suitcases and luggage,
refer to page120.
Coupe: ski bag*
The ski bag is designed for safe, clean transport
of up to 4 pairs of standard skis or up to
2snowboards.
With the ski bag you can stow skis with a length
of up to 6.6 ft/2.0 m. When skis of 6.6 ft/2.0 m
length are loaded, the overall capacity of the ski
bag is reduced due to its tapered design.
Loading
Ensure that the skis are clean when they are
loaded into the ski bag. Wrap sharp edges to
prevent damage.
1.Fold down the center panel in the rear seat
backrest.
2.Press the button, reach into the recess and
fold down the cover. To stabilize the cover
in the folded-down position, place the cen-
ter panel underneath it.
Page 137 of 272
Navigation
Driving tips
135Reference
At a glance
Controls
Communications
Entertainment
Mobility
5.Select additional route criteria, if desired.
Where possible, the selected criteria will be
avoided on the route.
>"Avoid highways": highways are avoided
where possible.
>"Avoid toll roads": toll roads are avoided
where possible.
>"Avoid ferries": ferries are avoided
where possible.
The setting applies to the current route and to
the planning of future routes.
Route
General information
Depending on your vehicle's equipment, vari-
ous views of the route are available during route
guidance:
>Arrow display on the Control Display.
>List of route segments.
>Map view, refer to page136.
Arrow display
The following information is displayed during
route guidance:
>Large arrow: current direction of travel.
>Small arrow: indicates the next change of
direction.
>Intersection view.
>Lane information.
>Traffic bulletins.
>Distance to the next change of direction.
>Street name of the next change of direction.
Lane information
In the arrow display, the recommended lanes of
multi-lane roads are each marked with a trian-
gle.
>Filled triangle: optimum lane.
>Empty triangle: likewise possible lane. It
can, however, also be possible to briefly
make additional lane changes.
Displaying the list of route segments
If the route guidance has been started, then you
can display a list of route segments. The dis-
tance to be traveled and traffic bulletins are dis-
played for each segment of the route.
1."Navigation"
2."Route information"
3.Highlight the route segment.
The route segment is displayed in the preview
map.
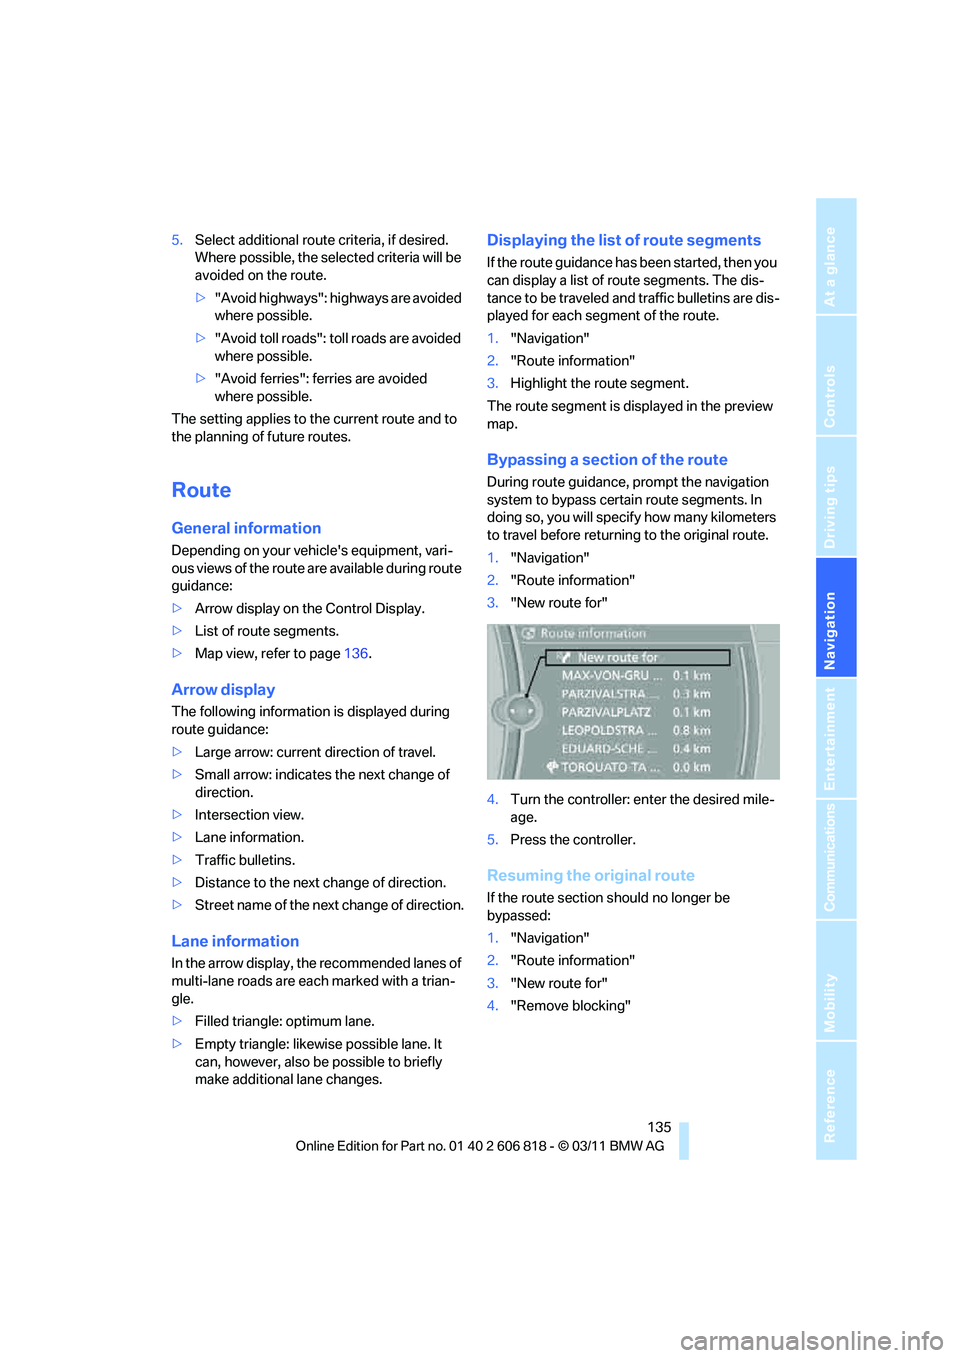
Bypassing a section of the route
During route guidance, prompt the navigation
system to bypass certain route segments. In
doing so, you will specify how many kilometers
to travel before returning to the original route.
1."Navigation"
2."Route information"
3."New route for"
4.Turn the controller: enter the desired mile-
age.
5.Press the controller.
Resuming the original route
If the route section should no longer be
bypassed:
1."Navigation"
2."Route information"
3."New route for"
4."Remove blocking"
Page 200 of 272
ConnectedDrive
198
ConnectedDrive
BMW Assist*
General information
BMW Assist provides a number of different ser-
vices. For example, the position data of the
vehicle can be transmitted to the BMW Assist
Response Center when an Emergency
Request
* is sent.
Many BMW Assist services depend on the con-
tract individually agreed upon.
After the contract has expired, the BMW Assist
system will be deactivated by the BMW Assist
Response Center without you having to visit a
BMW center. After the BMW Assist system has
been deactivated, no BMW Assist services will
be available. The BMW Assist system can be
reactivated by a BMW center after a new con-
tract has been signed.
Requirements
>The installed BMW Assist system is logged
into a mobile phone network. This network
must be capable of transmitting the ser-
vices.
>To transmit position data, the vehicle must
be able to determine its current position.
>To activate and update BMW Assist, a GPS
signal must be available.
>The BMW Assist service contract was
signed with your BMW center or with the
BMW Assist Response Center. The service
must have been fully enabled.
>BMW Assist is activated.
Services offered
>Emergency Request: when you press the
SOS button, a connection to the BMW
Assist Response Center is established. The
BMW Assist Response Center then speaks
with you and takes further steps to help you.>Automatic Emergency Request: under cer-
tain conditions, a connection to the BMW
Assist Response Center is established after
a serious accident. If possible, the BMW
Assist Response Center then speaks with
you and takes further steps to help you.
>Enhanced Roadside Assistance: BMW
Roadside Assistance
* can be contacted if
assistance is needed in the event of a
breakdown. If possible, the vehicle data and
position data are transmitted during this
call.
>Customer Relations: connection to Cus-
tomer Relations for information on all
aspects of your vehicle.
>TeleServices: data on your vehicle's service
status or required inspections are transmit-
ted to your BMW center, either automati-
cally before a service due date or when you
request a BMW service appointment.
>Remote Door Unlock: the BMW Assist
Response Center provides assistance if, for
example, the remote control is not available
and the vehicle needs to be opened.
>Stolen Vehicle Recovery: after you report to
the police that your vehicle was stolen, the
BMW Assist Response Center can deter-
mine its position.
>In addition, the optional Convenience Plan
offers Concierge service and information on
route planning, the traffic situation and
weather. Using Critical Calling, a limited
number of calls can be made via the BMW
Assist Response Center, for example if the
mobile phone is not available or discharged.
Press the SOS button to contact the BMW
Assist Response Center.
*
Page 208 of 272
Refueling
206
Refueling
Always switch off the engine before refu-
eling; otherwise, fuel cannot be added to
the tank and a message will be displayed.<
Take all precautionary measures and
observe all applicable regulations when
handling fuel. Do not carry any spare fuel con-
tainers in your vehicle. They can develop a leak
and cause an explosion or cause a fire in the
event of an accident.<
Fuel filler flap
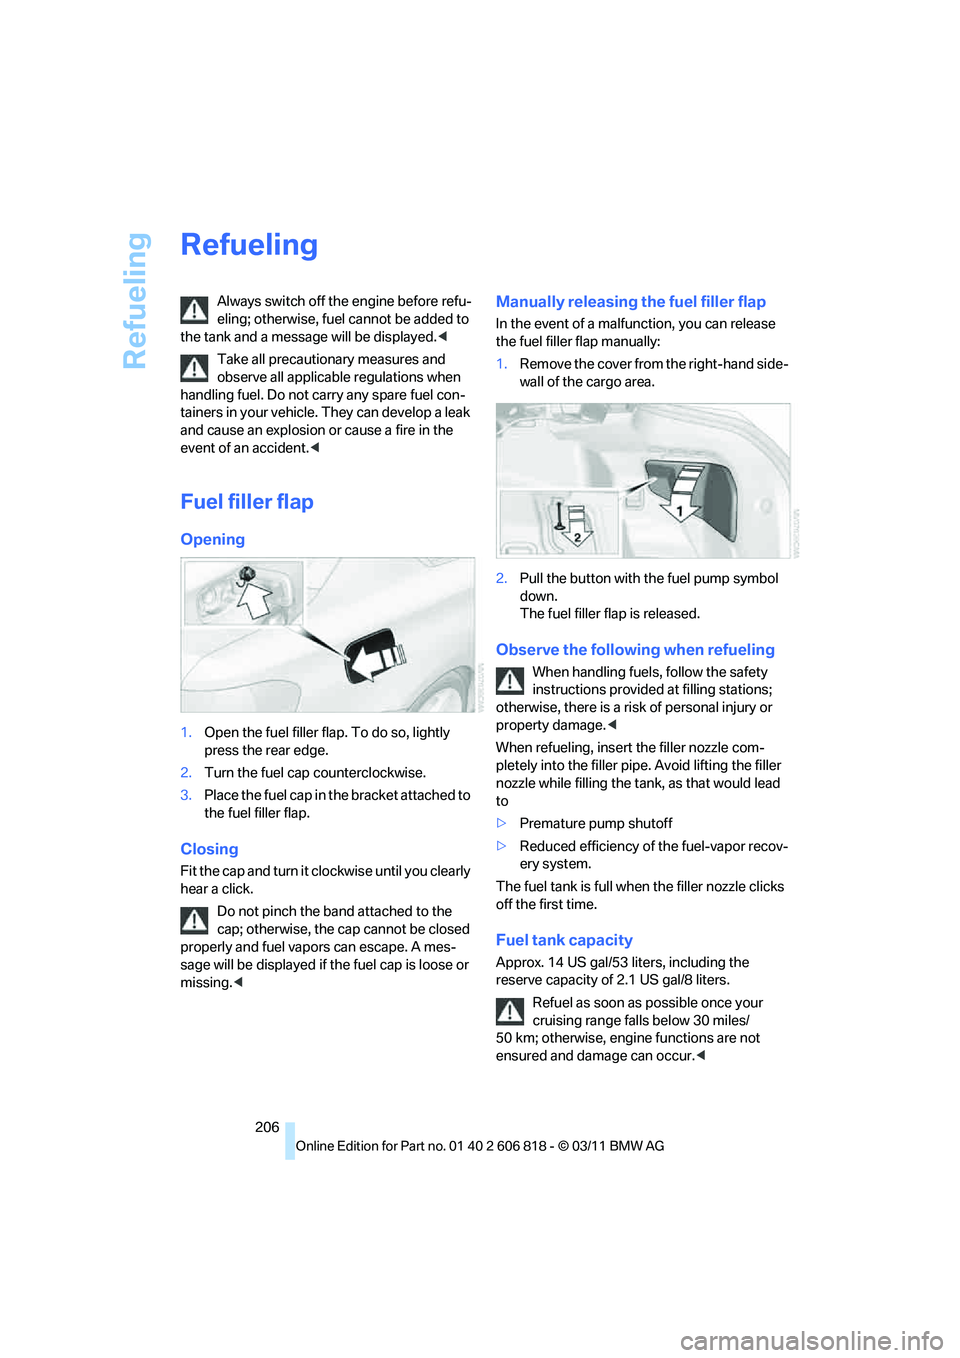
Opening
1.Open the fuel filler flap. To do so, lightly
press the rear edge.
2.Turn the fuel cap counterclockwise.
3.Place the fuel cap in the bracket attached to
the fuel filler flap.
Closing
Fit the cap and turn it clockwise until you clearly
hear a click.
Do not pinch the band attached to the
cap; otherwise, the cap cannot be closed
properly and fuel vapors can escape. A mes-
sage will be displayed if the fuel cap is loose or
missing.<
Manually releasing the fuel filler flap
In the event of a malfunction, you can release
the fuel filler flap manually:
1.Remove the cover from the right-hand side-
wall of the cargo area.
2.Pull the button with the fuel pump symbol
down.
The fuel filler flap is released.
Observe the following when refueling
When handling fuels, follow the safety
instructions provided at filling stations;
otherwise, there is a risk of personal injury or
property damage.<
When refueling, insert the filler nozzle com-
pletely into the filler pipe. Avoid lifting the filler
nozzle while filling the tank, as that would lead
to
>Premature pump shutoff
>Reduced efficiency of the fuel-vapor recov-
ery system.
The fuel tank is full when the filler nozzle clicks
off the first time.
Fuel tank capacity
Approx. 14 US gal/53 liters, including the
reserve capacity of 2.1 US gal/8 liters.
Refuel as soon as possible once your
cruising range falls below 30 miles/
50 km; otherwise, engine functions are not
ensured and damage can occur.<
Page 222 of 272
Under the hood
220
Checking coolant level
Do not add coolant to the cooling system
when the engine is hot. Escaping coolant
can cause burns.<
1.Do not open the engine hood before the
engine has cooled down.
2.Turn the cap of the expansion tank a little
counterclockwise to allow any accumulated
pressure to escape, then continue turning
to open.
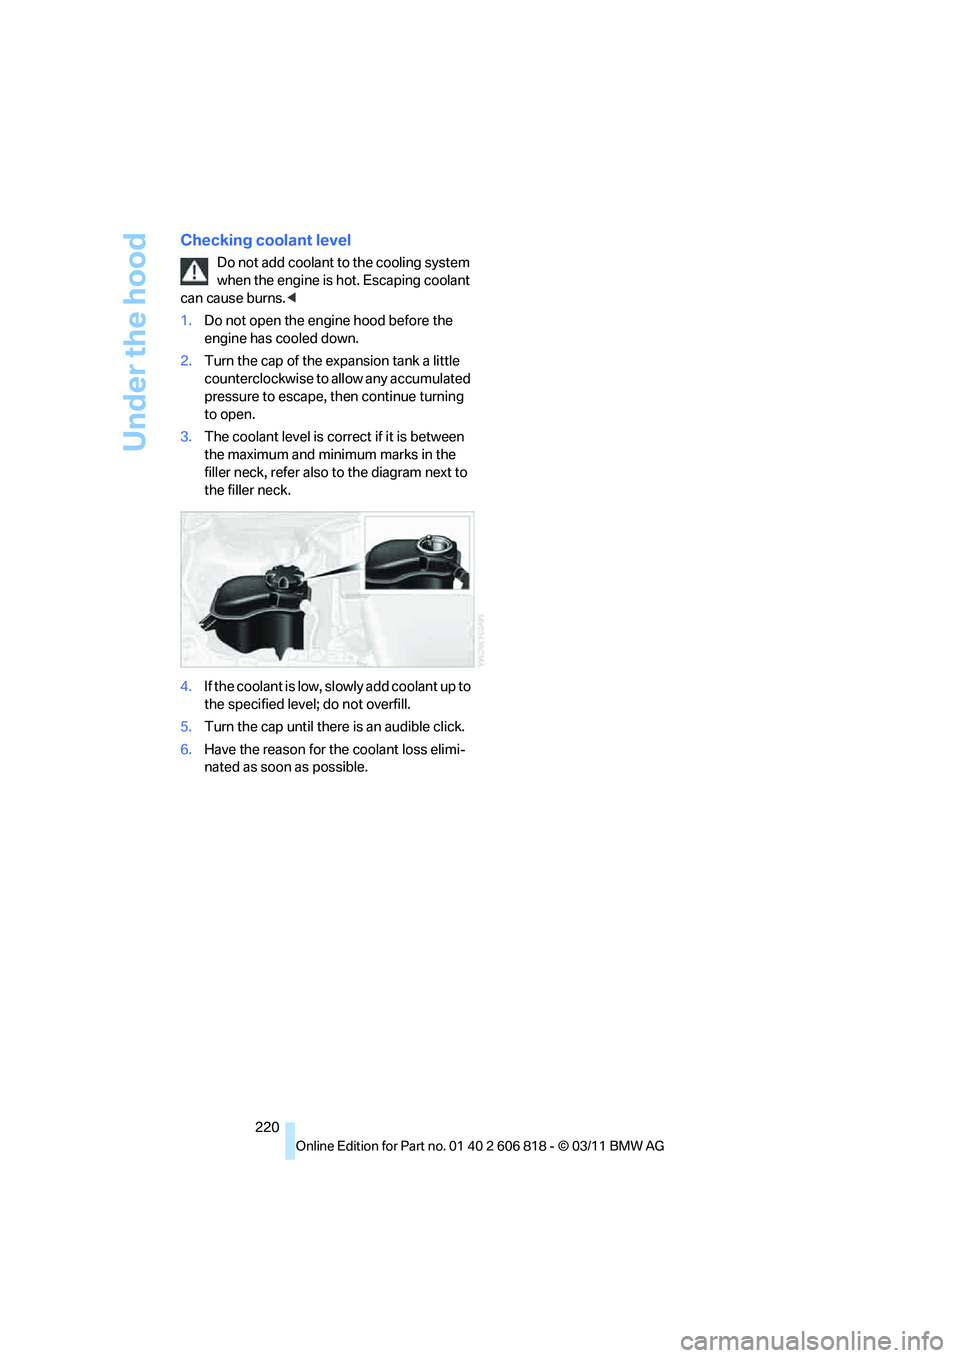
3.The coolant level is correct if it is between
the maximum and minimum marks in the
filler neck, refer also to the diagram next to
the filler neck.
4.If the coolant is low, slowly add coolant up to
the specified level; do not overfill.
5.Turn the cap until there is an audible click.
6.Have the reason for the coolant loss elimi-
nated as soon as possible.
Page 225 of 272

Mobility
223Reference
At a glance
Controls
Driving tips
Communications
Navigation
Entertainment
Care
Care products
Regular cleaning and care contributes signifi-
cantly to the value retention of your BMW.
BMW recommends cleaning and caring for your
vehicle with products that are approved by
BMW for this purpose.
Your BMW center will be happy to advise you on
the products and services available for cleaning
and caring for your BMW.
Original BMW CareProducts have been
material-tested, laboratory-checked and
proven in the field, and offer optimal care and
protection for your vehicle.<
Do not use cleaners that contain alcohol
or solvents as these may result in dam-
age.<
Cleaning agents can contain substances
that are dangerous or hazardous to your
health. Therefore, follow the warning and safety
instructions on the packaging. When cleaning
inside the vehicle, always open the doors or
windows of the vehicle. In enclosed areas, pro-
vide for sufficient ventilation. Only use products
designed for cleaning vehicles.<
Exterior care
Washing the vehicle
Especially during the winter months,
ensure that the vehicle is washed more
frequently. Heavy soiling and road salt can lead
to vehicle damage.<
After washing the vehicle, apply the
brakes briefly to dry them; otherwise,
water can reduce braking efficiency over the
short term and brake discs can corrode.<
Automatic car washes
Preference should be given to cloth car washes.Do not use high-pressure car washes;
otherwise, water may drip into the vehicle
around the windows.<
Before driving into a car wash, ensure that it is
suitable for your BMW. Check the following:
>Dimensions of your vehicle, refer to
page243.
>If necessary, fold in the outside rearview
mirrors, refer to page51.
>Maximum permissible tire width.
Avoid car washes with guide rail heights
over 4 in/10 cm; otherwise, there is the
danger of damaging chassis parts.<
>In Convertibles, do not treat the convertible
top with wax. Ensure that a program is avail-
able that does not apply wax or is designed
specifically for Convertibles.
Preparations before driving into an automatic
car wash:
>Unscrew the rod antenna
*.
>Deactivate the rain sensor
* to prevent unin-
tentional wiping.
>Remove additional attachments, e.g. spoil-
ers or telephone antennas, if there is a pos-
sibility that they could be damaged.
>Leave the remote control in the ignition
lock.
Automatic transmission
Before driving into an automatic car wash, per-
form the following steps to ensure that the vehi-
cle can roll:
1.Insert the remote control into the ignition
lock, even with Comfort Access.
2.Move the selector lever to position N.
3.Release the parking brake.
4.Switch off the engine.
5.Leave the remote control in the ignition lock
so that the vehicle can roll.