2012 BMW 128I CONVERTIBLE change time
[x] Cancel search: change timePage 103 of 272

Controls
101Reference
At a glance
Driving tips
Communications
Navigation
Entertainment
Mobility
the automatic climate control is optimized for
driving with the soft top down. In addition, the
air volume is increased as vehicle speed
increases.
The effectiveness of the Convertible Pro-
gram can be enhanced considerably by
installing the wind deflector.<
Adjusting air volume manually
To be able to manually adjust the air volume,
switch off the AUTO program first.
Press the left side of the button to
reduce the air volume. Press the
right side of the button to increase
it.
The air flow rate is lowered or switched off
entirely to reduce the drain on the battery. The
display remains the same.
Automatic recirculated air control
AUC/Recirculated air mode
You can respond to unpleasant odors or pollut-
ants in the immediate environment by tempo-
rarily suspending the supply of outside air. The
system then recirculates the air currently within
the vehicle.
Press the button repeatedly to
select an operating mode:
>LED off: outside air flows in continuously.
>Left-hand LED on, AUC mode: a sensor
detects pollutants in the outside air and
controls the shut-off automatically.
>Right-hand LED on, recirculated air mode:
the supply of outside air is permanently
shut off. If the windows fog over, switch off
recirculated air mode and increase the air
volume, if necessary. Make sure that air can
flow onto the windshield.
The recirculated air mode should not be
used continuously for lengthy periods;
otherwise, the quality of the air inside the car
will gradually deteriorate.<
Via the button on the steering wheel
You can switch quickly between the recircu-
lated air mode and the previous mode using a
button
on the steering wheel, refer to page11.
ALL program
Press the button.
The current temperature setting
on the driver's side is transferred to
the front passenger side.
If the temperature setting on the driver's side is
changed, the temperature on the front passen-
ger side is changed as well.
The program is switched off when the setting is
adjusted on the front passenger side or the but-
ton is pressed again.
Defrosting windows and removing
condensation
Press the button.
Quickly removes ice and conden-
sation from the windshield and
front side windows.
For this purpose, also switch on the cooling
function.
Switching cooling function on/off
The passenger compartment can only be
cooled while the engine is running.
Press the button.
The air is cooled and dehumidified
and – depending on the tempera-
ture setting – warmed again.
Depending on the weather, the windshield may
fog up briefly when the engine is started.
Pressing the AUTO button automatically
switches on the cooling function.
Rear window defroster
Press the button.
The defroster is switched off auto-
matically after a certain time.
Depending on your vehicle's equipment, the
upper wires serve as an antenna and are not
part of the rear window defroster.
Page 104 of 272
Climate
102
Switching the system on/off
Switching off
With the blower at its lowest set-
ting, press the left side of the but-
ton to switch off the automatic cli-
mate control.
All displays are cleared except for the rear win-
dow defroster if it is switched on.
The outside air supply is blocked when
the automatic climate control is switched
off. If the air quality deteriorates or the window
fogs over, switch the system back on and
increase the air volume.<
Switching on
Press any button except the ALL or the rear
window defroster button to reactivate the auto-
matic climate control.
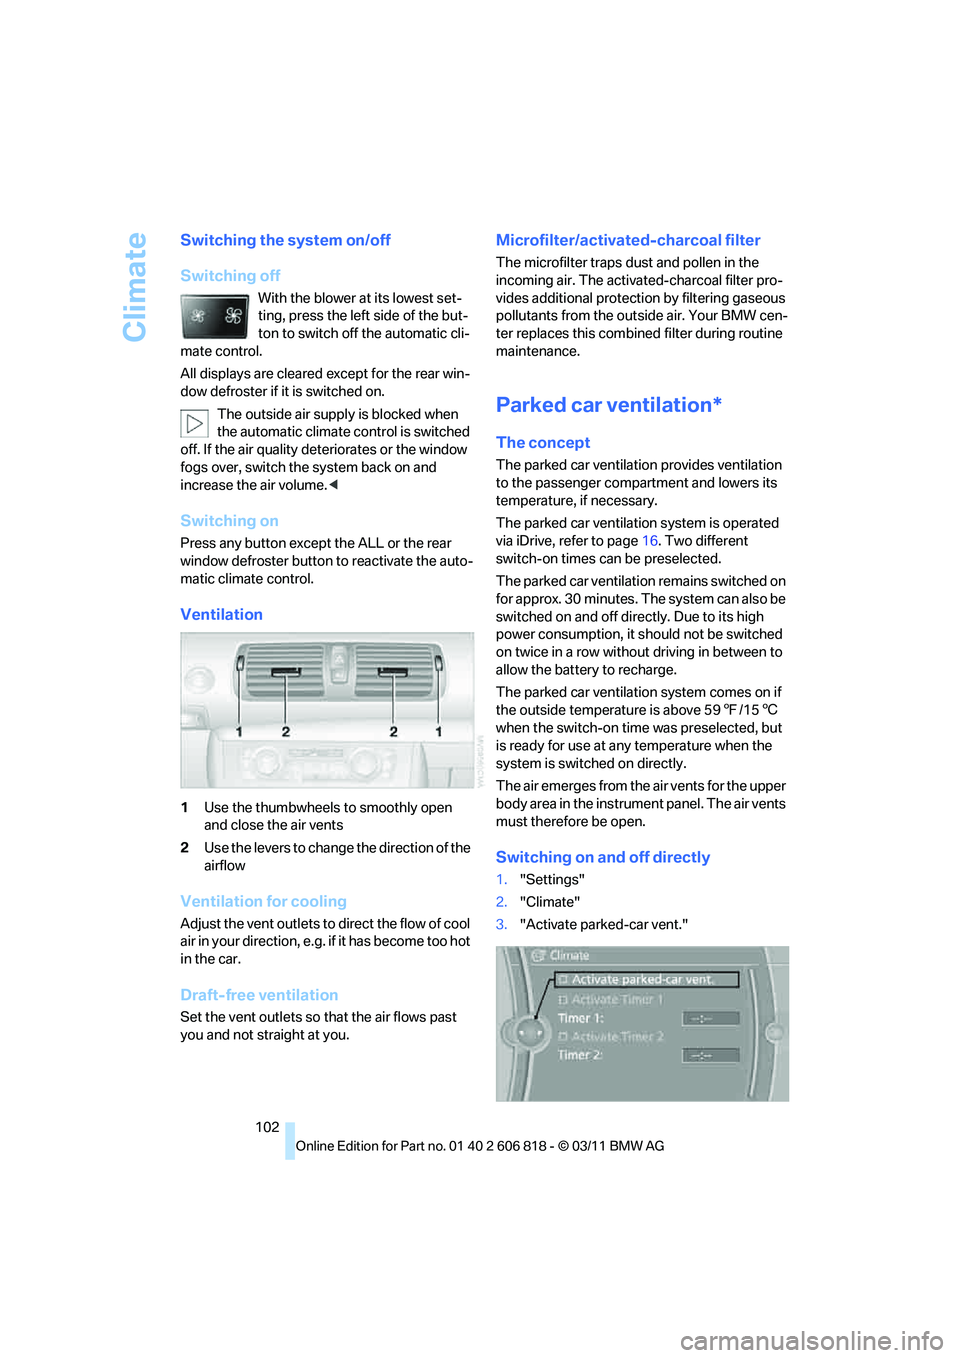
Ventilation
1Use the thumbwheels to smoothly open
and close the air vents
2Use the levers to change the direction of the
airflow
Ventilation for cooling
Adjust the vent outlets to direct the flow of cool
air in your direction, e.g. if it has become too hot
in the car.
Draft-free ventilation
Set the vent outlets so that the air flows past
you and not straight at you.
Microfilter/activated-charcoal filter
The microfilter traps dust and pollen in the
incoming air. The activated-charcoal filter pro-
vides additional protection by filtering gaseous
pollutants from the outside air. Your BMW cen-
ter replaces this combined filter during routine
maintenance.
Parked car ventilation*
The concept
The parked car ventilation provides ventilation
to the passenger compartment and lowers its
temperature, if necessary.
The parked car ventilation system is operated
via iDrive, refer to page16. Two different
switch-on times can be preselected.
The parked car ventilation remains switched on
for approx. 30 minutes. The system can also be
switched on and off directly. Due to its high
power consumption, it should not be switched
on twice in a row without driving in between to
allow the battery to recharge.
The parked car ventilation system comes on if
the outside temperature is above 597/156
when the switch-on time was preselected, but
is ready for use at any temperature when the
system is switched on directly.
The air emerges from the air vents for the upper
body area in the instrument panel. The air vents
must therefore be open.
Switching on and off directly
1."Settings"
2."Climate"
3."Activate parked-car vent."
Page 128 of 272
Destination entry
126 To delete letters:
>To delete individual letters:
Turn the controller to select , and
then press the controller.
>To delete all letters:
Turn the controller to select , and
then press the controller for an extended
period.
To enter spaces:
>Select the symbol.
The list gradually grows smaller each time
you enter a new letter.
3.Move the controller to the right.
4.Select the name of the town/city from the
list.
If there are several towns/cities with the same
name:
1.Change to the list of town/city names.
2.Highlight the town/city.
3.Select the town/city.
Entering the postal code*
1.Select "Town/City/Postal Code" or dis-
played city.
2.Select the symbol.
3.Select the digits.
4.Change to the list of postal codes and
towns/cities.
5.Highlight the entry.
6.Select an entry.
Entering street and intersection
1.Select "Street" or displayed street.
2.Enter the street and cross-street the same
way you entered the town/city.
After you enter the street, you can also enter
the cross street or the house number.
If there are several streets with the same name:
1.Change to the list of street names.
2.Highlight street.
3.Select the street.
Alternative: entering street and house
number
1.Select "Street" or displayed street.
2.Enter the street the same way you entered
the town/city.
3."House number"
4.Select the digits.
5.Change to the list of house numbers.
6.Select a house number or range of house
numbers.
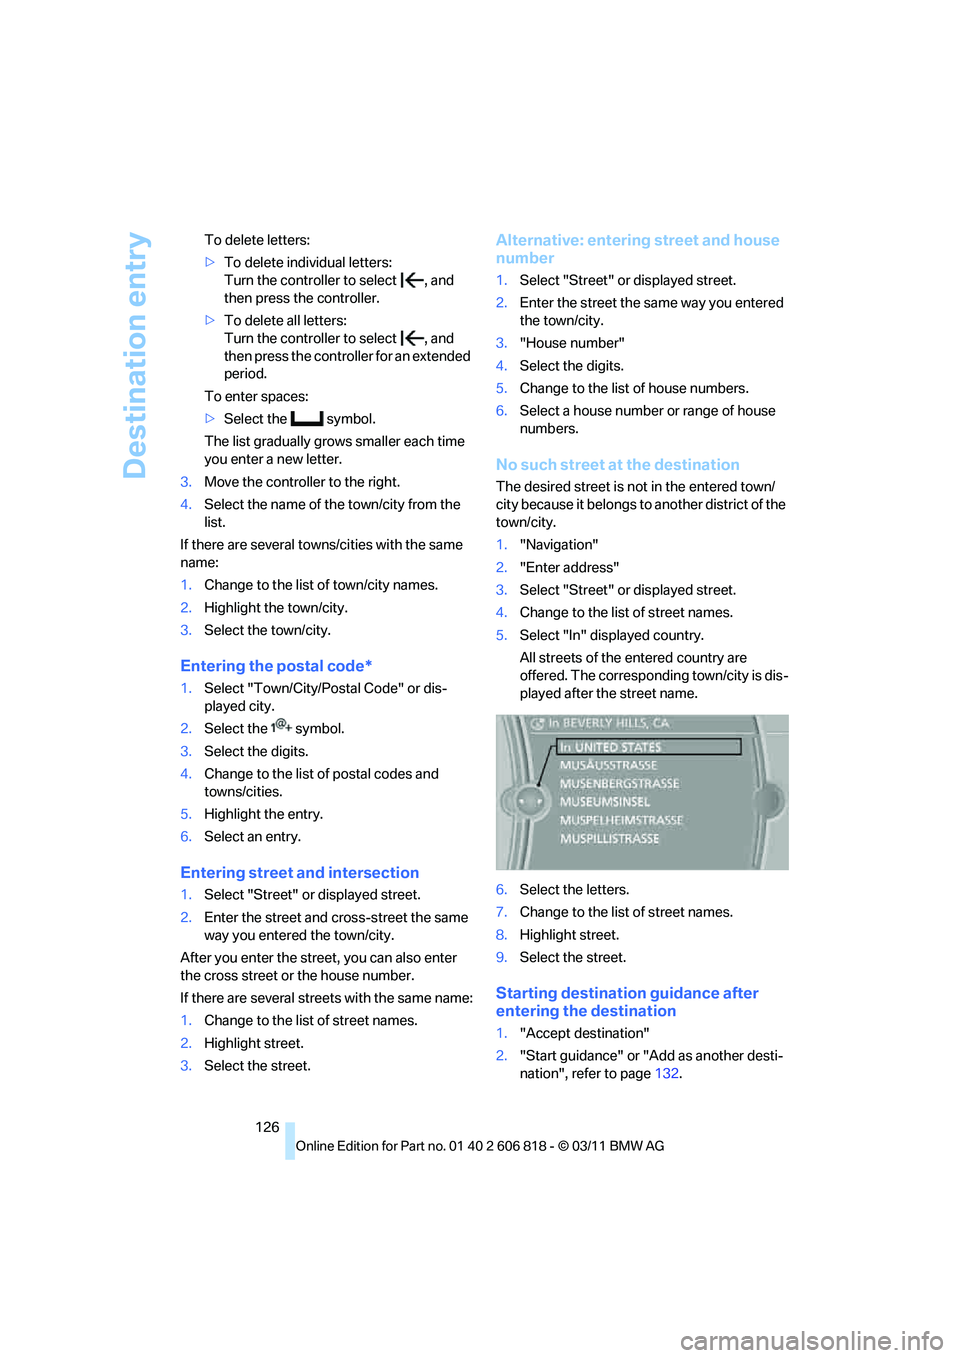
No such street at the destination
The desired street is not in the entered town/
city because it belongs to another district of the
town/city.
1."Navigation"
2."Enter address"
3.Select "Street" or displayed street.
4.Change to the list of street names.
5.Select "In" displayed country.
All streets of the entered country are
offered. The corresponding town/city is dis-
played after the street name.
6.Select the letters.
7.Change to the list of street names.
8.Highlight street.
9.Select the street.
Starting destination guidance after
entering the destination
1."Accept destination"
2."Start guidance" or "Add as another desti-
nation", refer to page132.
Page 136 of 272
Destination guidance
134
Destination guidance
Starting destination
guidance
1."Navigation"
2.Entering a destination, refer to page125.
3."Accept destination"
4."Start guidance"
The route is displayed on the Control Display
after it is calculated.
In the map view, the distance to the destination/
intermediate destination and the estimated
time of arrival are displayed.
The arrow display appears on the Control Dis-
play, if so desired.
Terminating destination
guidance
1."Navigation"
2."Map"
3."Guidance"
4."Stop guidance"
Continuing destination
guidance
If the destination was not reached during the
last trip, destination guidance can be resumed.
"Resume guidance"
Route criteria
General information
>You can influence the calculated route by
selecting certain trip criteria.
>Route criteria can be changed during desti-
nation entry and during route guidance.>Street types are part of the navigation data
and are taken into account in route plan-
ning, e.g. avoiding highways.
>The proposed route can differ from per-
sonal experience.
>The settings are stored for the remote con-
trol currently in use.
>Route guidance with traffic bulletins, refer
to page140.
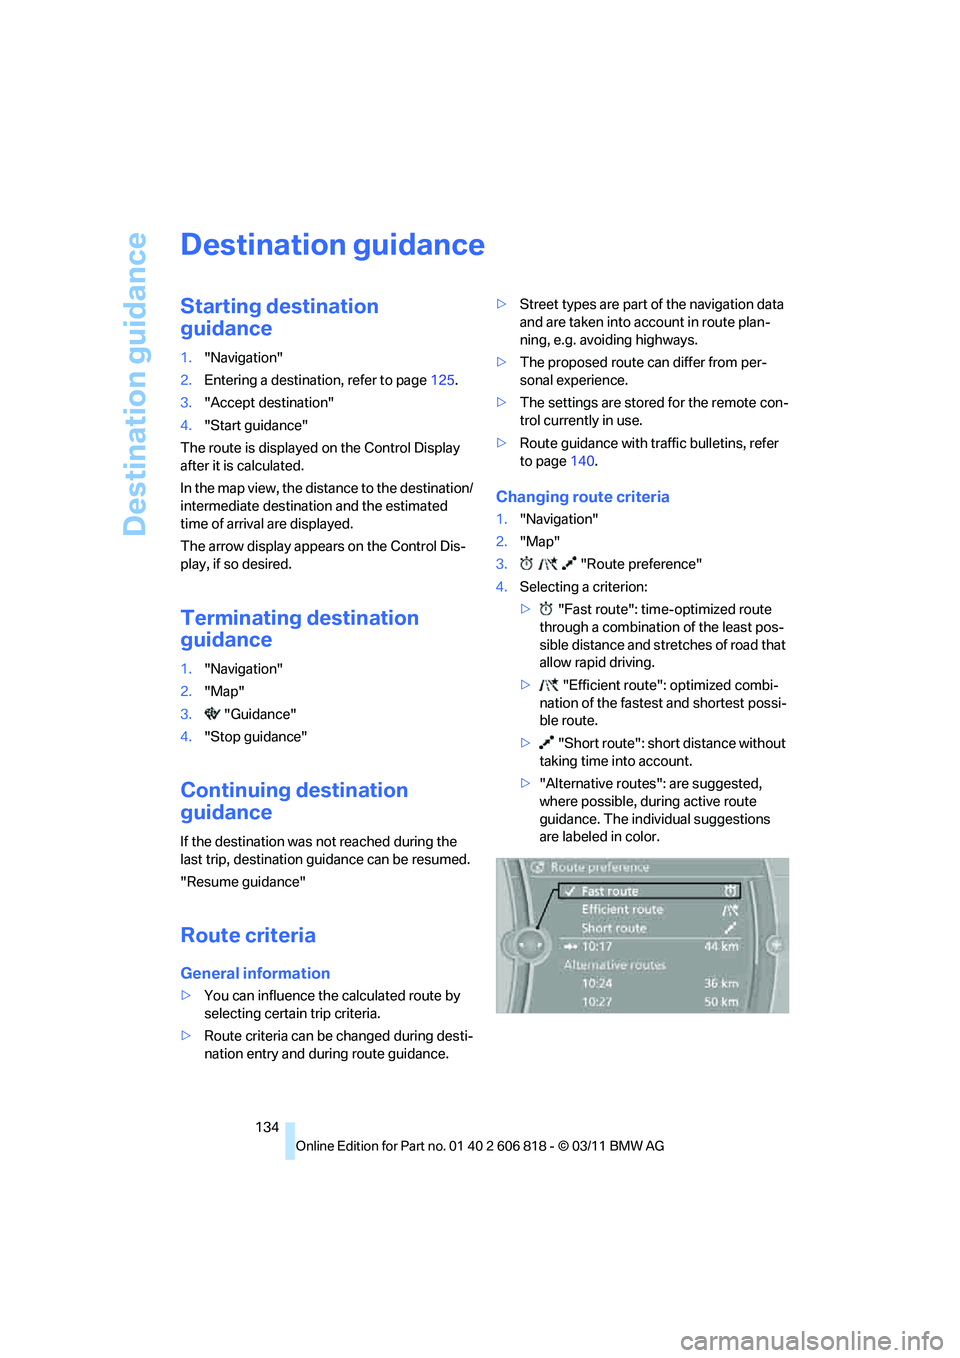
Changing route criteria
1."Navigation"
2."Map"
3."Route preference"
4.Selecting a criterion:
>"Fast route": time-optimized route
through a combination of the least pos-
sible distance and stretches of road that
allow rapid driving.
>"Efficient route": optimized combi-
nation of the fastest and shortest possi-
ble route.
>"Short route": short distance without
taking time into account.
>"Alternative routes": are suggested,
where possible, during active route
guidance. The individual suggestions
are labeled in color.
Page 140 of 272
Destination guidance
138
Map view for the split screen display
The map view for the split screen can be
selected separately from the main screen.
1.Open "Options".
2."Split screen"
3.Move the controller to the right repeatedly
until the split screen content is selected.
4.Select "Split screen content" or scale.
5.Select the map view:
>"Arrow display"
>"Map facing north"
>"Map direction of travel"
>"Map view with perspective"
>"Position"
>"Exit ramp view"
>"Traffic conditions/gray map"
6.To change the scale: switch to the split
screen and turn the controller.
Traffic bulletins*
Overview
>You can display the traffic bulletins from
radio stations that broadcast the TMC
(Traffic Message Channel) of a traffic infor-
mation service. Bulletins about traffic
obstructions and hazards are continuously
updated.
>Traffic bulletins are indicated by symbols on
the map.
>Traffic bulletins for the surrounding area are
stored in a list.
The symbol in the toolbar of the map view
turns red if a traffic bulletin relates to the calcu-
lated route.
Real Time Traffic Information End-User
Provisions
Certain BMW models equipped with navigation
have the capability to display real-time traffic
information. If your system has this capability the following additional terms and conditions
apply:
An End-User shall no longer have the right to
use the Traffic Data in the event that the End-
User is in material breach of the terms and con-
ditions contained herein.
A. Total Traffic Network, a division of Clear
Channel Broadcasting, Inc. ("Total Traffic Net-
work") holds the rights to the traffic incident
data and RDS-TMC network through which it is
delivered. You may not modify, copy, scan or
use any other method to reproduce, duplicate,
republish, transmit or distribute in any way any
portion of traffic incident data. You agree to
indemnify, defend and hold harmless BMW of
North America, LLC. ("BMW NA") and Total
Traffic Network, Inrix, Inc (and their affiliates)
against any and all claims, damages, costs or
other expenses that arise directly or indirectly
out of (a) your unauthorized use of the traffic
incident data or the RDS-TMC network, (b) your
violation of this directive and/or (c) any unautho-
rized or unlawful activities by you in connection
herewith.
B. Total Traffic Network traffic data is informa-
tional only. User assumes all risk of use. Total
Traffic Network, BMW NA, and their suppliers
make no representations about content, traffic
and road conditions, route usability, or speed.
C. The licensed material is provided to license
"as is," and "where is". Total Traffic Network,
including, but not limited to, any and all third
party providers of any of the licensed material,
expressly disclaims, to the fullest extent permit-
ted by law, all warranties or representations
with respect to the licensed material (including,
without limitation, that the licensed material will
be error-free, will operate without interruption
or that the traffic data will be accurate), express,
implied or statutory, including, without limita-
tion, the implied warranties of merchantability,
non-infringement fitness for a particular pur-
pose, or those arising from a course of dealing
or usage of trade.
D. Neither Total Traffic Network, Inrix, Inc. nor
BMW NA will be liable to you for any indirect,
special, consequential, exemplary, or incidental
Page 142 of 272
Destination guidance
140 >Traffic bulletins that lie on the route are
always shown.
>For your personal safety, it is not possible to
hide traffic bulletins that announce a poten-
tial hazard.
Route guidance with traffic bulletins
Semi-dynamic route guidance
With traffic bulletin reception switched on,
semi-dynamic route guidance is active.
The system takes into account the existing traf-
fic bulletins during route guidance. A message
is displayed as a function of the route, the traffic
bulletins, and the possible alternate routes. The
message displays the traffic bulletin and in the
event of a traffic obstruction, suggests an alter-
nate route. The difference in distance and time
between the original route and the alternate
route are also displayed.
Taking an alternate route:
"Detour"
With particular hazards, e.g. objects on the
roadway, a message is displayed without a pos-
sible alternate route.
It is also possible to take alternate routes can
also be taken if the traffic reports are accessed
via the list:
1."Navigation"
2."Map"
3."Traffic Info"
4."Detour information"
5."Detour"
Dynamic destination guidance
The route is automatically changed in the event
of traffic obstructions.
>The system does not point out traffic
obstructions along the original route.
>Traffic bulletins will continue to be dis-
played on the map.
>Depending on the type of road and the
nature and length of the traffic obstruction, the route can also be calculated so that you
travel through the traffic obstruction.
>Certain hazards are displayed regardless of
the setting.
To activate dynamic route guidance:
1."Navigation"
2.Open "Options".
3."Dynamic guidance"
Page 146 of 272
On/off and tone
144
On/off and tone
The following audio and video sources share
the same control elements and adjustments:
>Radio
>CD/DVD player
>CD changer
*
>Video*
>External devices, e.g. MP3 player
Controls
The audio and video sources can be controlled
using the:
>Buttons near the CD/DVD player
>iDrive
>Buttons on the steering wheel, refer to
page10
>Programmable memory keys, refer to
page21
>Voice activation system
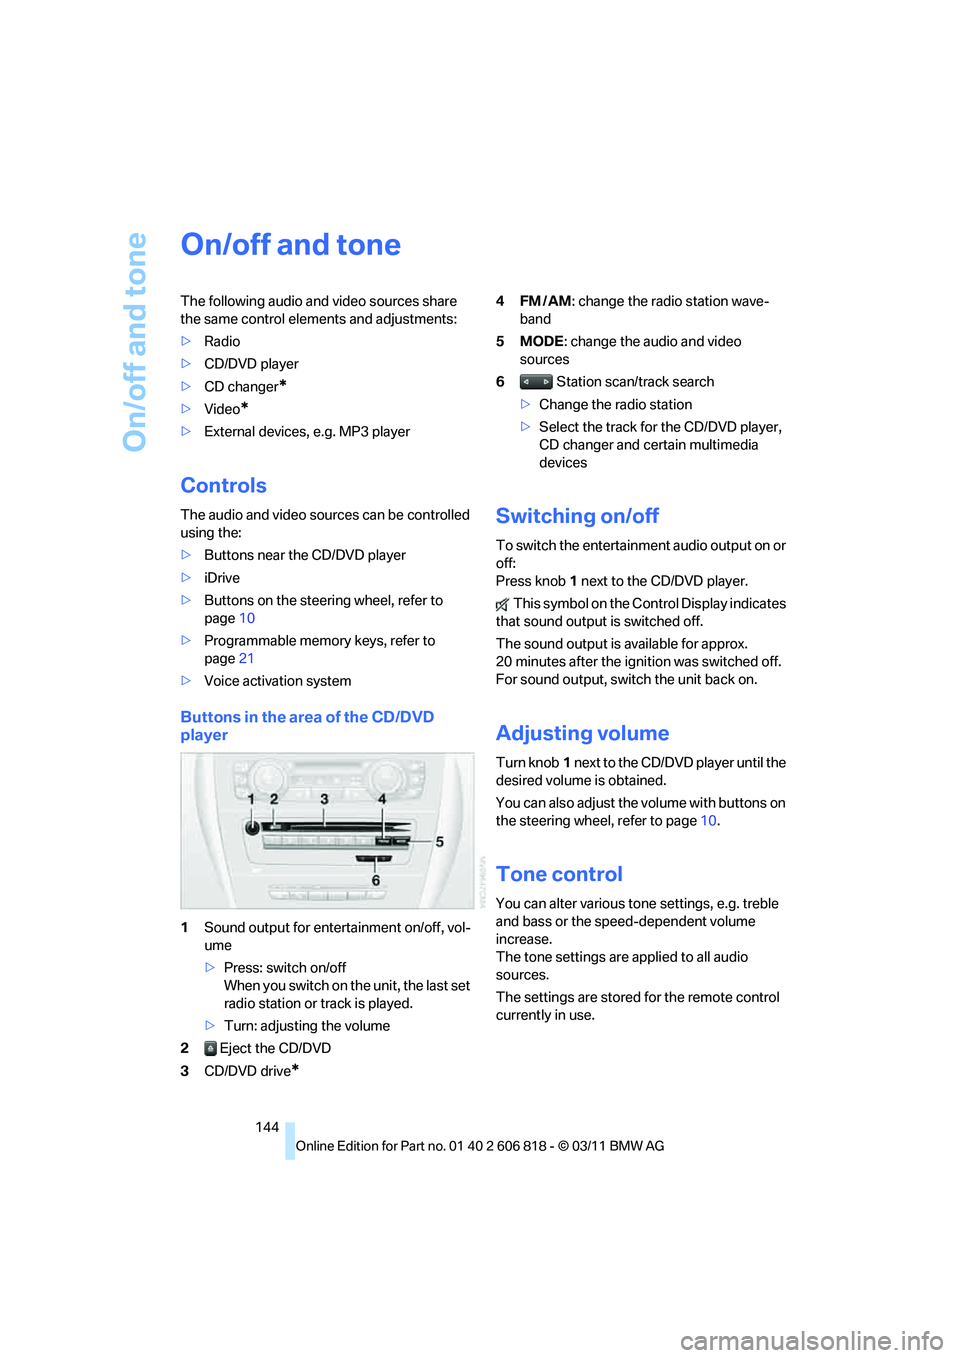
Buttons in the area of the CD/DVD
player
1Sound output for entertainment on/off, vol-
ume
>Press: switch on/off
When you switch on the unit, the last set
radio station or track is played.
>Turn: adjusting the volume
2Eject the CD/DVD
3CD/DVD drive
*
4FM/AM: change the radio station wave-
band
5MODE: change the audio and video
sources
6Station scan/track search
>Change the radio station
>Select the track for the CD/DVD player,
CD changer and certain multimedia
devices
Switching on/off
To switch the entertainment audio output on or
off:
Press knob1 next to the CD/DVD player.
This symbol on the Control Display indicates
that sound output is switched off.
The sound output is available for approx.
20 minutes after the ignition was switched off.
For sound output, switch the unit back on.
Adjusting volume
Turn knob1 next to the CD/DVD player until the
desired volume is obtained.
You can also adjust the volume with buttons on
the steering wheel, refer to page10.
Tone control
You can alter various tone settings, e.g. treble
and bass or the speed-dependent volume
increase.
The tone settings are applied to all audio
sources.
The settings are stored for the remote control
currently in use.
Page 153 of 272
Navigation
Entertainment
Driving tips
151Reference
At a glance
Controls
Communications
Mobility
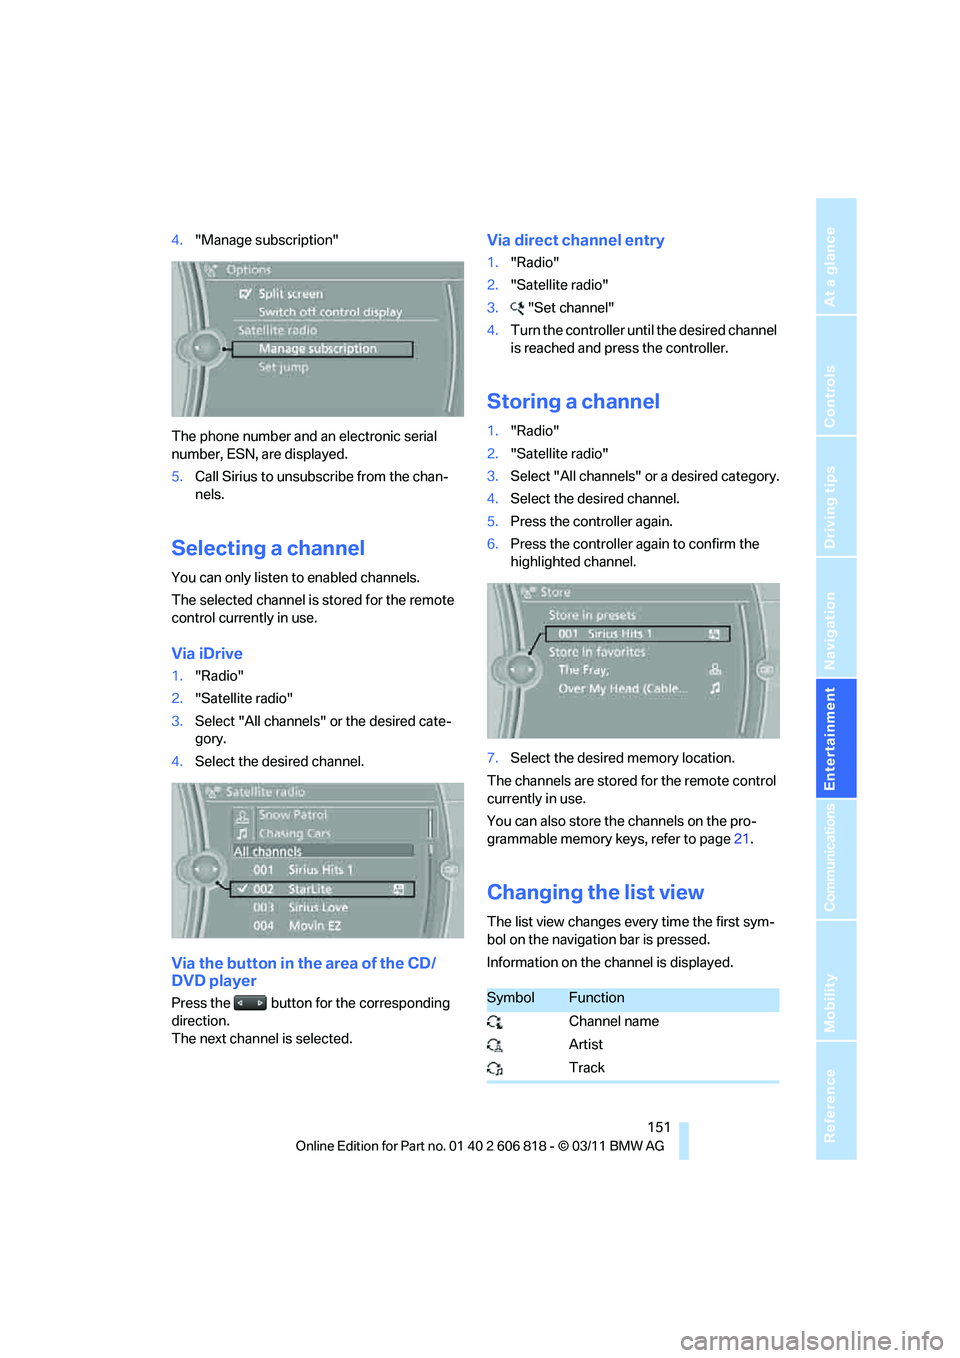
4."Manage subscription"
The phone number and an electronic serial
number, ESN, are displayed.
5.Call Sirius to unsubscribe from the chan-
nels.
Selecting a channel
You can only listen to enabled channels.
The selected channel is stored for the remote
control currently in use.
Via iDrive
1."Radio"
2."Satellite radio"
3.Select "All channels" or the desired cate-
gory.
4.Select the desired channel.
Via the button in the area of the CD/
DVD player
Press the button for the corresponding
direction.
The next channel is selected.
Via direct channel entry
1."Radio"
2."Satellite radio"
3."Set channel"
4.Turn the controller until the desired channel
is reached and press the controller.
Storing a channel
1."Radio"
2."Satellite radio"
3.Select "All channels" or a desired category.
4.Select the desired channel.
5.Press the controller again.
6.Press the controller again to confirm the
highlighted channel.
7.Select the desired memory location.
The channels are stored for the remote control
currently in use.
You can also store the channels on the pro-
grammable memory keys, refer to page21.
Changing the list view
The list view changes every time the first sym-
bol on the navigation bar is pressed.
Information on the channel is displayed.
SymbolFunction
Channel name
Artist
Track