Page 2 of 324

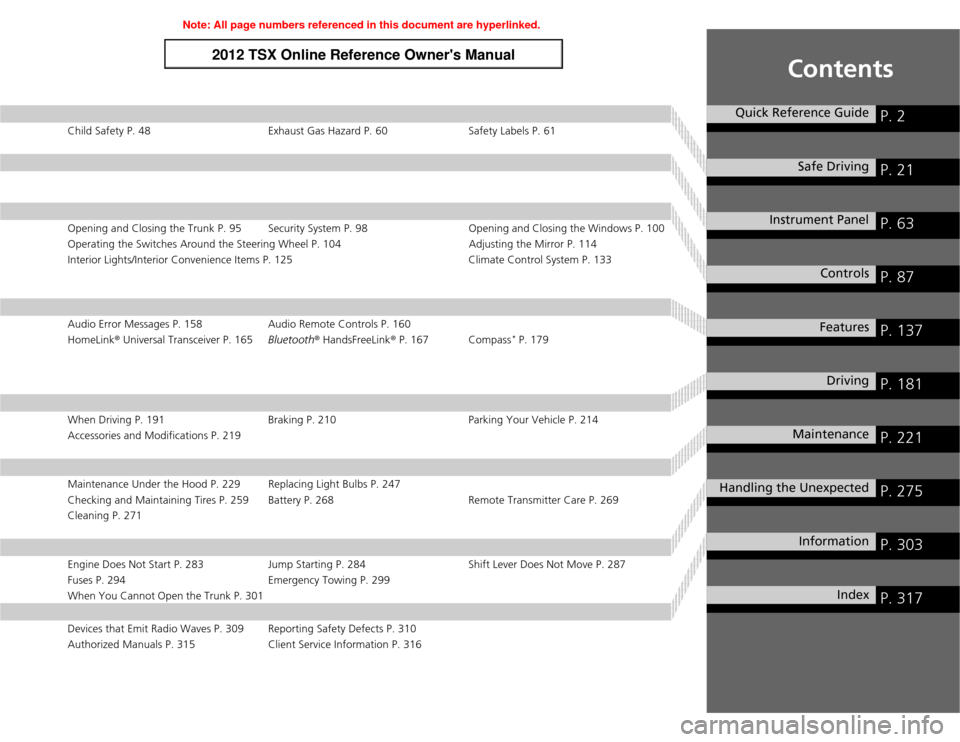
Contents
Child Safety P. 48 Exhaust Gas Hazard P. 60 Safety Labels P. 61Opening and Closing the Trunk P. 95 Security System P. 98 Opening and Closing the Windows P. 100
Operating the Switches Around the Steering Wheel P. 104 Adjusting the Mirror P. 114
Interior Lights/Interior Convenience Items P. 125 Climate Control System P. 133Audio Error Messages P. 158 Audio Remote Controls P. 160
HomeLink® Universal Transceiver P. 165Bluetooth® HandsFreeLink® P. 167 Compass
* P. 179
When Driving P. 191 Braking P. 210 Parking Your Vehicle P. 214
Accessories and Modifications P. 219Maintenance Under the Hood P. 229 Replacing Light Bulbs P. 247
Checking and Maintaining Tires P. 259 Battery P. 268 Remote Transmitter Care P. 269
Cleaning P. 271Engine Does Not Start P. 283 Jump Starting P. 284 Shift Lever Does Not Move P. 287
Fuses P. 294 Emergency Towing P. 299
When You Cannot Open the Trunk P. 301Devices that Emit Radio Waves P. 309 Reporting Safety Defects P. 310
Authorized Manuals P. 315 Client Service Information P. 316
Quick Reference Guide
P. 2
Safe Driving
P. 21
Instrument Panel
P. 63
Controls
P. 87
Features
P. 137
Driving
P. 181
Maintenance
P. 221
Handling the Unexpected
P. 275
Information
P. 303
Index
P. 317
Page 70 of 324

69
uuIndicatorsu
Continued
Instrument Panel
Indicator
Name
On/Blinking
Explanation
Message
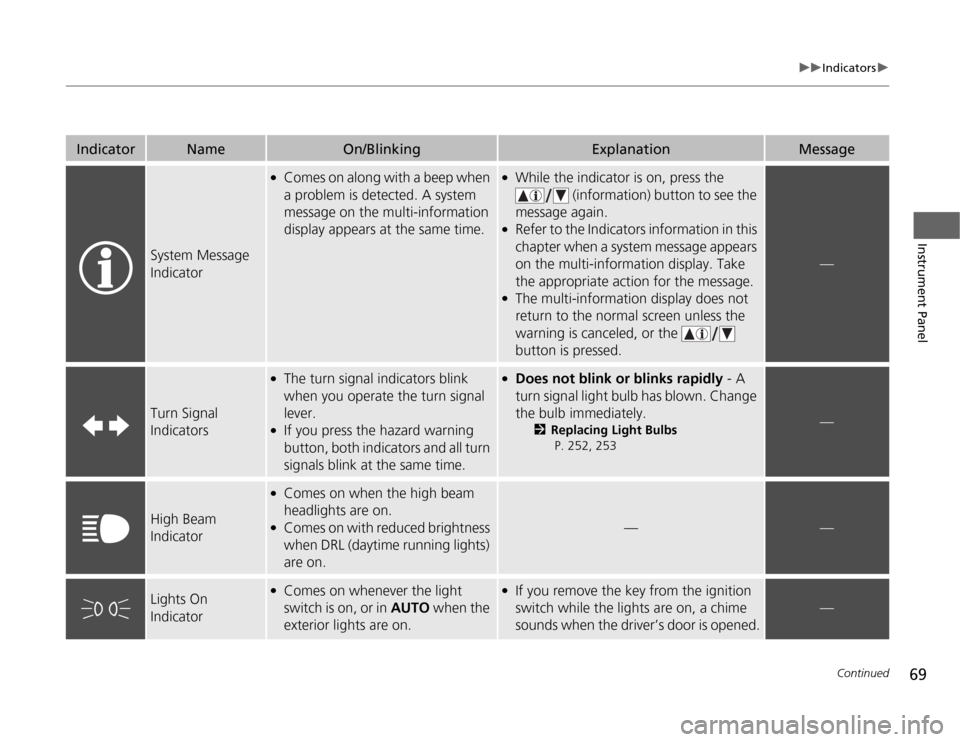
System Message
Indicator
●
Comes on along with a beep when
a problem is detected. A system
message on the multi-information
display appears at the same time.
●
While the indicator is on, press the
(information) button to see the
message again.
●
Refer to the Indicators information in this
chapter when a system message appears
on the multi-information display. Take
the appropriate action for the message.
●
The multi-information display does not
return to the normal screen unless the
warning is canceled, or the
button is pressed.
—
Turn Signal
Indicators
●
The turn signal indicators blink
when you operate the turn signal
lever.
●
If you press the hazard warning
button, both indicators and all turn
signals blink at the same time.
●
Does not blink or blinks rapidly - A
turn signal light bulb has blown. Change
the bulb immediately.
2Replacing Light Bulbs
P. 252, 253
—
High Beam
Indicator
●
Comes on when the high beam
headlights are on.
●
Comes on with reduced brightness
when DRL (daytime running lights)
are on.
—
—
Lights On
Indicator
●
Comes on whenever the light
switch is on, or in AUTO when the
exterior lights are on.
●
If you remove the key from the ignition
switch while the lights are on, a chime
sounds when the driver’s door is opened.
—
Page 106 of 324

105
uuOperating the Switches Around the Steering WheeluTurn SignalsContinued
Controls
Turn Signals
The turn signals can be used when the ignition
switch is in ON
(w
.
Light Switches
Rotating the light switch turns the lights on
and off, regardless of the position of the
ignition switch.■
High beams
Push the lever forward until you hear a click.
■
Low beams
When in high beams, pull the lever back to
return to low beams.
■
Flashing the high beams
Pull the lever back, and release it.
Right Turn
Left Turn
■
Manual Operation
1Light Switches
If you remove the key from the ignition switch while
the light is on, a chime sounds when the driver’s door
is opened.
When the lights are on, the lights on indicator in the
instrument panel will be on.
2Indicators P. 64
Repeatedly turning the headlights on and off reduces
the life of the HID headlight bulbs.
If you sense that the level of the headlights is
abnormal, have the vehicle inspected by a dealer.
Do not leave the lights on when the engine is off
because it will cause the battery to discharge.
High Beams
Flashing the high beams
Low Beams
Turns on parking, side marker,
tail and license plate lights
Turns on headlights, parking, side
marker, tail, and license plate
lights
Page 222 of 324

221
Maintenance
This chapter discusses basic maintenance.
Before Performing Maintenance
Inspection and Maintenance ............ 222
Safety When Performing Maintenance...223Parts and Fluids Used in Maintenance
Service ........................................... 224
Maintenance Minder
TM
..................... 225
Maintenance Under the Hood
Maintenance Items Under the Hood .. 229
Opening the Hood ........................... 231
Recommended Engine Oil ................ 234
Oil Check ......................................... 235
Adding Engine Oil ............................ 237Engine Coolant ................................ 240
Transmission Fluid ............................ 242
Brake/Clutch Fluid ............................ 244
Refilling Window Washer Fluid......... 246
Replacing Light Bulbs....................... 247
Checking and Maintaining Wiper
Blades.......................................... 257Checking and Maintaining Tires
Checking Tires ................................. 259
Tire and Loading Information Label .. 260
Tire Labeling .................................... 260
DOT Tire Quality Grading (U.S. Vehicles) ..262
Wear Indicators ............................... 264
Tire Service Life ................................ 264
Tire and Wheel Replacement ........... 265
Tire Rotation .................................... 266
Winter Tires ..................................... 267
Battery............................................... 268
Remote Transmitter Care................. 269
Replacing the Battery ....................... 269
Climate Control System Maintenance
.. 270
Cleaning
Interior Care .................................... 271
Exterior Care.................................... 273
Page 223 of 324

222Maintenance
Before Performing MaintenanceInspection and MaintenanceFor your safety, perform all listed inspections and maintenance to keep your vehicle
in good condition. If you become aware of any abnormality (noise, smell, insufficient
brake fluid, oil residue on the ground, etc.), have your vehicle inspected by a dealer.
(Note, however, that service at a dealer is not mandatory to keep your warranties in
effect.) Refer to the separate maintenance booklet for detailed maintenance and
inspection information.■
Daily inspections
Perform inspections before long distance trips, when washing the vehicle, or when
refueling.
■
Periodic inspections
•Check the automatic transmission fluid level monthly.
2Automatic Transmission Fluid P. 242
•Check the brake fluid level monthly.
2Brake/Clutch Fluid P. 244
•Check the tire pressure monthly. Examine the tread for wear and foreign objects.
2Checking and Maintaining Tires P. 259
•Check the operation of the exterior lights monthly.
2Replacing Light Bulbs P. 247
•Check the condition of the wiper blades at least every six months.
2Checking and Maintaining Wiper Blades P. 257
■
Types of Inspection and Maintenance
1Inspection and Maintenance
Maintenance, replacement, or repair of
emissions control devices and systems may be
done by any automotive repair establishment or
individuals using parts that are “certified” to
EPA standards.
According to state and federal regulations, failure to
perform maintenance on the maintenance main
items marked with # will not void your emissions
warranties. However, all maintenance services should
be performed in accordance with the intervals
indicated by the multi-information display.
2Maintenance Service Items P. 227
If you want to perform complex maintenance tasks
that require more skills and tools, purchase the
service manual.
2Authorized Manuals P. 315
If you want to perform maintenance yourself, make
sure that you have the necessary tools and skills first.
After performing maintenance, update the records in
the separate maintenance booklet.
U.S. models
Page 248 of 324

247
Continued
Maintenance
Replacing Light BulbsHeadlight BulbsWhen replacing, use the following bulbs.
1.Remove all the engine compartment covers.
2Engine Compartment Covers P. 233
2.Remove the engine coolant reservoir.
High beam headlight:
60 W (HB3)
Low beam headlight:
55 W (H1 for halogen bulb Type)
35 W (D2S for high voltage discharge type)
■
High Beam Headlight
1Headlight Bulbs
NOTICEHalogen bulbs get very hot when lit.
Oil, perspiration, or a scratch on the glass can cause
the bulb to overheat and shatter.
The headlight aim is set by the factory, and does not
need to be adjusted. However, if you regularly carry
heavy items in the trunk or tow a trailer, have the
aiming readjusted at a dealer or by a qualified
technician.
The HB3 and H1 types are halogen bulbs.
When replacing a bulb, handle it by its base, and
protect the glass from contact with your skin or hard
objects. If you touch the glass, clean it with
denatured alcohol and a clean cloth.
Engine Coolant Reservoir
4-cylinder models
6-cylinder modelsPassenger sideAll models
6-cylinder models
Engine Coolant Reservoir
Page 249 of 324
uuReplacing Light BulbsuHeadlight Bulbs
248Maintenance
3.Remove the fasteners, using a flat-tip
screwdriver. Remove the cover of the air
intake duct and its upper part.
3.Remove the fasteners, and remove the air
intake duct cover.
1Headlight Bulbs
The exterior lights’ inside lenses (headlights, brake
lamps, etc.) may fog temporarily after a vehicle wash
or while driving in the rain. This does not impact the
exterior light function.
However, if you see a large amount of water or ice
accumulated inside the lenses, have your vehicle
inspected by a dealer.
4-cylinder models
Fastener
CoverAir Intake
Duct
Driver side4-cylinder models
6-cylinder models
Fastener
Cover
6-cylinder models
Page 250 of 324
249
uuReplacing Light BulbsuHeadlight Bulbs
Continued
Maintenance
4.Remove the coupler.
uIt can be removed by pushing the tab.
5.Rotate the old bulb to the left to remove.
6.Insert a new bulb into the headlight
assembly and turn it to the right.
7.Insert the coupler into the connector of the
bulb.
4-cylinder models
Bulb
Coupler
Tab6-cylinder models
Bulb
Tab
Coupler
Driver and passenger sideAll models