Page 130 of 324
Continued
129
uuInterior Lights/Interior Convenience ItemsuInterior Convenience Items
Controls
There are two accessory power sockets; one in
the console compartment and the other at the
front of the center console. They can be used
when the ignition switch is in ACCESSORY
(q
or ON
(w
.
Open the cover to use it.
■
Accessory Power Sockets
1Accessory Power Sockets
NOTICEDo not insert an automotive type cigarette lighter
element.
This can overheat the power socket.
The accessory power socket is designed to supply
power for 12 volt DC accessories that are rated 120
watts or less (10 amps).
To prevent battery drain, only use the power socket
with the engine running.
When both sockets are being used, the combined
power rating of the accessories should not exceed
120 watts (10 amps).
Page 133 of 324

uuInterior Lights/Interior Convenience ItemsuInterior Convenience Items
132Controls
The ignition switch must be in ON
(w
to use
the seat heaters. The HI setting heats the seats
faster than the LO setting.
There is no heater in the passenger’s seat-
back due to the side airbag cutoff system.
While in HI, the heater cycles on and off.
uThe appropriate indicator will be on
while the seat heater is on. Briefly press
the button on the opposite side to turn
the heater off. The indicator will be off.
When a comfortable temperature is
reached, select LO to keep the seat
warm.
■
Seat Heaters
1Seat Heaters
Do not use the seat heaters even in LO when the
engine is off. Under such conditions, the battery may
be weakened, making the engine difficult to start.
In the LO setting, the heater runs continuously and
does not automatically turn off after a period of time.
3
WARNING
Heat induced burns are possible when
using seat heaters.
Persons with a diminished ability to sense
temperature (e.g., persons with diabetes,
lower-limb nerve damage, or paralysis) or
with sensitive skin should not use seat
heaters.
Page 134 of 324

133
Continued
Controls
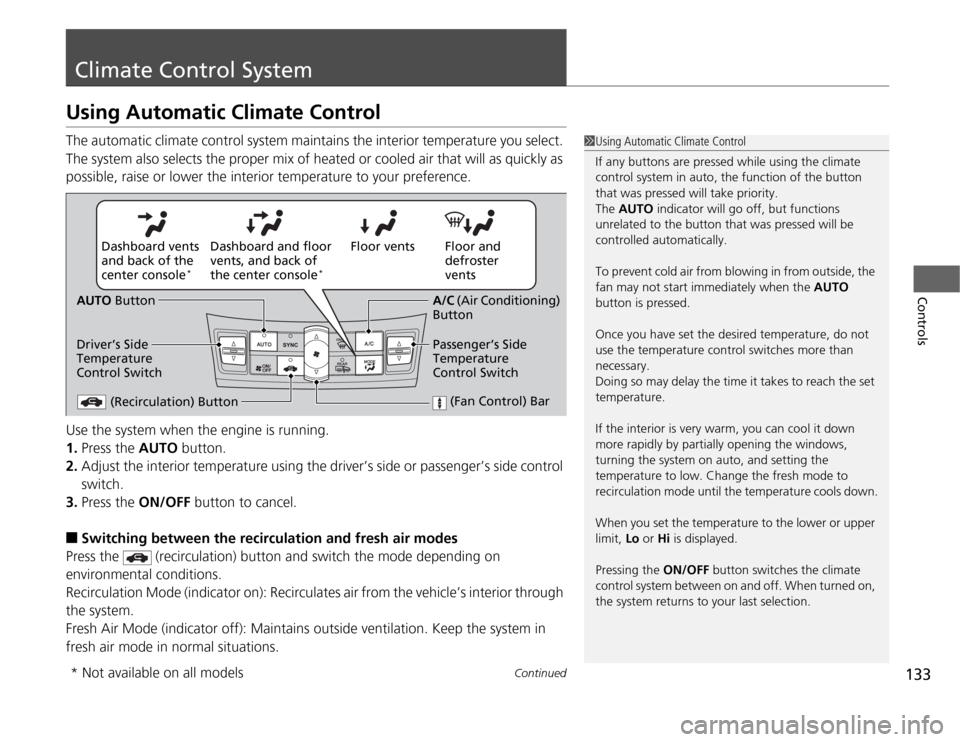
Climate Control SystemUsing Automatic Climate ControlThe automatic climate control system maintains the interior temperature you select.
The system also selects the proper mix of heated or cooled air that will as quickly as
possible, raise or lower the interior temperature to your preference.
Use the system when the engine is running.
1.Press the AUTO button.
2.Adjust the interior temperature using the driver’s side or passenger’s side control
switch.
3.Press the ON/OFF button to cancel.■
Switching between the recirculation and fresh air modes
Press the (recirculation) button and switch the mode depending on
environmental conditions.
Recirculation Mode (indicator on): Recirculates air from the vehicle’s interior through
the system.
Fresh Air Mode (indicator off): Maintains outside ventilation. Keep the system in
fresh air mode in normal situations.
1Using Automatic Climate Control
If any buttons are pressed while using the climate
control system in auto, the function of the button
that was pressed will take priority.
The AUTO indicator will go off, but functions
unrelated to the button that was pressed will be
controlled automatically.
To prevent cold air from blowing in from outside, the
fan may not start immediately when the AUTO
button is pressed.
Once you have set the desired temperature, do not
use the temperature control switches more than
necessary.
Doing so may delay the time it takes to reach the set
temperature.
If the interior is very warm, you can cool it down
more rapidly by partially opening the windows,
turning the system on auto, and setting the
temperature to low. Change the fresh mode to
recirculation mode until the temperature cools down.
When you set the temperature to the lower or upper
limit, Lo or Hi is displayed.
Pressing the ON/OFF button switches the climate
control system between on and off. When turned on,
the system returns to your last selection.
Floor and
defroster
vents Floor vents Dashboard and floor
vents, and back of
the center console
*
Dashboard vents
and back of the
center console
*
AUTO Button
Driver’s Side
Temperature
Control Switch
(Recirculation) Button
(Fan Control) Bar
A/C (Air Conditioning)
Button
Passenger’s Side
Temperature
Control Switch
* Not available on all models
Page 182 of 324

181
Driving
This chapter discusses driving, refueling, and information on items such as accessories.
Before Driving
Driving Preparation .......................... 182
Maximum Load Limit........................ 185
Towing a Trailer
Towing Preparation .......................... 187
Driving Safely with a Trailer .............. 189
Towing Your Vehicle ........................ 190
When Driving
Starting the Engine .......................... 191
Precautions While Driving................. 193
Automatic Transmission ................... 194Shifting ............................................ 195
Shifting ............................................ 199
Cruise Control ................................. 201
VSA
® (Vehicle Stability Assist), aka ESC
(Electronic Stability Control), System ...... 204
TPMS (Tire Pressure Monitoring System) ... 206
Tire Pressure Monitoring System (TPMS) -
Required Federal Explanation ........... 208
Braking
Brake System ................................... 210
ABS (Anti-lock Brake System) ........... 212Automatic transmissionManual transmission
Brake Assist System ......................... 213
Parking Your Vehicle
When Stopped ................................ 214
Parking ............................................ 214
Refueling
Fuel Information .............................. 215
How to Refuel ................................. 216
Fuel Economy.................................... 218
Improving Fuel Economy .................. 218
Accessories and Modifications
Accessories ...................................... 219
Modifications................................... 219
Page 188 of 324

187
Continued
Driving
Towing a TrailerTowing PreparationYour vehicle can tow a trailer if you carefully observe the load limits, use the proper
equipment, and follow the towing guidelines. Check the load limits before driving.
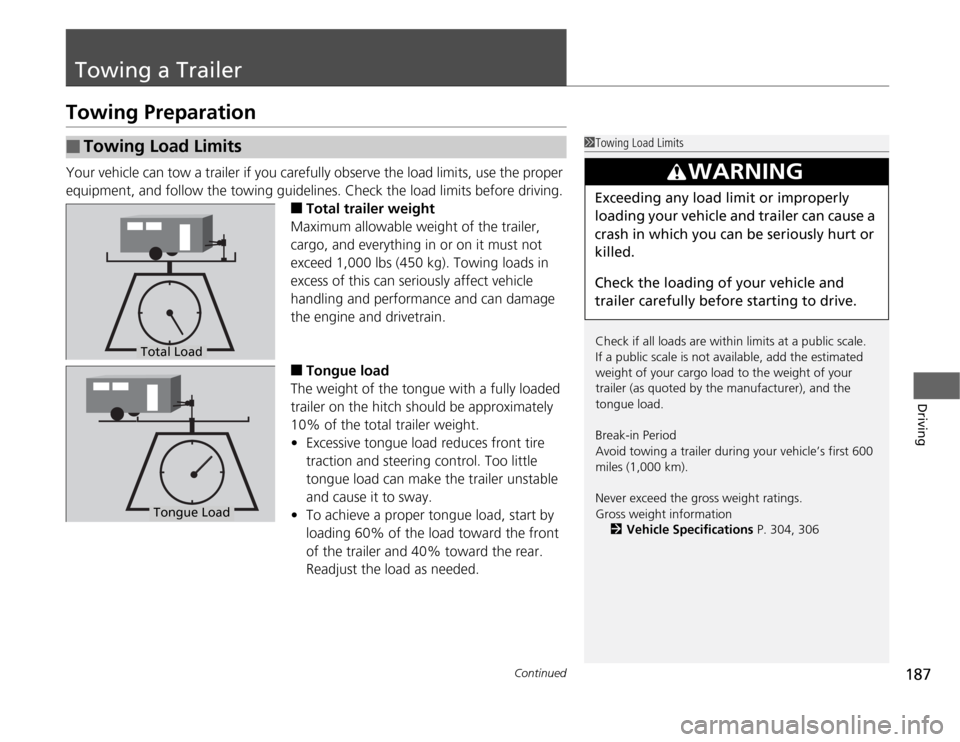
■
Total trailer weight
Maximum allowable weight of the trailer,
cargo, and everything in or on it must not
exceed 1,000 lbs (450 kg). Towing loads in
excess of this can seriously affect vehicle
handling and performance and can damage
the engine and drivetrain.
■
Tongue load
The weight of the tongue with a fully loaded
trailer on the hitch should be approximately
10% of the total trailer weight.
•Excessive tongue load reduces front tire
traction and steering control. Too little
tongue load can make the trailer unstable
and cause it to sway.
•To achieve a proper tongue load, start by
loading 60% of the load toward the front
of the trailer and 40% toward the rear.
Readjust the load as needed.
■
Towing Load Limits
1Towing Load Limits
Check if all loads are within limits at a public scale.
If a public scale is not available, add the estimated
weight of your cargo load to the weight of your
trailer (as quoted by the manufacturer), and the
tongue load.
Break-in Period
Avoid towing a trailer during your vehicle’s first 600
miles (1,000 km).
Never exceed the gross weight ratings.
Gross weight information
2Vehicle Specifications P. 304, 306
3
WARNING
Exceeding any load limit or improperly
loading your vehicle and trailer can cause a
crash in which you can be seriously hurt or
killed.
Check the loading of your vehicle and
trailer carefully before starting to drive.
Total Load
Tongue Load
Page 191 of 324

uuTowing a TraileruTowing Your Vehicle
190Driving
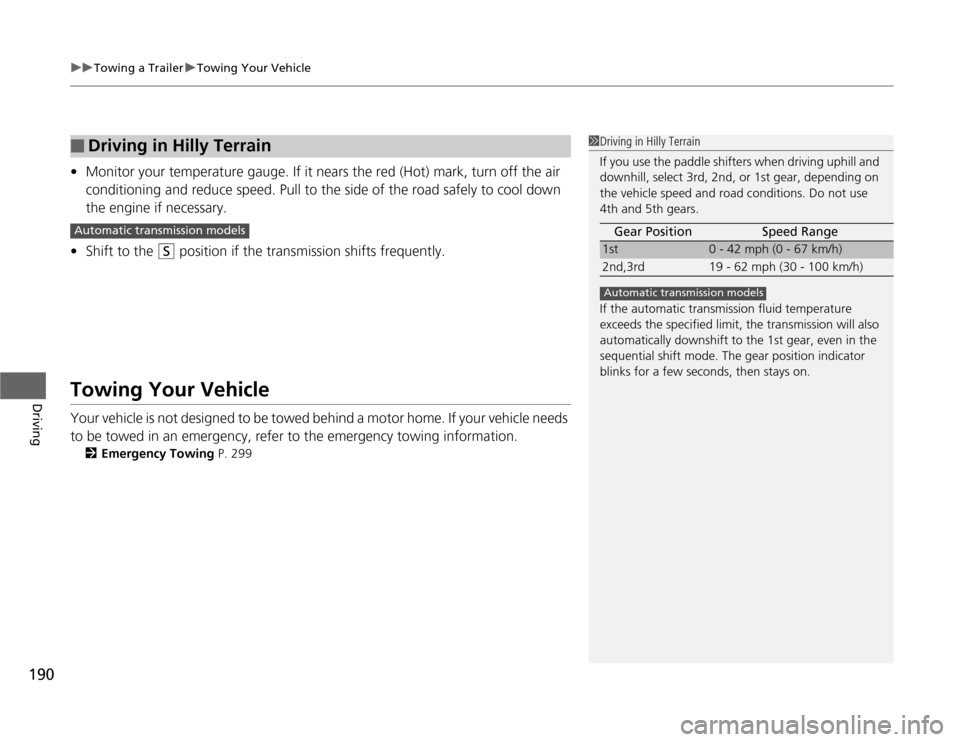
•Monitor your temperature gauge. If it nears the red (Hot) mark, turn off the air
conditioning and reduce speed. Pull to the side of the road safely to cool down
the engine if necessary.
•Shift to the
(S
position if the transmission shifts frequently.
Towing Your VehicleYour vehicle is not designed to be towed behind a motor home. If your vehicle needs
to be towed in an emergency, refer to the emergency towing information.
2Emergency Towing P. 299
■
Driving in Hilly Terrain
1Driving in Hilly Terrain
If you use the paddle shifters when driving uphill and
downhill, select 3rd, 2nd, or 1st gear, depending on
the vehicle speed and road conditions. Do not use
4th and 5th gears.
If the automatic transmission fluid temperature
exceeds the specified limit, the transmission will also
automatically downshift to the 1st gear, even in the
sequential shift mode. The gear position indicator
blinks for a few seconds, then stays on.Gear Position Speed Range
1st
0 - 42 mph (0 - 67 km/h)
2nd,3rd 19 - 62 mph (30 - 100 km/h)
Automatic transmission models
Automatic transmission models
Page 192 of 324

191
Continued
Driving
When DrivingStarting the Engine
1.Make sure the parking brake is applied.
2.Check that the shift lever is in
(P
, then
depress the brake pedal.
uAlthough it is possible to start the vehicle
in
(N
, it is safer to start it in
(P
.
2.Check that the shift lever is in
(N
. Then
depress the brake pedal with your right
foot, and the clutch pedal with your left
foot.
uThe clutch pedal must be fully depressed
to start the engine.
1Starting the Engine
Keep your foot firmly on the brake pedal when
starting the engine.
The engine is harder to start in cold weather and in
thinner air found at altitudes above 8,000 feet (2,400
meters).
When starting the engine in cold weather, turn off all
electrical accessories such as the lights, climate
control system, and rear defogger in order to reduce
battery drain.
If exhaust sounds abnormal or you can smell exhaust
gas inside the vehicle, have your vehicle checked by a
dealer. There may be a problem with the engine or
exhaust system.
Brake Pedal
Automatic transmission models
Brake Pedal Clutch Pedal
Manual transmission models
Page 193 of 324

uuWhen DrivinguStarting the Engine
192Driving
3.Turn the ignition switch to START
(e
without depressing the accelerator pedal.
1.Keeping your right foot on the brake pedal, release the parking brake. Check that
the brake system indicator has gone off.
2Parking Brake P. 210
2.Put the shift lever in
(D
. Select
(R
when reversing.
3.Gradually release the brake pedal and gently depress the accelerator pedal to pull
away.
1Starting the Engine
Do not hold the key in START
(e
for more than 15
seconds.
•If the engine does not start right away, wait for at
least 10 seconds before trying again.•If the engine starts, but then immediately stops,
wait at least 10 seconds before repeating step 3
while gently depressing the accelerator pedal.
Release the accelerator pedal once the engine
starts.
The immobilizer system protects your vehicle from
theft. If an improperly coded key (or other device) is
used, the engine’s fuel system is disabled.
2Immobilizer System P. 98
■
Starting to Drive
Automatic transmission models