2012.5 Peugeot 308 SW BL light
[x] Cancel search: lightPage 86 of 382
4
84
ACCESS
Deadlocking renders the exterior and
interior door controls inoperative.
It also deactivates the manual central
control button.
Therefore, never leave anyone inside
the vehicle when it is deadlocked.
Deadlocking using the remote
control
Deadlocking using the key
�)
Short press on the closed
padlock to lock the vehicle
or
Deadlocking is confi rmed by fi xed light-
ing of the direction indicators for ap-
proximately two seconds.
According to version, the door mirrors
fold at the same time.
�)
Turn the key to the right in the driver's
door lock to lock the vehicle.
�)
Turn the key to the right again within
fi ve seconds to deadlock the vehicle.
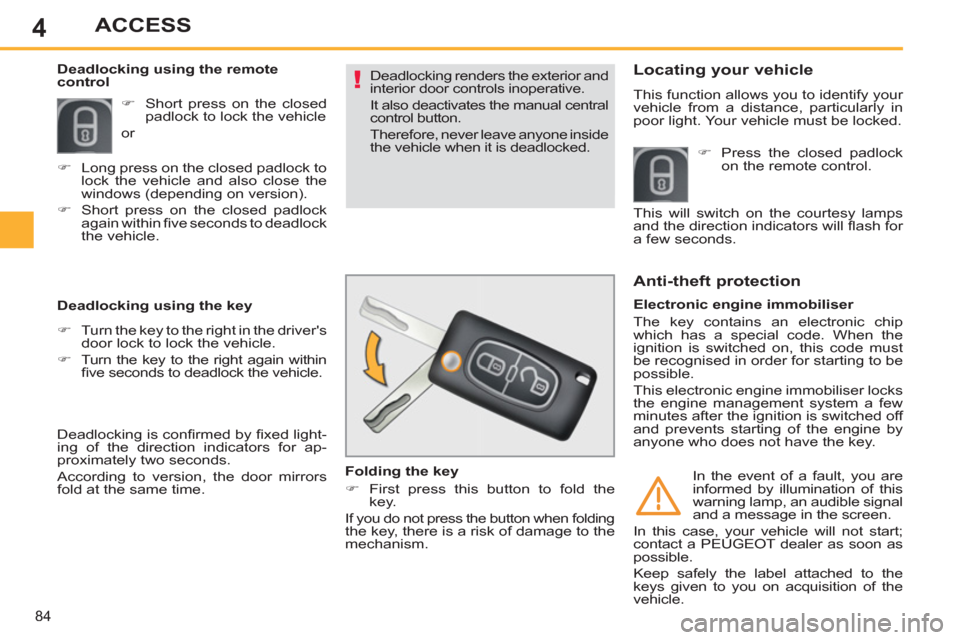
Folding the key
�)
First press this button to fold the
key.
If you do not press the button when folding
the key, there is a risk of damage to the
mechanism.
Locating your vehicle
This function allows you to identify your
vehicle from a distance, particularly in
poor light. Your vehicle must be locked.
Electronic engine immobiliser
The key contains an electronic chip
which has a special code. When the
ignition is switched on, this code must
be recognised in order for starting to be
possible.
This electronic engine immobiliser locks
the engine management system a few
minutes after the ignition is switched off
and prevents starting of the engine by
anyone who does not have the key.
Anti-theft protection
In the event of a fault, you are
informed by illumination of this
warning lamp, an audible signal
and a message in the screen.
In this case, your vehicle will not start;
contact a PEUGEOT dealer as soon as
possible.
Keep safely the label attached to the
keys given to you on acquisition of the
vehicle.
�)
Long press on the closed padlock to
lock the vehicle and also close the
windows (depending on version).
�)
Short press on the closed padlock
again within fi ve seconds to deadlock
the vehicle.
�)
Press the closed padlock
on the remote control.
This will switch on the courtesy lamps
and the direction indicators will fl ash for
a few seconds.
Page 97 of 382
4
95
ACCESS
PANORAMIC SUNROOF
Component which has a tinted glass pan-
oramic surface to increase the light and
visibility in the passenger compartment.
Fitted with an electric blind in several
sections to improve temperature and
noise related comfort.
If the blind meets an obstacle dur-
ing operation, you must reverse the
movement of the blind. To do this,
press the control concerned.
When the driver operates the blind
control, he must ensure that no one
is preventing correct closing of the
blind.
The driver must ensure that pas-
sengers use the blind correctly.
Be aware of children when operating
the blind.
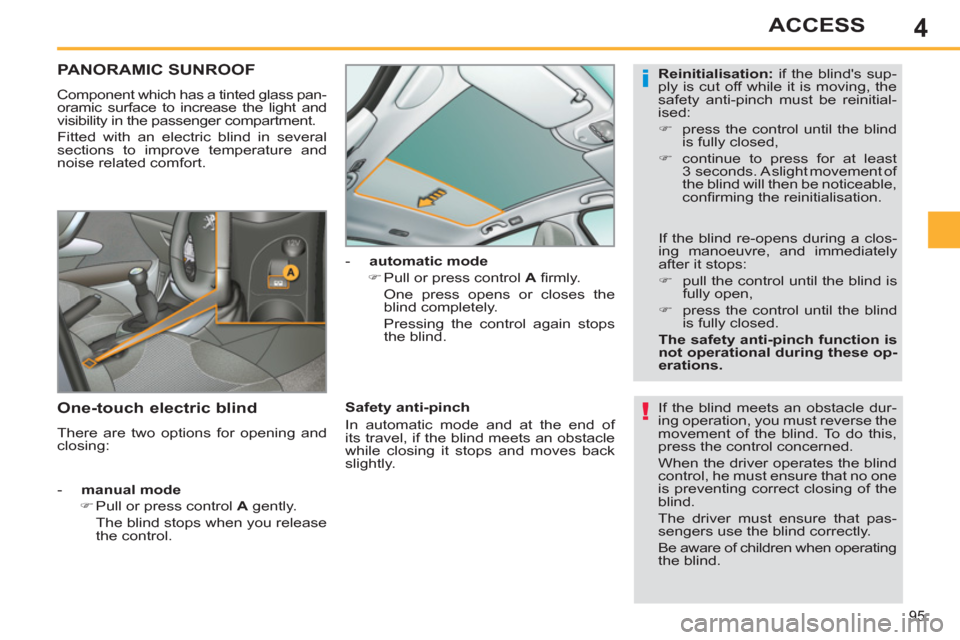
- manual mode
�)
Pull or press control A
gently.
The blind stops when you release
the control.
- automatic mode
�)
Pull or press control A
fi rmly.
One press opens or closes the
blind completely.
Pressing the control again stops
the blind.
Safety anti-pinch
In automatic mode and at the end of
its travel, if the blind meets an obstacle
while closing it stops and moves back
slightly.
One-touch electric blind
There are two options for opening and
closing:
Reinitialisation:
if the blind's sup-
ply is cut off while it is moving, the
safety anti-pinch must be reinitial-
ised:
�)
press the control until the blind
is fully closed,
�)
continue to press for at least
3 seconds. A slight movement of
the blind will then be noticeable,
confi rming the reinitialisation.
If the blind re-opens during a clos-
ing manoeuvre, and immediately
after it stops:
�)
pull the control until the blind is
fully open,
�)
press the control until the blind
is fully closed.
The safety anti-pinch function is
not operational during these op-
erations.
Page 101 of 382

5
99
VISIBILITY
EXTERIOR LIGHTING
CONTROLS
Control stalk for the selection and control
of the various front and rear lamps pro-
viding the vehicle's lighting.
Main lighting
The various front and rear lamps of the
vehicle are designed to adapt the driv-
er's visibility progressively in relation to
the climatic conditions:
- sidelamps, to be seen,
- dipped beam headlamps to see
without dazzling other drivers,
- main beam headlamps to see clearly
when the road is clear.
Additional lighting
Other lamps are fi tted to fulfi l the require-
ments of particular driving conditions:
- a rear foglamp to be seen from a
distance,
- front foglamps for even better
forward vision,
- directional headlamps for improved
visibility when cornering,
- daytime running lamps to be seen
during the day.
Settings
Various automatic lighting control modes
are also available depending on options:
- daytime running lamps,
- automatic illumination of headlamps,
- directional lighting,
- guide-me-home lighting.
Model without AUTO lighting
Model with AUTO lighting
Automatic illumination of
headlamps.
Manual controls
The lighting is controlled directly by the
driver by means of the ring A
and the
stalk B
.
A.
Main lighting mode selection ring:
turn it to position the symbol required
facing the mark.
Lamps off.
Sidelamps.
B.
Stalk for switching headlamps: pull
the stalk towards you to switch the
lighting between dipped and main
beam headlamps.
In the lamps off and sidelamps modes,
the driver can switch on the main beam
headlamps temporarily ("headlamp
fl ash") by maintaining a pull on the
stalk. Dipped headlamps or main
beam headlamps.
Displays
Illumination of the corresponding indica-
tor lamp in the instrument panel confi rms
that the lighting selected is on.
Page 102 of 382
5
100
VISIBILITY
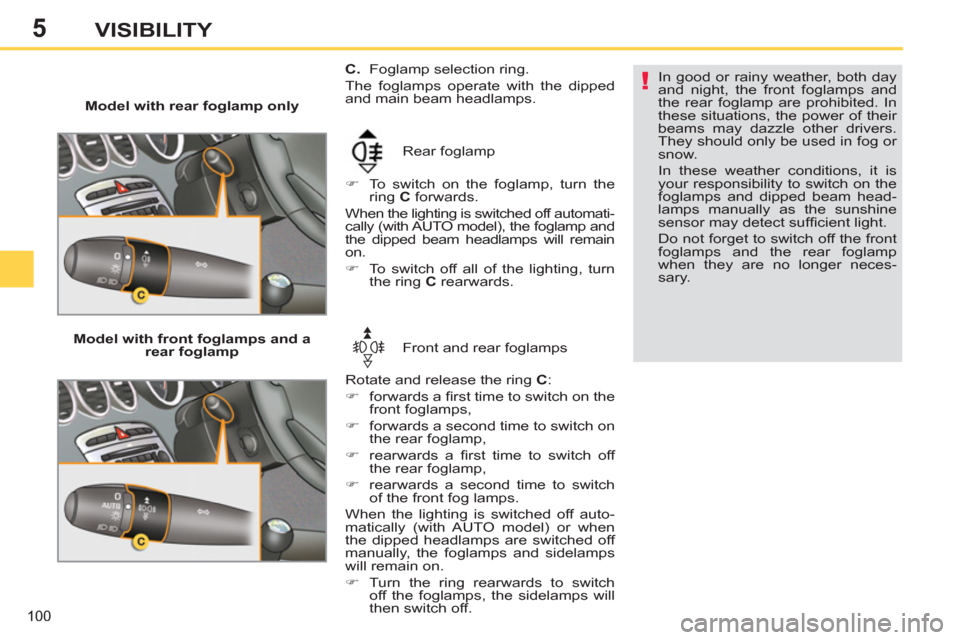
Model with rear foglamp only
Rear foglamp
�)
To switch on the foglamp, turn the
ring C
forwards.
When the lighting is switched off automati-
cally (with AUTO model), the foglamp and
the dipped beam headlamps will remain
on.
�)
To switch off all of the lighting, turn
the ring C
rearwards.
In good or rainy weather, both day
and night, the front foglamps and
the rear foglamp are prohibited. In
these situations, the power of their
beams may dazzle other drivers.
They should only be used in fog or
snow.
In these weather conditions, it is
your responsibility to switch on the
foglamps and dipped beam head-
lamps manually as the sunshine
sensor may detect suffi cient light.
Do not forget to switch off the front
foglamps and the rear foglamp
when they are no longer neces-
sary.
Model with front foglamps and a
rear foglamp Front and rear foglamps
Rotate and release the ring C
:
�)
forwards a fi rst time to switch on the
front foglamps,
�)
forwards a second time to switch on
the rear foglamp,
�)
rearwards a fi rst time to switch off
the rear foglamp,
�)
rearwards a second time to switch
of the front fog lamps.
When the lighting is switched off auto-
matically (with AUTO model) or when
the dipped headlamps are switched off
manually, the foglamps and sidelamps
will remain on.
�)
Turn the ring rearwards to switch
off the foglamps, the sidelamps will
then switch off.
C.
Foglamp selection ring.
The foglamps operate with the dipped
and main beam headlamps.
Page 103 of 382
5VISIBILITY
Switching off the lamps when
the ignition is switched off
On switching off the ignition, all of the
lamps turn off immediately, except for
dipped beam if guide-me-home lighting
is activated.
Switching on the lamps after the
ignition is switched off
To reactivate the lighting control, rotate
ring A
to the "0"
position - lamps off,
then to the desired position.
On opening the driver's door a
temporary audible signal warns the
driver that the lighting is on.
The lamps, with the exception of the
sidelamps, switch off automatically
after a maximum duration of thirty
minutes to prevent discharging of the
battery.
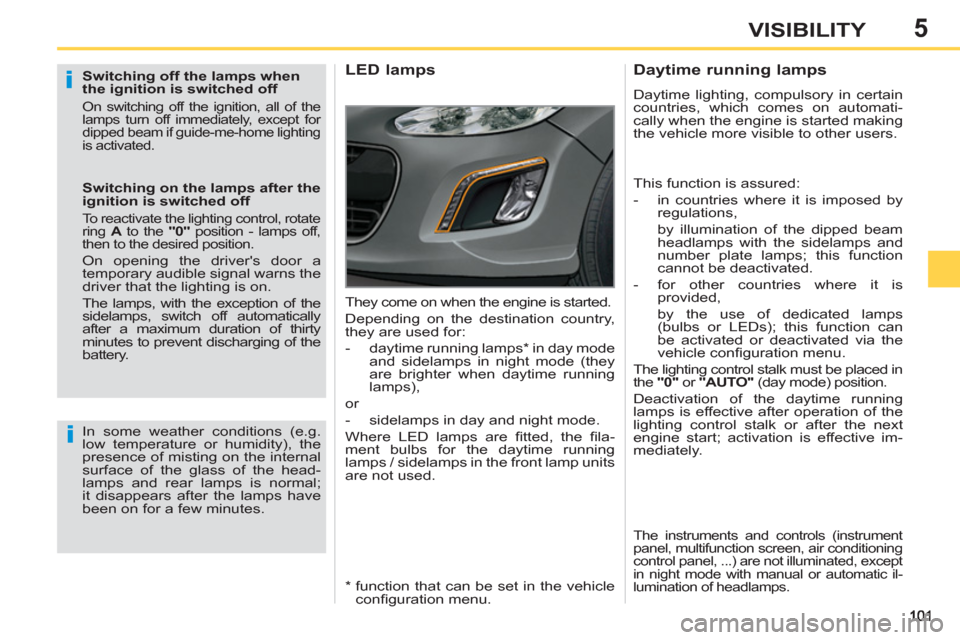
LED lamps
In some weather conditions (e.g.
low temperature or humidity), the
presence of misting on the internal
surface of the glass of the head-
lamps and rear lamps is normal;
it disappears after the lamps have
been on for a few minutes.
Daytime running lamps
Daytime lighting, compulsory in certain
countries, which comes on automati-
cally when the engine is started making
the vehicle more visible to other users.
This function is assured:
- in countries where it is imposed by
regulations,
by illumination of the dipped beam
headlamps with the sidelamps and
number plate lamps; this function
cannot be deactivated.
- for other countries where it is
provided,
by the use of dedicated lamps
(bulbs or LEDs); this function can
be activated or deactivated via the
vehicle confi guration menu.
The lighting control stalk must be placed in
the "0"
or "AUTO"
(day mode) position.
Deactivation of the daytime running
lamps is effective after operation of the
lighting control stalk or after the next
engine start; activation is effective im-
mediately.
The instruments and controls (instrument
panel, multifunction screen, air conditioning
control panel, ...) are not illuminated, except
in night mode with manual or automatic il-
lumination of headlamps.
They come on when the engine is started.
Depending on the destination country,
they are used for:
- daytime running lamps * in day mode
and sidelamps in night mode (they
are brighter when daytime running
lamps),
or
- sidelamps in day and night mode.
Where LED lamps are fi tted, the fi la-
ment bulbs for the daytime running
lamps / sidelamps in the front lamp units
are not used.
*
function that can be set in the vehicle
confi guration menu.
Page 104 of 382
5
AUTO
102
VISIBILITY
In fog or snow, the sunshine sensor
may detect suffi cient light. There-
fore, the lighting will not come on
automatically.
Do not cover the sunshine sensor,
coupled with the rain sensor and
located in the centre of the wind-
screen behind the rear view mirror;
the associated functions would no
longer be controlled.
Operating fault
In the event of a fault with the
sunshine sensor, the lighting
come on, this warning lamp
is displayed in the instrument
panel and/or a message ap-
pears in the screen, accompanied by
an audible signal.
Contact a PEUGEOT dealer or a qualifi ed
workshop.
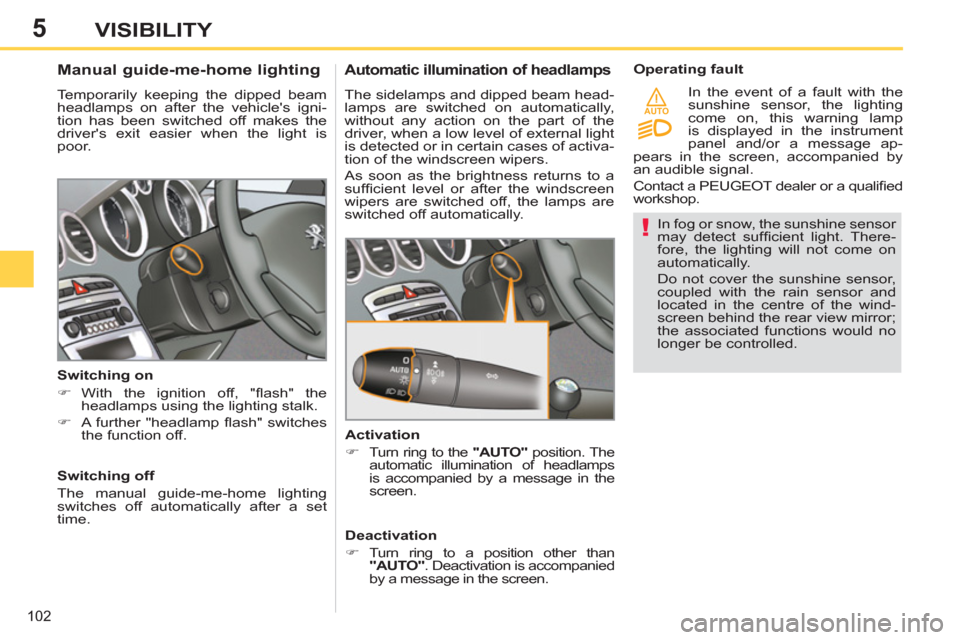
Manual guide-me-home lighting
Temporarily keeping the dipped beam
headlamps on after the vehicle's igni-
tion has been switched off makes the
driver's exit easier when the light is
poor.
Switching on
�)
With the ignition off, "fl ash" the
headlamps using the lighting stalk.
�)
A further "headlamp fl ash" switches
the function off.
Switching off
The manual guide-me-home lighting
switches off automatically after a set
time.
Automatic illumination of headlamps
The sidelamps and dipped beam head-
lamps are switched on automatically,
without any action on the part of the
driver, when a low level of external light
is detected or in certain cases of activa-
tion of the windscreen wipers.
As soon as the brightness returns to a
suffi cient level or after the windscreen
wipers are switched off, the lamps are
switched off automatically.
Activation
�)
Turn ring to the "AUTO"
position. The
automatic illumination of headlamps
is accompanied by a message in the
screen.
Deactivation
�)
Turn ring to a position other than
"AUTO"
. Deactivation is accompanied
by a message in the screen.
Page 105 of 382
5
103
VISIBILITY
Exterior welcome lighting
The remote switching on of the light-
ing makes your approach to the vehicle
easier in poor light. It is activated ac-
cording to the level of light detected by
the sunshine sensor.
Switching on
�)
Press the open padlock on the remote
control.
The dipped beam headlamps and the
sidelamps come on; your vehicle is
also unlocked.
Switching off
The exterior welcome lighting switches
off automatically after a set time, when
the ignition is switched on or on locking
the vehicle.
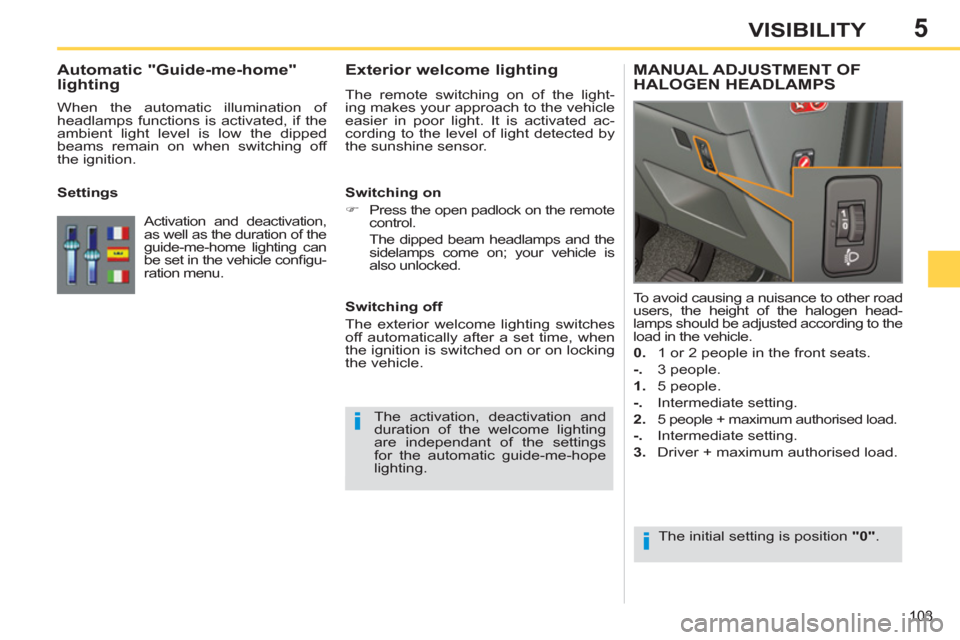
MANUAL ADJUSTMENT OFHALOGEN HEADLAMPS
The initial setting is position "0"
.
To avoid causing a nuisance to other road
users, the height of the halogen head-
lamps should be adjusted according to the
load in the vehicle.
0.
1 or 2 people in the front seats.
-.
3 people.
1.
5 people.
-.
Intermediate setting.
2.
5 people + maximum authorised load.
-.
Intermediate setting.
3.
Driver + maximum authorised load.
The activation, deactivation and
duration of the welcome lighting
are independant of the settings
for the automatic guide-me-hope
lighting.
Automatic "Guide-me-home"
lighting
When the automatic illumination of
headlamps functions is activated, if the
ambient light level is low the dipped
beams remain on when switching off
the ignition.
Settings
Activation and deactivation,
as well as the duration of the
guide-me-home lighting can
be set in the vehicle confi gu-
ration menu.
Page 106 of 382

5VISIBILITY
DIRECTIONAL LIGHTING
When the dipped or main beam head-
lamps are on, this function enables the
light beams to provide improved lighting
of the side of the road when cornering.
The use of this function, from approxi-
mately 12 mph (20 km/h) and associ-
ated with the xenon headlamps only,
considerably improves the quality of
your lighting when cornering.
with directional lighting
without directional lighting
Programming
Operating fault
The function is activated or
deactivated via the vehicle
confi guration menu.
If a fault occurs, this warning
lamp fl ashes in the instrument
panel, accompanied by a mes-
sage in the screen.
Contact a PEUGEOT dealer or a qualifi ed
workshop.
AUTOMATIC ADJUSTMENT OF XENON HEADLAMPS
Do not touch the xenon headlamp
bulbs.
Contact a PEUGEOT dealer or a
qualifi ed workshop. In order to avoid causing a nuisance to
other road users, this system corrects the
height of the xenon headlamp beams au-
tomatically and when stationary, in relation
to the load in the vehicle.
If a malfunction occurs, this
warning lamp is displayed on
the instrument panel, accom-
panied by an audible signal
and a message in the screen.
The system then places your headlam-
ps in the lowest position. When stationary or moving at very
low speed or when reverse gear is
engaged, the function is inactive.
The status of the function remains
in the memory when the ignition is
switched off.